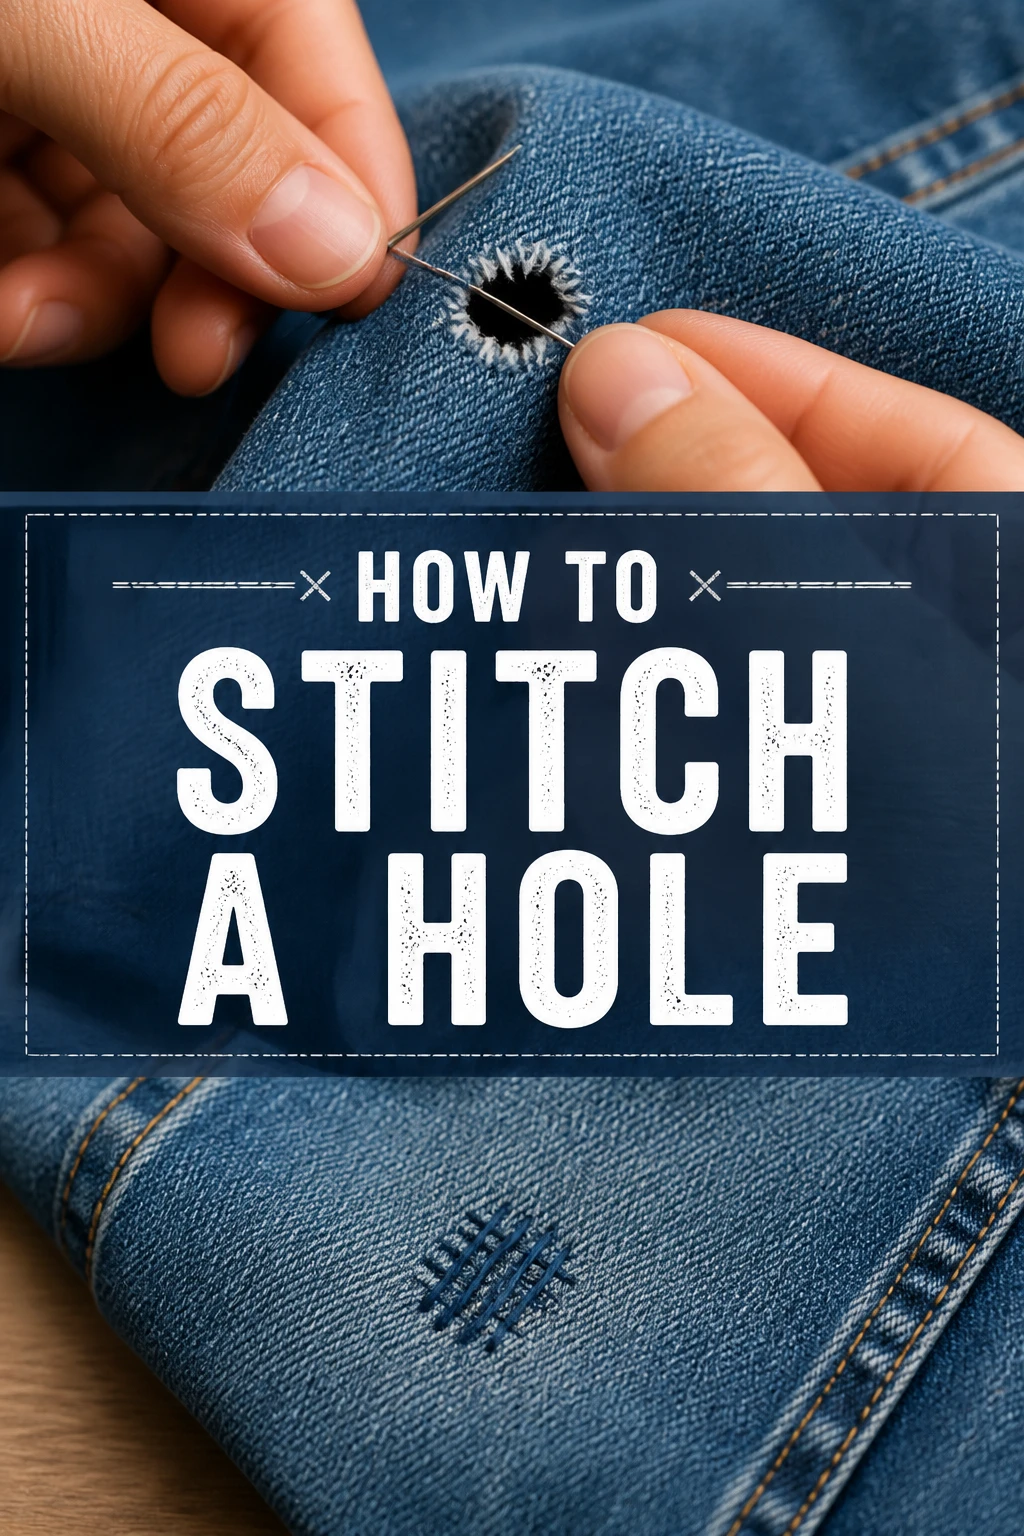
🧵 How To Stitch A Hole
There’s nothing quite like the disappointment of discovering a small tear or hole in a favorite garment.
I remember finding a tiny snag in my most comfortable sweater, thinking it was ruined.
Learning to stitch a hole yourself not only saves money but also extends the life of your cherished items, giving them a second chance.

Quick Overview
Stitching a hole is a fundamental skill that every household can benefit from. This guide will walk you through the process, transforming a damaged item back into something wearable and loved. You’ll gain the confidence to tackle future mending projects with ease.
- Time needed: 15-45 minutes (depending on hole size and complexity)
- Difficulty: Beginner
- What you’ll need: Needle, thread, scissors, fabric (optional, for patching), pins
Step-by-Step Instructions
Step 1: Assess the Damage and Gather Supplies
Before you even pick up a needle, take a moment to understand the hole you’re dealing with. Is it a small tear, a frayed seam, or a larger gash? This assessment guides your approach.
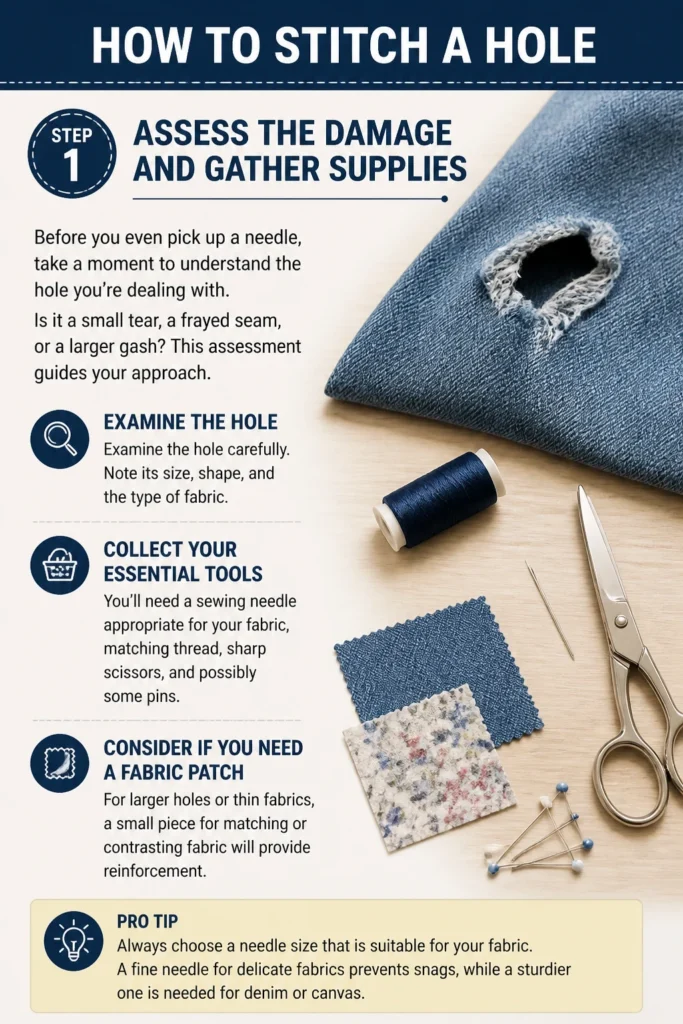
- Examine the hole carefully. Note its size, shape, and the type of fabric.
- Collect your essential tools. You’ll need a sewing needle appropriate for your fabric, matching thread, sharp scissors, and possibly some pins.
- Consider if you need a fabric patch. For larger holes or thin fabrics, a small piece of matching or contrasting fabric will provide reinforcement.
Pro Tip: Always choose a needle size that is suitable for your fabric. A fine needle for delicate fabrics prevents snags, while a sturdier one is needed for denim or canvas.
Step 2: Prepare the Fabric
Proper preparation makes a huge difference in the final appearance and durability of your mend. This step ensures clean edges and a stable area to work on.
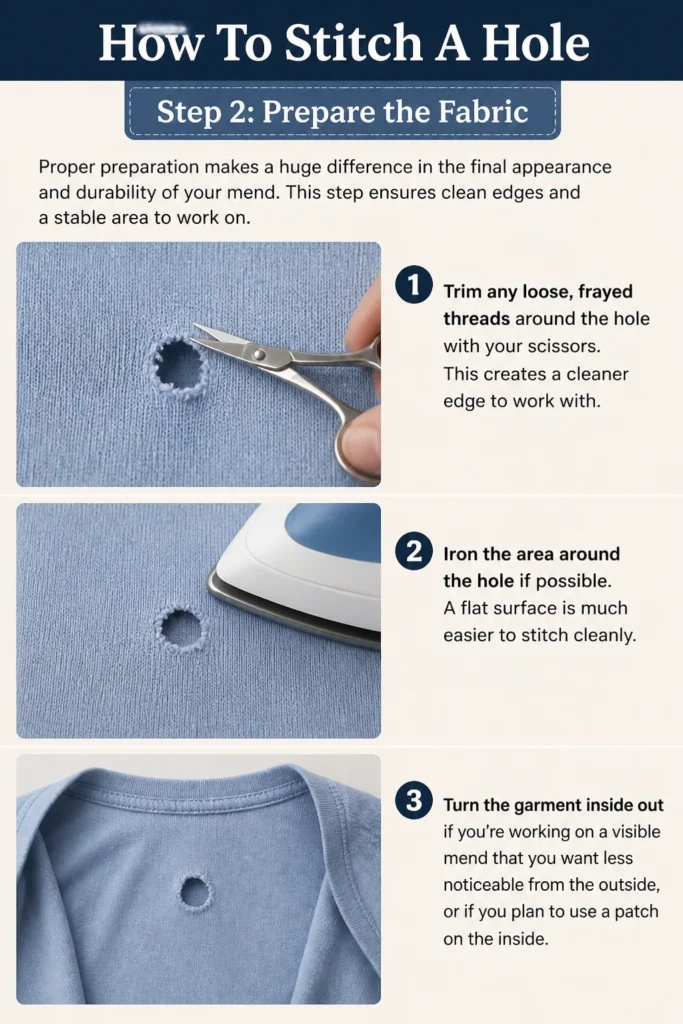
- Trim any loose, frayed threads around the hole with your scissors. This creates a cleaner edge to work with.
- Iron the area around the hole if possible. A flat surface is much easier to stitch cleanly.
- Turn the garment inside out if you’re working on a visible mend that you want less noticeable from the outside, or if you plan to use a patch on the inside.
Step 3: Choose Your Stitch
The type of stitch you select depends on the hole and the desired outcome. For most simple holes, a basic running stitch or whip stitch will suffice.
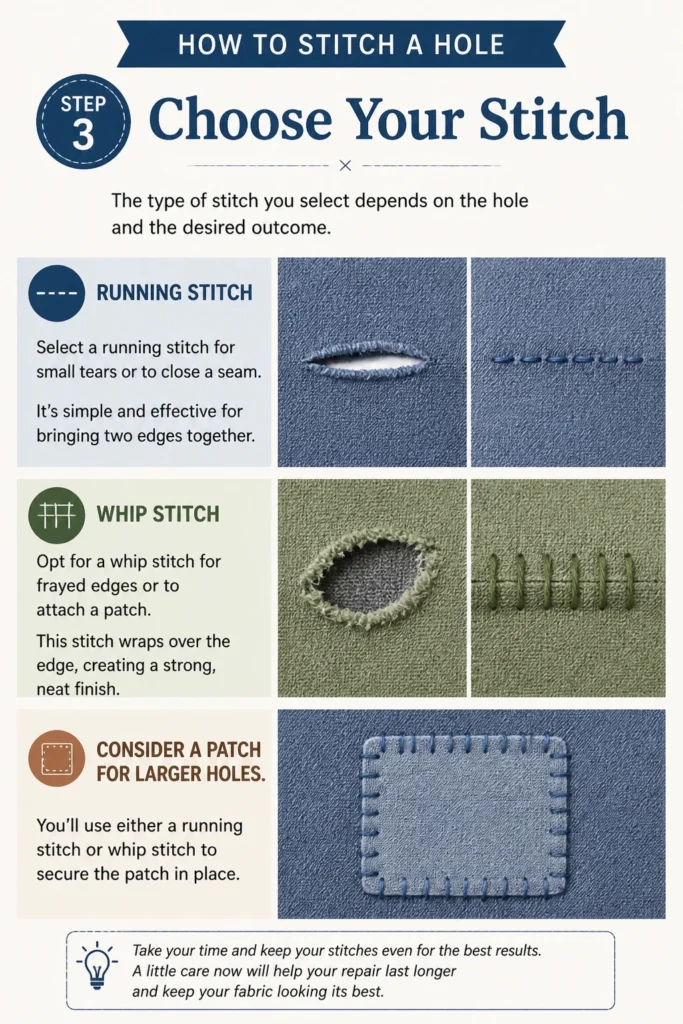
- Select a running stitch for small tears or to close a seam. It’s simple and effective for bringing two edges together.
- Opt for a whip stitch for frayed edges or to attach a patch. This stitch wraps over the edge, creating a strong, neat finish.
- Consider a patch for larger holes. You’ll use either a running stitch or whip stitch to secure the patch in place.
Step 4: Thread Your Needle and Knot
This seemingly simple step is crucial for smooth stitching. A well-threaded needle with a secure knot prevents frustrating tangles and unraveling.
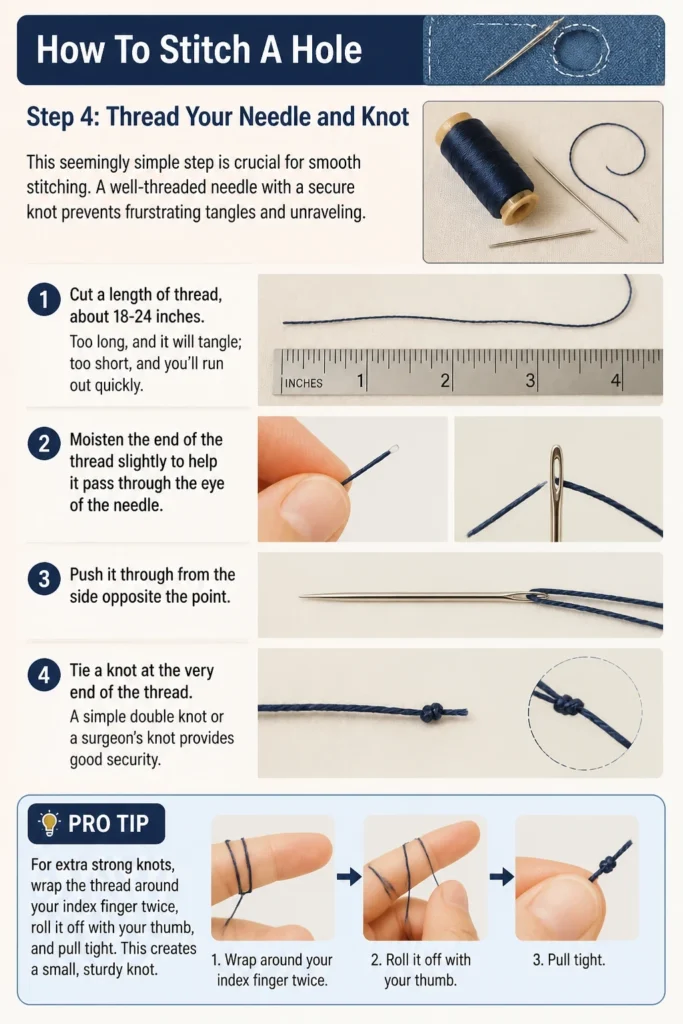
- Cut a length of thread, about 18-24 inches. Too long, and it will tangle; too short, and you’ll run out quickly.
- Moisten the end of the thread slightly to help it pass through the eye of the needle. Push it through from the side opposite the point.
- Tie a knot at the very end of the thread. A simple double knot or a surgeon’s knot provides good security.
Pro Tip: For extra strong knots, wrap the thread around your index finger twice, roll it off with your thumb, and pull tight. This creates a small, sturdy knot.
Step 5: Position and Pin (If Using a Patch)
If your hole requires a patch, careful positioning is key to a smooth, flat repair. Pins hold everything securely in place.
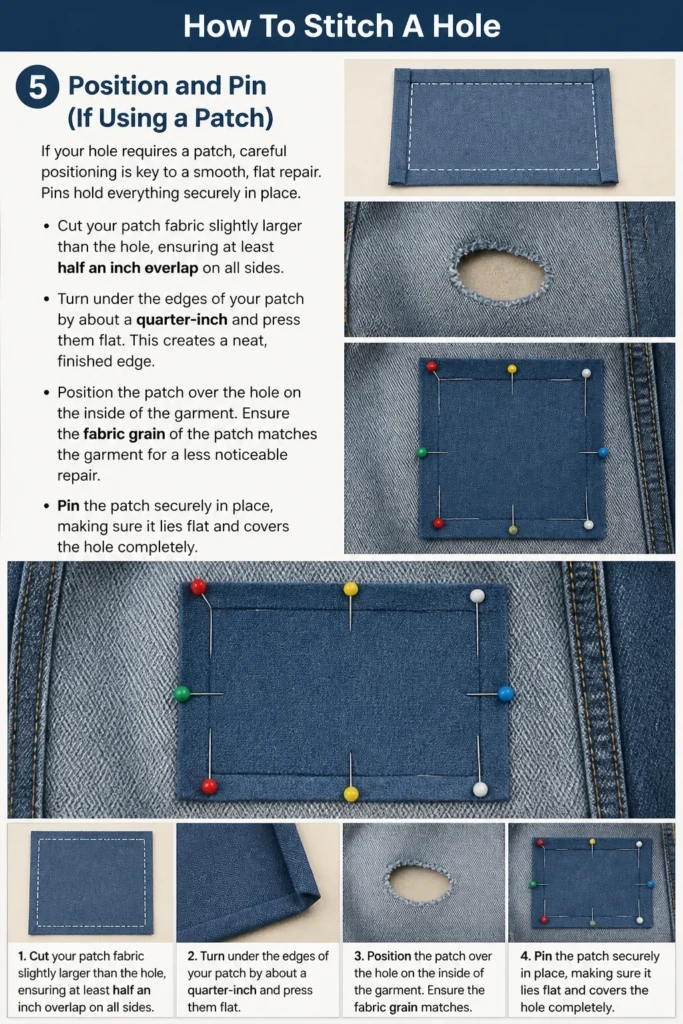
- Cut your patch fabric slightly larger than the hole, ensuring at least half an inch overlap on all sides.
- Turn under the edges of your patch by about a quarter-inch and press them flat. This creates a neat, finished edge.
- Position the patch over the hole on the inside of the garment. Ensure the fabric grain of the patch matches the garment for a less noticeable repair.
- Pin the patch securely in place, making sure it lies flat and covers the hole completely.
Step 6: Begin Stitching
Starting your stitch correctly sets the foundation for a strong and invisible mend. Always begin from the inside of the garment to hide the knot.
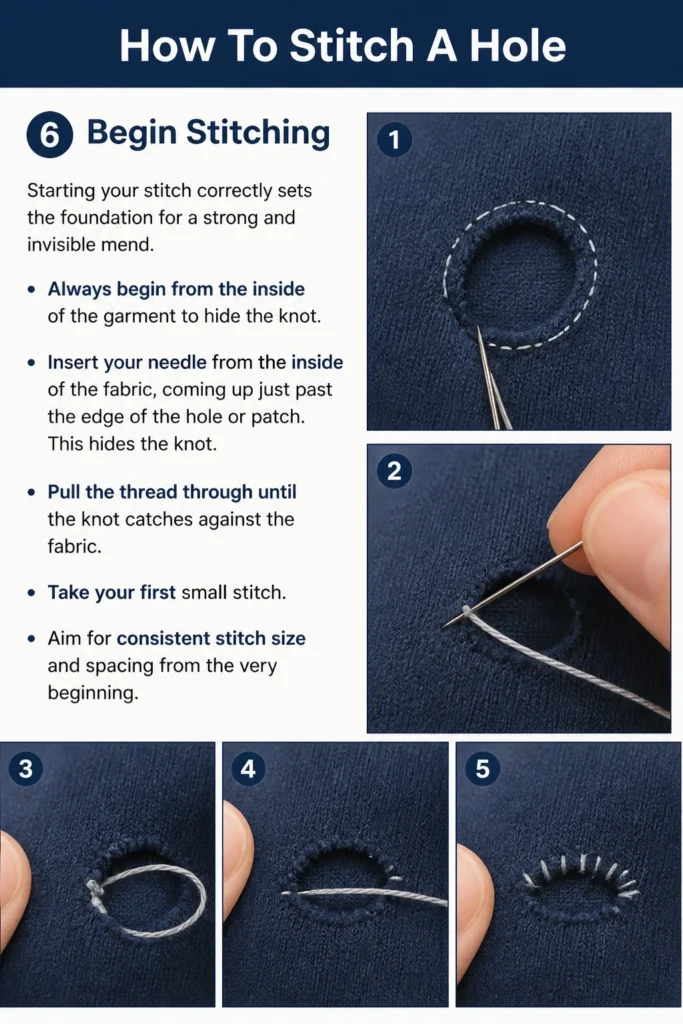
- Insert your needle from the inside of the fabric, coming up just past the edge of the hole or patch. This hides the knot.
- Pull the thread through until the knot catches against the fabric.
- Take your first small stitch. Aim for consistent stitch size and spacing from the very beginning.
Step 7: Execute Your Chosen Stitch
Whether you’re doing a running stitch or a whip stitch, consistency is your best friend. Small, even stitches are stronger and look neater.
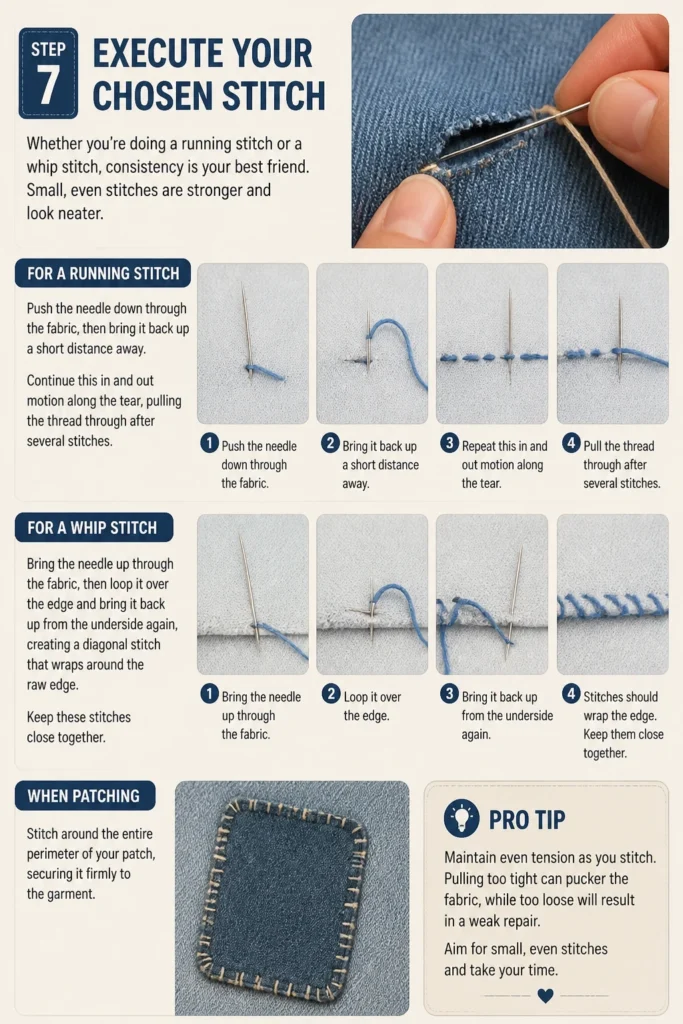
- For a Running Stitch: Push the needle down through the fabric, then bring it back up a short distance away. Continue this “in and out” motion along the tear, pulling the thread through after several stitches.
- For a Whip Stitch: Bring the needle up through the fabric, then loop it over the edge and bring it back up from the underside again, creating a diagonal stitch that wraps around the raw edge. Keep these stitches close together.
- When patching: Stitch around the entire perimeter of your patch, securing it firmly to the garment.
Pro Tip: Maintain even tension as you stitch. Pulling too tight can pucker the fabric, while too loose will result in a weak mend.
Step 8: Finish and Secure Your Stitch
Once you’ve stitched all the way around the hole or patch, it’s time to secure your work. A proper finishing knot ensures your repair won’t unravel.
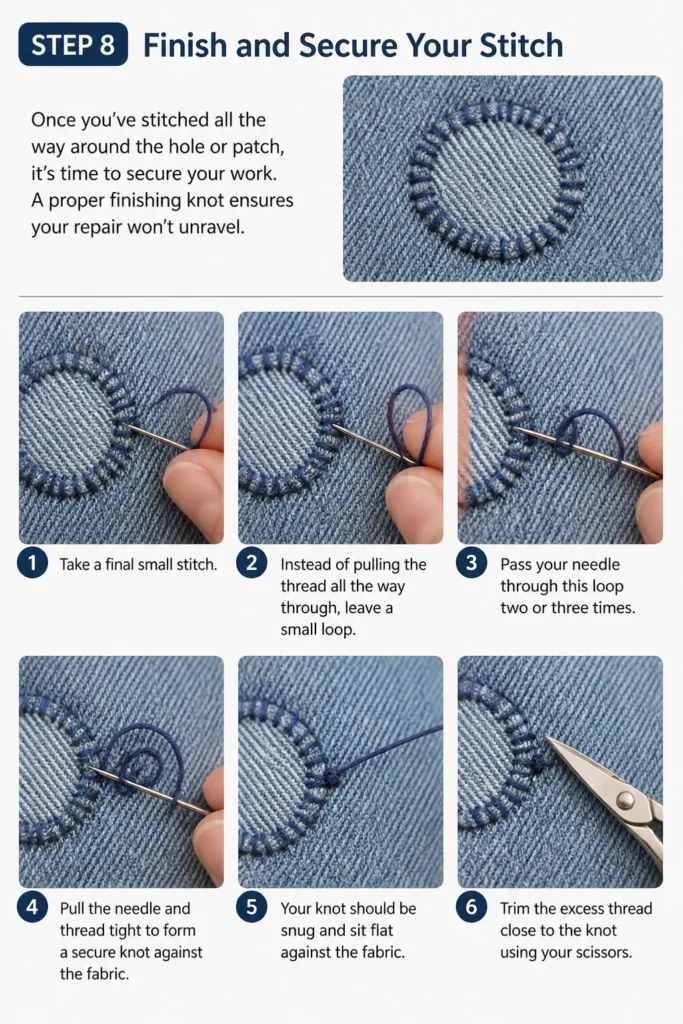
- Take a final small stitch. Instead of pulling the thread all the way through, leave a small loop.
- Pass your needle through this loop two or three times.
- Pull the needle and thread tight to form a secure knot against the fabric.
- Trim the excess thread close to the knot using your scissors.
Step 9: Final Touches
After securing your stitches, a few final steps can improve the look and feel of your mended item.
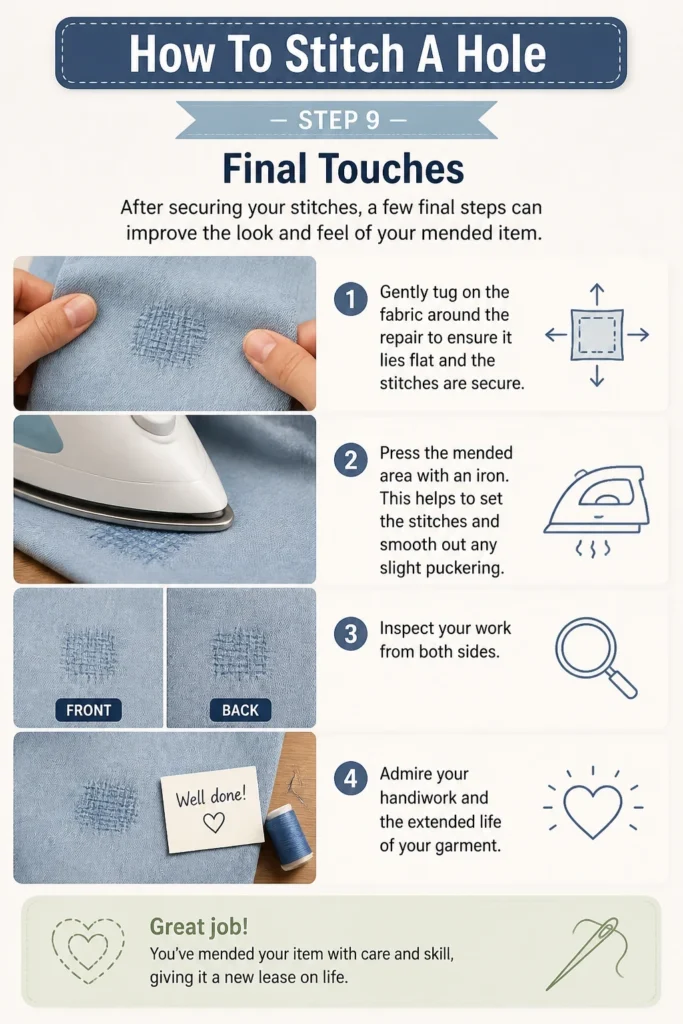
- Gently tug on the fabric around the repair to ensure it lies flat and the stitches are secure.
- Press the mended area with an iron. This helps to set the stitches and smooth out any slight puckering.
- Inspect your work from both sides. Admire your handiwork and the extended life of your garment.
Common Mistakes to Avoid
Using the Wrong Thread
Many beginners grab any thread available, but thread choice matters. Using thread that is too thick for delicate fabric can cause further damage, while thread that is too thin for heavy-duty material like denim will likely break quickly, leading to an unraveling mend. Always try to match the thread weight to the fabric and choose a color that blends or complements the garment.
Stitching Too Tightly or Too Loosely
Achieving the right tension is an art. Pulling stitches too tight will cause the fabric to pucker and distort, making the repair very noticeable and uncomfortable. Conversely, stitching too loosely results in a weak mend that won’t hold up to wear and washing, causing the hole to reappear. Practice maintaining even, moderate tension throughout your work.
Neglecting Fabric Preparation
Skipping the steps of trimming loose threads or ironing the area can significantly impact your results. Frayed edges can get caught in your stitches, creating a messy look and a less secure mend. A wrinkled area makes it difficult to lay stitches evenly and accurately, leading to a less professional finish. Take the time to prepare your fabric properly for the best outcome.
Using Too Long a Thread
While it might seem efficient to use a very long piece of thread to avoid re-threading, it often leads to tangles, knots, and frustration. Long threads are more prone to fraying and snagging as you pull them through the fabric repeatedly. Aim for a manageable length, typically 18-24 inches, to keep your stitching smooth and efficient.
Troubleshooting
Fabric is Puckering
If you notice the fabric around your repair beginning to gather or pucker, it’s usually a sign that your stitches are too tight.
To fix this, gently try to loosen the tension by carefully pulling on the fabric around the stitches. If the puckering is severe, you might need to unpick a few stitches and re-sew them with less tension. Remember to use a thimble and take small, even stitches.
Thread Keeps Tangling or Knotting
Frequent tangles and knots are frustrating and often indicate that your thread is too long or you’re pulling it through too quickly.
Try cutting a shorter length of thread for your next section of stitching. Also, take your time pulling the thread through the fabric, guiding it with your free hand to prevent it from twisting. Using a thread conditioner or beeswax can also help reduce tangles.
Stitches are Uneven or Visible
If your stitches are looking messy or standing out more than you’d like, it’s usually a matter of practice and technique.
Focus on taking smaller, more consistent stitches. Ensure your needle enters and exits the fabric at regular intervals. For less visible mends, try to pick up only a few threads of the fabric with each stitch, especially on the right side of the garment. Practice on scrap fabric to refine your technique.
Key Takeaways
- Assess your hole thoroughly to choose the best mending strategy.
- Prepare the fabric by trimming and ironing for a clean, stable base.
- Select the right stitch (running, whip, or patch) for the specific type of damage.
- Use appropriate thread and needle to match your fabric for durability and appearance.
- Maintain even tension to prevent puckering or weak stitches.
- Always secure your knots at the start and end of your stitching to ensure the repair holds.
Frequently Asked Questions
Can I stitch any type of fabric?
Most woven fabrics are suitable for hand stitching. Delicate fabrics like silk or very stretchy knits can be more challenging but are still mendable with fine needles and careful technique. For very thick materials like leather, specialized needles and thread are required.
How do I choose the right thread color?
For an invisible mend, try to match the thread color as closely as possible to the fabric. If an exact match isn’t available, choose a slightly darker shade, as darker threads tend to blend in better than lighter ones. For decorative mending, contrasting thread can create a unique, visible repair.
What if the hole is on a seam?
Mending a hole on a seam is often easier than a hole in the middle of fabric. Carefully unpick a few stitches on either side of the hole if needed, then use a backstitch or a small running stitch to re-sew the seam, reinforcing the area where the hole was.
Can I machine stitch a hole instead?
Yes, many holes can be machine stitched, especially if you’re comfortable with a sewing machine. A zigzag stitch is excellent for reinforcing frayed edges, and a darning foot can be used for larger holes. However, hand stitching offers more control and is often preferred for smaller, more delicate repairs.
Our Top Recommended Finds
- Basic Sewing Kit: A compact kit containing needles, various thread colors, a thimble, and small scissors is indispensable for quick repairs.
- Thimble: Essential for protecting your finger when pushing needles through tougher fabrics, making stitching much more comfortable.
- Fabric Glue Pen: While not for stitching, a fabric glue pen can temporarily hold edges or patches in place before stitching, making your work easier.
Give Your Garments a Second Life
Learning to stitch a hole is a rewarding skill that extends beyond just fixing clothes. It’s about sustainability, creativity, and the satisfaction of repairing something with your own hands. You’re not just mending fabric; you’re preserving memories and reducing waste.
Now that you have the knowledge and the steps, why not grab that item with the small hole you’ve been putting off? Embrace the process, practice your stitches, and watch as your beloved items get a new lease on life. Your wardrobe, and your wallet, will thank you.