🧵 How To Applique For Beginners
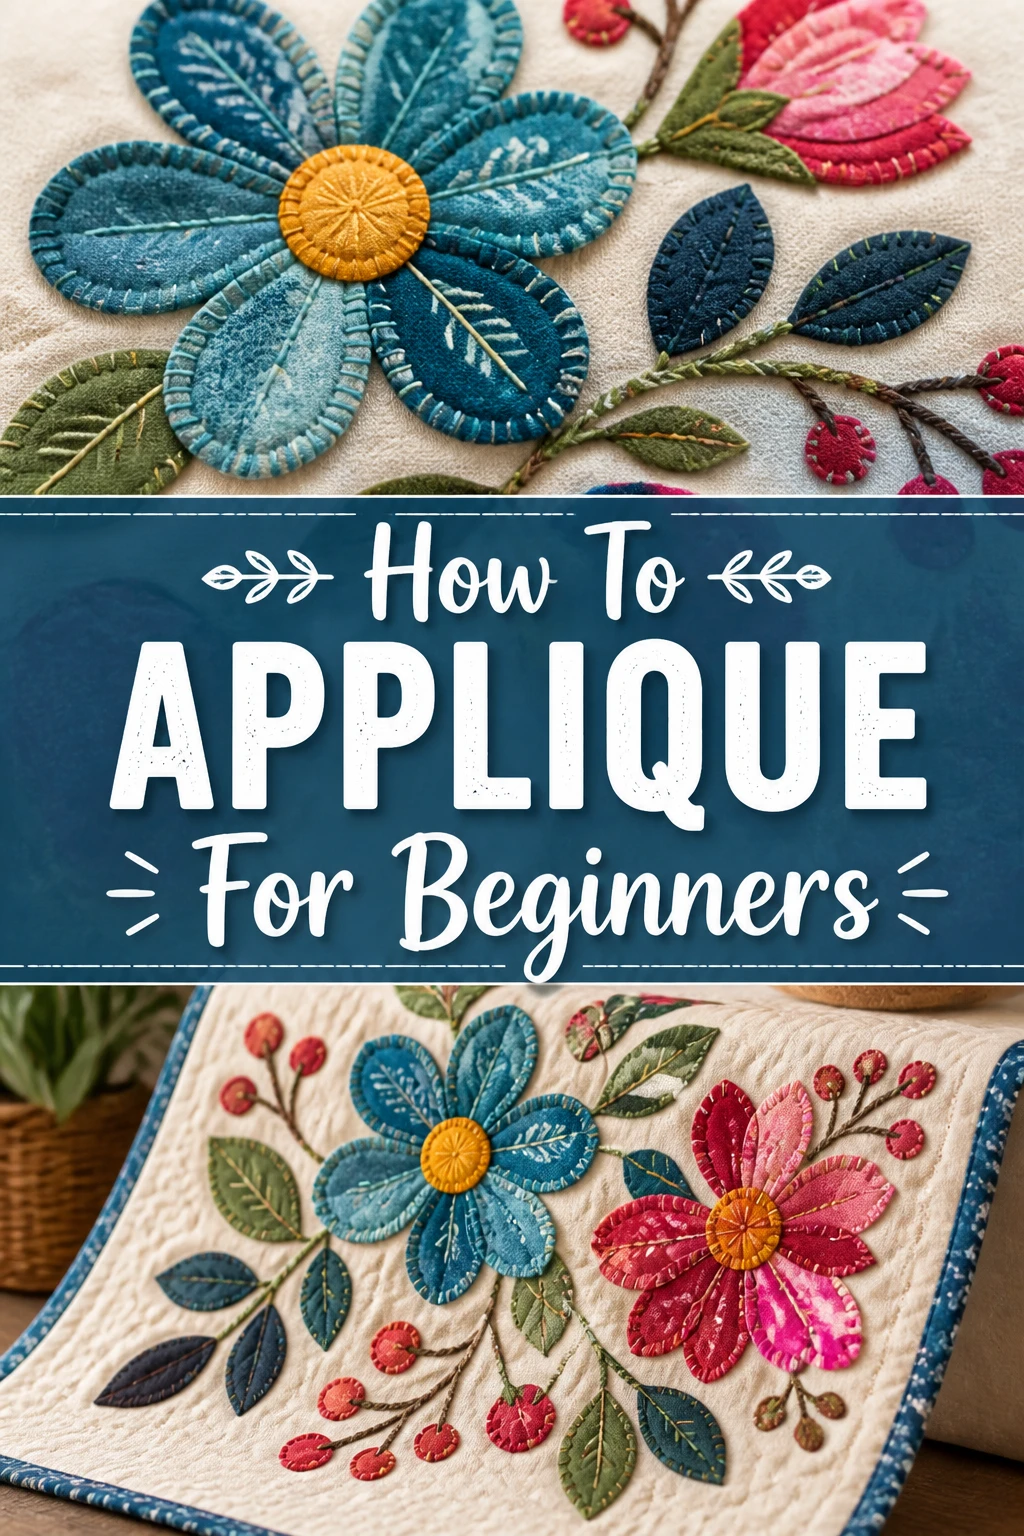
There’s a unique joy in transforming plain fabric into something vibrant and personal.
Appliqué, the art of layering fabric pieces onto a base, offers endless creative possibilities.
I remember my first appliqué project, a simple flower on a tote bag, and the immense satisfaction it brought. This guide will help you discover that same rewarding experience.
Quick Overview
You’re about to learn the foundational techniques to create beautiful fabric designs, adding a personal touch to clothing, quilts, or home decor.
- Time needed: 2-4 hours for a simple project
- Difficulty: Beginner
- What you’ll need: Fabric scraps, fusible web, scissors, iron, sewing machine or hand-sewing needle & thread
Step-by-Step Instructions
Step 1: Gather Your Materials
Before you begin, collect everything you’ll need for your appliqué project.
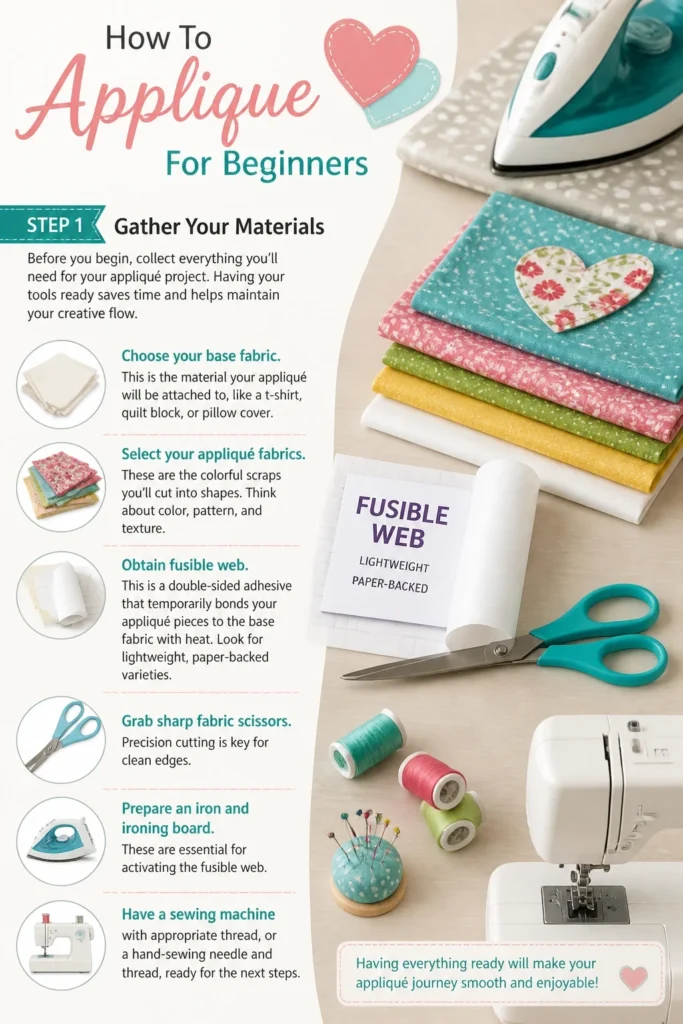
Having your tools ready saves time and helps maintain your creative flow.
- Choose your base fabric. This is the material your appliqué will be attached to, like a t-shirt, quilt block, or pillow cover.
- Select your appliqué fabrics. These are the colorful scraps you’ll cut into shapes. Think about color, pattern, and texture.
- Obtain fusible web. This is a double-sided adhesive that temporarily bonds your appliqué pieces to the base fabric with heat. Look for lightweight, paper-backed varieties.
- Grab sharp fabric scissors. Precision cutting is key for clean edges.
- Prepare an iron and ironing board. These are essential for activating the fusible web.
- Have a sewing machine with appropriate thread, or a hand-sewing needle and thread for securing your design permanently.
- Find a pencil or fabric marker for tracing, and a design template or sketch.
Pro Tip: Always pre-wash and dry all your fabrics before starting. This prevents future shrinking or color bleeding, ensuring your finished piece remains beautiful.
Step 2: Choose Your Design
The design is the heart of your appliqué project. It dictates the shapes you’ll cut and the overall look.
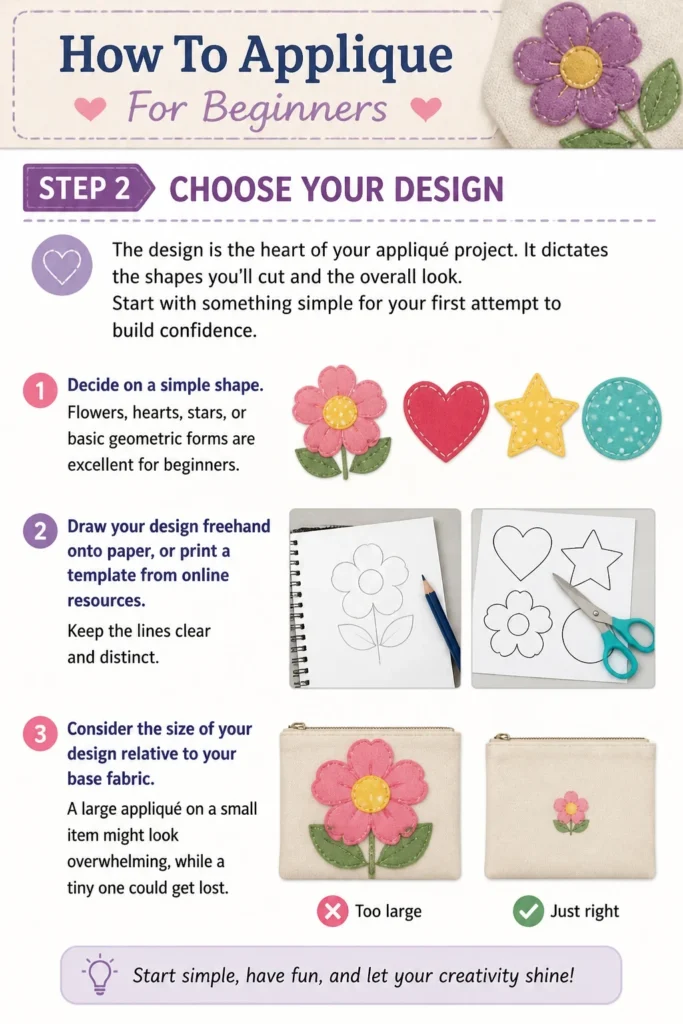
Start with something simple for your first attempt to build confidence.
- Decide on a simple shape. Flowers, hearts, stars, or basic geometric forms are excellent for beginners.
- Draw your design freehand onto paper, or print a template from online resources. Keep the lines clear and distinct.
- Consider the size of your design relative to your base fabric. A large appliqué on a small item might look overwhelming, while a tiny one could get lost.
Step 3: Prepare Your Fabric & Fusible Web
This crucial step ensures your appliqué pieces will adhere correctly and have crisp edges.
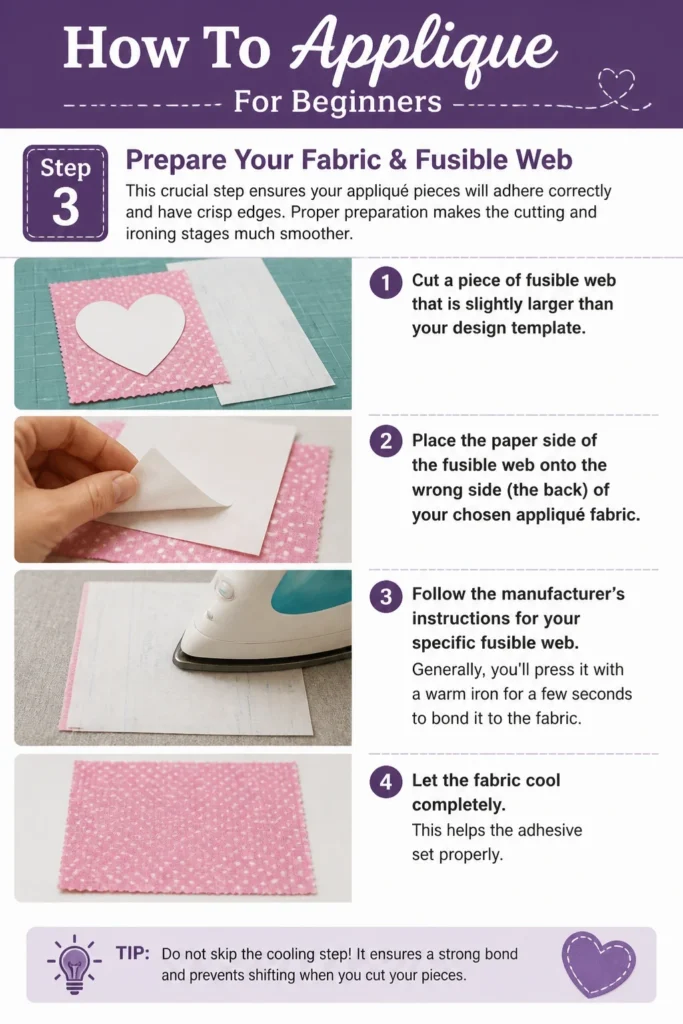
Proper preparation makes the cutting and ironing stages much smoother.
- Cut a piece of fusible web that is slightly larger than your design template.
- Place the paper side of the fusible web onto the wrong side (the back) of your chosen appliqué fabric.
- Follow the manufacturer’s instructions for your specific fusible web. Generally, you’ll press it with a warm iron for a few seconds to bond it to the fabric.
- Let the fabric cool completely. This helps the adhesive set properly.
Step 4: Cut Out Your Appliqué Pieces
Accuracy in cutting directly impacts the final appearance of your appliqué.
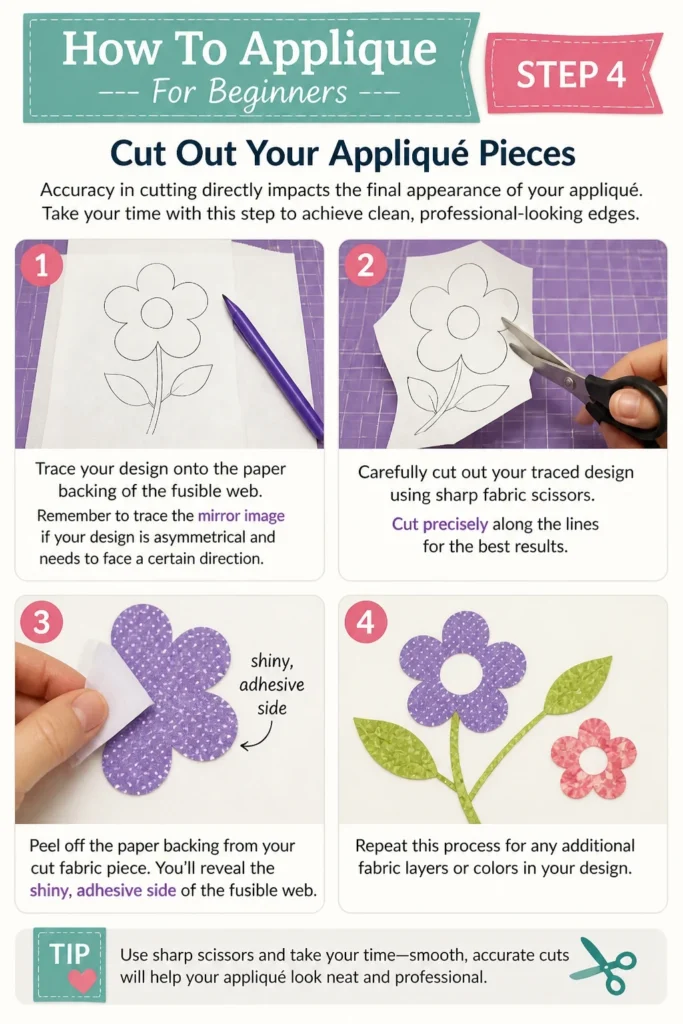
Take your time with this step to achieve clean, professional-looking edges.
- Trace your design onto the paper backing of the fusible web. Remember to trace the mirror image if your design is asymmetrical and needs to face a certain direction.
- Carefully cut out your traced design using sharp fabric scissors. Cut precisely along the lines for the best results.
- Peel off the paper backing from your cut fabric piece. You’ll reveal the shiny, adhesive side of the fusible web.
- Repeat this process for any additional fabric layers or colors in your design.
Step 5: Position and Iron Your Appliqué
This is where your design starts to come to life on your base fabric.
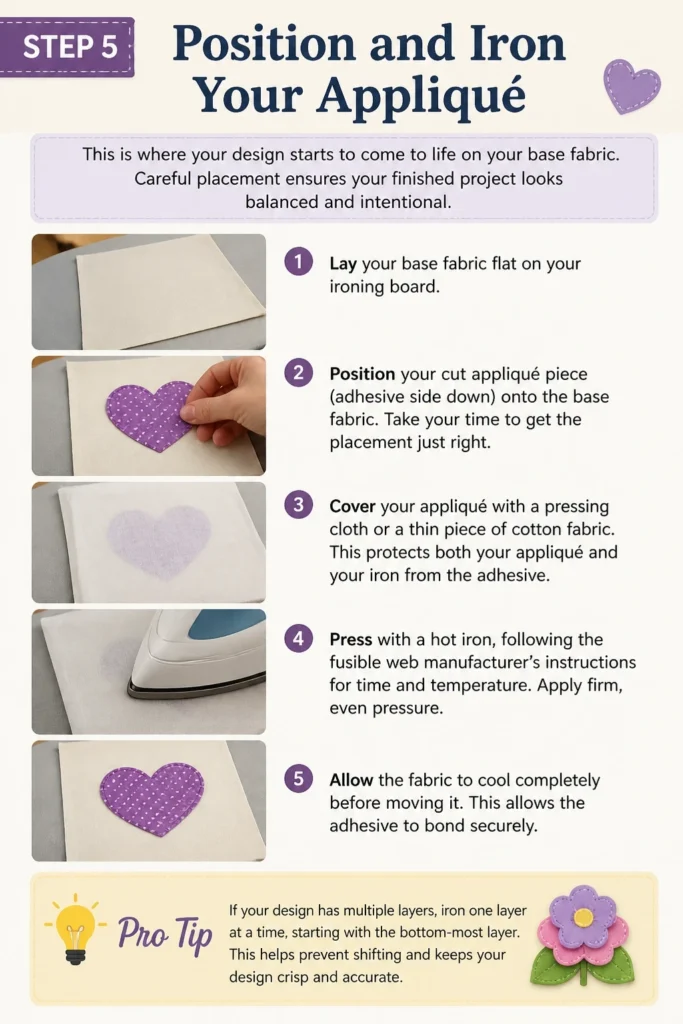
Careful placement ensures your finished project looks balanced and intentional.
- Lay your base fabric flat on your ironing board.
- Position your cut appliqué piece (adhesive side down) onto the base fabric. Take your time to get the placement just right.
- Cover your appliqué with a pressing cloth or a thin piece of cotton fabric. This protects both your appliqué and your iron from the adhesive.
- Press with a hot iron, following the fusible web manufacturer’s instructions for time and temperature. Apply firm, even pressure.
- Allow the fabric to cool completely before moving it. This allows the adhesive to bond securely.
Pro Tip: If your design has multiple layers, iron one layer at a time, starting with the bottom-most layer. This prevents shifting and ensures each piece adheres properly.
Step 6: Secure Your Appliqué (Sewing)
While fusible web holds your appliqué temporarily, sewing provides permanent security and a finished look.
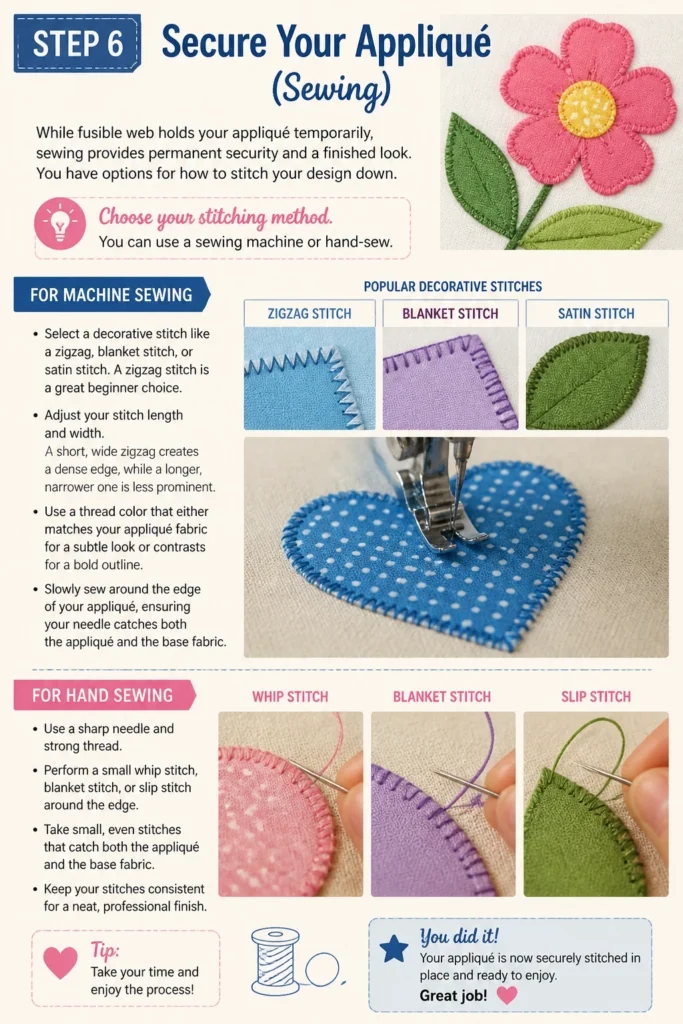
You have options for how to stitch your design down.
- Choose your stitching method. You can use a sewing machine or hand-sew.
- For machine sewing:
- Select a decorative stitch like a zigzag, blanket stitch, or satin stitch. A zigzag stitch is a great beginner choice.
- Adjust your stitch length and width. A short, wide zigzag creates a dense edge, while a longer, narrower one is less prominent.
- Use a thread color that either matches your appliqué fabric for a subtle look or contrasts for a bold outline.
- Slowly sew around the edge of your appliqué, ensuring your needle catches both the appliqué and the base fabric.
- For hand sewing:
- Use a sharp needle and strong thread.
- Perform a small whipstitch or blanket stitch around the edge. Make your stitches small and even for a neat finish.
Step 7: Finish and Refine
The final touches make a big difference in the overall presentation of your appliquéd item.
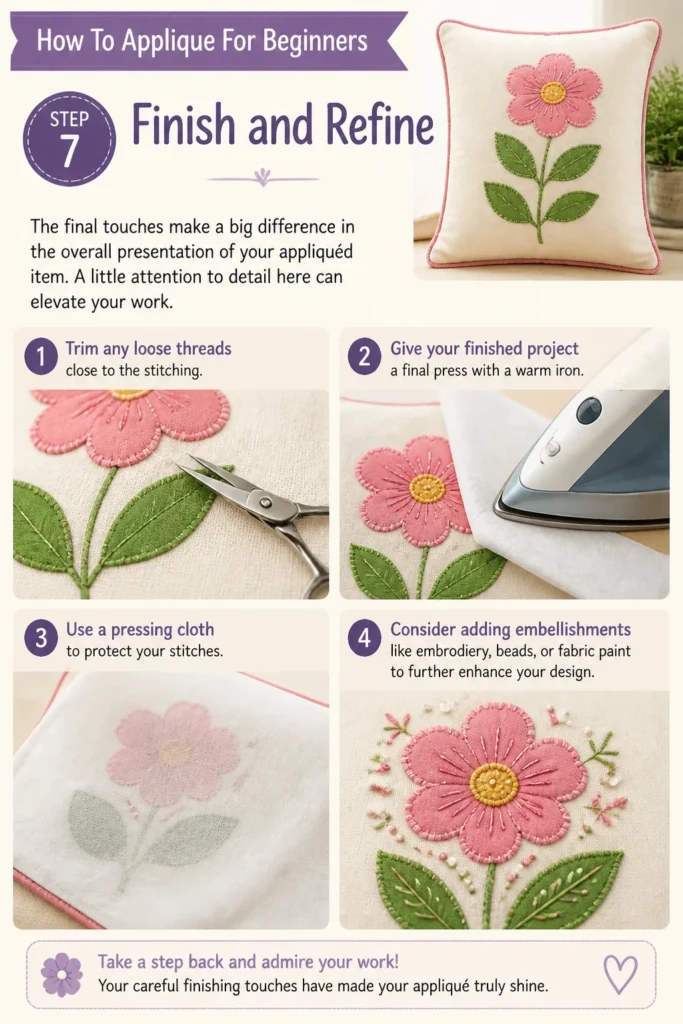
A little attention to detail here can elevate your work.
- Trim any loose threads close to the stitching.
- Give your finished project a final press with a warm iron. Use a pressing cloth to protect your stitches.
- Consider adding embellishments like embroidery, beads, or fabric paint to further enhance your design.
Common Mistakes to Avoid
Not Pre-Washing Fabric
Many beginners skip pre-washing their fabrics, which can lead to problems later on. Fabrics can shrink unevenly after the first wash, causing your appliquéd design to pucker or warp.
Always wash and dry all your fabrics (base and appliqué) the same way you intend to wash the finished item. This stabilizes the fabric and prevents unwelcome surprises.
Ignoring Grainline
The grainline refers to the direction of the fabric threads. Cutting appliqué pieces without considering the grain can make them stretch or distort, especially if they are intricate shapes.
Try to align the main axis of your appliqué piece with the straight grain of the fabric. This provides stability and helps the appliqué maintain its shape over time.
Skipping Stabilizer or Using the Wrong Type
When sewing machine appliqué, especially with dense stitches like satin stitch, the base fabric can pucker or distort. Many beginners don’t realize that a stabilizer is often necessary.
Use a lightweight tear-away or cut-away stabilizer underneath your base fabric where the appliqué will be sewn. This supports the stitches and keeps your fabric flat. Choose a tear-away for projects that need flexibility and a cut-away for more stability.
Rushing the Ironing Process
Improperly fusing the appliqué can cause it to lift or bubble, making it difficult to sew neatly. Beginners often don’t apply enough heat or pressure, or they don’t allow it to cool properly.
Always follow the fusible web manufacturer’s instructions precisely regarding iron temperature, pressing time, and cooling. Press firmly and allow the piece to cool completely before moving or sewing.
Troubleshooting
Appliqué Edges Fraying
If your appliqué edges are fraying after stitching, it usually means your chosen stitch isn’t wide or dense enough to fully encompass the raw edge of the fabric.
Increase the width of your zigzag or satin stitch to ensure it covers the entire raw edge. For hand appliqué, make sure your blanket stitches are close together and wrap around the edge effectively.
Bubbling or Wrinkling
Bubbling or wrinkling in your appliqué can occur if the fusible web wasn’t applied evenly, or if the base fabric was stretched during placement or sewing.
Ensure you press the fusible web firmly and evenly across the entire appliqué piece during the initial fusing. When positioning and ironing the appliqué to the base, avoid stretching either fabric. Using a stabilizer can also help prevent base fabric distortion.
Stitches Looking Uneven
Uneven stitches, whether by machine or hand, can happen due to inconsistent speed, tension issues, or simply rushing the process.
For machine sewing, practice on scraps to find the right speed and tension settings. Guide the fabric smoothly without pushing or pulling. For hand sewing, focus on making each stitch the same size and spacing. Taking your time is the best remedy for uneven stitches.
Key Takeaways
- Preparation is Key: Pre-wash fabrics and have all materials ready before starting.
- Start Simple: Choose basic shapes and designs for your first few projects to build confidence.
- Read Instructions: Always follow the specific directions for your chosen fusible web and sewing machine.
- Take Your Time: Precision in cutting, ironing, and sewing leads to a much more satisfying result.
- Practice Makes Perfect: Don’t be afraid to experiment on scrap fabric before committing to your main project.
- Embrace the Process: Appliqué is a creative journey; enjoy the steps and the unique pieces you create.
Frequently Asked Questions
What’s the best stitch for appliqué?
For beginners, a zigzag stitch is highly recommended. It’s versatile, easy to control, and effectively covers raw edges. As you gain experience, you can explore satin stitch for a more solid, embroidered look, or a blanket stitch for a charming, hand-stitched aesthetic.
Can I appliqué on any fabric?
Almost! Appliqué works best on stable, woven fabrics like cotton, linen, or denim. While you can appliqué on knits, they require a bit more care and a good stabilizer to prevent stretching. Avoid very delicate or slippery fabrics for your first projects.
Do I need a special machine foot for appliqué?
Not necessarily, but it can help. An open-toe or clear appliqué foot offers better visibility of your stitching area, which is very helpful for precise work. However, a standard zigzag foot will work perfectly fine for most beginner appliqué projects.
How do I wash appliquéd items?
Always refer to the care instructions for your base fabric and any embellishments. Generally, machine-appliquéd items can be machine washed on a gentle cycle with cold water and tumble dried on low. Hand-appliquéd items may benefit from hand washing or line drying to protect the stitches.
Our Top Recommended Finds
- Pellon Lite Steam-A-Seam 2: This excellent fusible web offers a temporary stick, allowing you to reposition your appliqué pieces before final ironing.
- Fiskars Amplify Fabric Shears: Super sharp and comfortable, these scissors make precise cutting of fabric and fusible web a breeze, reducing hand strain.
- Teflon Pressing Sheet: An indispensable tool for appliqué, this sheet prevents fusible web adhesive from sticking to your iron or ironing board, keeping everything clean.
Your Appliqué Adventure Awaits!
You now have the fundamental steps to embark on your appliqué journey.
From simple shapes to more complex designs, the possibilities are only limited by your imagination.
Don’t wait—pick out some fabric scraps, choose a fun shape, and start stitching your very first appliqué today!