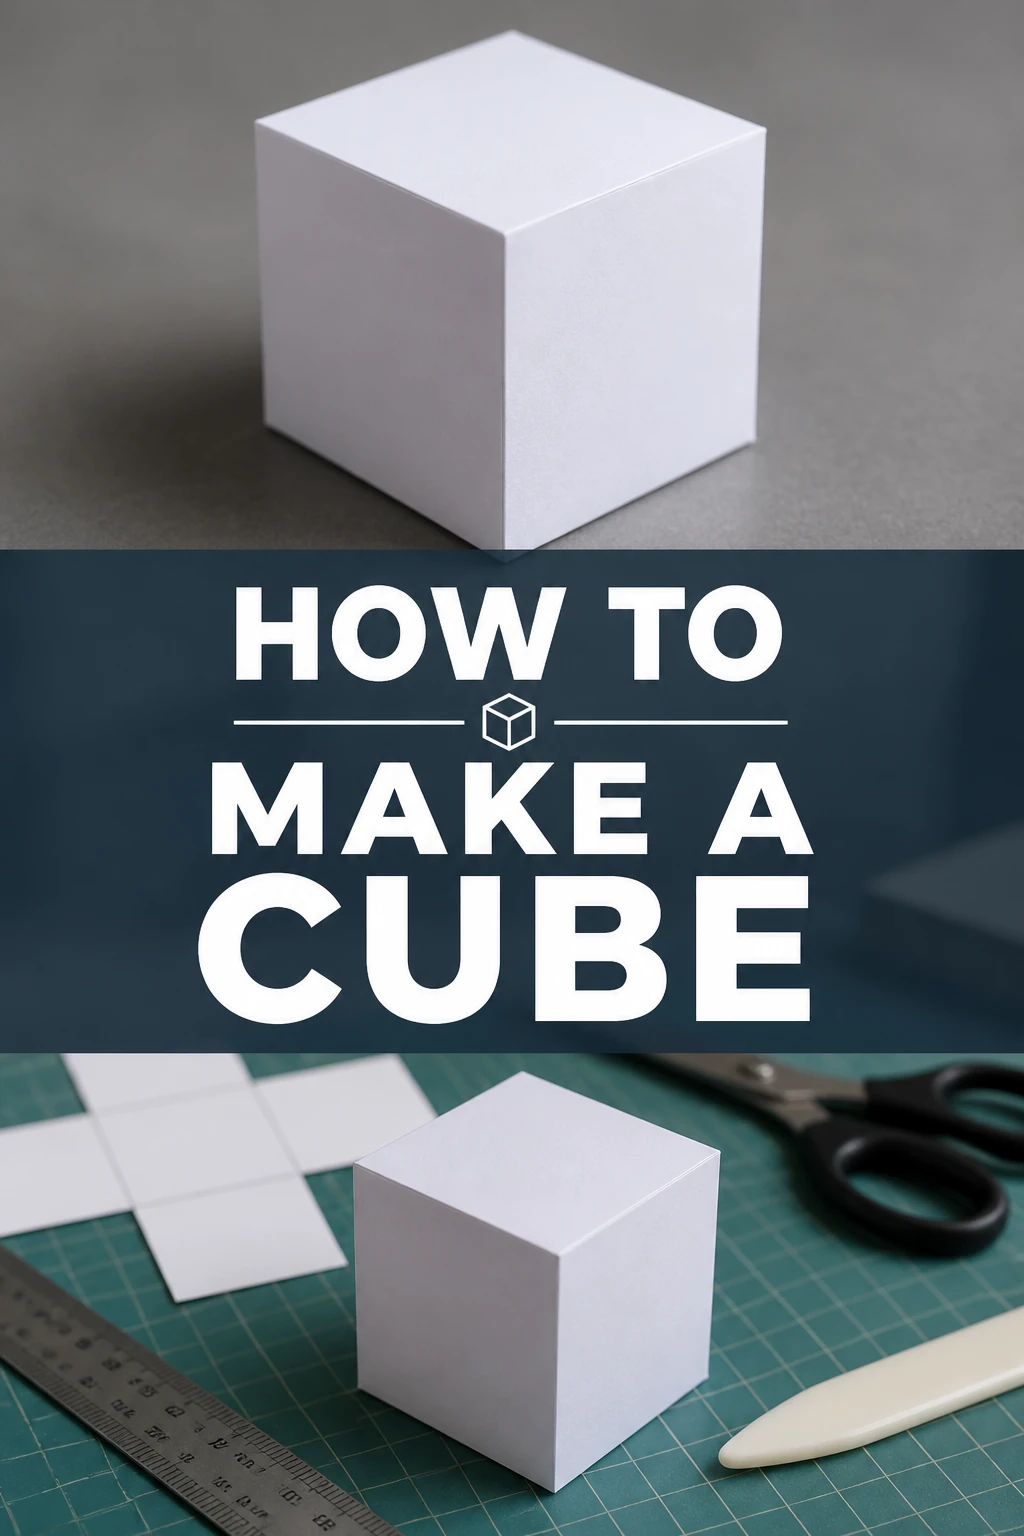
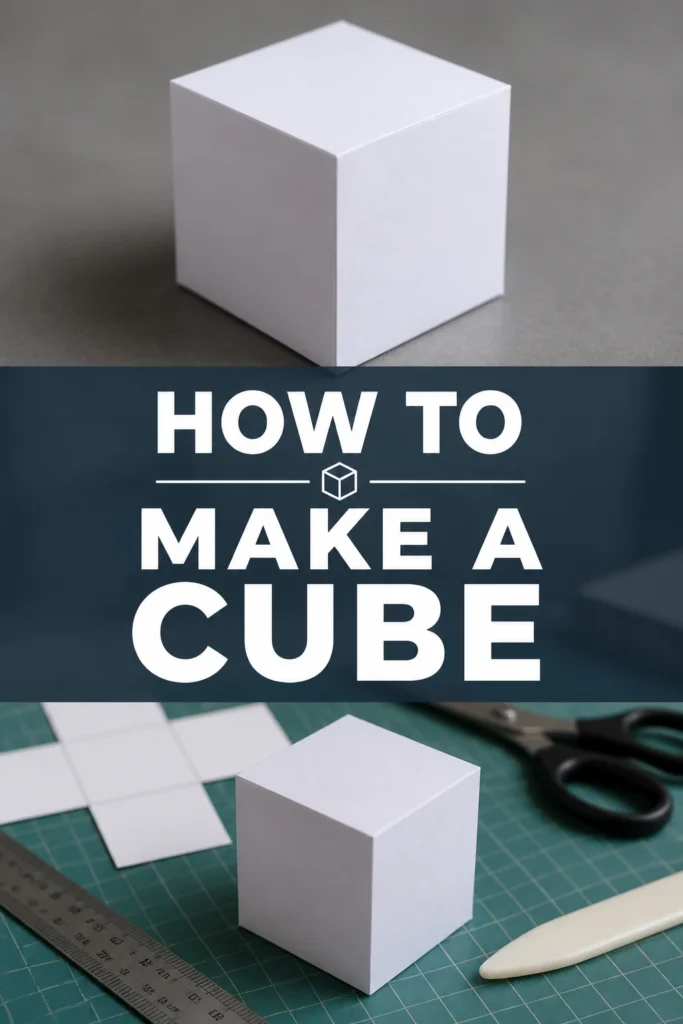
📐 How To Make A Cube
There’s a unique satisfaction in building something from scratch, especially a fundamental geometric shape like a cube.
I remember the first time I meticulously cut and folded paper to form a perfect cube; the precision felt incredibly rewarding.
This guide will walk you through creating your own cube, ensuring you gain a practical skill and a tangible result.
Quick Overview
You’re about to craft a perfect six-sided cube, transforming flat material into a three-dimensional object.
This project is excellent for developing precision and understanding basic geometry.
- Time needed: 45-90 minutes
- Difficulty: Beginner
- What you’ll need: Cardstock or thick paper, ruler, pencil, scissors or craft knife, glue stick or craft glue.
Step-by-Step Instructions
Step 1: Gather Your Materials
Before you begin, lay out all the items you’ll need on a clean, flat surface.
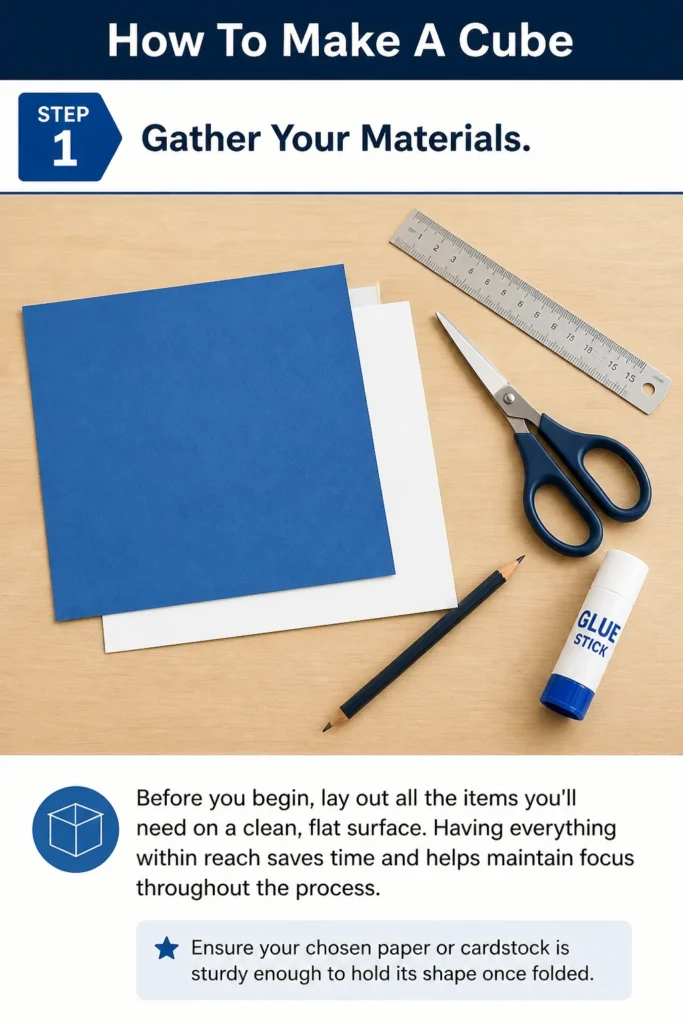
Having everything within reach saves time and helps maintain focus throughout the process.
Ensure your chosen paper or cardstock is sturdy enough to hold its shape once folded.
Step 2: Prepare Your Work Surface
A stable and well-lit area is crucial for accuracy.
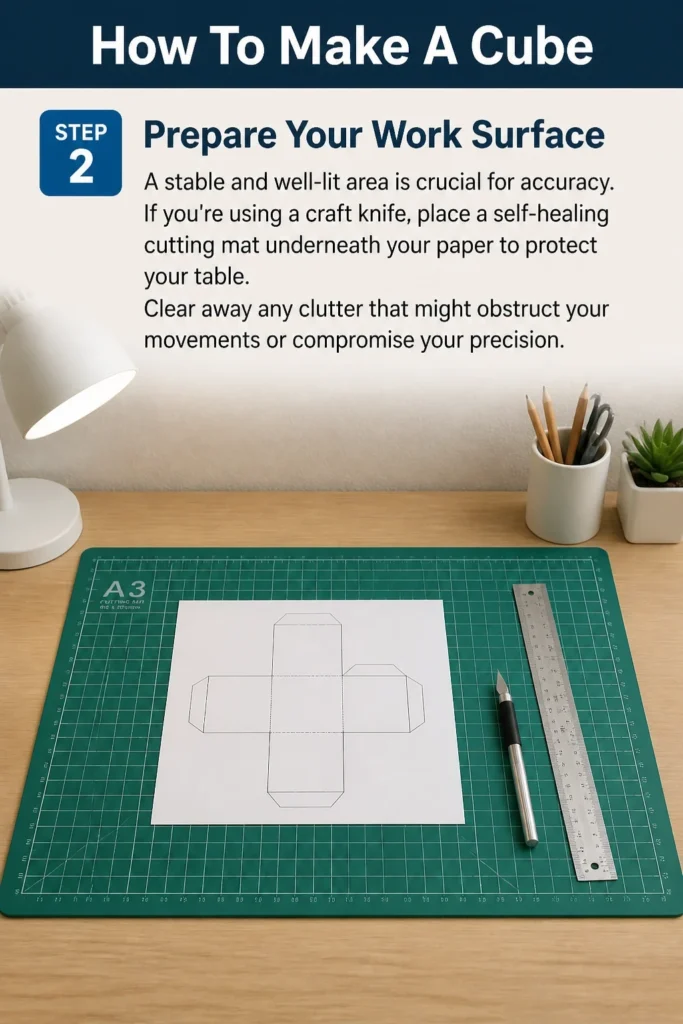
If you’re using a craft knife, place a self-healing cutting mat underneath your paper to protect your table.
Clear away any clutter that might obstruct your movements or compromise your precision.
Step 3: Understand the Cube Net
A cube net is a two-dimensional pattern that can be folded to form a three-dimensional cube.
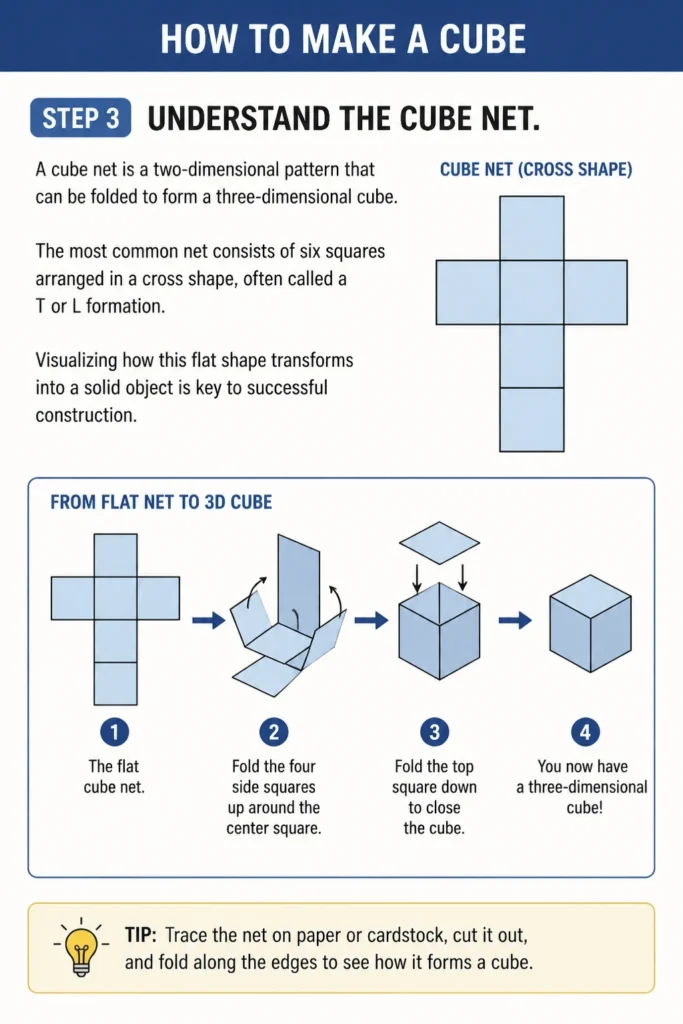
The most common net consists of six squares arranged in a cross shape, often called a “T” or “L” formation.
Visualizing how this flat shape transforms into a solid object is key to successful construction.
Step 4: Measure and Mark Your Squares
Decide on the side length for your cube; for a first attempt, a 5 cm (2 inch) side is manageable.
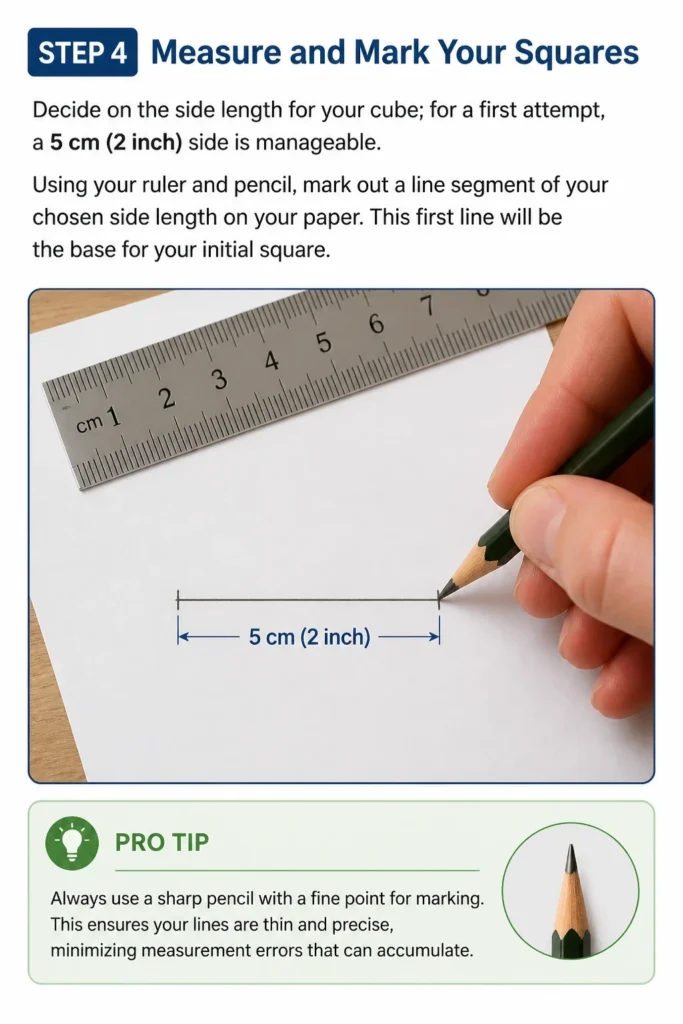
Using your ruler and pencil, mark out a line segment of your chosen side length on your paper.
This first line will be the base for your initial square.
Pro Tip: Always use a sharp pencil with a fine point for marking. This ensures your lines are thin and precise, minimizing measurement errors that can accumulate.
Step 5: Draw the First Row of Squares
From your initial line, draw a perfect square using your ruler and pencil.
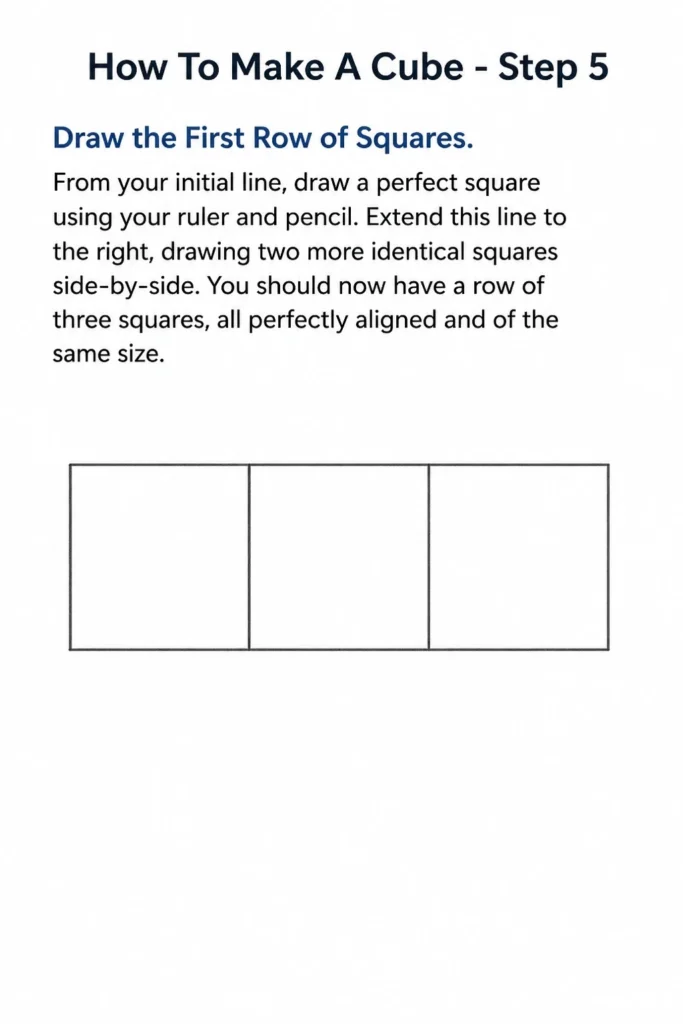
Extend this line to the right, drawing two more identical squares side-by-side.
You should now have a row of three squares, all perfectly aligned and of the same size.
Step 6: Complete the Cross Pattern
Return to the middle square of your three-square row.
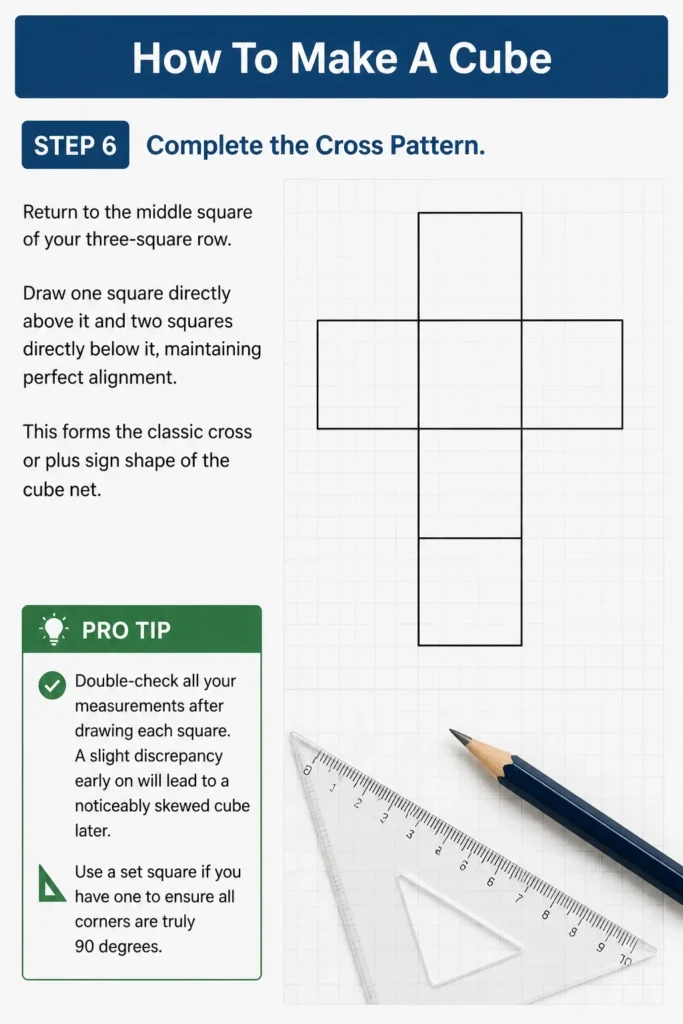
Draw one square directly above it and two squares directly below it, maintaining perfect alignment.
This forms the classic “cross” or “plus sign” shape of the cube net.
Pro Tip: Double-check all your measurements after drawing each square. A slight discrepancy early on will lead to a noticeably skewed cube later. Use a set square if you have one to ensure all corners are truly 90 degrees.
Step 7: Add the Glue Tabs
Glue tabs are small flaps that extend from some edges of your net, providing a surface for adhesive.
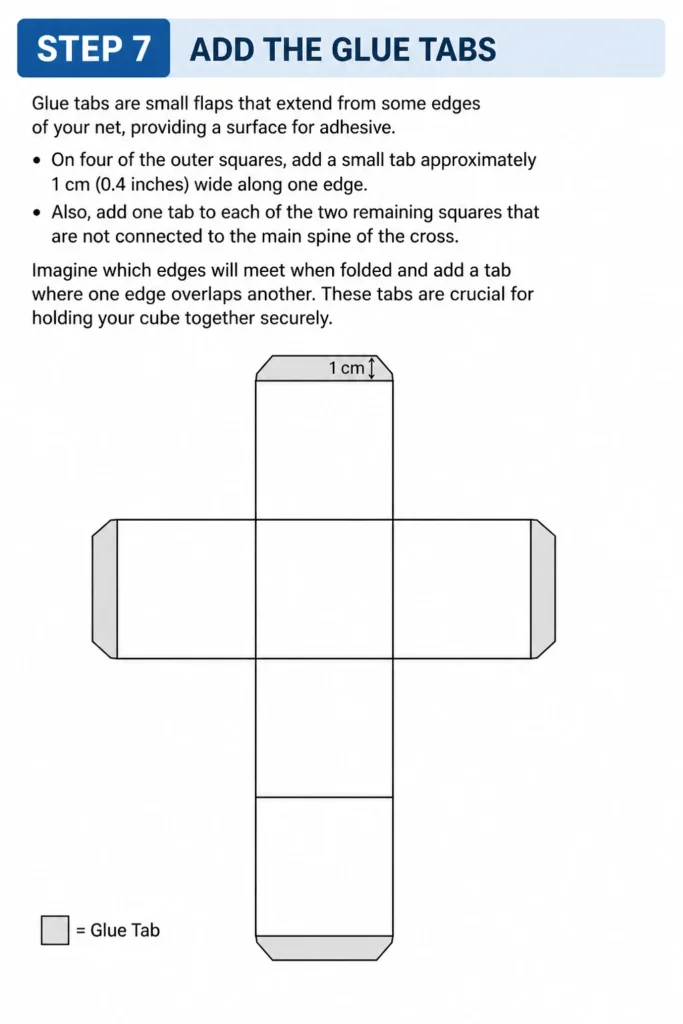
On four of the outer squares, add a small tab approximately 1 cm (0.4 inches) wide along one edge.
Also, add one tab to each of the two remaining squares that are not connected to the main “spine” of the cross.
Imagine which edges will meet when folded and add a tab where one edge overlaps another.
These tabs are crucial for holding your cube together securely.
Step 8: Cut Out Your Net
Carefully cut along the outer perimeter of your cube net, including all the glue tabs.
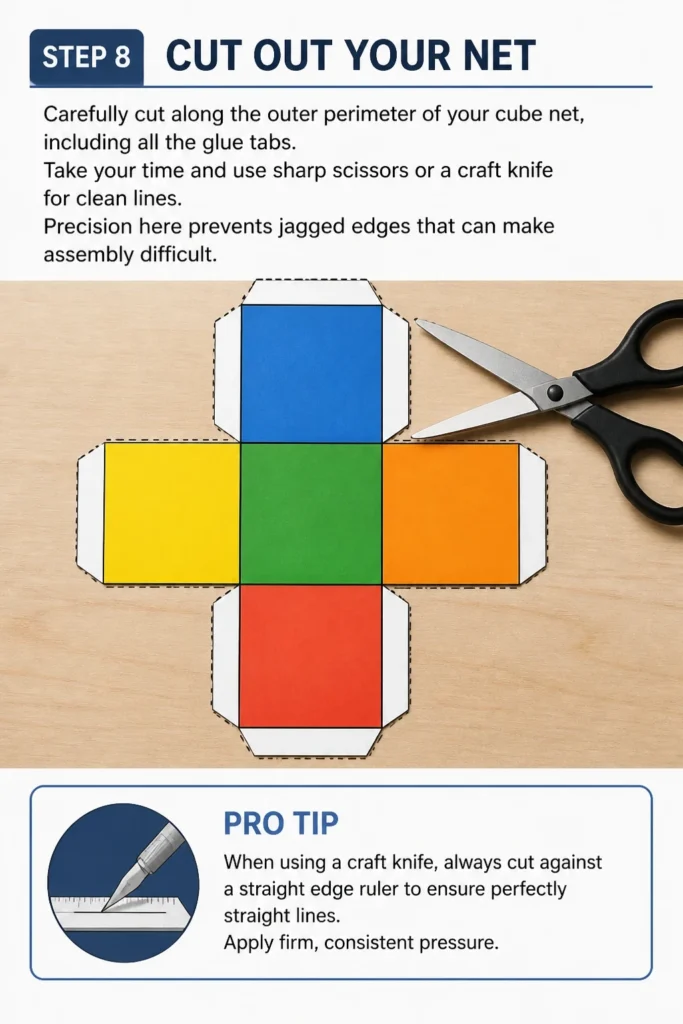
Take your time and use sharp scissors or a craft knife for clean lines.
Precision here prevents jagged edges that can make assembly difficult.
Pro Tip: When using a craft knife, always cut against a straight edge ruler to ensure perfectly straight lines. Apply firm, consistent pressure.
Step 9: Score the Fold Lines
Scoring creates a crease along your fold lines, making them sharp and accurate.
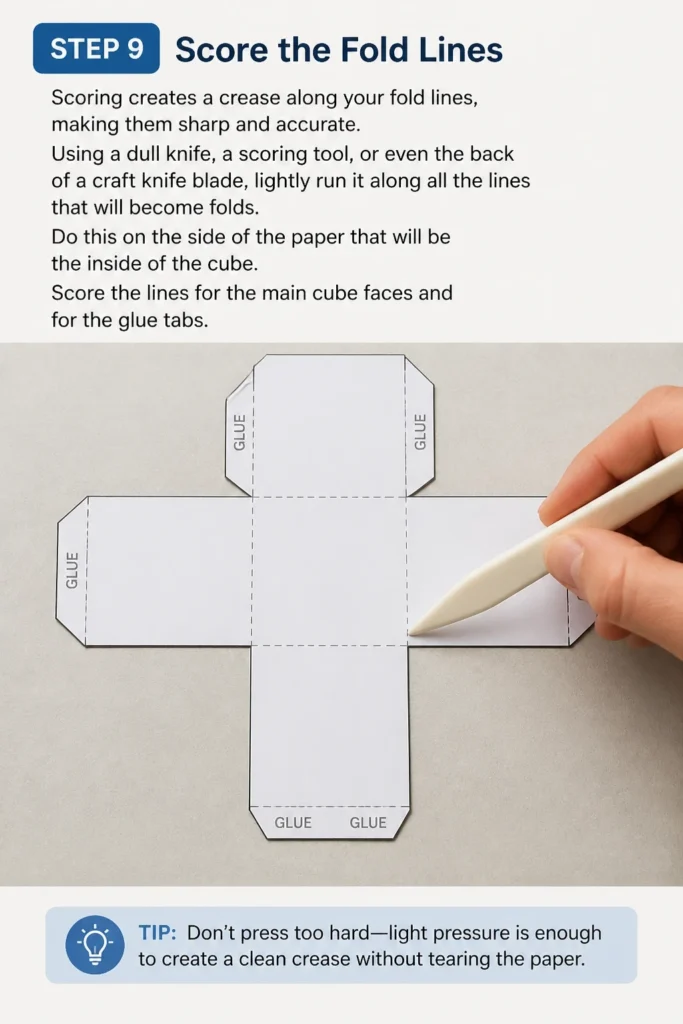
Using a dull knife, a scoring tool, or even the back of a craft knife blade, lightly run it along all the lines that will become folds.
Do this on the side of the paper that will be the inside of the cube.
Score the lines for the main cube faces and for the glue tabs.
Step 10: Fold the Cube
Gently fold all the scored lines inwards, towards the center of the net.
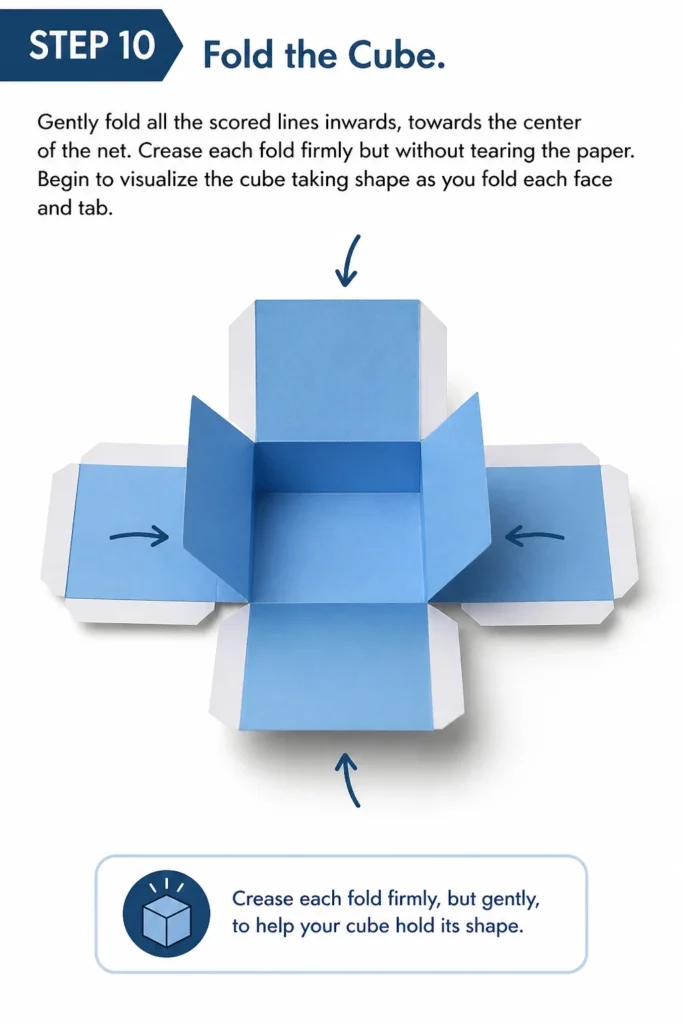
Crease each fold firmly but without tearing the paper.
Begin to visualize the cube taking shape as you fold each face and tab.
Step 11: Apply Adhesive and Assemble
Apply a thin, even layer of glue to one glue tab at a time.
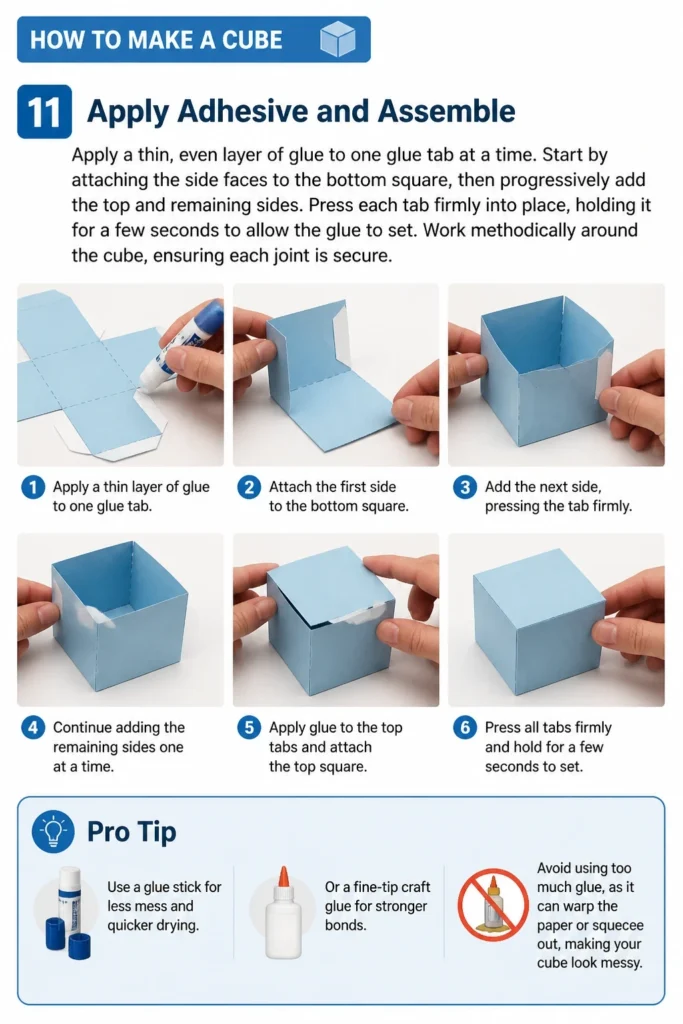
Start by attaching the side faces to the bottom square, then progressively add the top and remaining sides.
Press each tab firmly into place, holding it for a few seconds to allow the glue to set.
Work methodically around the cube, ensuring each joint is secure.
Pro Tip: Use a glue stick for less mess and quicker drying, or a fine-tip craft glue for stronger bonds. Avoid using too much glue, as it can warp the paper or squeeze out, making your cube look messy.
Step 12: Allow to Dry
Once all the tabs are glued, gently hold the cube in shape or place small weights on it if necessary.
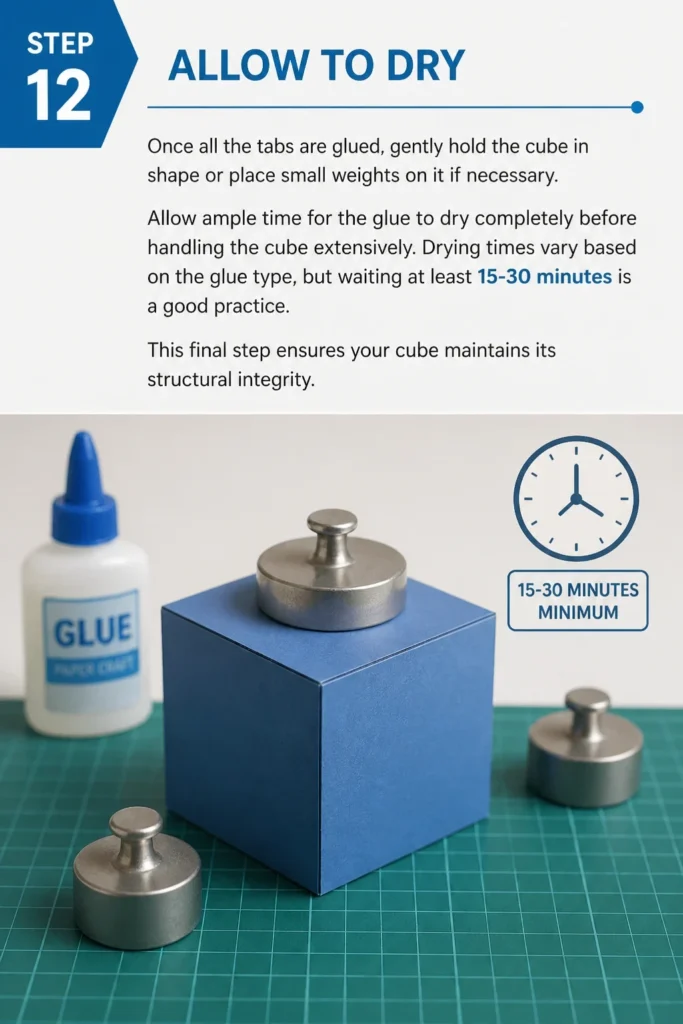
Allow ample time for the glue to dry completely before handling the cube extensively.
Drying times vary based on the glue type, but waiting at least 15-30 minutes is a good practice.
This final step ensures your cube maintains its structural integrity.
Common Mistakes to Avoid
Inaccurate Measurements
One of the most frequent errors is not measuring precisely. Even a millimeter off on one side can lead to faces that don’t align perfectly, resulting in a lopsided cube.
Always double-check your measurements and use a reliable ruler. Take your time during the marking phase to ensure every line is exactly where it should be.
Forgetting Glue Tabs or Placing Them Incorrectly
The glue tabs are essential for holding the cube together. Forgetting to draw them, or drawing them on the wrong edges, will leave you with a net that cannot be assembled.
Carefully review your net before cutting to ensure all necessary tabs are present and correctly positioned to overlap when folded.
Cutting on Fold Lines
It’s easy to accidentally cut along a line that should be a fold, especially if your pencil lines are thick.
Always distinguish clearly between cutting lines (the outer perimeter) and scoring lines (the internal folds). Cutting a fold line will separate a face from the main net, requiring you to start over.
Impatience with Drying
Rushing the drying process is a common pitfall. If you handle the cube before the glue has fully set, the tabs can detach, or the paper can warp.
Give your cube adequate time to dry. Patience ensures a strong, lasting bond and a sturdy final product.
Troubleshooting
Cube Won’t Hold Its Shape
If your cube collapses or feels flimsy, the most likely cause is insufficient glue or inadequate drying time.
Go back and apply a bit more glue to the loose tabs, pressing them firmly into place. If using liquid glue, ensure it’s applied evenly. Let it dry completely without disturbance.
Edges Aren’t Straight
Crooked edges usually stem from imprecise cutting or inaccurate folding.
For future attempts, ensure your cuts are perfectly straight, ideally using a craft knife and ruler. When folding, press firmly along the scored lines to achieve crisp, sharp creases.
Visible Glue Marks
Excessive glue can seep out from the tabs, leaving unsightly marks on the exterior of your cube.
Use less glue next time; a thin, even layer is usually sufficient. If you do get excess glue, try to gently wipe it away immediately with a damp cloth before it dries, or use a rubber cement pick-up square for dried residue.
Key Takeaways
- Precision in measuring and marking is the foundation of a well-formed cube.
- Understanding the cube net and where each face and tab connects is crucial for assembly.
- Scoring fold lines creates crisp, professional-looking edges.
- Patience during gluing and drying ensures structural integrity and a clean finish.
- Practice improves your technique, leading to increasingly perfect creations.
- Even a simple project like a cube builds valuable crafting and spatial reasoning skills.
Frequently Asked Questions
What kind of paper is best for making a cube?
Cardstock is ideal because it’s sturdy enough to hold its shape without being too thick to fold easily. Craft paper or construction paper can also work, but avoid very thin printer paper, as it tends to be flimsy and difficult to work with for a rigid structure.
Can I make a cube without glue?
Yes, you can. Some cube net designs incorporate interlocking tabs that fit into slots, eliminating the need for adhesive. This method requires even more precise cutting and design, but it can result in a very clean, glue-free finish.
How can I make a larger cube?
To make a larger cube, simply increase the side length of your squares when you draw the net. The principles remain the same, but you might need larger paper and potentially sturdier cardstock to maintain stability for bigger dimensions.
Can I use a different material?
Absolutely. The concept of a cube net applies to many materials. You could use thin plastic sheets, foam board, or even metal if you have the right tools for cutting and scoring. Each material presents its own challenges and rewards.
Our Top Recommended Finds
- Precision Craft Knife: Essential for clean, straight cuts, especially when paired with a metal ruler. It offers more control than scissors for intricate details.
- Self-Healing Cutting Mat: Protects your work surface from knife blades and provides a non-slip base for cutting. Many mats also have grid lines for easy alignment.
- Quick-Drying Craft Glue: A good quality glue that dries clear and quickly will make the assembly process much smoother and less prone to shifting.
Your Next Step in Creation
You’ve just completed a fundamental exercise in crafting, transforming a flat piece of paper into a precise three-dimensional form.
This skill is a stepping stone to more complex geometric models, origami, or even architectural scale models.
Why not try making several cubes of different sizes or colors, or even experiment with cutting out shapes on the faces before assembly?
Take this foundational knowledge and build something new today.