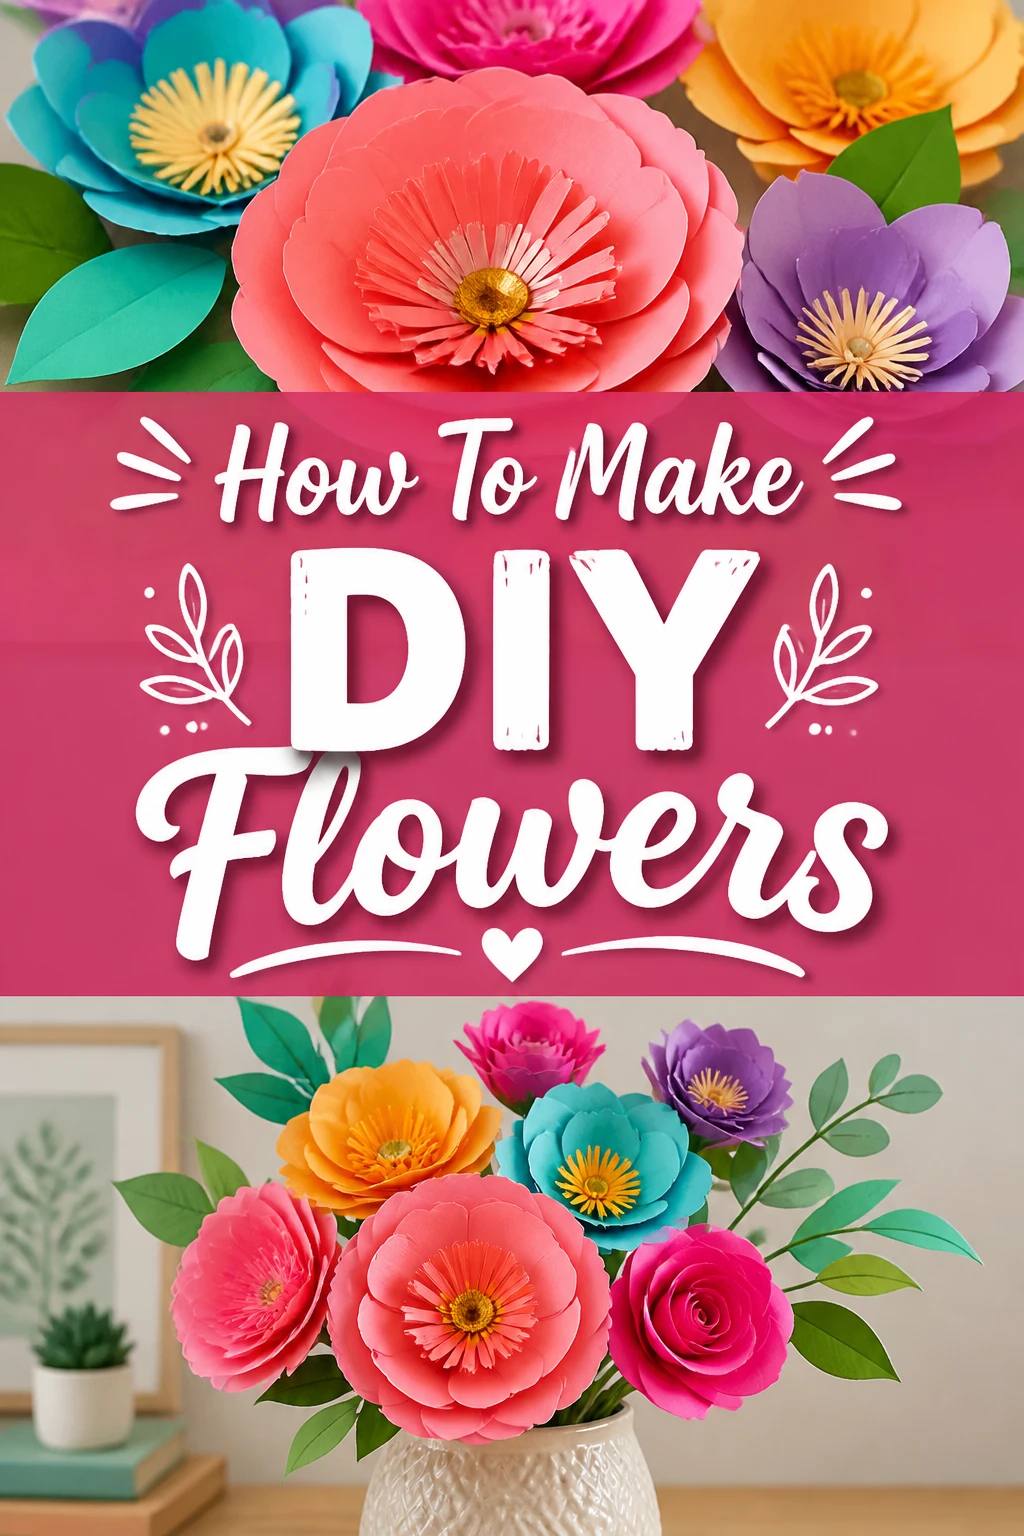
🌸 How To Make DIY Flowers
There’s something truly special about a handmade gift, especially when it’s a beautiful flower crafted by your own hands.
I remember the first time I made a paper rose; the sense of accomplishment was incredibly rewarding.
This guide comes from countless hours of experimenting and perfecting different DIY flower techniques, ensuring you get clear, practical advice.
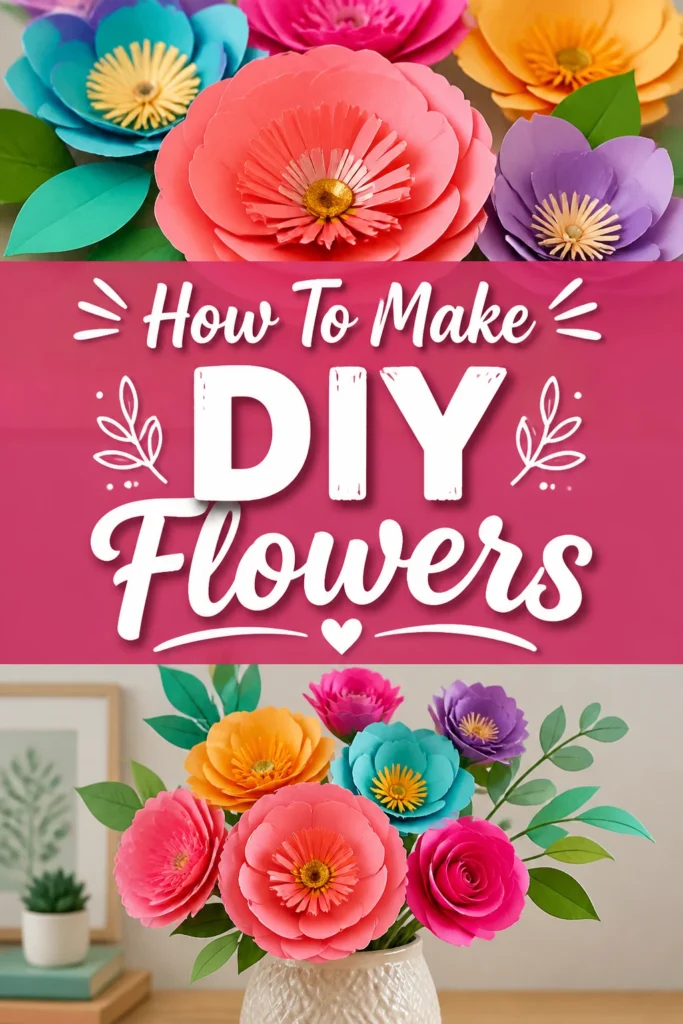
Quick Overview
You’re about to embark on a delightful journey to create stunning, lasting blooms that never wilt.
This process is wonderfully meditative and results in unique decorations or thoughtful gifts.
- Time needed: 1-3 hours (depending on complexity and number of flowers)
- Difficulty: Beginner
- What you’ll need: Paper, scissors, glue, optional floral wire
Step-by-Step Instructions
We’ll focus on creating a classic paper rose, a versatile technique that forms the basis for many other flower styles.
Feel free to adapt colors and sizes to match your vision.
Step 1: Gather Your Materials
Before you begin, ensure everything you need is within easy reach on a clean workspace.
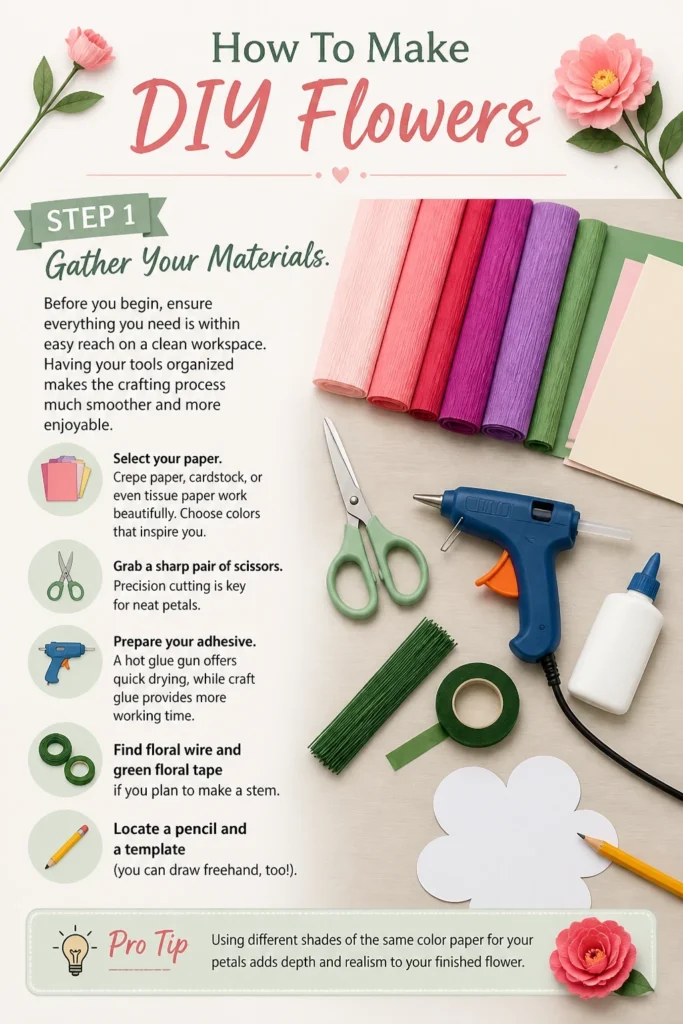
Having your tools organized makes the crafting process much smoother and more enjoyable.
- Select your paper. Crepe paper, cardstock, or even tissue paper work beautifully. Choose colors that inspire you.
- Grab a sharp pair of scissors. Precision cutting is key for neat petals.
- Prepare your adhesive. A hot glue gun offers quick drying, while craft glue provides more working time.
- Find floral wire and green floral tape if you plan to make a stem.
- Locate a pencil and a template (you can draw freehand, too!).
Pro Tip: Using different shades of the same color paper for your petals adds depth and realism to your finished flower.
Step 2: Prepare Your Petals
The shape and size of your petals will determine the final look of your rose.
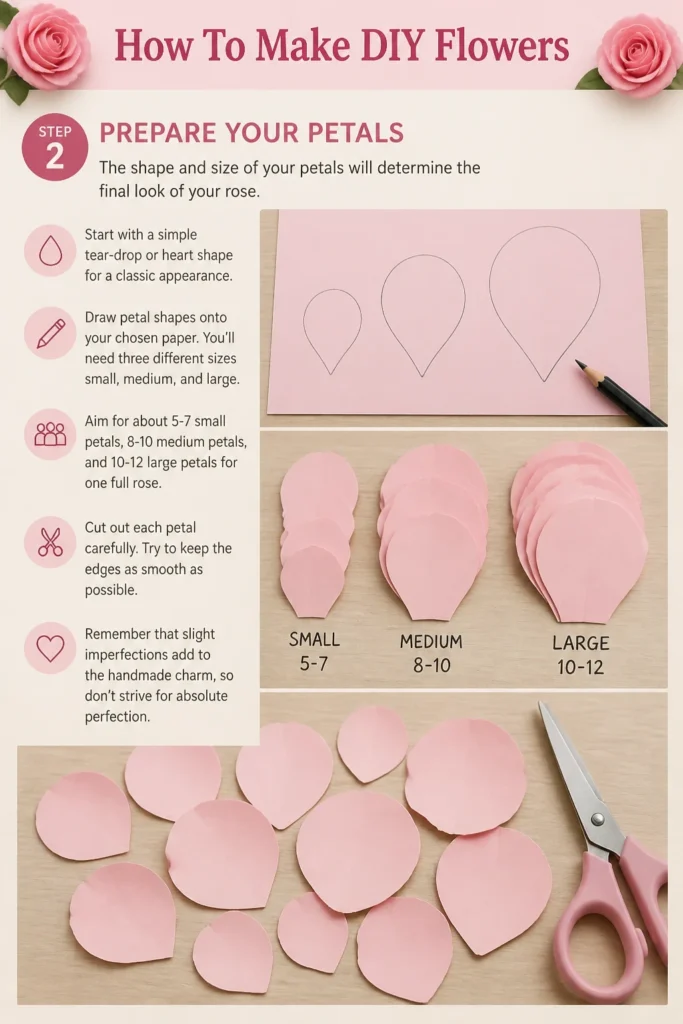
Start with a simple tear-drop or heart shape for a classic appearance.
- Draw petal shapes onto your chosen paper. You’ll need three different sizes: small, medium, and large.
- Aim for about 5-7 small petals, 8-10 medium petals, and 10-12 large petals for one full rose.
- Cut out each petal carefully. Try to keep the edges as smooth as possible.
- Remember that slight imperfections add to the handmade charm, so don’t strive for absolute perfection.
Step 3: Shape Your Petals
This step is crucial for giving your paper flower a natural, three-dimensional look.
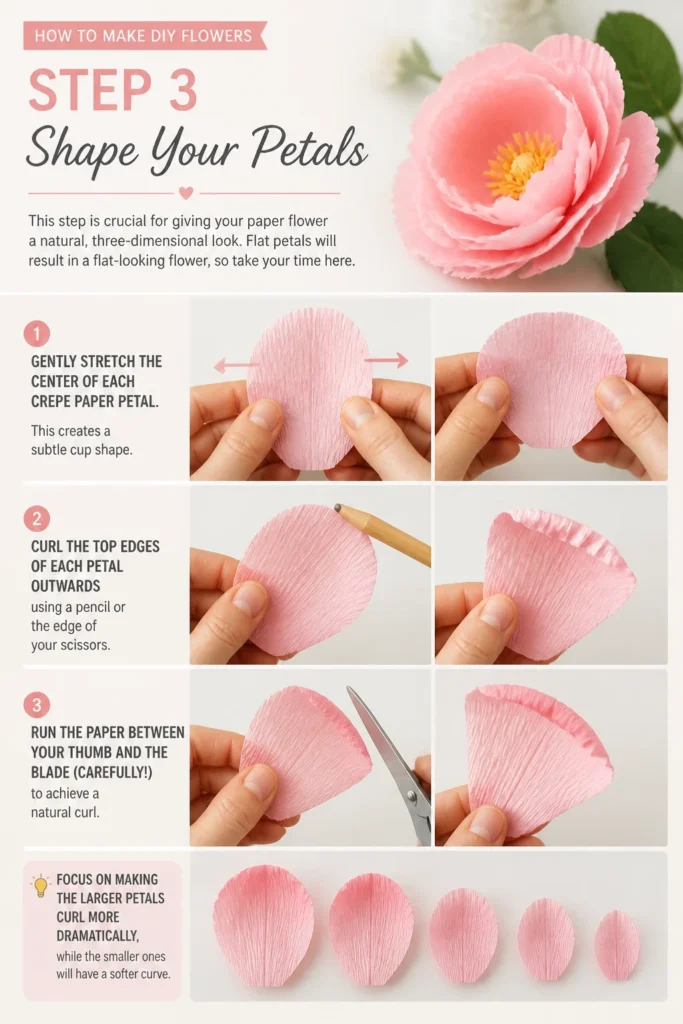
Flat petals will result in a flat-looking flower, so take your time here.
- Gently stretch the center of each crepe paper petal. This creates a subtle cup shape.
- Curl the top edges of each petal outwards using a pencil or the edge of your scissors. Run the paper between your thumb and the blade (carefully!) to achieve a natural curl.
- Focus on making the larger petals curl more dramatically, while the smaller ones will have a softer curve.
Step 4: Form the Flower Bud
The core of your rose begins here, establishing its central structure.
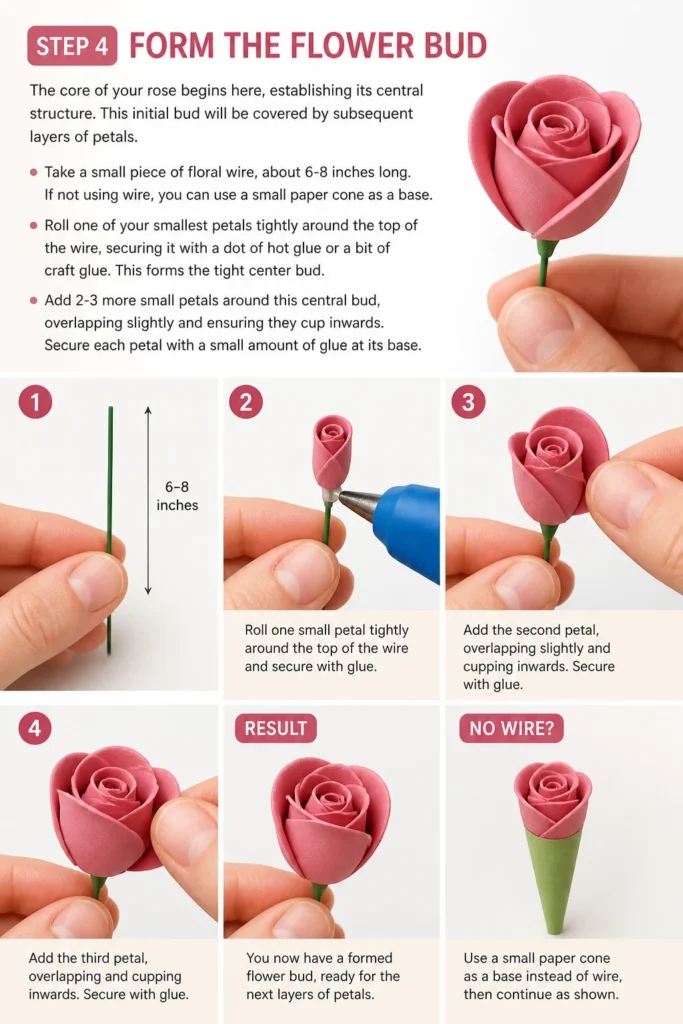
This initial bud will be covered by subsequent layers of petals.
- Take a small piece of floral wire, about 6-8 inches long. If not using wire, you can use a small paper cone as a base.
- Roll one of your smallest petals tightly around the top of the wire, securing it with a dot of hot glue or a bit of craft glue. This forms the tight center bud.
- Add 2-3 more small petals around this central bud, overlapping slightly and ensuring they cup inwards.
- Secure each petal with a small amount of glue at its base.
Step 5: Add Outer Petals
Now, build out your rose by layering the medium and then the large petals.
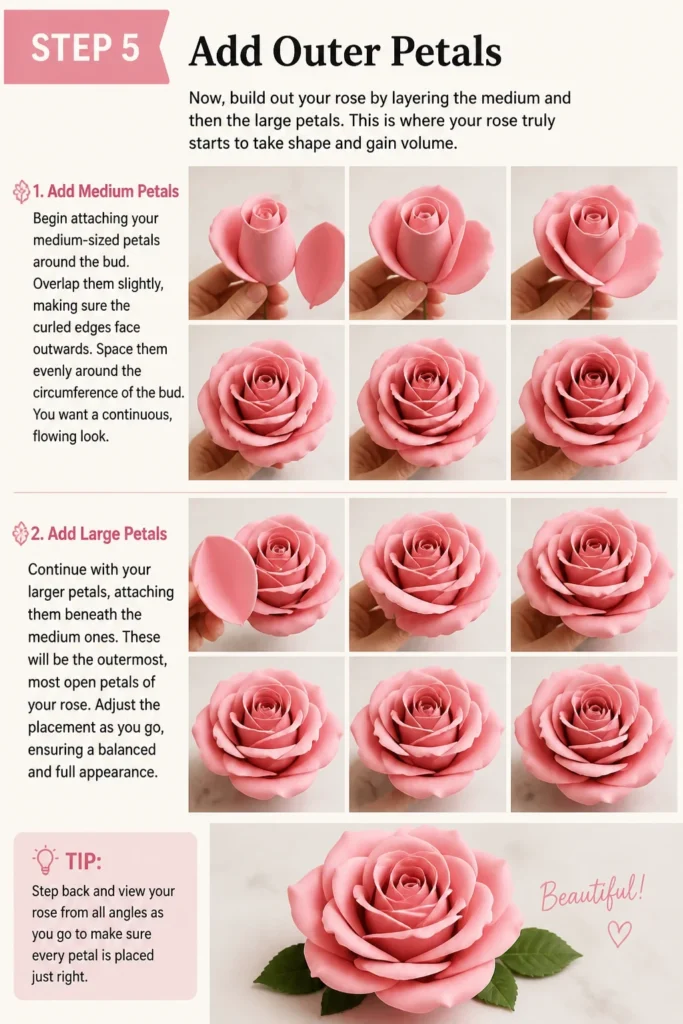
This is where your rose truly starts to take shape and gain volume.
- Begin attaching your medium-sized petals around the bud. Overlap them slightly, making sure the curled edges face outwards.
- Space them evenly around the circumference of the bud. You want a continuous, flowing look.
- Continue with your larger petals, attaching them beneath the medium ones. These will be the outermost, most open petals of your rose.
- Adjust the placement as you go, ensuring a balanced and full appearance.
Step 6: Create the STEM and Leaves
A realistic stem and a few leaves will complete the illusion of a freshly picked bloom.
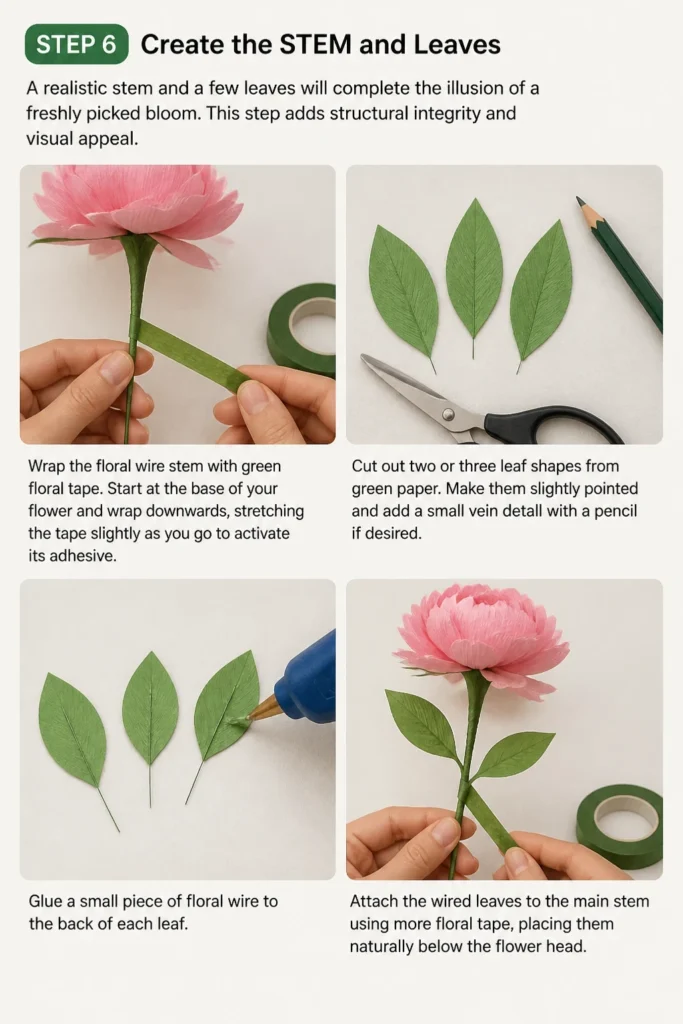
This step adds structural integrity and visual appeal.
- Wrap the floral wire stem with green floral tape. Start at the base of your flower and wrap downwards, stretching the tape slightly as you go to activate its adhesive.
- Cut out two or three leaf shapes from green paper. Make them slightly pointed and add a small vein detail with a pencil if desired.
- Glue a small piece of floral wire to the back of each leaf.
- Attach the wired leaves to the main stem using more floral tape, placing them naturally below the flower head.
Step 7: Refine and Finish
Take a moment to step back and admire your creation, making any final adjustments.
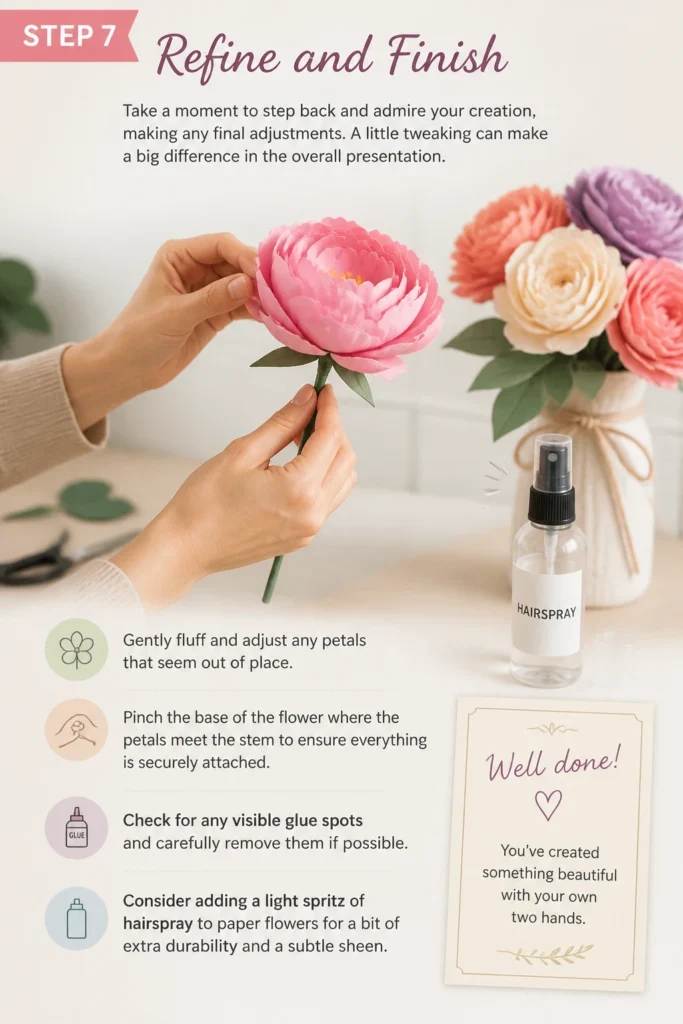
A little tweaking can make a big difference in the overall presentation.
- Gently fluff and adjust any petals that seem out of place.
- Pinch the base of the flower where the petals meet the stem to ensure everything is securely attached.
- Check for any visible glue spots and carefully remove them if possible.
- Consider adding a light spritz of hairspray to paper flowers for a bit of extra durability and a subtle sheen.
Common Mistakes to Avoid
Even experienced crafters encounter challenges. Knowing common pitfalls helps you sidestep them for a smoother process.
Cutting Petals Uniformly
Many beginners try to make every petal identical. This often leads to a stiff, unnatural-looking flower.
Embrace slight variations in shape and size; it mimics the organic beauty of real flowers and adds charm.
Using Too Much Glue
Excessive glue can seep through your paper, creating unsightly marks and making your flower look messy.
Apply small, precise dots of glue. A little goes a long way, especially with hot glue.
Skipping Petal Shaping
If you don’t shape your petals by stretching and curling, your flower will appear flat and two-dimensional.
Invest time in gently molding each petal; it’s the secret to creating a lifelike, voluminous bloom.
Impatience with Drying
Rushing the drying process, especially with liquid craft glue, can cause petals to shift or detach.
Allow ample time for the glue to set completely before handling or moving your flower extensively.
Troubleshooting
Sometimes things don’t go exactly as planned. Here are solutions to common issues you might face.
Flower Looks Flat
If your finished flower lacks volume, it’s likely due to insufficient petal shaping or not enough overlapping.
Gently go back and re-shape individual petals, adding more curl to the edges. You can also add a few extra layers of larger petals to fill it out.
Petals Aren’t Staying Glued
This often happens if you’re using too little glue, an old adhesive, or if the paper is too slick for the glue type.
Ensure you’re using fresh, strong glue. For tricky papers, try a different adhesive like a stronger craft glue or a quick-drying hot glue gun.
Stem Feels Flimsy
A wobbly stem can detract from your beautiful flower. This typically occurs if the floral wire is too thin or not adequately wrapped.
You can reinforce a flimsy stem by wrapping another layer of floral tape or by twisting two pieces of floral wire together before wrapping.
Key Takeaways
Creating DIY flowers is a rewarding craft that gets easier with practice.
Keep these core principles in mind for your next project.
- Embrace variety: Don’t strive for perfectly identical petals; natural variation adds realism.
- Shape is key: Curling and stretching petals are essential for a three-dimensional, lifelike appearance.
- Glue wisely: Use small, precise amounts of adhesive to avoid mess and secure petals effectively.
- Layer thoughtfully: Build your flower from the inside out, gradually adding larger petals for volume.
- Reinforce stems: Ensure your flower has a sturdy base by properly wiring and taping the stem.
- Practice makes perfect: Your first flower is a learning experience; each subsequent one will be even better.
Frequently Asked Questions
New to DIY flowers? Here are some common questions and their answers to help you along.
What kind of paper is best for DIY flowers?
Crepe paper is excellent for its stretch and texture, mimicking real petals. Cardstock provides sturdy, structured flowers, while tissue paper creates delicate, airy blooms. Experiment to find your favorite!
Can I use fabric instead of paper?
Absolutely! Fabric flowers offer a different texture and durability. You’ll need to use fabric stiffener or choose fabrics that hold their shape well, and often use techniques like heat-sealing edges to prevent fraying.
How do I make them last?
Paper flowers are naturally long-lasting. To protect them from dust and moisture, you can lightly spray them with a clear acrylic sealant or hairspray. Keep them out of direct sunlight to prevent fading.
Can children do this?
Yes, with supervision! Simple designs using tissue paper and school glue are great for kids. For hot glue guns or sharp scissors, adult guidance is essential to ensure safety.
Our Top Recommended Finds
To help you get started or enhance your crafting toolkit, here are a few general recommendations.
- Craft Paper Assortment: A multi-pack of colored cardstock or crepe paper gives you many options to experiment with different flower types.
- Hot Glue Gun with Glue Sticks: Essential for quick, strong bonds, a mini hot glue gun is perfect for intricate flower work.
- Floral Wire and Tape Kit: This often includes wires of various gauges and green floral tape, everything you need for realistic stems and leaves.
Your Journey into DIY Blooms
You’ve now got the tools and knowledge to create your very own stunning DIY flowers.
The satisfaction of crafting something beautiful with your own hands is truly unmatched.
Why not try making a bouquet for a friend, or perhaps a decorative centerpiece for your home today?
Let your creativity blossom!