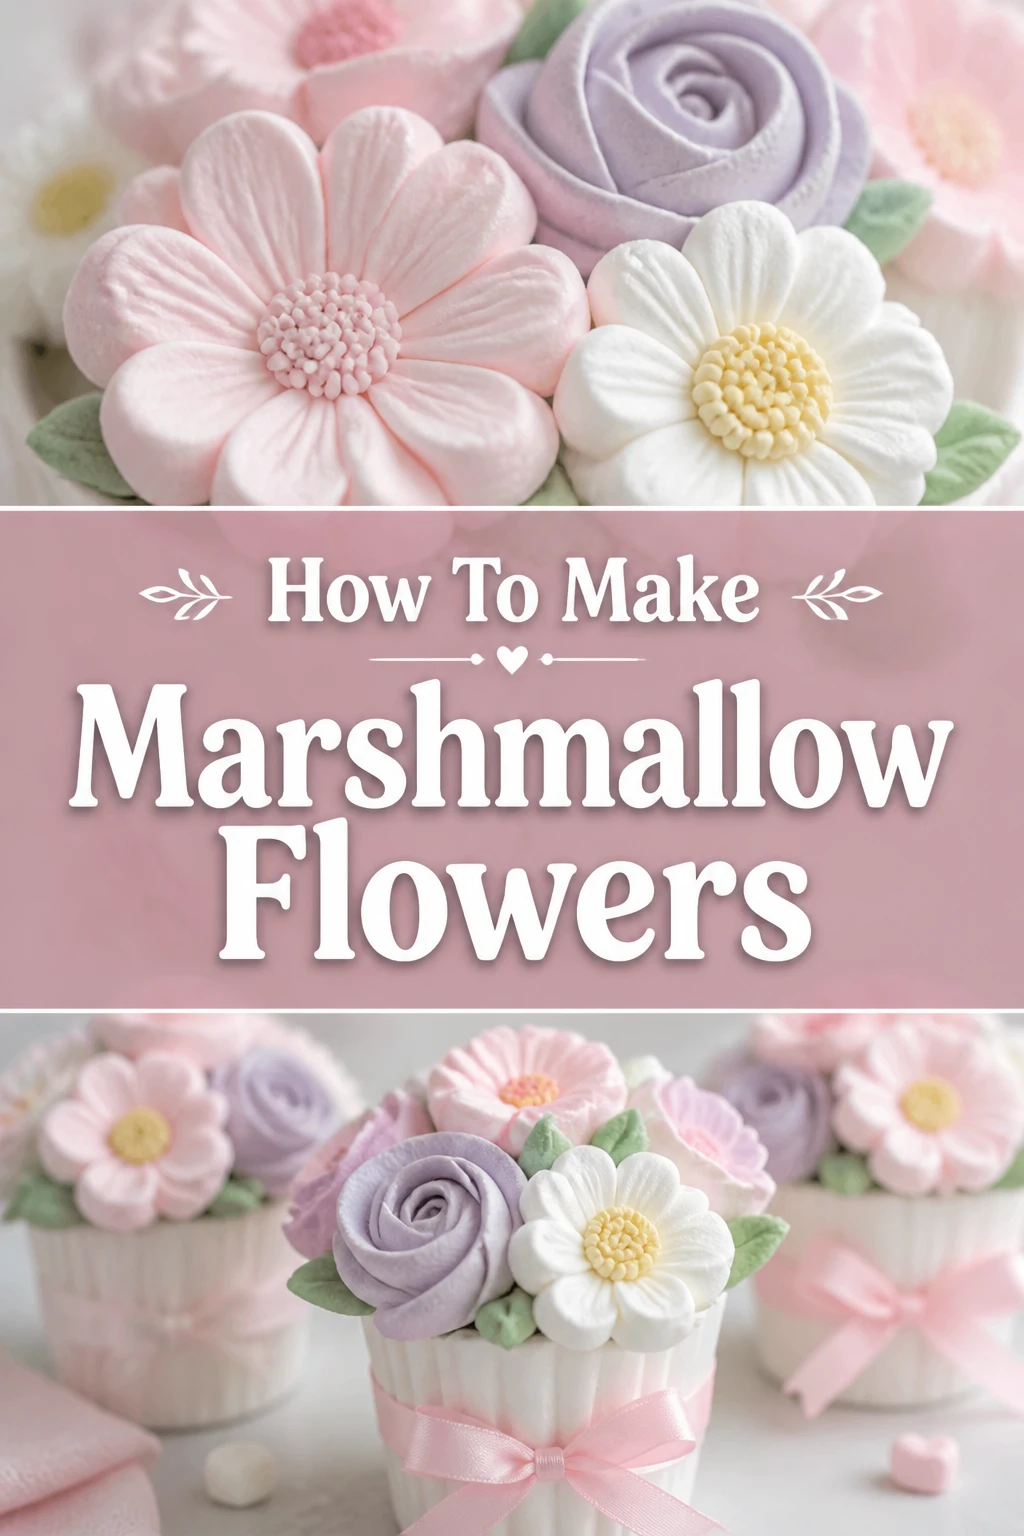
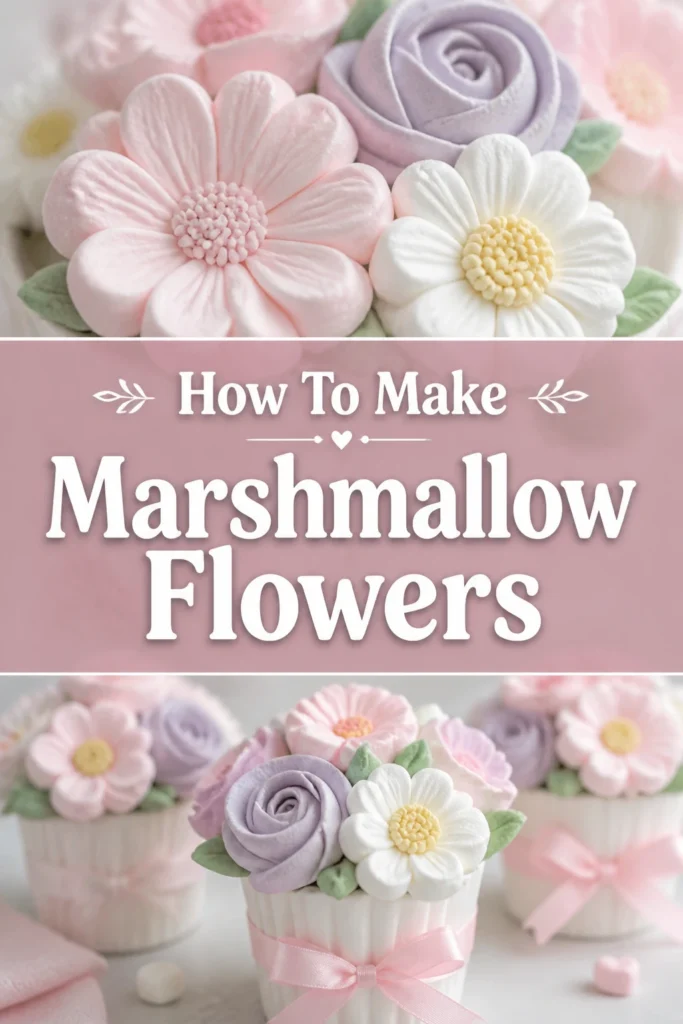
🌸 How To Make Marshmallow Flowers
I remember the first time I tried to make marshmallow flowers. It seemed like a simple craft, but getting them just right took a little practice.
Through some trial and error, I’ve discovered the secrets to crafting these adorable, edible decorations.
This guide will share all my best tips, ensuring your marshmallow flowers bloom beautifully every single time you make them.
Quick Overview
You’re about to create charming, edible marshmallow flowers perfect for decorating desserts or simply enjoying as a sweet treat.
This guide will walk you through each step, from cutting and shaping to coloring and assembly, making the process fun and easy.
- Time needed: 45-75 minutes (active preparation) + 1-2 hours drying time
- Difficulty: Beginner
- What you’ll need: Large marshmallows, sharp kitchen scissors, powdered sugar, cornstarch, small bowls, food coloring, water, small paint brushes (food-safe), a non-stick mat or cutting board, and optional sprinkles.
Step-by-Step Instructions
Step 1: Gather Your Supplies
Collect all your necessary ingredients and tools before you begin. Having everything at hand makes the process much smoother and more enjoyable.
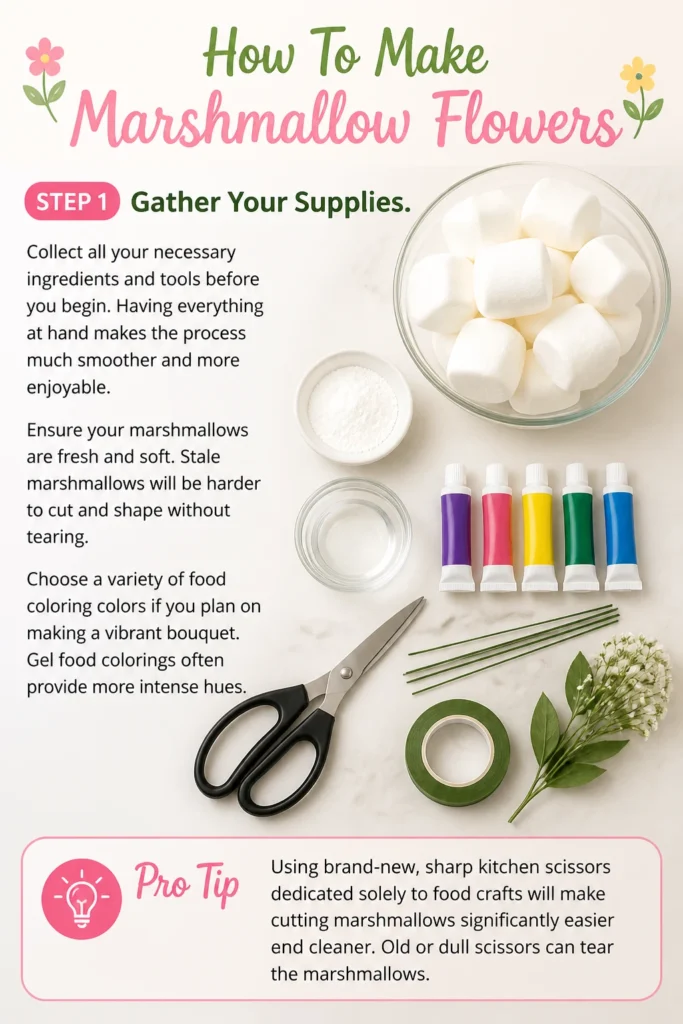
Ensure your marshmallows are fresh and soft. Stale marshmallows will be harder to cut and shape without tearing.
Choose a variety of food coloring colors if you plan on making a vibrant bouquet. Gel food colorings often provide more intense hues.
Pro Tip: Using brand-new, sharp kitchen scissors dedicated solely to food crafts will make cutting marshmallows significantly easier and cleaner. Old or dull scissors can tear the marshmallows.
Step 2: Prepare Your Workstation
Mix a small amount of powdered sugar and cornstarch together in a shallow bowl. This mixture will be your non-stick dusting agent.
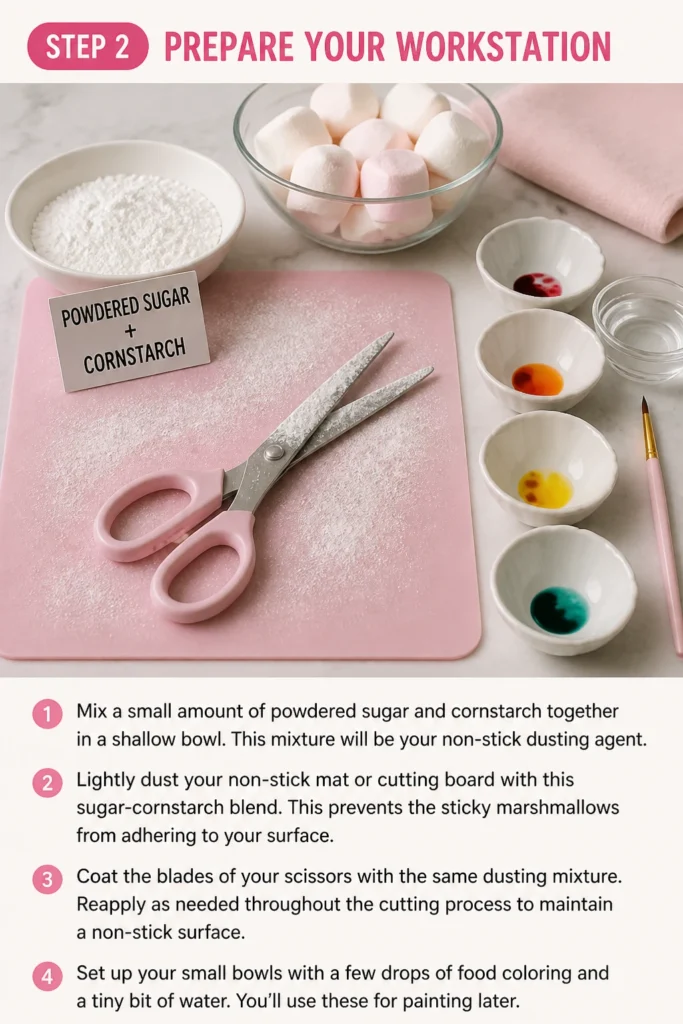
Lightly dust your non-stick mat or cutting board with this sugar-cornstarch blend. This prevents the sticky marshmallows from adhering to your surface.
Coat the blades of your scissors with the same dusting mixture. Reapply as needed throughout the cutting process to maintain a non-stick surface.
Set up your small bowls with a few drops of food coloring and a tiny bit of water. You’ll use these for painting later.
Step 3: Cut the Marshmallows for Petals
Take one large marshmallow. You will typically get four petals from each marshmallow, sometimes five if you’re careful.
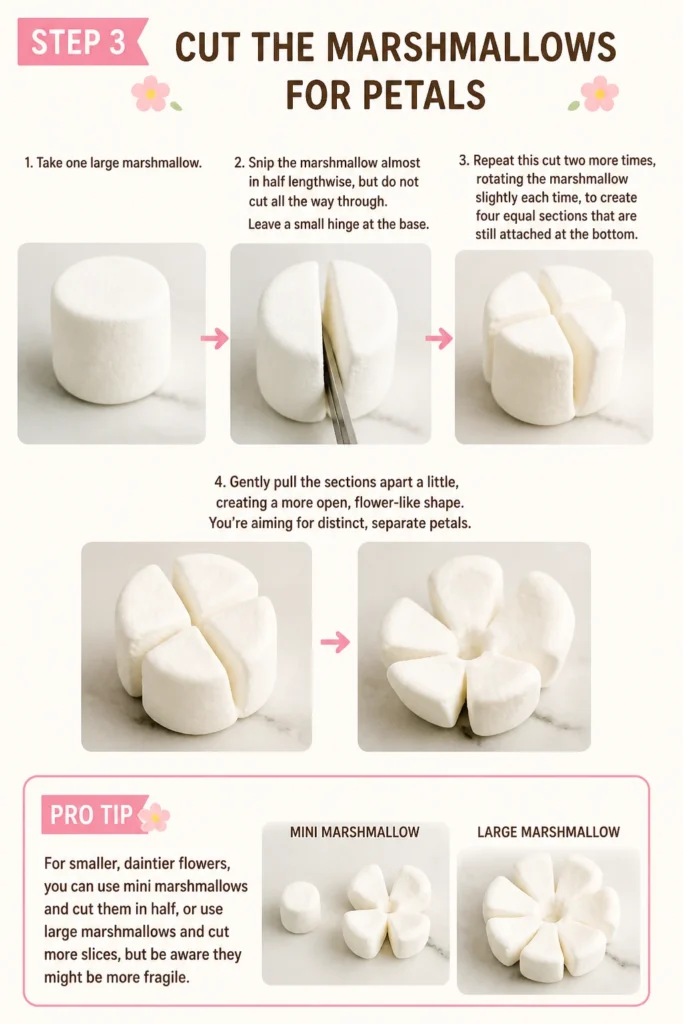
Snip the marshmallow almost in half lengthwise, but do not cut all the way through. Leave a small hinge at the base.
Repeat this cut two more times, rotating the marshmallow slightly each time, to create four equal sections that are still attached at the bottom.
Gently pull the sections apart a little, creating a more open, flower-like shape. You’re aiming for distinct, separate petals.
Pro Tip: For smaller, daintier flowers, you can use mini marshmallows and cut them in half, or use large marshmallows and cut more slices, but be aware they might be more fragile.
Step 4: Shape the Petals
Flatten each petal section with your fingers. Gently press down to widen them and make them appear more like actual flower petals.
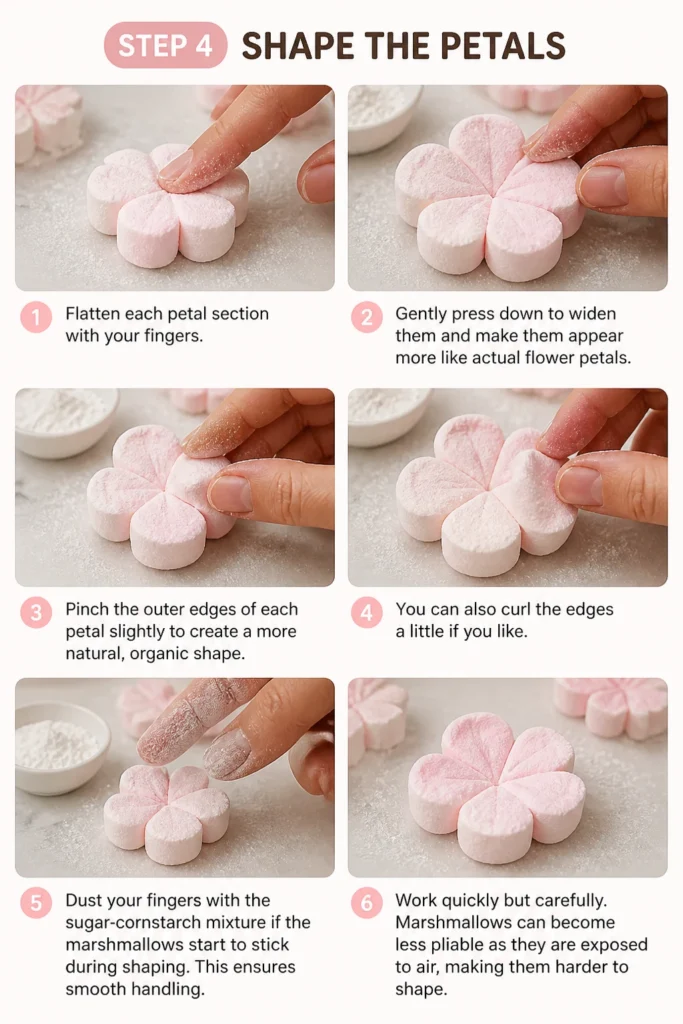
Pinch the outer edges of each petal slightly to create a more natural, organic shape. You can also curl the edges a little if you like.
Dust your fingers with the sugar-cornstarch mixture if the marshmallows start to stick during shaping. This ensures smooth handling.
Work quickly but carefully. Marshmallows can become less pliable as they are exposed to air, making them harder to shape.
Step 5: Assemble the Flower
Choose one marshmallow petal structure to be the base of your flower. This will be the foundational layer.
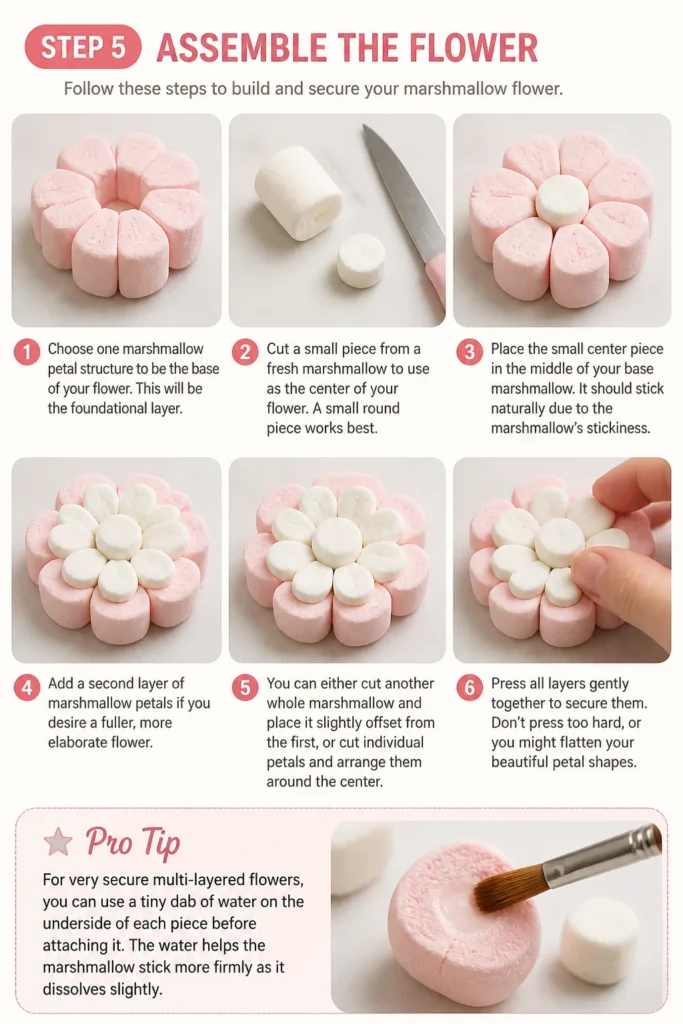
Cut a small piece from a fresh marshmallow to use as the center of your flower. A small round piece works best.
Place the small center piece in the middle of your base marshmallow. It should stick naturally due to the marshmallow’s stickiness.
Add a second layer of marshmallow petals if you desire a fuller, more elaborate flower. You can either cut another whole marshmallow and place it slightly offset from the first, or cut individual petals and arrange them around the center.
Press all layers gently together to secure them. Don’t press too hard, or you might flatten your beautiful petal shapes.
Pro Tip: For very secure multi-layered flowers, you can use a tiny dab of water on the underside of new petals to help them adhere better to the base. Use sparingly to avoid stickiness.
Step 6: Color Your Flowers
Prepare your food coloring stations. Place a tiny drop of food coloring in a small bowl, then add an equally tiny drop of water to dilute it slightly.
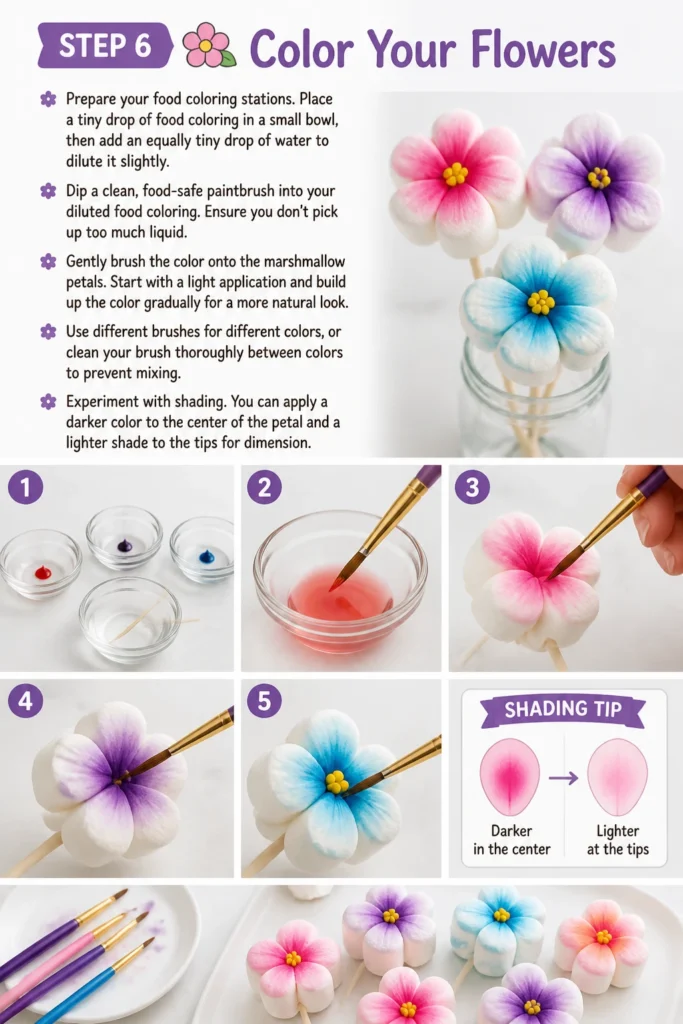
Dip a clean, food-safe paintbrush into your diluted food coloring. Ensure you don’t pick up too much liquid.
Gently brush the color onto the marshmallow petals. Start with a light application and build up the color gradually for a more natural look.
Use different brushes for different colors, or clean your brush thoroughly between colors to prevent mixing.
Experiment with shading. You can apply a darker color to the center of the petal and a lighter shade to the tips for dimension.
Step 7: Add Details and Dry
Sprinkle edible glitter or small sugar pearls onto the center of your flowers while the coloring is still slightly damp. This adds a beautiful sparkle and texture.
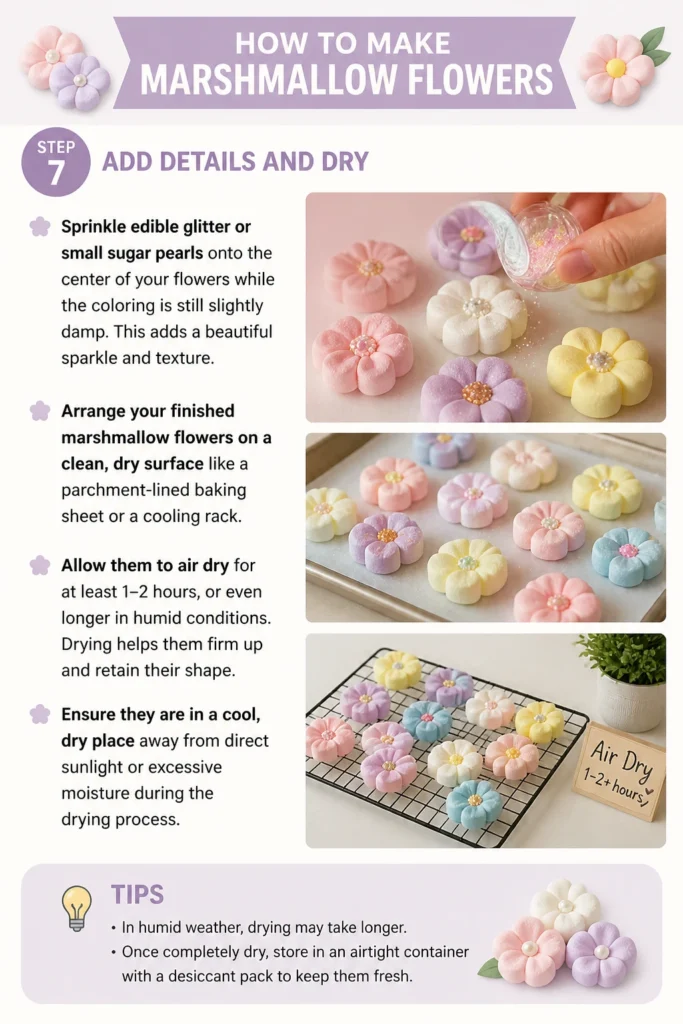
Arrange your finished marshmallow flowers on a clean, dry surface like a parchment-lined baking sheet or a cooling rack.
Allow them to air dry for at least 1-2 hours, or even longer in humid conditions. Drying helps them firm up and retain their shape.
Ensure they are in a cool, dry place away from direct sunlight or excessive moisture during the drying process.
Step 8: Store Your Creations
Once completely dry and firm, carefully transfer your marshmallow flowers to an airtight container.
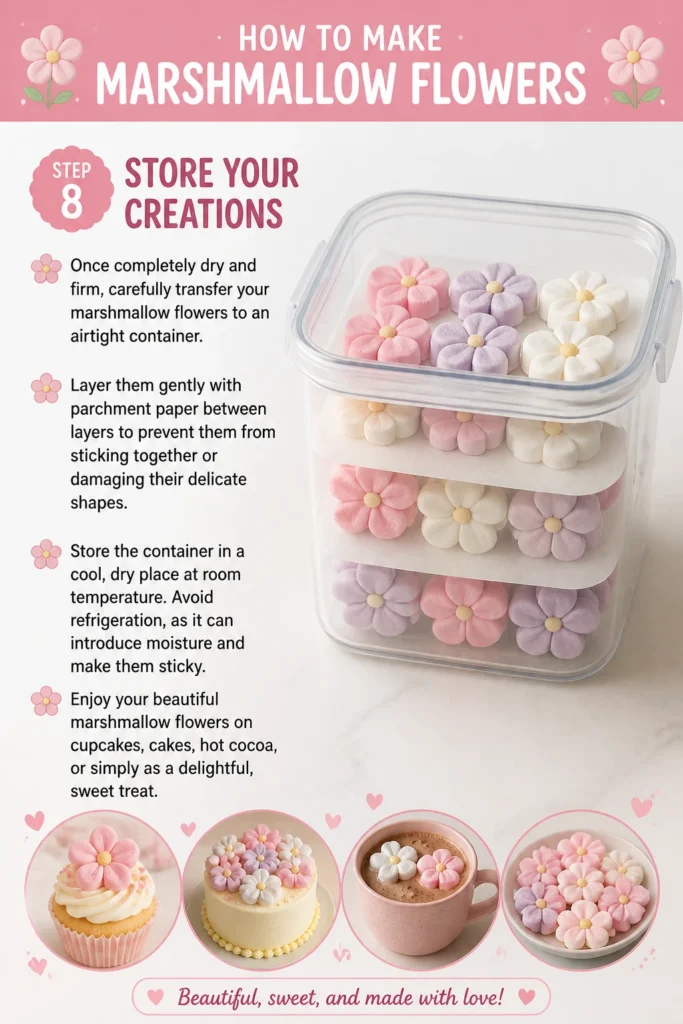
Layer them gently with parchment paper between layers to prevent them from sticking together or damaging their delicate shapes.
Store the container in a cool, dry place at room temperature. Avoid refrigeration, as it can introduce moisture and make them sticky.
Enjoy your beautiful marshmallow flowers on cupcakes, cakes, hot cocoa, or simply as a delightful, sweet treat.
Common Mistakes to Avoid
Cutting Too Deeply
Many people snip their marshmallows almost completely through when trying to create petals. This makes the petals too weak and prone to tearing when you try to shape them.
Instead, always leave a small hinge at the base of the marshmallow. This keeps the petals connected and provides structural integrity, making them much easier to work with.
Too Much Water or Food Coloring
Using undiluted food coloring or too much water in your coloring mixture can make your marshmallows overly sticky and soggy. This makes them difficult to dry and can cause them to lose their shape.
Always dilute gel food coloring with a tiny drop of water. Apply thin layers of color, allowing each layer to dry slightly before adding more. Less is definitely more when it comes to coloring marshmallows.
Not Dusting Tools and Surfaces
Forgetting to dust your scissors, fingers, and work surface with a powdered sugar and cornstarch mixture is a common oversight. This leads to frustrating stickiness, tearing, and misshapen petals.
Make it a habit to regularly dust everything that comes into contact with the marshmallows. This creates a non-stick barrier, ensuring smooth cutting and shaping. Reapply often.
Rushing the Drying Process
Impatience during the drying phase can lead to soft, floppy marshmallow flowers that don’t hold their form. They might also stick to surfaces or other flowers.
Allow your flowers ample time to air dry in a cool, dry environment. This firms them up and sets their shape, ensuring they maintain their beauty when stored or used for decoration.
Troubleshooting
Marshmallows are too sticky to work with
If your marshmallows are becoming excessively sticky during handling, it’s usually due to moisture or insufficient dusting. The humidity in the air can also play a role.
Generously dust your fingers, scissors, and work surface with the powdered sugar and cornstarch mixture. Reapply this blend frequently. If the air is very humid, try working in an air-conditioned room or speed up the drying process with a fan on a low setting after shaping.
Petals won’t hold their shape or are tearing
Tearing often happens if your scissors aren’t sharp enough, or if you’ve cut too deeply into the marshmallow. If they won’t hold shape, they might be too thin or have too much moisture.
Ensure your scissors are very sharp and clean. When cutting, leave a stronger hinge at the base. For shaping, avoid overly thinning the petals. If using water for adhesion, use only a tiny, tiny dab. Allow shaped petals to air dry a bit before painting if they feel too soft.
Colors are streaky or uneven
Streaky or uneven coloring can occur if the food coloring isn’t properly diluted, or if too much color is applied at once. Marshmallows absorb liquid quickly.
Always dilute your gel food coloring with a tiny drop of water before painting. Apply the color in very thin, even layers using a clean, soft brush. Build up the intensity gradually. If a streak appears, try to blend it out with a clean, slightly damp brush before it dries completely.
Key Takeaways
- Dusting your tools and surfaces with a powdered sugar and cornstarch mixture is absolutely essential for a non-stick experience.
- Gentle, careful cutting with sharp scissors, leaving a small hinge, prevents tearing and creates strong petals.
- Less is truly more when it comes to diluting and applying food coloring to avoid sticky, soggy marshmallows.
- Layering petals and adding a distinct center piece creates depth and a realistic, dimensional flower appearance.
- Patience during the air-drying process is crucial for marshmallow flowers to firm up and retain their beautiful shape.
- Store finished flowers in an airtight container at room temperature to maintain their freshness and prevent stickiness.
Frequently Asked Questions
Can I use different sized marshmallows for these flowers?
Absolutely! Large marshmallows are easiest for beginners because they offer more surface area to work with. However, you can use smaller marshmallows to create tiny, delicate flowers. Just be aware that mini marshmallows will be more fiddly to cut and shape, requiring extra patience and precision.
How long do marshmallow flowers typically last?
When stored properly in an airtight container at room temperature, marshmallow flowers can last for about 1-2 weeks. Their texture might firm up slightly over time, but they will still be perfectly edible. Avoid refrigeration as it can introduce moisture and make them sticky.
Can I make these marshmallow flowers ahead of time for an event?
Yes, making them a few days in advance is perfectly fine! In fact, allowing them to fully dry for 24 hours can even improve their firmness and durability. Just ensure they are completely dry before storing them in an airtight container away from humidity.
What are some creative ways to use marshmallow flowers?
Marshmallow flowers are incredibly versatile! They make stunning decorations for cupcakes, cakes, brownies, and cookies. You can float them on hot chocolate or coffee for a charming touch. They also make delightful edible gifts, or simply a fun, sweet treat for children and adults alike.
Blossom with Confidence: Your Marshmallow Masterpiece Awaits!
You now have all the knowledge and practical steps needed to create your own beautiful marshmallow flowers.
Don’t be afraid to experiment with different colors, petal shapes, and even adding edible glitter or sprinkles.
The more you practice, the more confident and creative you’ll become.
These charming edible decorations are perfect for elevating any dessert, adding a personal touch to gifts, or simply enjoying as a delightful treat.
Why not gather your supplies today and let your creativity bloom? Your kitchen is about to become a garden of sweet delights!