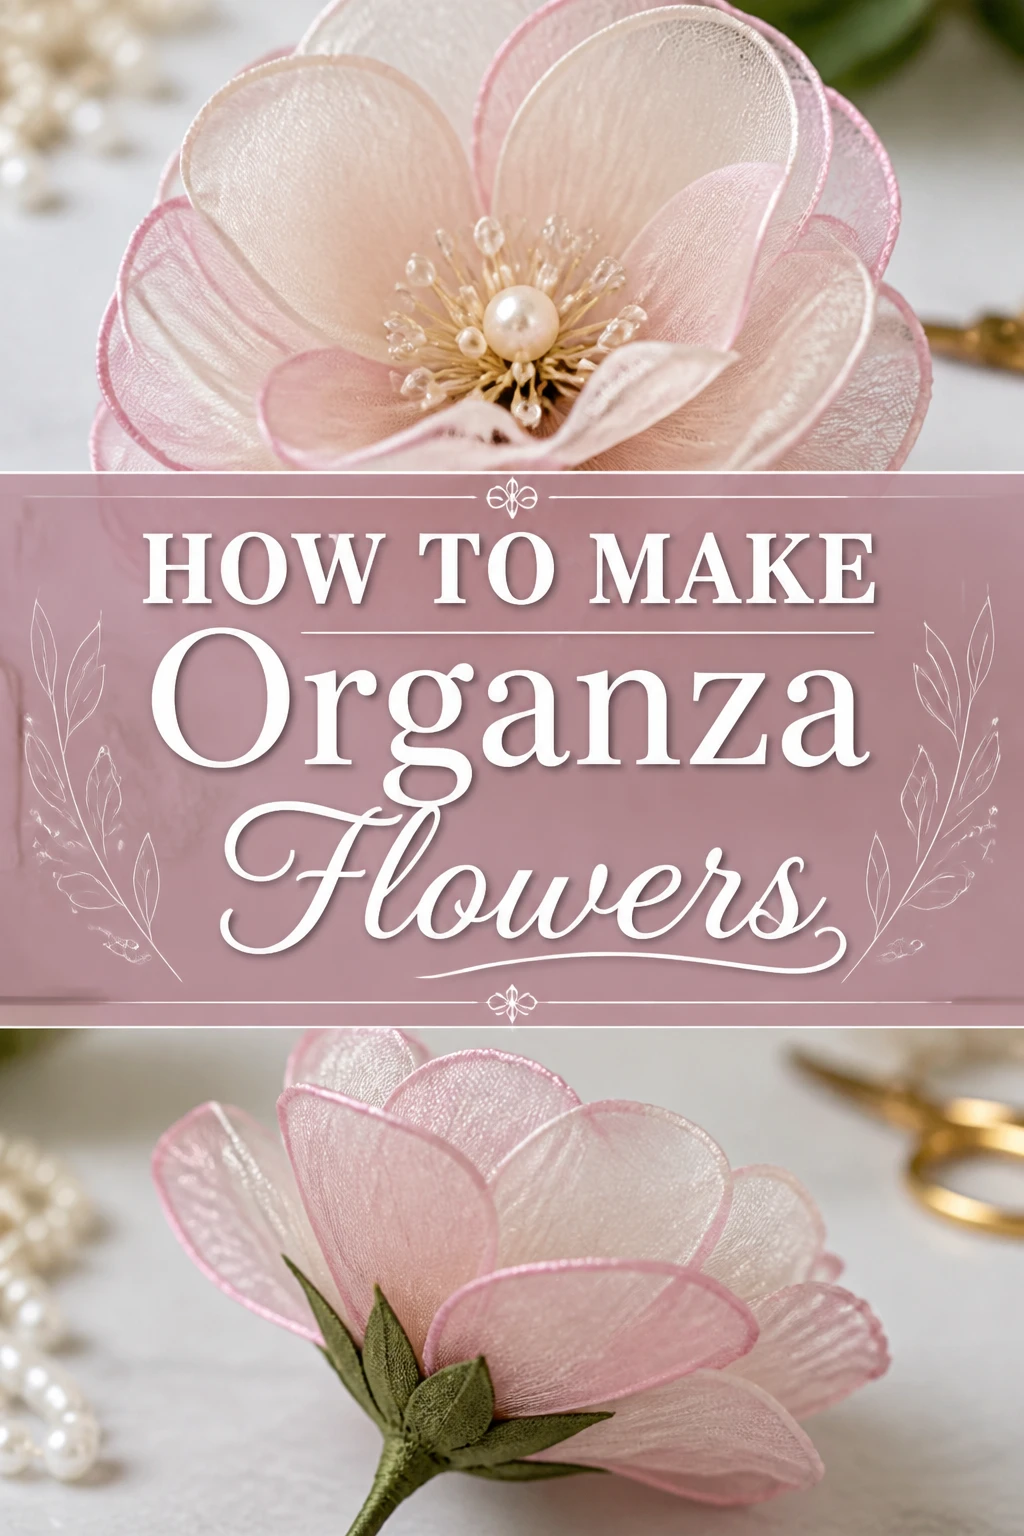
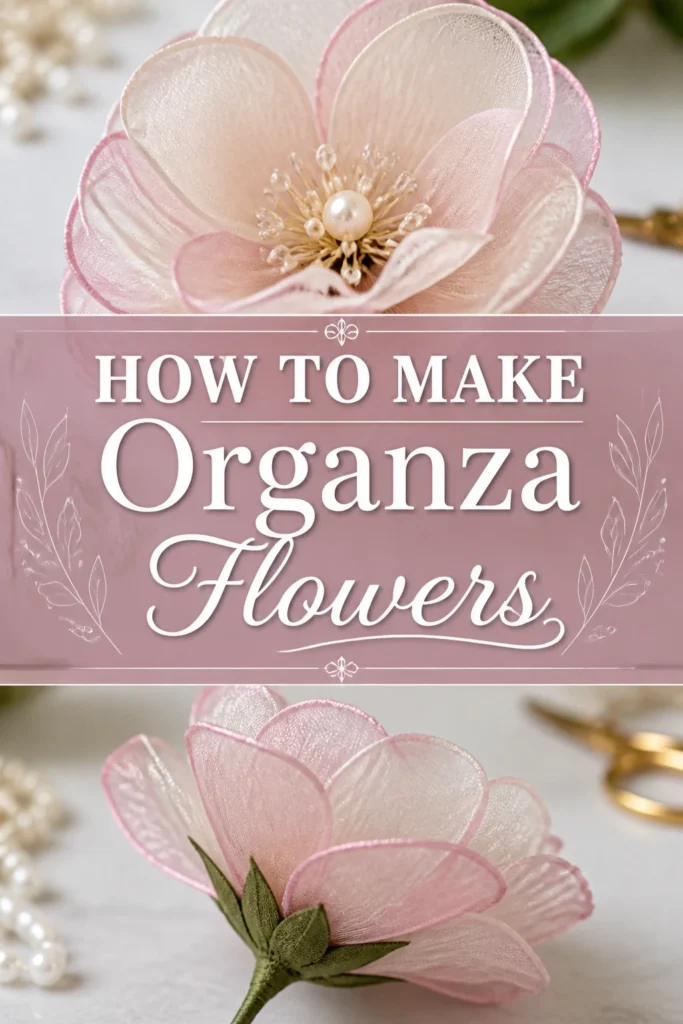
🌸 How To Make Organza Flowers
Organza flowers add a touch of delicate beauty to any project. They can transform simple garments, accessories, or home decor into something truly special. Learning this craft is incredibly rewarding. I’ve made countless organza flowers over the years, discovering the best techniques to create stunning, lasting blooms.
Quick Overview
You are about to create beautiful, ethereal organza flowers. This guide will walk you through each step, ensuring a successful and enjoyable crafting experience.
- Time needed: 1-2 hours (depending on flower size and quantity)
- Difficulty: Beginner
- What you’ll need: Organza fabric, sharp scissors, a candle or heat gun, needle, thread, beads or pearls (optional).
Step-by-Step Instructions
The art of making organza flowers is all about patience and precision. Follow these steps carefully to bring your delicate blooms to life.
Step 1: Gather Your Materials
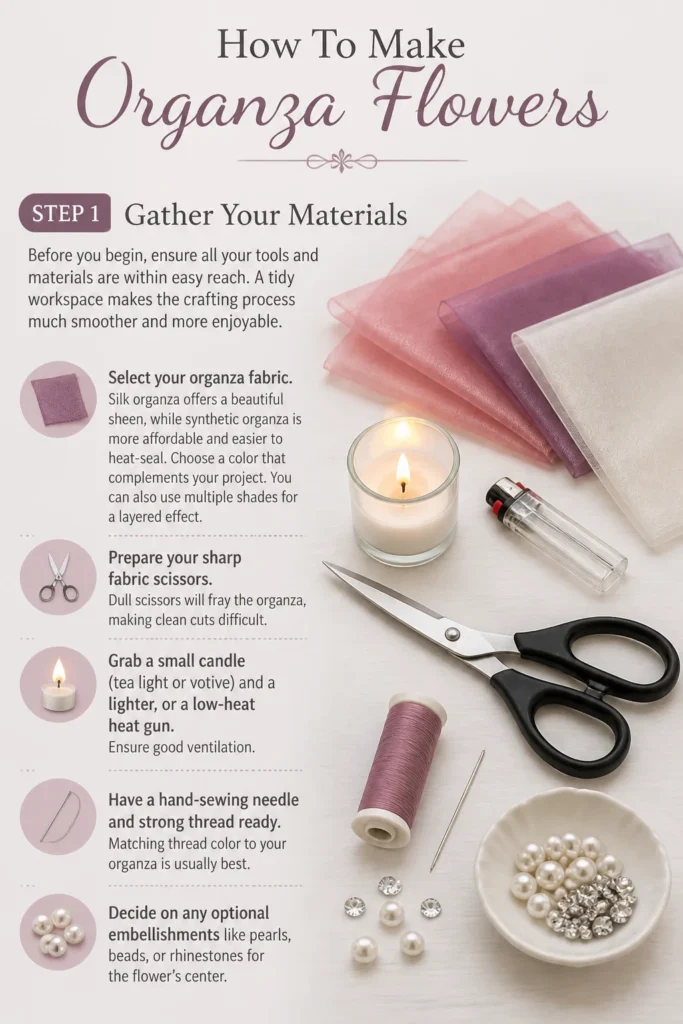
Before you begin, ensure all your tools and materials are within easy reach. A tidy workspace makes the crafting process much smoother and more enjoyable.
- Select your organza fabric. Silk organza offers a beautiful sheen, while synthetic organza is more affordable and easier to heat-seal.
- Choose a color that complements your project. You can also use multiple shades for a layered effect.
- Prepare your sharp fabric scissors. Dull scissors will fray the organza, making clean cuts difficult.
- Grab a small candle (tea light or votive) and a lighter, or a low-heat heat gun. Ensure good ventilation.
- Have a hand-sewing needle and strong thread ready. Matching thread color to your organza is usually best.
- Decide on any optional embellishments like pearls, beads, or rhinestones for the flower’s center.
Step 2: Cut Organza Circles
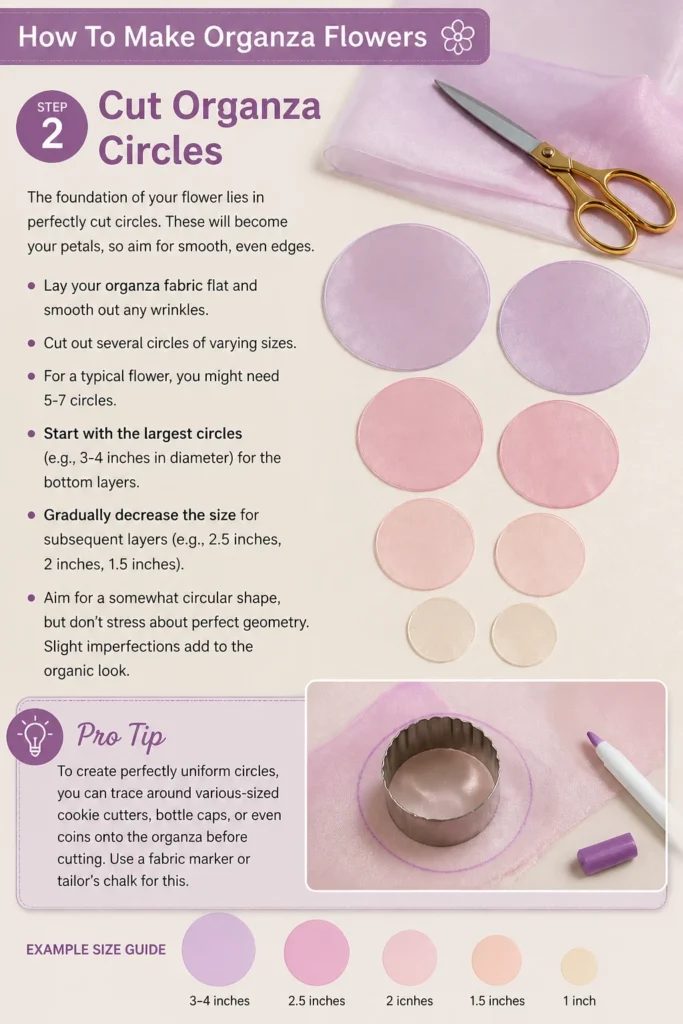
The foundation of your flower lies in perfectly cut circles. These will become your petals, so aim for smooth, even edges.
- Lay your organza fabric flat and smooth out any wrinkles.
- Cut out several circles of varying sizes. For a typical flower, you might need 5-7 circles.
- Start with the largest circles (e.g., 3-4 inches in diameter) for the bottom layers.
- Gradually decrease the size for subsequent layers (e.g., 2.5 inches, 2 inches, 1.5 inches).
- Aim for a somewhat circular shape, but don’t stress about perfect geometry. Slight imperfections add to the organic look.
Pro Tip: To create perfectly uniform circles, you can trace around various-sized cookie cutters, bottle caps, or even coins onto the organza before cutting. Use a fabric marker or tailor’s chalk for this.
Step 3: Shape Petal Edges with Heat
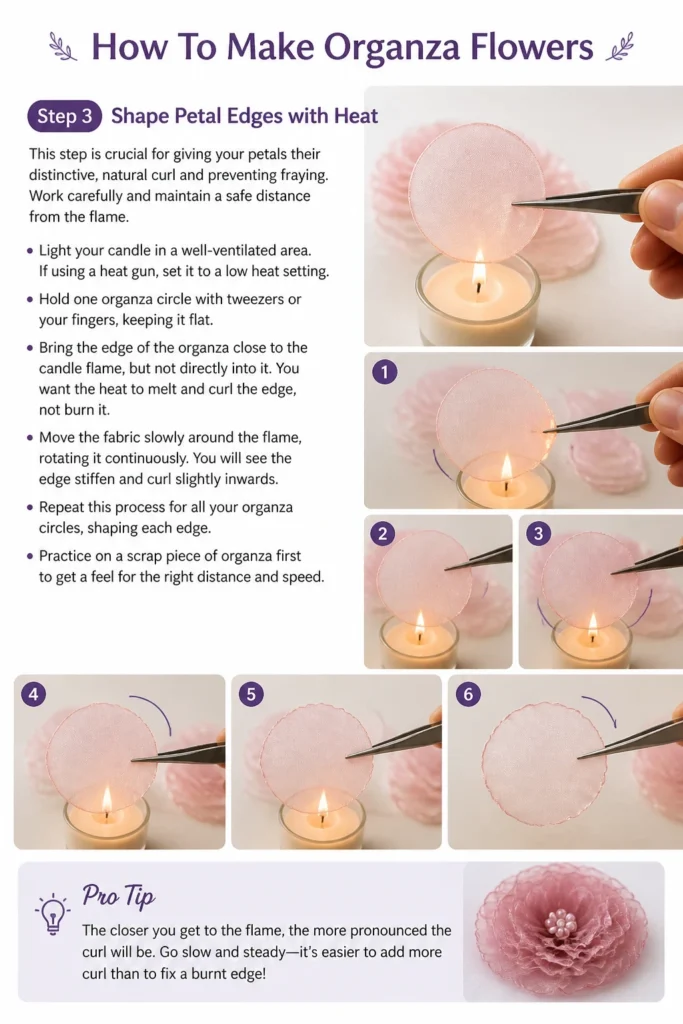
This step is crucial for giving your petals their distinctive, natural curl and preventing fraying. Work carefully and maintain a safe distance from the flame.
- Light your candle in a well-ventilated area. If using a heat gun, set it to a low heat setting.
- Hold one organza circle with tweezers or your fingers, keeping it flat.
- Bring the edge of the organza close to the candle flame, but not directly into it. You want the heat to melt and curl the edge, not burn it.
- Move the fabric slowly around the flame, rotating it continuously. You will see the edge stiffen and curl slightly inwards.
- Repeat this process for all your organza circles, shaping each edge.
- Practice on a scrap piece of organza first to get a feel for the right distance and speed.
Pro Tip: The closer you get to the flame, the more dramatic the curl will be. For a softer, more subtle curl, keep the fabric a little further away. Different parts of the flame have different temperatures; the blue part is hottest.
Step 4: Layer and Stack Petals
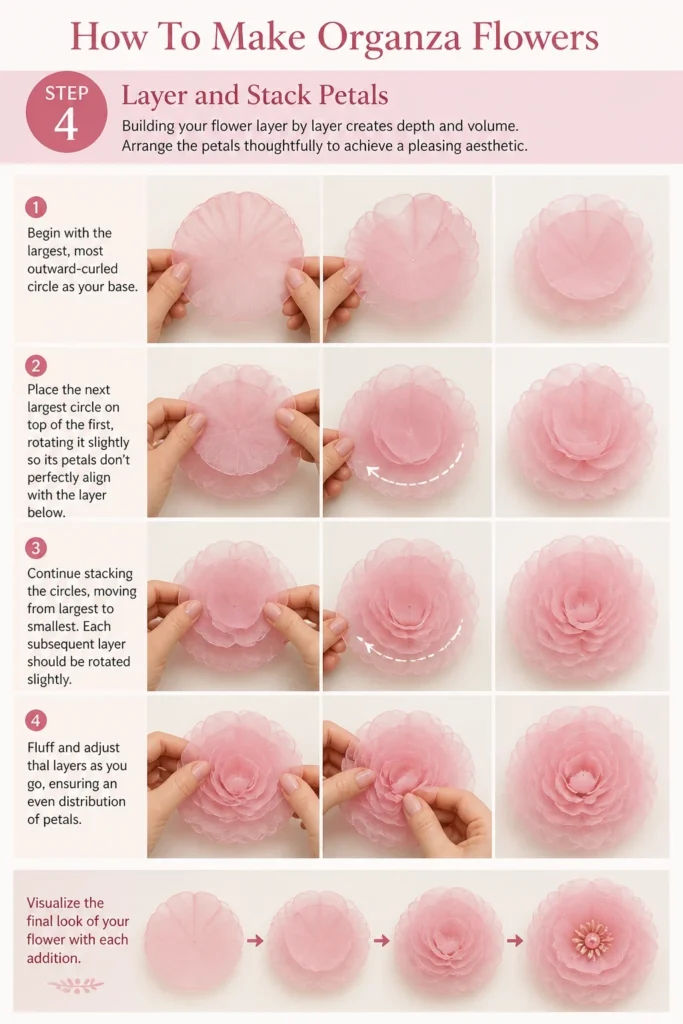
Building your flower layer by layer creates depth and volume. Arrange the petals thoughtfully to achieve a pleasing aesthetic.
- Begin with the largest, most outward-curled circle as your base.
- Place the next largest circle on top of the first, rotating it slightly so its petals don’t perfectly align with the layer below.
- Continue stacking the circles, moving from largest to smallest. Each subsequent layer should be rotated slightly.
- Fluff and adjust the layers as you go, ensuring an even distribution of petals.
- Visualize the final look of your flower with each addition.
Step 5: Secure the Center
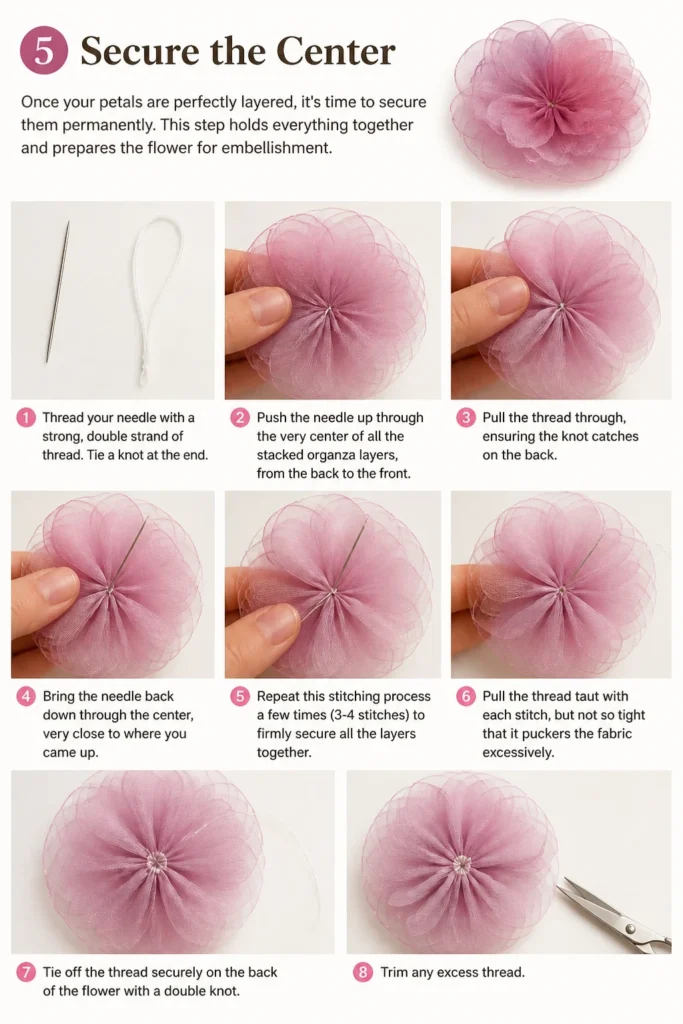
Once your petals are perfectly layered, it’s time to secure them permanently. This step holds everything together and prepares the flower for embellishment.
- Thread your needle with a strong, double strand of thread. Tie a knot at the end.
- Push the needle up through the very center of all the stacked organza layers, from the back to the front.
- Pull the thread through, ensuring the knot catches on the back.
- Bring the needle back down through the center, very close to where you came up.
- Repeat this stitching process a few times (3-4 stitches) to firmly secure all the layers together.
- Pull the thread taut with each stitch, but not so tight that it puckers the fabric excessively.
- Tie off the thread securely on the back of the flower with a double knot. Trim any excess thread.
Step 6: Add a Center Embellishment
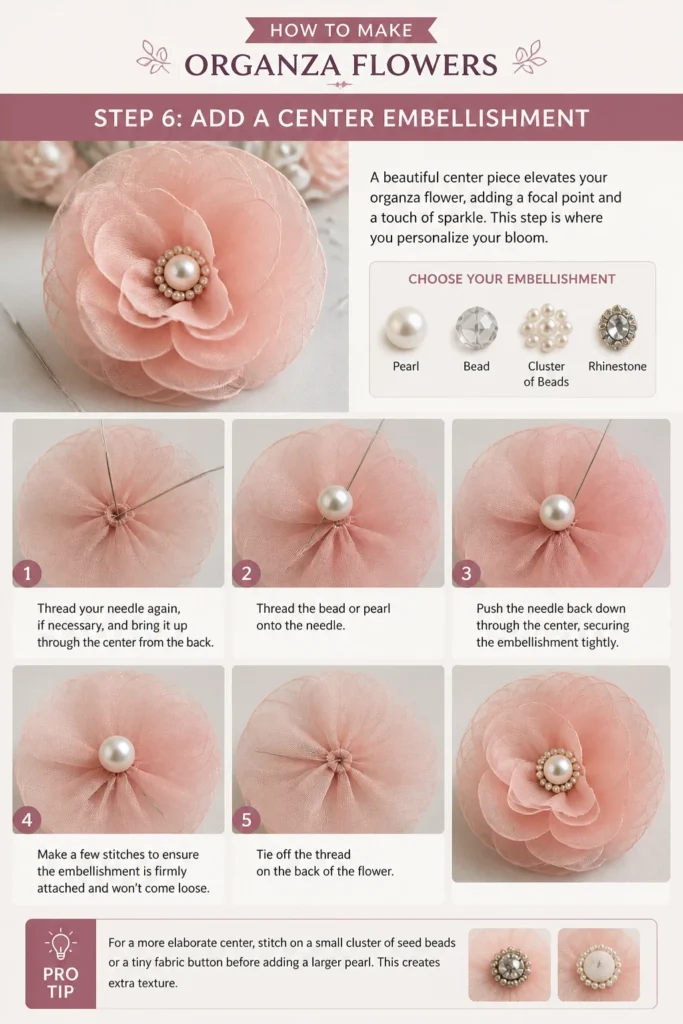
A beautiful center piece elevates your organza flower, adding a focal point and a touch of sparkle. This step is where you personalize your bloom.
- Choose your desired embellishment: a pearl, bead, cluster of beads, or a rhinestone.
- Thread your needle again, if necessary, and bring it up through the center from the back.
- Thread the bead or pearl onto the needle.
- Push the needle back down through the center, securing the embellishment tightly.
- Make a few stitches to ensure the embellishment is firmly attached and won’t come loose.
- Tie off the thread on the back of the flower.
Pro Tip: For a more elaborate center, stitch on a small cluster of seed beads or a tiny fabric button before adding a larger pearl. This creates extra texture.
Step 7: Attach a Backing (Optional)
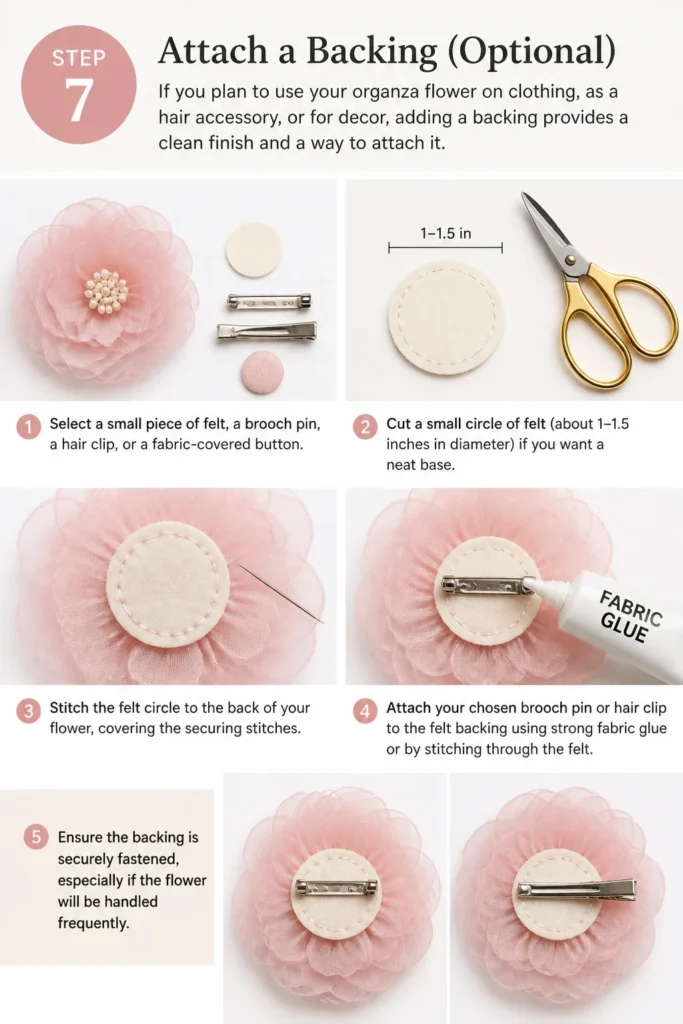
If you plan to use your organza flower on clothing, as a hair accessory, or for decor, adding a backing provides a clean finish and a way to attach it.
- Select a small piece of felt, a brooch pin, a hair clip, or a fabric-covered button.
- Cut a small circle of felt (about 1-1.5 inches in diameter) if you want a neat base.
- Stitch the felt circle to the back of your flower, covering the securing stitches.
- Attach your chosen brooch pin or hair clip to the felt backing using strong fabric glue or by stitching through the felt.
- Ensure the backing is securely fastened, especially if the flower will be handled frequently.
Common Mistakes to Avoid
Even experienced crafters can make small errors. Being aware of these common pitfalls will help you achieve perfect organza flowers every time.
Over-melting Edges
Bringing the organza too close or holding it too long in the flame can cause the edges to melt excessively, become brittle, or even burn. This results in stiff, unnatural-looking petals or charred edges that detract from the flower’s delicate appearance. Instead, move the fabric quickly and consistently around the heat, not directly into the flame, allowing for a gentle, natural curl. Practice on scrap pieces to gauge the right distance and speed.
Uneven Petal Sizes
Cutting circles that are too similar in size for each layer can make your flower look flat and lack dimension. The varying sizes are crucial for creating a full, voluminous bloom with distinct layers. Always aim for a noticeable difference in diameter between each petal layer, gradually decreasing in size from the bottom to the top. This layering technique provides the depth and visual interest you want.
Skipping the Center Securement
Some might be tempted to just glue the layers together or only stitch the center embellishment. However, skipping the initial securement stitches can lead to a flimsy flower that falls apart easily. The layers need to be firmly stitched together before adding any decorative center. This foundational stitching ensures the flower’s structure remains intact, making it robust enough for wear or display.
Using the Wrong Thread
Opting for thin, weak thread or thread that doesn’t match the organza color can compromise the flower’s durability and appearance. Weak thread might break, causing the flower to unravel. Non-matching thread can be visible, detracting from the delicate aesthetic. Always use a strong, good quality polyester or silk thread that closely matches your organza fabric. Double-threading your needle adds extra strength.
Troubleshooting
Even with the best intentions, sometimes things don’t go exactly as planned. Here are solutions to common issues you might encounter.
Petals look flat
If your finished flower appears flat and lacks the desired volume, it’s likely due to insufficient heat-shaping or too little variation in petal sizes. To fix this, carefully unstack the petals if possible. Re-shape the edges of each petal, focusing on creating a more pronounced curl by bringing the fabric a tiny bit closer to the flame (but still not into it). When restacking, ensure each layer is rotated significantly from the one below it, and consider adding an extra, slightly smaller layer.
Edges are too stiff/brittle
This issue arises from over-melting the organza edges with too much heat or holding it too long in one spot. Unfortunately, stiff or brittle edges are difficult to reverse without damaging the fabric. For future flowers, use less heat and move the fabric more quickly around the flame. If some petals are too stiff, try to gently crinkle them in your hand to soften them slightly, or replace the most affected petals with new ones.
Flower falls apart
A flower that unravels or loses its layers indicates that the center was not secured strongly enough. The initial stitches holding all the layers together are critical. To prevent this, ensure you make at least 3-4 firm stitches through all layers in the center, pulling the thread taut after each stitch. Use a strong, double strand of thread and tie a secure double knot at the back. If your flower has fallen apart, you will need to re-stitch the layers together from scratch.
Key Takeaways
- Always work in a well-ventilated area when using a candle or heat gun.
- Practice heat-shaping on scrap organza to master the technique.
- Varying petal sizes and rotating layers are key for a voluminous flower.
- Secure all layers with strong, hidden stitches before adding embellishments.
- Don’t be afraid to experiment with different organza types and colors.
- Patience and attention to detail will yield the most beautiful results.
Frequently Asked Questions
What kind of organza is best?
Both silk organza and synthetic (polyester) organza work well. Silk organza offers a natural sheen and beautiful drape, while synthetic organza is often more affordable, comes in a wider range of colors, and melts/curls very easily with heat. For beginners, synthetic organza is often recommended due to its ease of use.
Can I use a lighter instead of a candle?
Yes, a lighter can be used, but it requires more careful handling. The flame is smaller and more concentrated, increasing the risk of burning the fabric if not moved quickly. A candle provides a more consistent and slightly larger heat source, which can be easier for beginners to control. Always prioritize safety and good ventilation regardless of the heat source.
How can I make bigger flowers?
To create larger organza flowers, simply cut larger circles for your petals. You might also need more layers to maintain fullness and proportion. For very large flowers, consider using slightly heavier organza or adding a stiff felt backing to help maintain its shape. The heat-shaping technique remains the same, just applied to bigger pieces.
How do I attach them to clothing?
For clothing, you can stitch the entire flower directly onto the garment using small, discreet stitches around the base. Alternatively, you can attach a brooch pin to the back of the flower (as described in Step 7) and then pin it to your clothing. For a more permanent attachment, use strong fabric glue after stitching, but always test the glue on a scrap first.
Our Top Recommended Finds
- Sharp Fabric Scissors: Essential for clean, fray-free cuts that ensure professional-looking petals.
- Embroidery Needles Set: A variety of needle sizes helps you work with different threads and embellishments with ease.
- Assorted Organza Fabric Pack: Great for beginners to experiment with various colors and fabric types without buying large quantities.
Embrace Your Creative Bloom
You now have all the knowledge and steps to craft exquisite organza flowers. This delightful skill opens up a world of creative possibilities. Imagine them adorning headbands, enhancing gift wrapping, or even becoming unique bridal accessories.
Don’t hesitate to start your first flower today. With each bloom, you’ll gain confidence and develop your own unique style. Happy crafting!