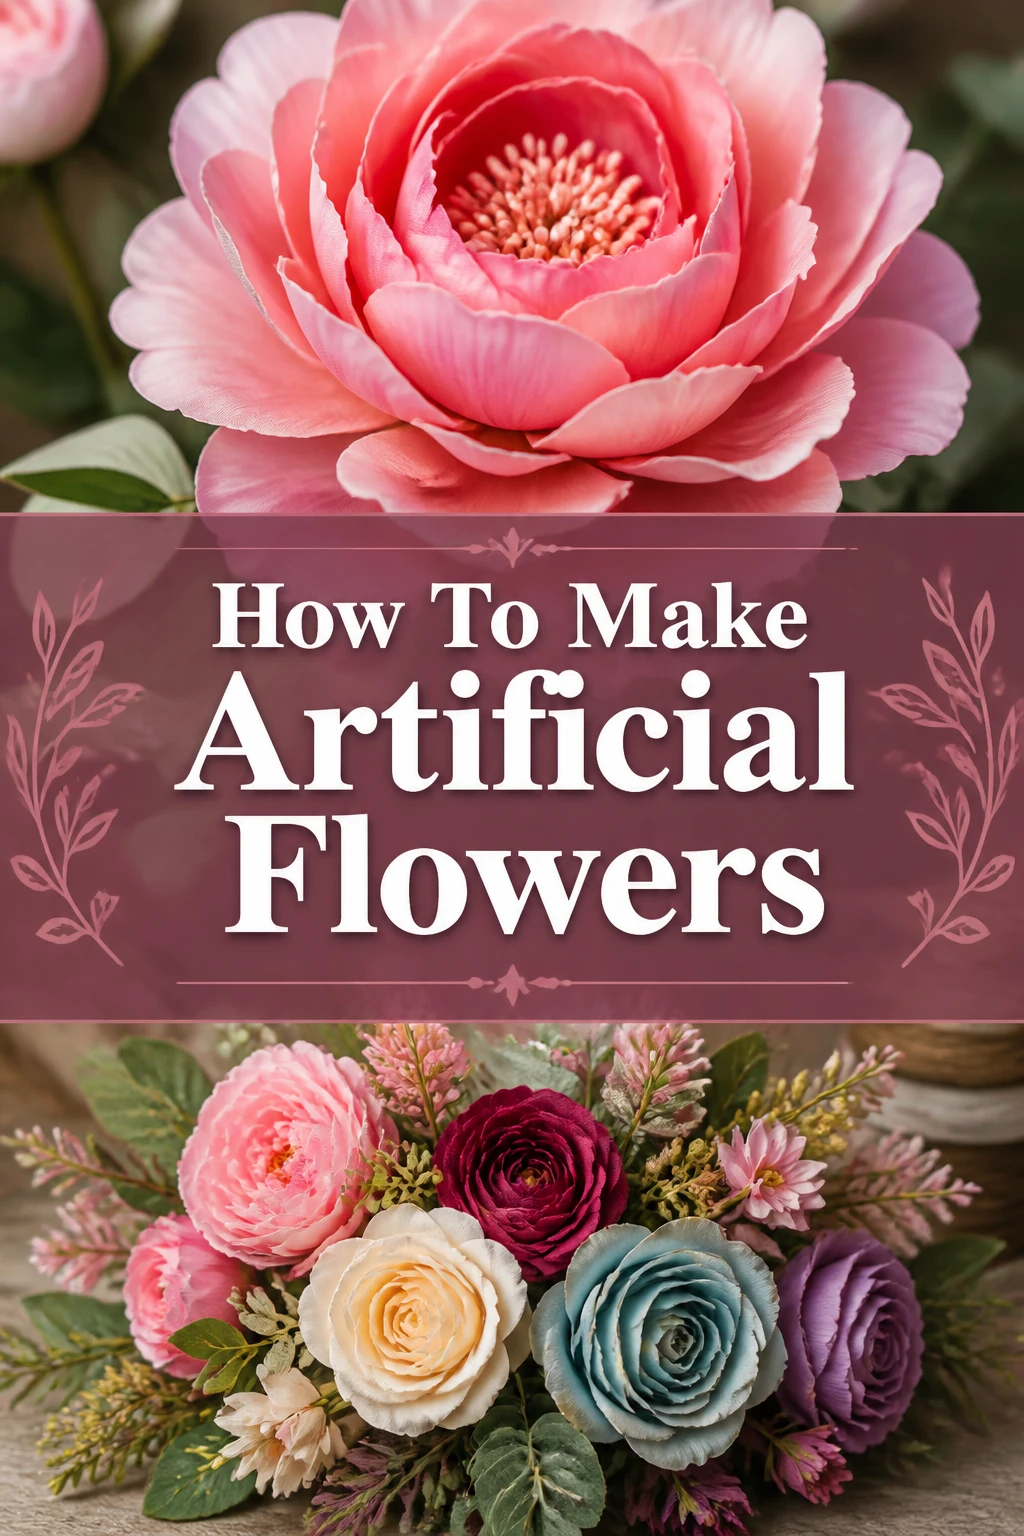
🌸 How To Make Artificial Flowers
There’s something truly special about creating beauty with your own hands. Crafting artificial flowers offers a lasting way to bring color and charm into any space. It’s a wonderful hobby that combines creativity with practical skill.
I’ve spent countless hours experimenting with different materials and techniques to achieve the most lifelike results. This guide will share my tested methods, helping you craft stunning blooms that will fool even the keenest eye. You’ll soon discover the joy of making your own everlasting floral arrangements.
Quick Overview
This guide will walk you through the process of creating beautiful, realistic artificial flowers from scratch. You’ll learn how to select materials, shape petals, and assemble your floral masterpiece. By the end, you’ll have a custom-made flower ready to brighten your home or give as a thoughtful gift.
- Time needed: 2-4 hours per flower, depending on complexity and drying time
- Difficulty: Intermediate
- What you’ll need: Fabric or paper, scissors, floral wire, glue, paint/dye, shaping tools
Step-by-Step Instructions
Step 1: Gather Your Materials and Tools
Before you begin, ensure you have all necessary items laid out. This preparation prevents interruptions and makes the creative process smoother. A well-organized workspace is key to a successful crafting session.
You will need:
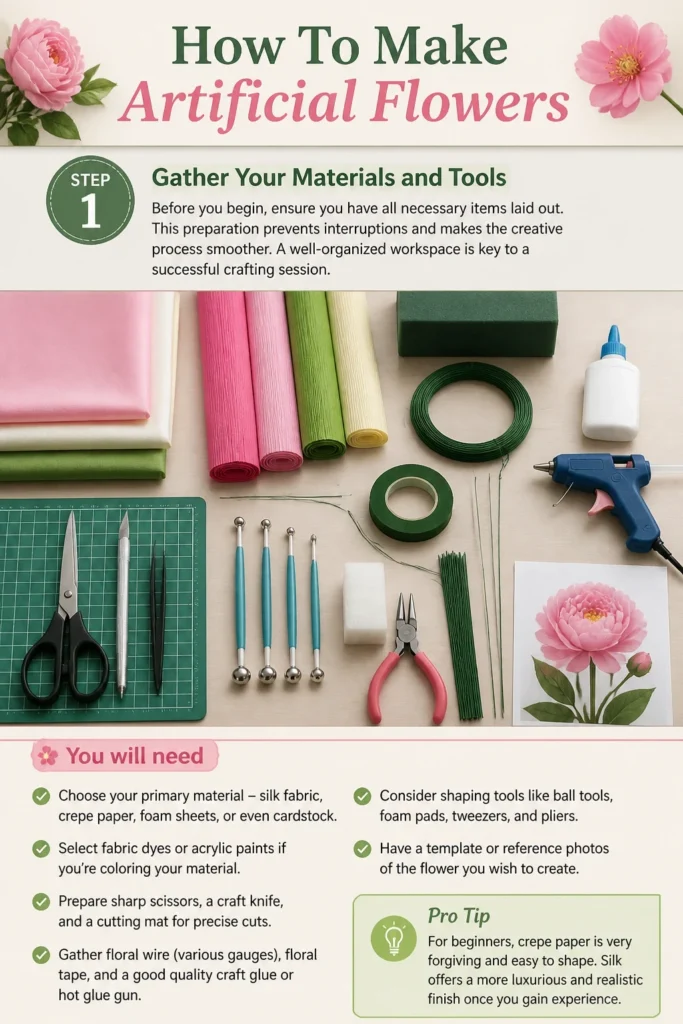
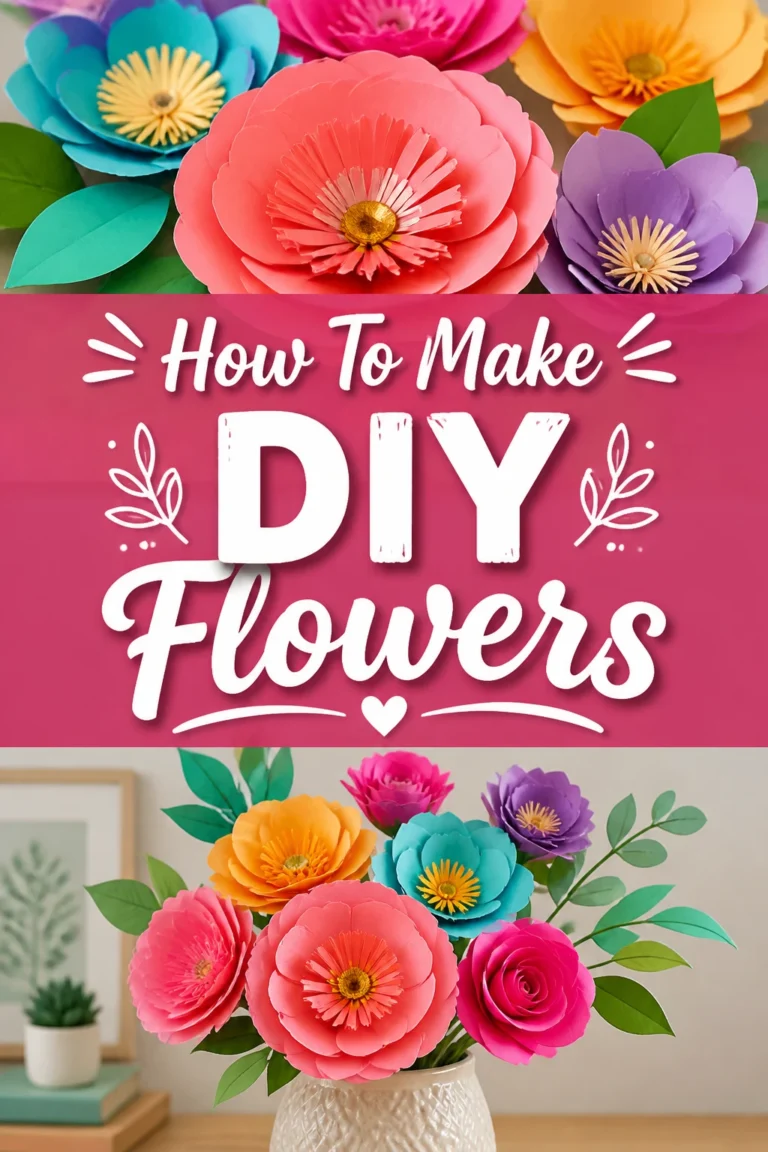
- Choose your primary material: silk fabric, crepe paper, foam sheets, or even cardstock.
- Select fabric dyes or acrylic paints if you’re coloring your material.
- Prepare sharp scissors, a craft knife, and a cutting mat for precise cuts.
- Gather floral wire (various gauges), floral tape, and a good quality craft glue or hot glue gun.
- Consider shaping tools like ball tools, foam pads, tweezers, and pliers.
- Have a template or reference photos of the flower you wish to create.
Pro Tip: For beginners, crepe paper is very forgiving and easy to shape. Silk offers a more luxurious and realistic finish but requires more delicate handling.
Step 2: Choose Your Flower and Template
Decide which type of flower you want to create first. A simple rose, peony, or camellia are excellent starting points for learning various techniques. Having a clear vision will guide your material and color choices.
Once you have a flower in mind, find a suitable template.
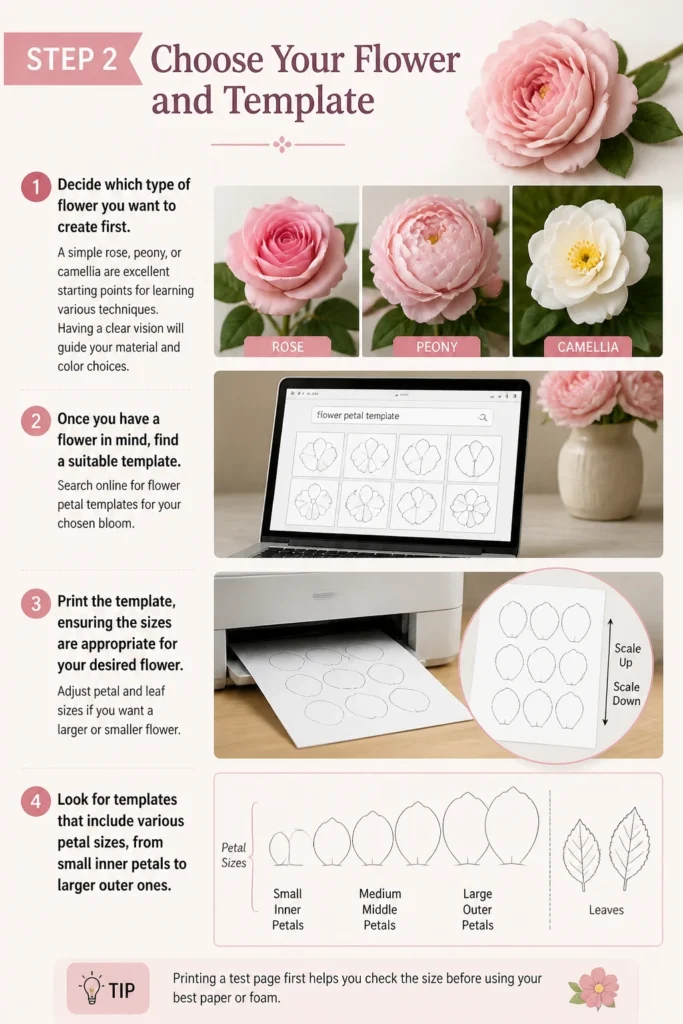
- Search online for “flower petal templates” for your chosen bloom.
- Print the template, ensuring the sizes are appropriate for your desired flower.
- Adjust petal and leaf sizes if you want a larger or smaller flower.
- Look for templates that include various petal sizes, from small inner petals to larger outer ones.
Step 3: Prepare and Cut Petals and Leaves
This step requires patience and precision. The quality of your cuts directly impacts the final appearance of your flower. Take your time to achieve clean edges.
If using fabric:
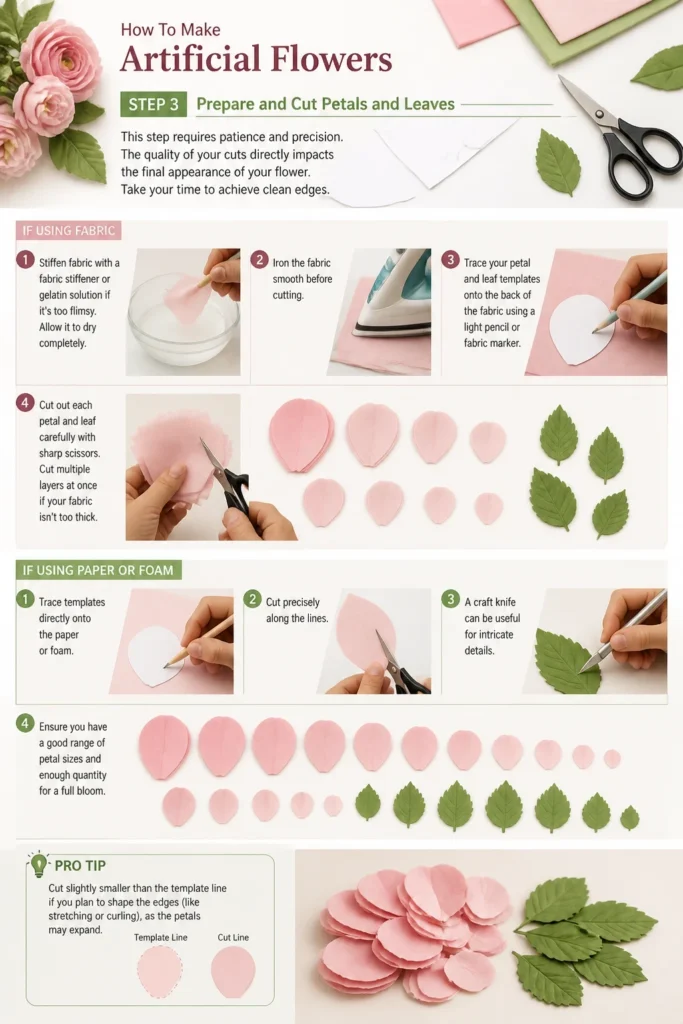
- Stiffen fabric with a fabric stiffener or gelatin solution if it’s too flimsy. Allow it to dry completely.
- Iron the fabric smooth before cutting.
- Trace your petal and leaf templates onto the back of the fabric using a light pencil or fabric marker.
- Cut out each petal and leaf carefully with sharp scissors. Cut multiple layers at once if your fabric isn’t too thick.
If using paper or foam:
- Trace templates directly onto the paper or foam.
- Cut precisely along the lines. A craft knife can be useful for intricate details.
- Ensure you have a good range of petal sizes and enough quantity for a full bloom.
Pro Tip: Cut slightly inside your traced lines to avoid any visible pencil marks on your finished petals.
Step 4: Color and Detail (Optional)
Adding color and subtle details can drastically increase the realism of your artificial flowers. This step is where you truly bring your petals to life. Don’t be afraid to experiment with shading.
For fabric petals:
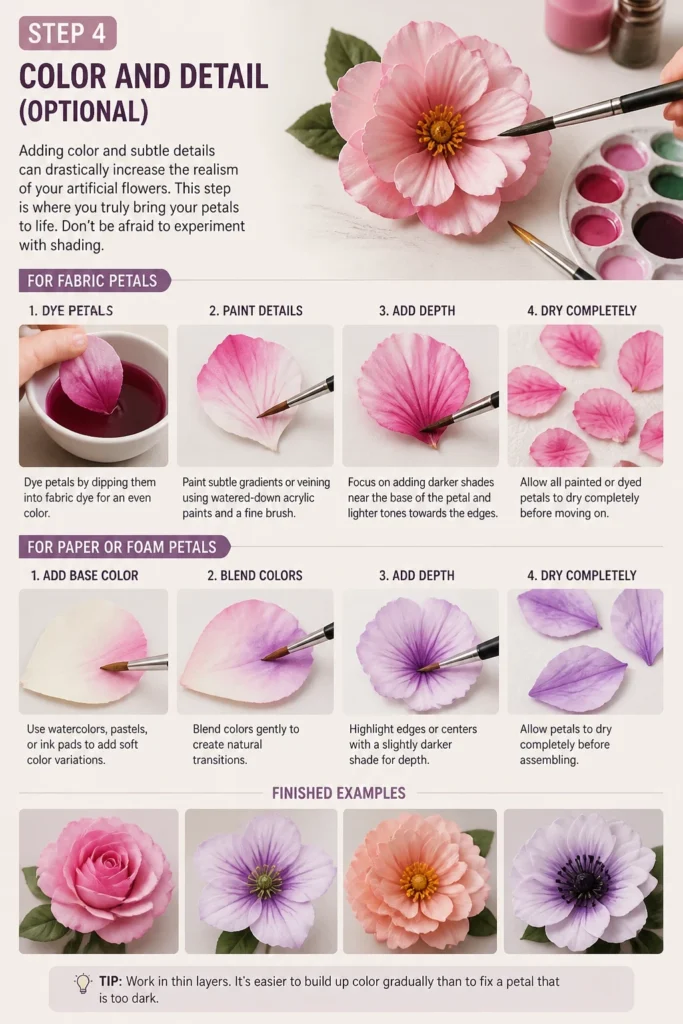
- Dye petals by dipping them into fabric dye for an even color.
- Paint subtle gradients or veining using watered-down acrylic paints and a fine brush.
- Focus on adding darker shades near the base of the petal and lighter tones towards the edges.
- Allow all painted or dyed petals to dry completely before moving on.
For paper or foam petals:
- Use watercolors, pastels, or ink pads to add soft color variations.
- Blend colors gently to create natural transitions.
- Highlight edges or centers with a slightly darker shade for depth.
Step 5: Shape the Petals and Leaves
This is where flat pieces transform into lifelike components. Shaping gives your flower its volume, curve, and natural movement. Each petal needs individual attention to achieve realism.
For fabric petals:
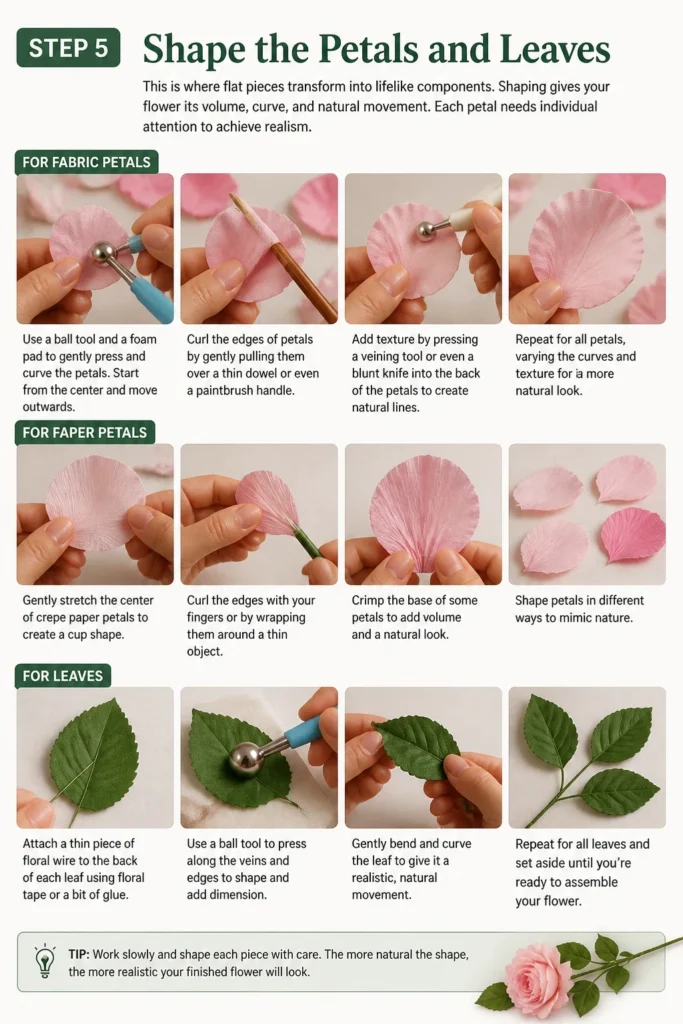
- Use a ball tool and a foam pad to gently press and curve the petals. Start from the center and move outwards.
- Curl the edges of petals by gently pulling them over a thin dowel or even a paintbrush handle.
- Add texture by pressing a veining tool or even a blunt knife into the back of the petals to create natural lines.
For paper petals:
- Gently stretch the center of crepe paper petals to create a cup shape.
- Curl the edges with your fingers or by wrapping them around a thin object.
- Crimp the base of some petals to add volume.
For leaves:
- Attach a thin piece of floral wire to the back of each leaf with glue for support and shaping.
- Bend and curve the leaves slightly to make them look less flat and more natural.
Step 6: Assemble the Flower Center
The center of the flower is often the starting point for assembly. This core provides a base for all subsequent petals. It sets the stage for your bloom.
For a wired center:
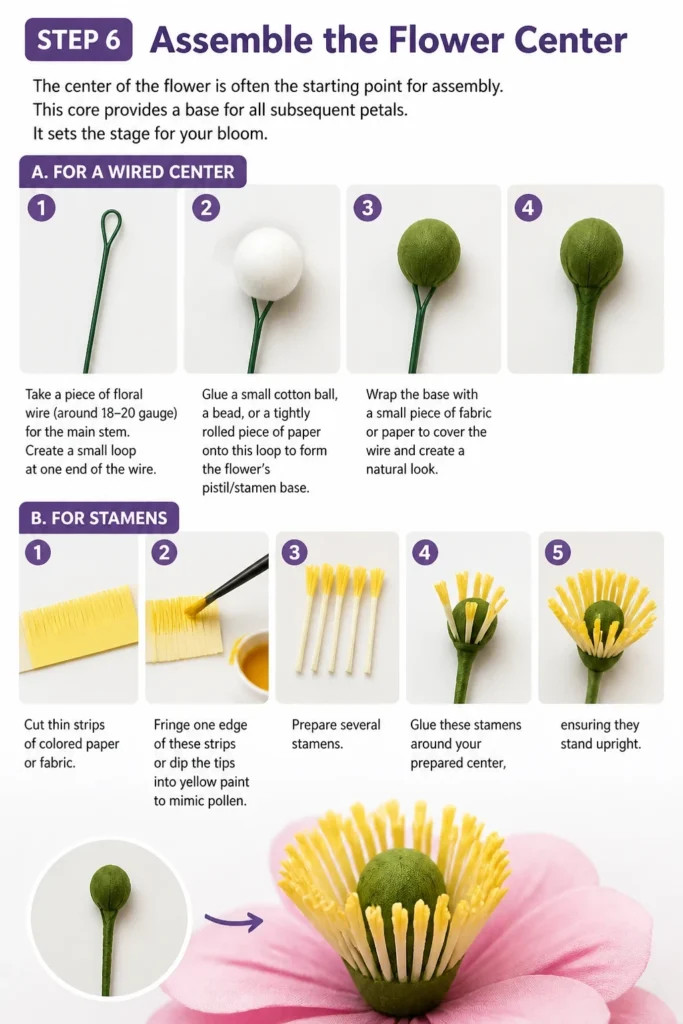
- Take a piece of floral wire (around 18-20 gauge) for the main stem.
- Create a small loop at one end of the wire.
- Glue a small cotton ball, a bead, or a tightly rolled piece of paper onto this loop to form the flower’s pistil/stamen base.
- Wrap the base with a small piece of fabric or paper to cover the wire and create a natural look.
For stamens:
- Cut thin strips of colored paper or fabric.
- Fringe one edge of these strips or dip the tips into yellow paint to mimic pollen.
- Glue these stamens around your prepared center, ensuring they stand upright.
Step 7: Attach the Petals
This is where your flower truly begins to take shape. Work systematically, attaching petals layer by layer, from smallest to largest. Pay attention to how natural flowers overlap.
Start with the smallest petals:
- Apply a small dab of glue to the base of the smallest, most cupped petals.
- Attach them tightly around the prepared flower center, slightly overlapping each other.
- Continue adding petals, working outwards and gradually using larger sizes.
- Stagger each new layer of petals so they sit between the petals of the previous layer, creating a fuller look.
- Rotate the flower as you go to ensure even distribution and a balanced appearance.
Step 8: Add Leaves and Calyx
Leaves and the calyx (the green part at the base of the flower head) complete the natural look. These elements provide contrast and realism. They anchor the bloom to its stem.
For the calyx:
- Cut out small, pointed green shapes to form the calyx.
- Glue these around the very base of your assembled petals, covering any visible glue or wire connections.
For the leaves:
- Attach your prepared wired leaves to the main floral stem using floral tape.
- Wrap the tape tightly, starting from just below the calyx and working your way down the stem.
- Add leaves at varying points along the stem for a more organic appearance.
Step 9: Finish the STEM
A well-finished stem makes the flower look professional and ready for display. It also provides stability. This final touch brings the entire piece together.
- Wrap the entire floral wire stem with green floral tape.
- Start just below the calyx and wrap downwards, stretching the tape slightly as you go to activate its adhesive.
- Ensure the tape overlaps smoothly, covering all wire and any visible glue.
- Bend the stem slightly to mimic a natural plant’s posture if desired.
Common Mistakes to Avoid
Over-Gluing
Using too much glue, especially hot glue, can leave unsightly residue and make your flower look messy. It can also make the petals stiff and unnatural. Always use small dabs of glue, just enough to secure the pieces, and wipe away any excess immediately.
Inconsistent Petal Sizing and Shaping
A common pitfall is cutting or shaping petals inconsistently. This leads to an asymmetrical and less realistic flower. Always use templates for cutting and take your time to shape each petal individually, aiming for slight variations as found in nature, but not drastic differences.
Neglecting the Natural Flow
Many beginners arrange petals too uniformly, resulting in a stiff, artificial appearance. Real flowers have a natural flow and slight imperfections. When assembling, stagger petals, rotate them slightly, and allow for gentle curves and overlaps that mimic organic growth.
Using the Wrong Materials
Choosing materials that are too thick, too shiny, or not suitable for shaping can hinder your results. For delicate flowers, opt for lighter fabrics or crepe paper. For structured blooms, consider stiffer fabrics or cardstock. Always test a small piece of your chosen material first.
Troubleshooting
My Petals Look Flat and Lifeless
If your petals lack dimension, it’s usually due to insufficient shaping. Revisit Step 5. Ensure you are gently stretching, curling, and cupping each petal. For fabric, use a ball tool and foam pad with a little more pressure. For paper, gently stretch the paper’s grain. Practice on spare pieces to get the feel for how much pressure to apply.
Visible Glue Marks on My Flower
Visible glue detracts from realism. This often happens from using too much glue or applying it in the wrong spot. Use a fine-tipped applicator for craft glue, or a low-temp hot glue gun with thin glue sticks. Apply glue sparingly to the very base of the petals where they will be hidden by subsequent layers. If using hot glue, pull off any “spider webs” immediately.
My Flower is Falling Apart
If your flower components are not holding together, the adhesive might be insufficient or improperly applied. Ensure you are using a strong craft glue suitable for your chosen materials, or a reliable hot glue gun. Allow adequate drying time for craft glue before handling. Make sure the surfaces are clean and free of dust or oils before gluing.
Key Takeaways
- Preparation is paramount: gather all tools and materials before you begin.
- Templates ensure consistent petal sizing and a professional finish.
- Shaping individual petals is crucial for adding realism and volume.
- Layering petals systematically, from smallest to largest, builds a full bloom.
- Don’t rush the process; patience and attention to detail yield the best results.
- Finishing touches like a calyx, leaves, and a wrapped stem complete the natural look.
Frequently Asked Questions
Can I use real leaves for my artificial flowers?
While possible, real leaves will eventually wilt, dry out, and crumble, compromising the longevity of your artificial flower. It’s best to create artificial leaves from fabric, paper, or foam, or purchase high-quality faux leaves that match your flower. This ensures your creation remains beautiful indefinitely.
How do I make my artificial flowers more durable?
To increase durability, consider using fabric stiffener on your fabric petals. For paper flowers, a light coat of clear acrylic sealant spray can protect them from moisture and dust, making them more resilient. Ensure all glued joints are secure and use strong, flexible floral wire for stems.
What’s the best type of glue for artificial flowers?
The best glue depends on your material. For fabric and paper, a strong craft glue like Tacky Glue or a low-temperature hot glue gun works well. Hot glue provides instant adhesion, while craft glue allows for repositioning but requires drying time. For foam, specific foam adhesives are often recommended.
Can I wash my artificial flowers?
Most artificial flowers are not designed to be washed with water. Dust them regularly with a soft brush, a hairdryer on a cool setting, or a can of compressed air. If they must be cleaned, a very lightly damp cloth can be used on durable fabric flowers, but avoid saturating them, especially if they are paper or have painted details.
Our Top Recommended Finds
- Fabric Stiffener Spray: Essential for giving delicate fabrics the body needed for shaping and holding their form.
- Floral Wire Assortment: Having various gauges (thinner for petals, thicker for stems) provides flexibility for different flower types.
- Low-Temperature Hot Glue Gun: Safer and less prone to leaving visible strings than high-temp guns, perfect for delicate work.
Cultivate Your Crafting Garden
You’ve now gathered the knowledge to embark on a delightful journey into artificial flower making. Each bloom you create will be a testament to your patience and artistic flair. Imagine the satisfaction of holding a vibrant, handcrafted flower, knowing you brought it to life.
Don’t let perfection be the enemy of good. Start with a simple design, embrace the process, and allow your creativity to blossom. Pick up your materials today and begin crafting your very first everlasting floral masterpiece. The world of handmade beauty awaits your touch.