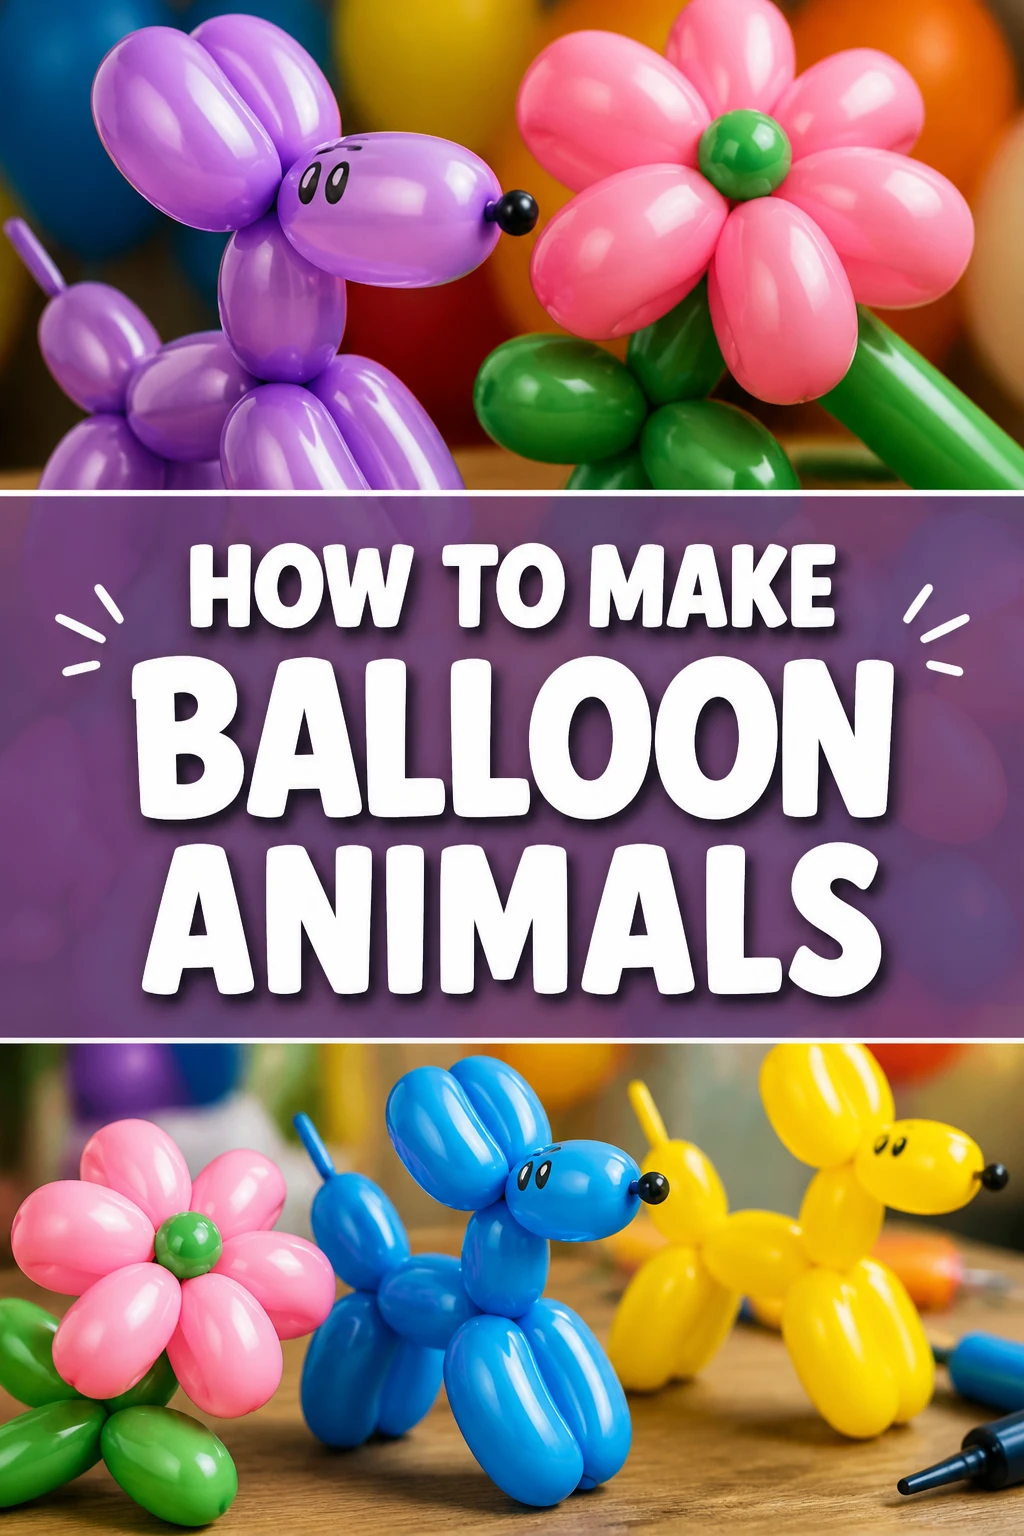
🎈 How To Make Balloon Animals
I remember the first time I tried to make a balloon dog at a local community fair years ago.
The first five balloons popped instantly, leaving me with a pile of rubber scraps and a very confused group of kids.
Since then, I have twisted thousands of balloons, and I can tell you that the secret isn’t in your hands, but in understanding how the air moves inside the latex.
Quick Overview
This guide will take you from a total beginner to someone who can confidently create a small menagerie of air-filled friends.
- Time needed: 20 to 30 minutes for your first successful animal
- Difficulty: Beginner
- What you’ll need: 260Q twisting balloons, a hand pump, and a permanent marker
Step 1: Select High Quality Materials
Start by purchasing the right kind of balloons, specifically the 260 size.
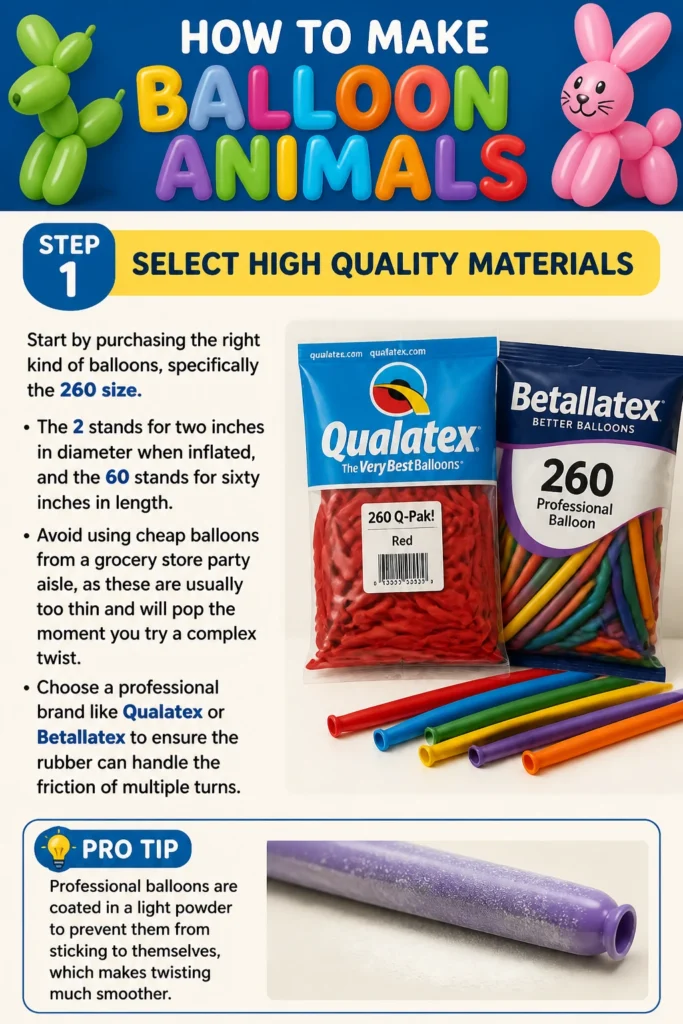
The “2” stands for two inches in diameter when inflated, and the “60” stands for sixty inches in length.
Avoid using cheap balloons from a grocery store party aisle, as these are usually too thin and will pop the moment you try a complex twist.
Choose a professional brand like Qualatex or Betallatex to ensure the rubber can handle the friction of multiple turns.
Pro Tip: Professional balloons are coated in a light powder to prevent them from sticking to themselves, which makes twisting much smoother.
Step 2: Inflate and Burp the Balloon
Slide the opening of the balloon onto the nozzle of your hand pump and hold it firmly with your thumb and forefinger.
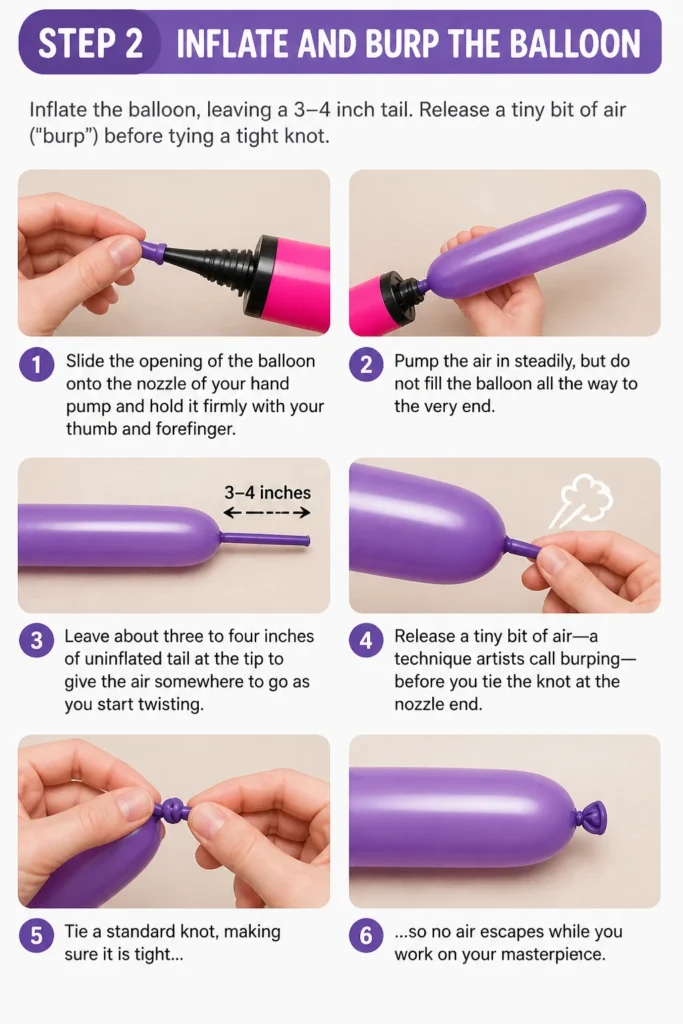
Pump the air in steadily, but do not fill the balloon all the way to the very end.
Leave about three to four inches of uninflated “tail” at the tip to give the air somewhere to go as you start twisting.
Release a tiny bit of air—a technique artists call “burping”—before you tie the knot at the nozzle end.
Tie a standard knot, making sure it is tight so no air escapes while you work on your masterpiece.
Step 3: Master the Basic Twist
Grasp the balloon near the knot with your non-dominant hand to keep it steady.
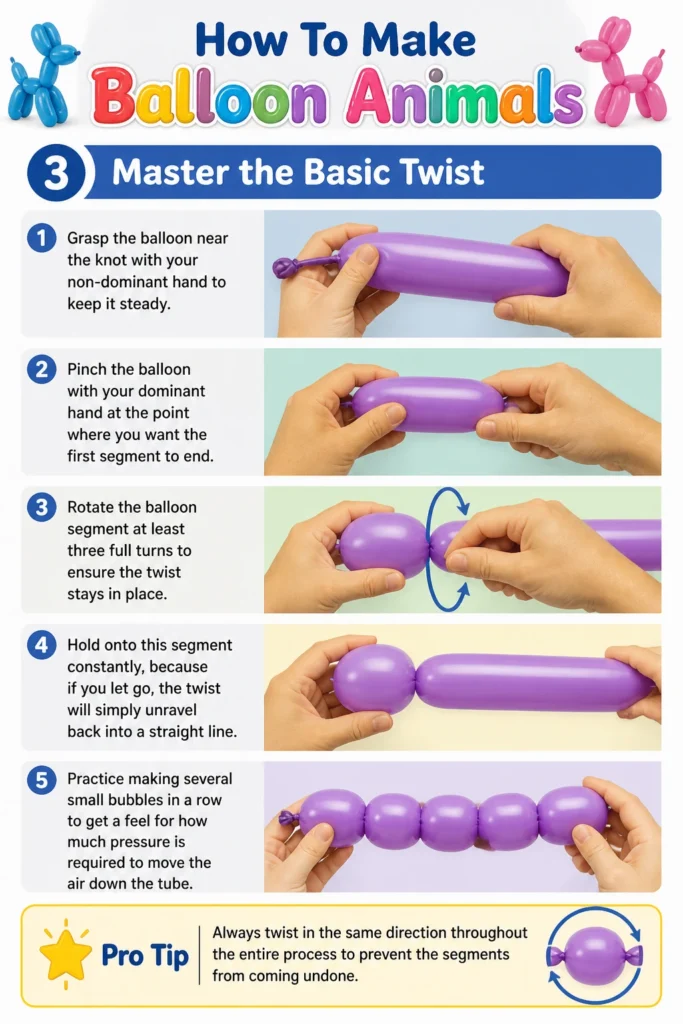
Pinch the balloon with your dominant hand at the point where you want the first segment to end.
Rotate the balloon segment at least three full turns to ensure the twist stays in place.
Hold onto this segment constantly, because if you let go, the twist will simply unravel back into a straight line.
Practice making several small bubbles in a row to get a feel for how much pressure is required to move the air down the tube.
Pro Tip: Always twist in the same direction throughout the entire process to prevent the segments from coming undone.
Step 4: Execute the Lock Twist
Create two bubbles of equal size right next to each other by using the basic twist method.
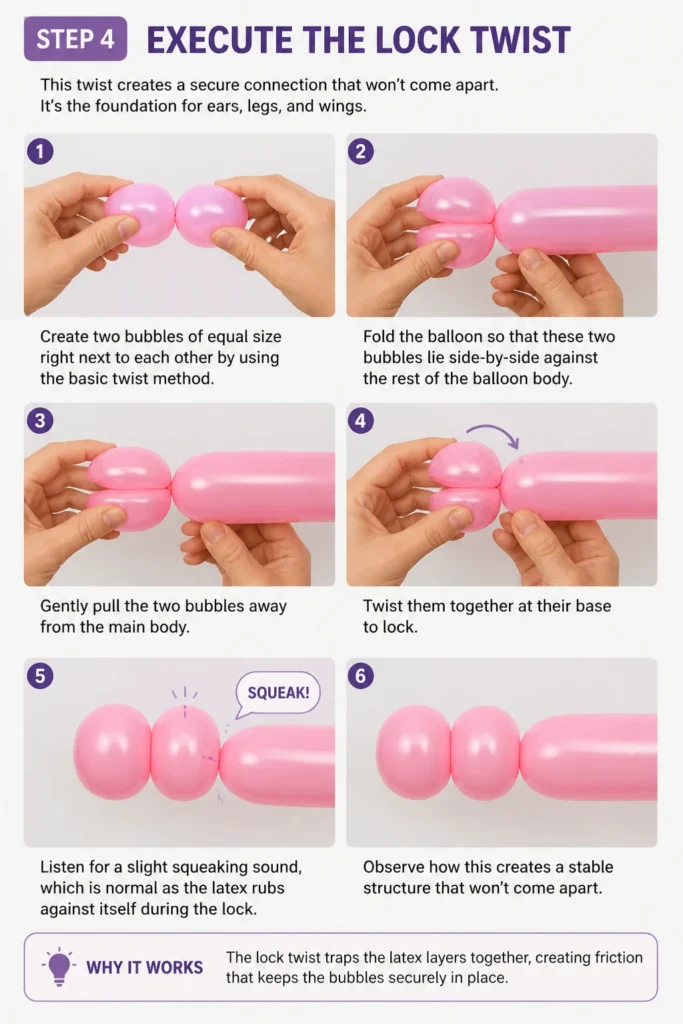
Fold the balloon so that these two bubbles lie side-by-side against the rest of the balloon body.
Gently pull the two bubbles away from the main body and twist them together at their base.
Listen for a slight squeaking sound, which is normal as the latex rubs against itself during the lock.
Observe how this creates a stable structure that won’t come apart, which is the foundation for ears, legs, and wings.
Step 5: Form the Head of the Dog
Twist a small bubble about two inches long starting from the knotted end; this will be the dog’s nose.
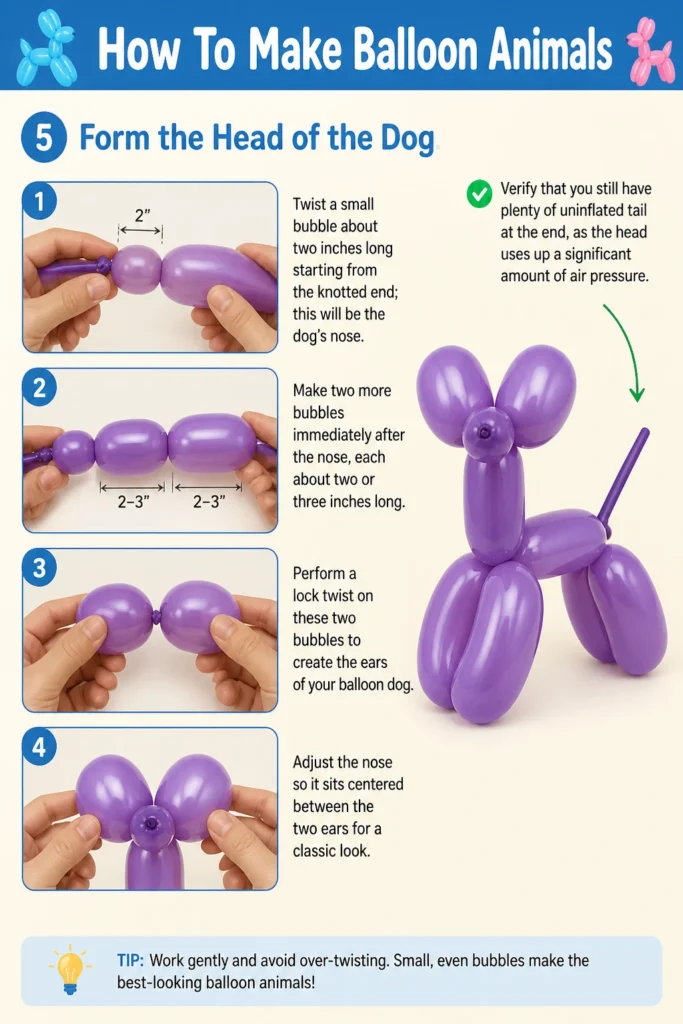
Make two more bubbles immediately after the nose, each about two or three inches long.
Perform a lock twist on these two bubbles to create the ears of your balloon dog.
Adjust the nose so it sits centered between the two ears for a classic look.
Verify that you still have plenty of uninflated tail at the end, as the head uses up a significant amount of air pressure.
Step 6: Build the Front Legs and Neck
Leave a space of about two inches below the ears to serve as the neck of the animal.
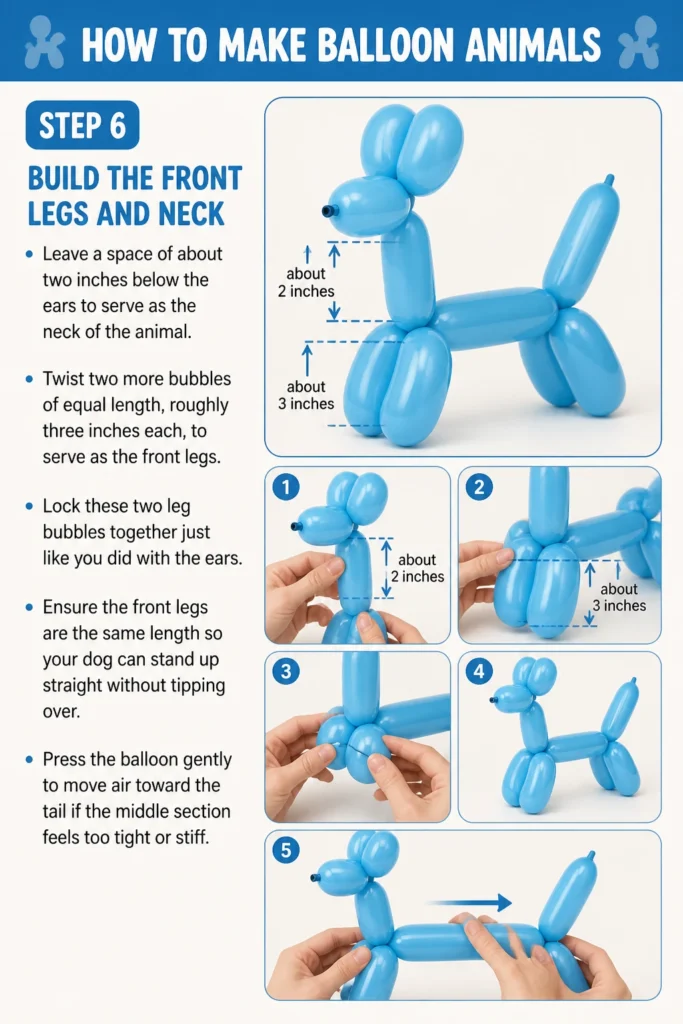
Twist two more bubbles of equal length, roughly three inches each, to serve as the front legs.
Lock these two leg bubbles together just like you did with the ears.
Ensure the front legs are the same length so your dog can stand up straight without tipping over.
Press the balloon gently to move air toward the tail if the middle section feels too tight or stiff.
Step 7: Finish the Body and Tail
Measure a four-inch section for the body and create a basic twist at that point.
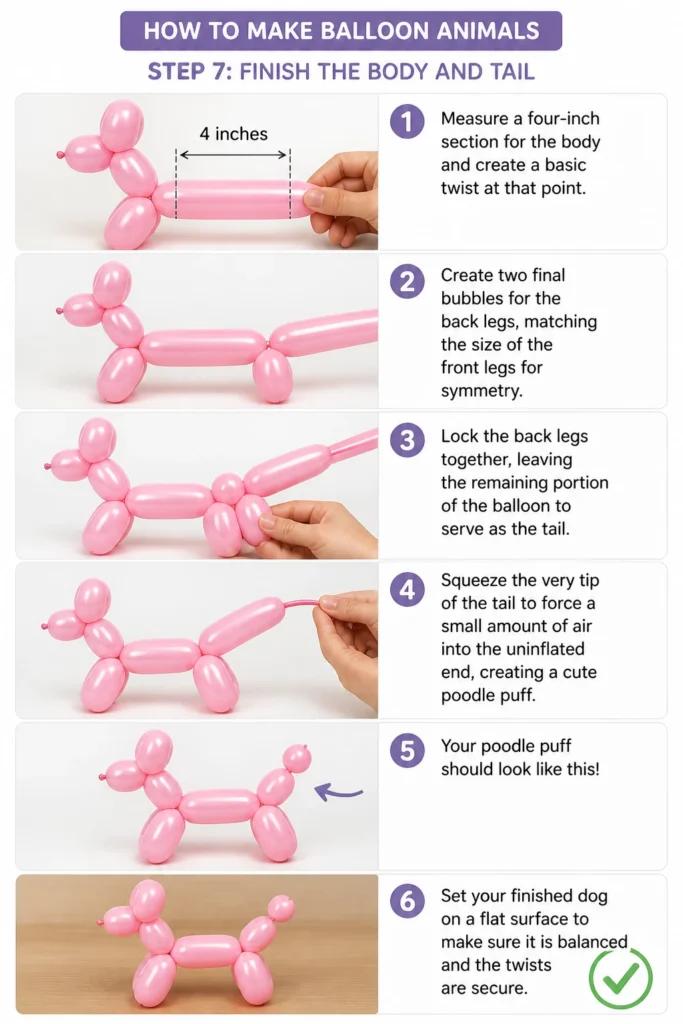
Create two final bubbles for the back legs, matching the size of the front legs for symmetry.
Lock the back legs together, leaving the remaining portion of the balloon to serve as the tail.
Squeeze the very tip of the tail to force a small amount of air into the uninflated end, creating a cute “poodle” puff.
Set your finished dog on a flat surface to make sure it is balanced and the twists are secure.
Step 8: Add Personality with Markers
Pick up a black permanent marker once you are finished with all the physical twisting.
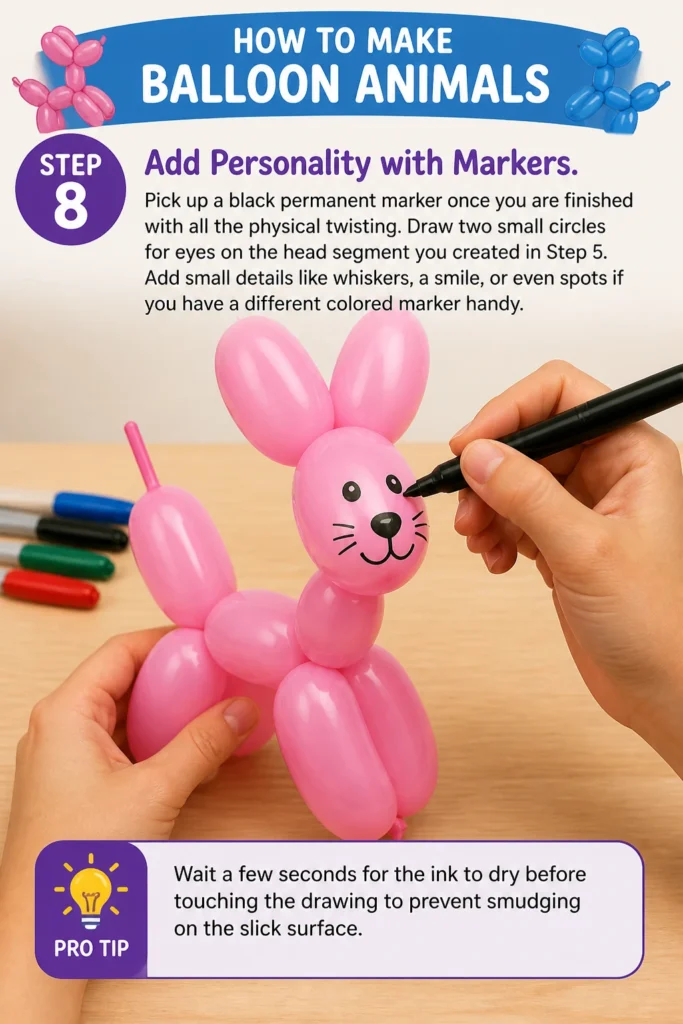
Draw two small circles for eyes on the head segment you created in Step 5.
Add small details like whiskers, a smile, or even spots if you have a different colored marker handy.
Avoid using sharp-tipped pens or pencils, as these will puncture the latex and ruin your hard work instantly.
Pro Tip: Wait a few seconds for the ink to dry before touching the drawing to prevent smudging on the slick surface.
Common Mistakes to Avoid
Over-Inflating the Balloon
Many beginners try to fill the entire balloon with air until it is tight and firm. This leaves no room for the air to move when you twist, causing the balloon to explode mid-process. Always leave a few inches of empty tail at the end to act as a pressure relief valve.
Twisting in Opposite Directions
If you twist the first bubble clockwise and the second bubble counter-clockwise, they will often cancel each other out. This leads to the balloon untwisting as soon as you let go. Stick to one direction for every twist you make on a single animal.
Ignoring the Burp
Skipping the step where you let a little air out before tying the knot makes the balloon much harder to handle. A “soft” balloon is much easier to manipulate and less likely to pop than a “hard” one. The slight loss of volume is worth the added durability.
Troubleshooting
The Balloon Keeps Untwisting
This usually happens because you aren’t holding the previous twists while making new ones. You must maintain a grip on the first segment until it is locked into place with another part of the balloon. Once a lock twist is completed, those segments will stay put on their own.
The Latex Pops Frequently
If your balloons are popping even with a tail, check your hands for sharp jewelry or long fingernails. Also, ensure you are working on a smooth surface, as even a tiny piece of glitter or a rough table edge can cause a pop. Sometimes, old balloons that have been exposed to heat or sunlight become brittle and pop more easily.
The Animal Looks Lopsided
Lopsided animals are usually the result of unequal bubble sizes for the legs or ears. Try to use your fingers as a measuring tool to ensure that the two bubbles intended for a lock twist are identical. Practice makes your eyes better at judging these lengths quickly.
Key Takeaways
- Always use professional 260Q balloons for the best results and fewer pops.
- Leave a three to four-inch tail at the end of the balloon to manage air pressure.
- Always twist in the same direction to keep your segments from unraveling.
- Use lock twists to secure ears and legs into a permanent shape.
- Practice the “burp” technique to make the latex softer and easier to handle.
- Add eyes and details with a marker only after all the twisting is complete.
Frequently Asked Questions
Can I blow up twisting balloons with my mouth?
It is extremely difficult to blow up a 260 balloon with your mouth because they require a lot of initial pressure. Most professionals use a hand pump to save their lungs and prevent lightheadedness. If you must try, stretch the balloon several times first to loosen the latex.
How long will a balloon animal last?
A well-made balloon animal can last anywhere from two to five days depending on the environment. High heat and direct sunlight will cause the air to expand and the latex to degrade faster. Keeping them in a cool, shaded area will help them stay inflated longer.
What is the easiest animal to make after the dog?
The sword is actually the simplest design because it only requires one or two twists. After that, a giraffe is very easy because it uses the exact same steps as a dog, just with a much longer neck and shorter legs. Once you master the dog, you have the building blocks for dozens of other creatures.
Are balloon animals safe for small children?
You should always supervise children under the age of three around balloons. If a balloon pops, the small pieces of rubber can become a choking hazard. Always clean up any broken scraps immediately to keep the play area safe.
Our Top Recommended Finds
- Qualatex 260Q Assorted Colors: These are the industry standard for a reason and offer the best durability for beginners.
- Dual-Action Hand Pump: Look for a pump that pushes air out on both the push and pull strokes to inflate balloons twice as fast.
- Sharpie Retractable Markers: These allow you to quickly draw faces without having to worry about losing a cap while holding a balloon.
Start Your Twisting Journey Today
Now that you have the basic techniques down, the best thing you can do is grab a bag of balloons and start practicing.
Don’t be afraid of the popping sound; it is just a part of the learning process that every professional has gone through.
Once you feel comfortable with the dog, try looking up instructions for a swan or a flower to expand your skills.
You might even find yourself being the hit of the next family gathering or birthday party you attend.
Pick up your pump and see what kind of colorful creatures you can bring to life right now.