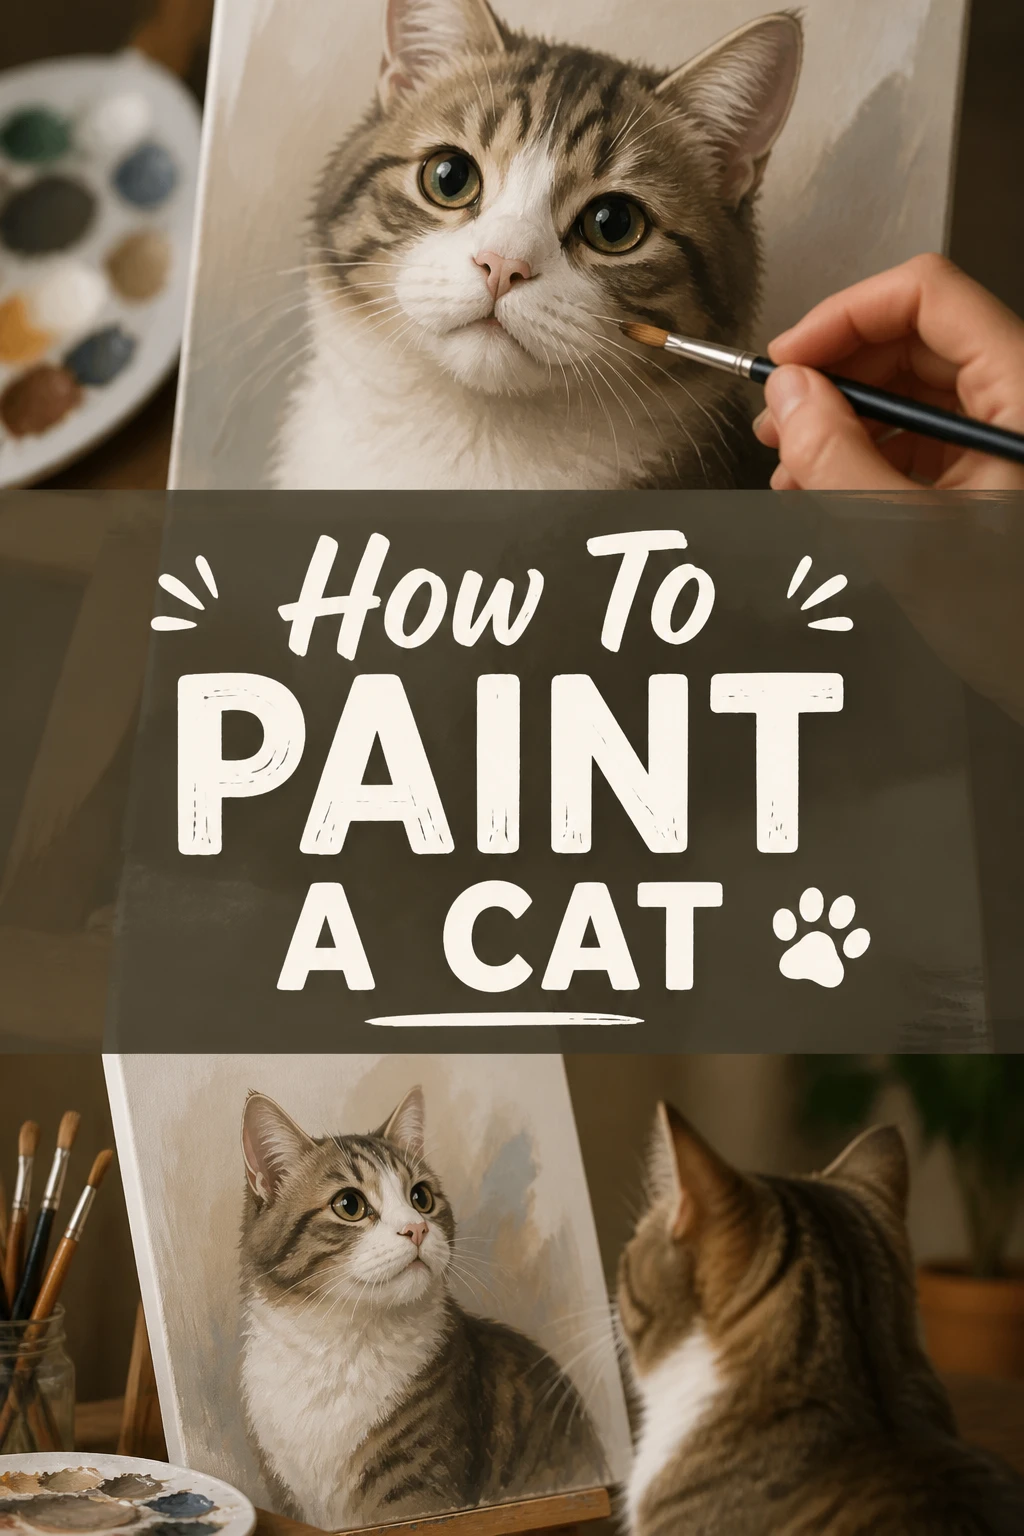
🎨 How To Paint A Cat
Painting a cat can feel like capturing a wisp of magic on canvas.
Their unique personalities and intricate fur patterns present a delightful challenge.
Through years of brushstrokes and countless feline muses, I’ve discovered practical methods to bring these beloved creatures to life with paint.
Quick Overview
This guide will walk you through creating a captivating cat portrait, from initial sketch to final details.
You’ll learn how to build form, texture, and expression, making your painted cat truly shine.
- Time needed: 2-5 hours (depending on detail and experience)
- Difficulty: Intermediate
- What you’ll need: Canvas or art board, acrylic or oil paints, various brushes (flat, round, liner), a reference photo, palette, water container, paper towels.
Step-by-Step Instructions
Step 1: Gather Your Tools and Reference
Before you begin, ensure your workspace is tidy and well-lit. Having everything within reach keeps your creative flow uninterrupted.
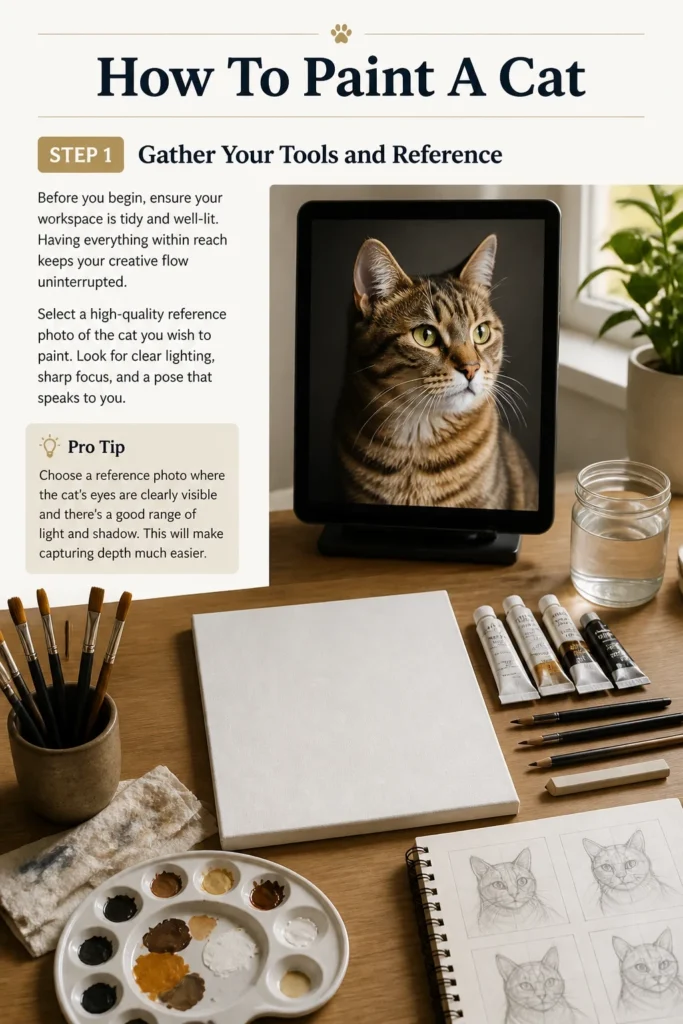
Select a high-quality reference photo of the cat you wish to paint. Look for clear lighting, sharp focus, and a pose that speaks to you.
Pro Tip: Choose a reference photo where the cat’s eyes are clearly visible and there’s a good range of light and shadow. This will make capturing depth much easier.
Step 2: Sketch the Basic Form
Lightly sketch the cat’s main shapes onto your canvas using a pencil or a thin wash of light paint. Focus on the head, body, and major limb positions.
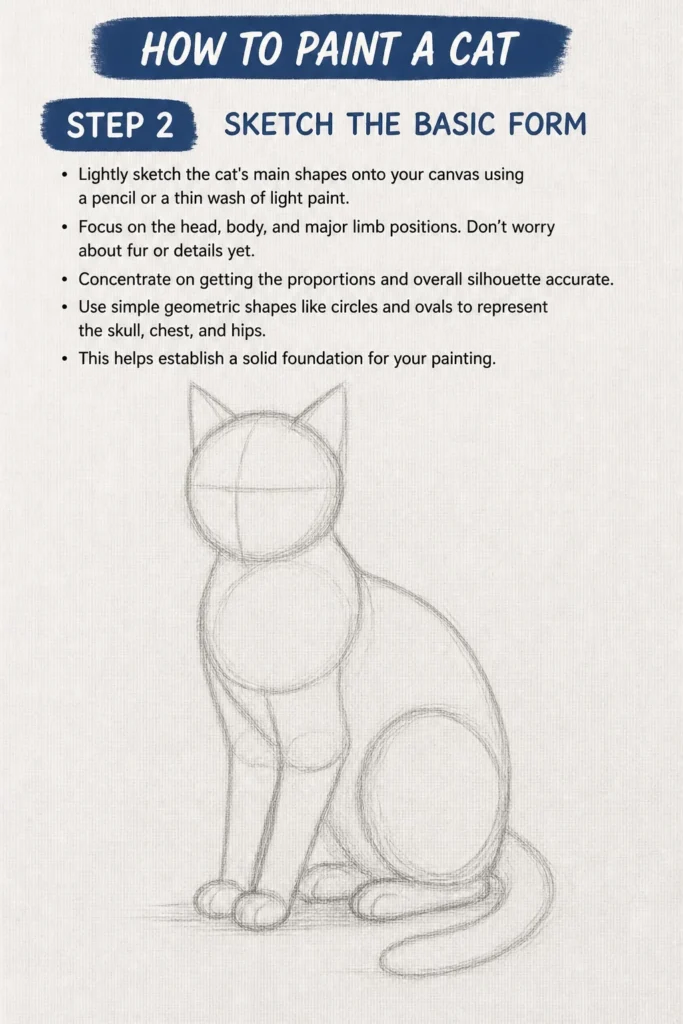
Don’t worry about fur or details yet. Concentrate on getting the proportions and overall silhouette accurate.
Use simple geometric shapes like circles and ovals to represent the skull, chest, and hips. This helps establish a solid foundation for your painting.
Step 3: Lay Down the Underpainting
Apply a thin layer of diluted paint to establish the darkest and lightest areas of the cat. This is called the underpainting or ‘blocking in’.
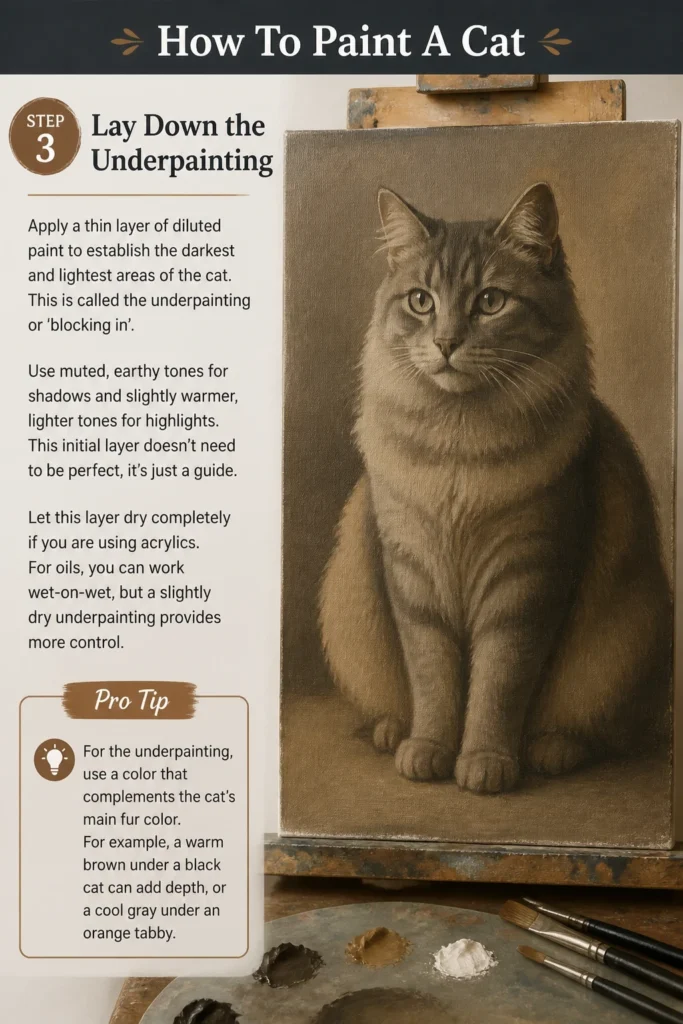
Use muted, earthy tones for shadows and slightly warmer, lighter tones for highlights. This initial layer doesn’t need to be perfect, it’s just a guide.
Let this layer dry completely if you are using acrylics. For oils, you can work wet-on-wet, but a slightly dry underpainting provides more control.
Pro Tip: For the underpainting, use a color that complements the cat’s main fur color. For example, a warm brown under a black cat can add depth, or a cool gray under an orange tabby.
Step 4: Build Up Fur and Texture
Start layering thicker paint to build the cat’s fur. Use small, varied brushstrokes that follow the direction of the fur growth.
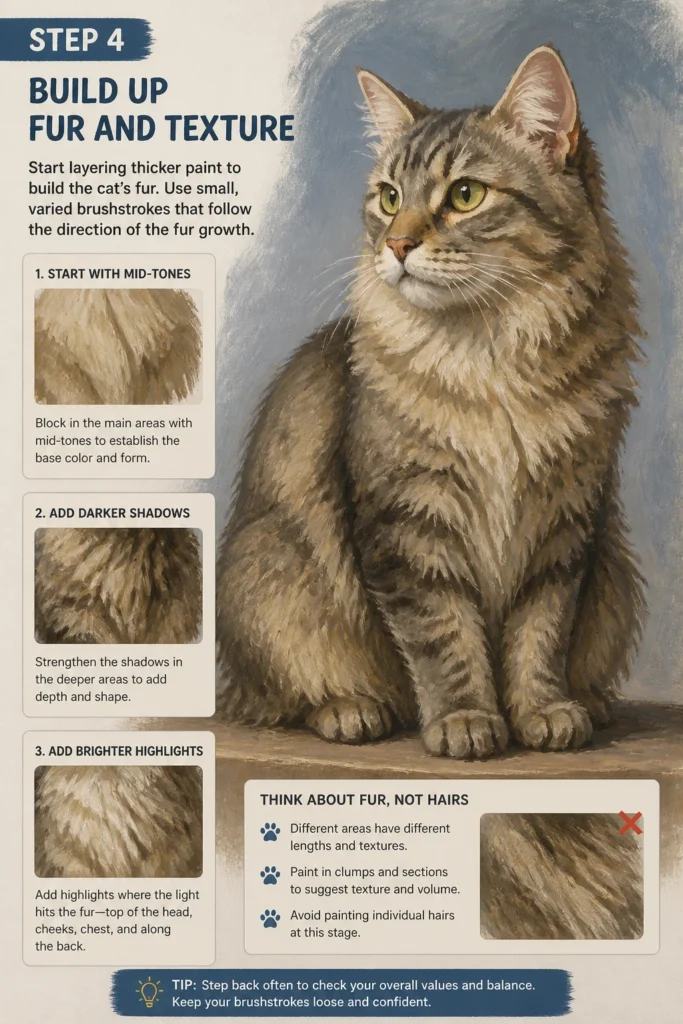
Begin with the mid-tones, then gradually introduce darker shadows and brighter highlights. Think about the different lengths and textures of fur across the body.
Avoid painting individual hairs at this stage. Instead, focus on creating clumps and sections of fur that suggest texture and volume.
Step 5: Focus on the Eyes and Nose
The eyes are the soul of the portrait. Carefully paint the basic shape of the eyes, paying close attention to their color and the pupils.
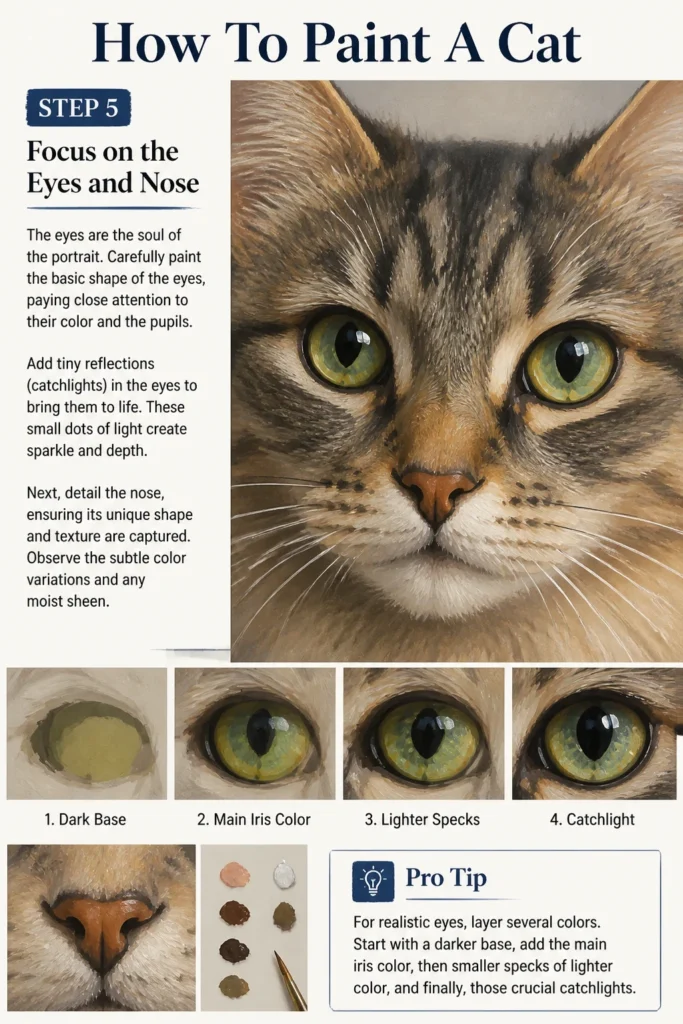
Add tiny reflections (catchlights) in the eyes to bring them to life. These small dots of light create sparkle and depth.
Next, detail the nose, ensuring its unique shape and texture are captured. Observe the subtle color variations and any moist sheen.
Pro Tip: For realistic eyes, layer several colors. Start with a darker base, add the main iris color, then smaller specks of lighter color, and finally, those crucial catchlights.
Step 6: Add Whiskers and Fine Details
Use a very fine liner brush and thinned paint to carefully add the whiskers. Observe their direction, length, and how they emerge from the muzzle.
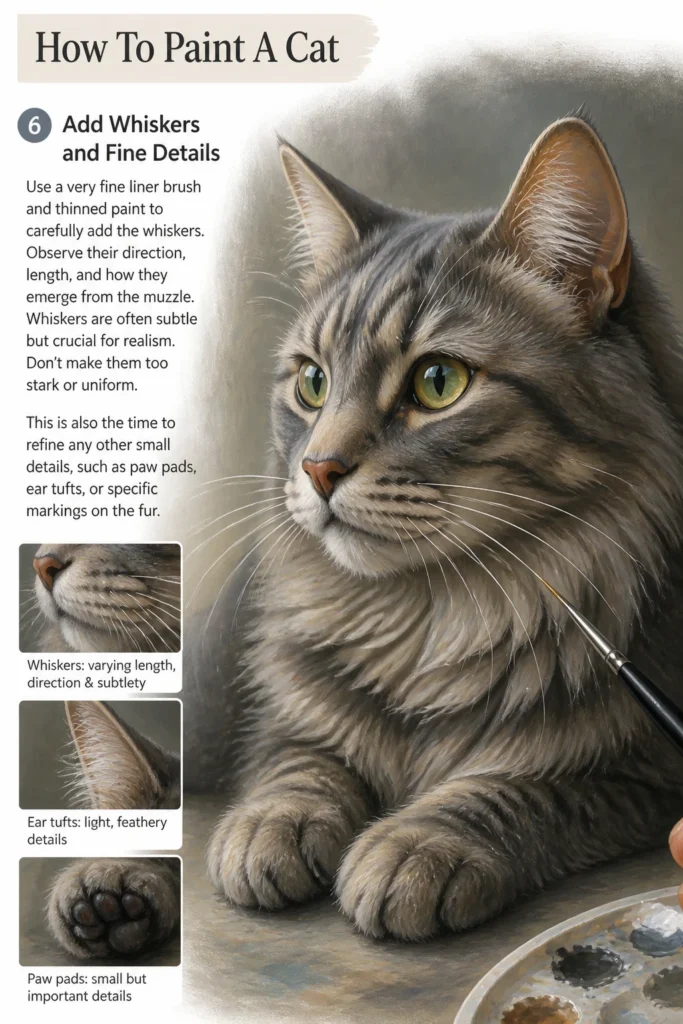
Whiskers are often subtle but crucial for realism. Don’t make them too stark or uniform.
This is also the time to refine any other small details, such as paw pads, ear tufts, or specific markings on the fur.
Step 7: Refine and Evaluate
Step back from your painting regularly to evaluate your progress. Look for areas that need more contrast, softer edges, or additional layers of fur.
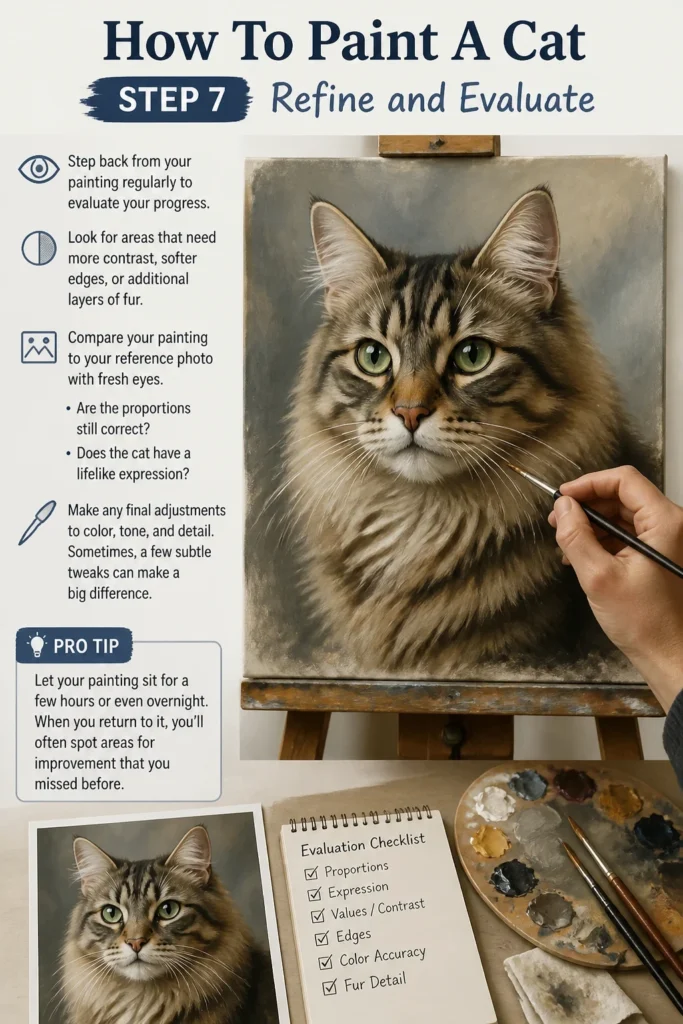
Compare your painting to your reference photo with fresh eyes. Are the proportions still correct? Does the cat have a lifelike expression?
Make any final adjustments to color, tone, and detail. Sometimes, a few subtle tweaks can make a big difference.
Pro Tip: Let your painting sit for a few hours or even overnight. When you return to it, you’ll often spot areas for improvement that you missed before.
Common Mistakes to Avoid
Rushing the Sketch
Many beginners jump straight into painting before establishing a solid drawing. An inaccurate sketch will lead to a distorted final painting, regardless of how well the fur is rendered.
Take your time with the initial drawing. Use light lines and measure proportions carefully. A strong foundation is essential for a successful portrait.
Overworking the Fur
It’s tempting to paint every single hair, but this often results in a stiff, unnatural look. Overworking the fur can make it appear flat and lifeless.
Focus on suggesting fur textures and patterns with varied brushstrokes. Let areas blend and avoid overly defined lines for a more organic feel.
Ignoring Light and Shadow
A common pitfall is painting a cat with flat, even lighting, which makes the subject look two-dimensional. Light and shadow create form and depth.
Consciously observe how light falls on your cat in the reference photo. Identify distinct highlight and shadow areas and incorporate them to give your painting dimension.
Making Eyes Lifeless
The eyes are critical for conveying emotion and realism. Painting them as simple, flat circles can make the cat look vacant or inanimate.
Pay close attention to the reflections, pupil shape, and subtle color variations within the iris. These details breathe life into the gaze.
Troubleshooting
My Cat Looks Flat
If your painted cat lacks dimension, it’s likely due to insufficient contrast between light and shadow. You might be using too many mid-tones.
Go back and deepen your darkest shadows and brighten your lightest highlights. This push and pull of values will create form and make your cat pop off the canvas.
The Fur Looks Stiff or Unnatural
Stiff fur often results from uniform brushstrokes or a lack of understanding of fur direction. It can also happen when you try to paint individual hairs too early.
Use a variety of brush sizes and vary your stroke length and pressure. Ensure your strokes follow the natural growth pattern of the fur, allowing some areas to blend softly.
I Can’t Get the Eyes Right
The eyes are challenging, and small inaccuracies can significantly alter the cat’s expression. It’s easy to make them too large, too small, or misaligned.
Take a break and return with fresh eyes. Double-check the eye placement and size against your reference. Focus on adding those crucial catchlights and subtle color shifts in the iris.
Key Takeaways
- Always start with a solid sketch to ensure accurate proportions.
- Build up your painting in layers, from underpainting to fine details.
- Pay close attention to light and shadow to create depth and form.
- Focus on suggesting fur texture rather than painting every single hair.
- The eyes are paramount for capturing the cat’s personality and bringing it to life.
- Step back frequently to evaluate your work and make adjustments.
Frequently Asked Questions
What type of paint is best for painting cats?
Acrylics are popular for their fast drying time, which allows for quick layering and corrections. Oils offer more blending time and richer colors, but take longer to dry.
Both mediums are excellent choices; it often comes down to personal preference and working style.
How do I capture different fur textures?
Vary your brushstrokes. Use short, choppy strokes for coarse fur, longer, softer strokes for sleek fur, and stippling for very fluffy areas.
Observing your reference closely for fur direction and length is key to replicating texture accurately.
Should I paint the background first or last?
Many artists prefer to block in the background early, after the initial sketch, or even during the underpainting phase. This helps establish the overall color harmony and value relationships.
You can refine the background further as you detail the cat, ensuring edges are crisp where needed.
How do I make my cat painting look more realistic?
Realism comes from accurate observation and attention to detail. Focus on correct proportions, strong values (lights and darks), and subtle color shifts.
Capturing the unique sparkle in the eyes and the delicate texture of the fur will significantly enhance the realism.
Our Top Recommended Finds
- Acrylic Paint Set (Artist Grade): Offers vibrant colors and better pigment load for smoother application and richer results.
- Fine Detail Brush Set: Essential for painting whiskers, individual hairs, and those critical catchlights in the eyes.
- Stretched Canvas Pack: Provides a sturdy, ready-to-use surface in various sizes, perfect for practicing and creating finished pieces.
Your Feline Masterpiece Awaits!
Painting a cat is a journey of observation and patience. Each stroke builds upon the last, slowly revealing the unique charm of your subject.
Don’t be afraid to experiment with colors and techniques. Every painting is a learning experience, bringing you closer to mastering pet portraits.
Now, grab your brushes and let the purr-fect creativity flow!