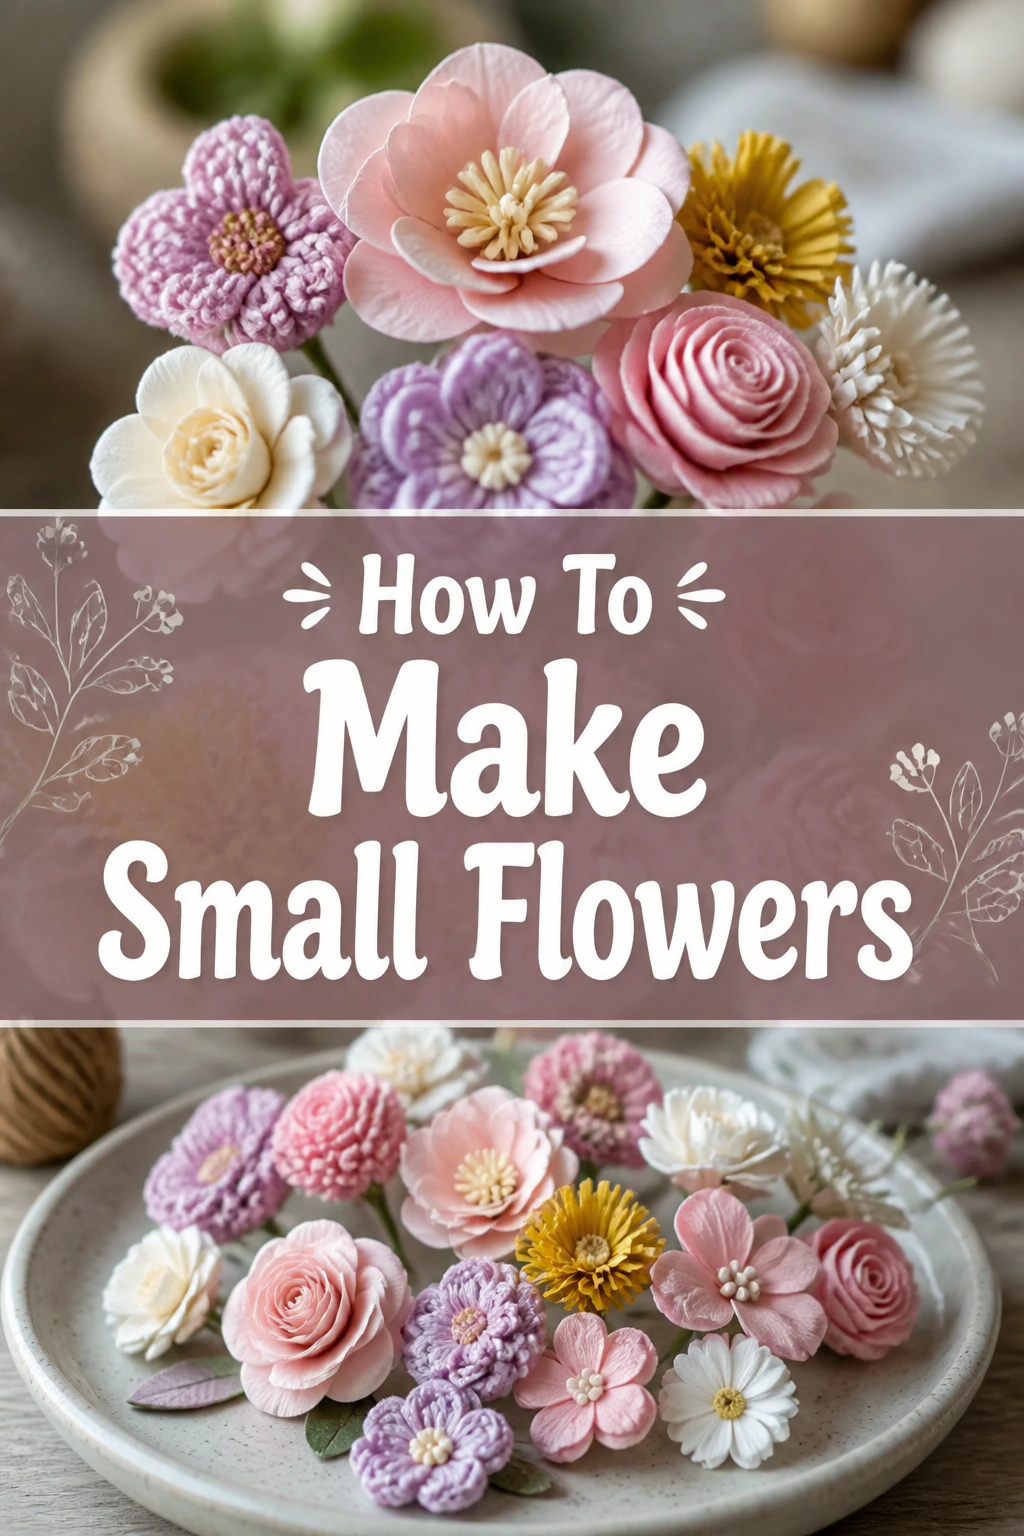
🌸 How To Make Small Flowers
There’s something truly enchanting about creating tiny floral wonders with your own hands.
I remember making my first miniature rose for a dollhouse; it was a fiddly but incredibly rewarding process.
This guide shares practical techniques I’ve learned, helping you craft delicate small flowers that bring joy to any project.
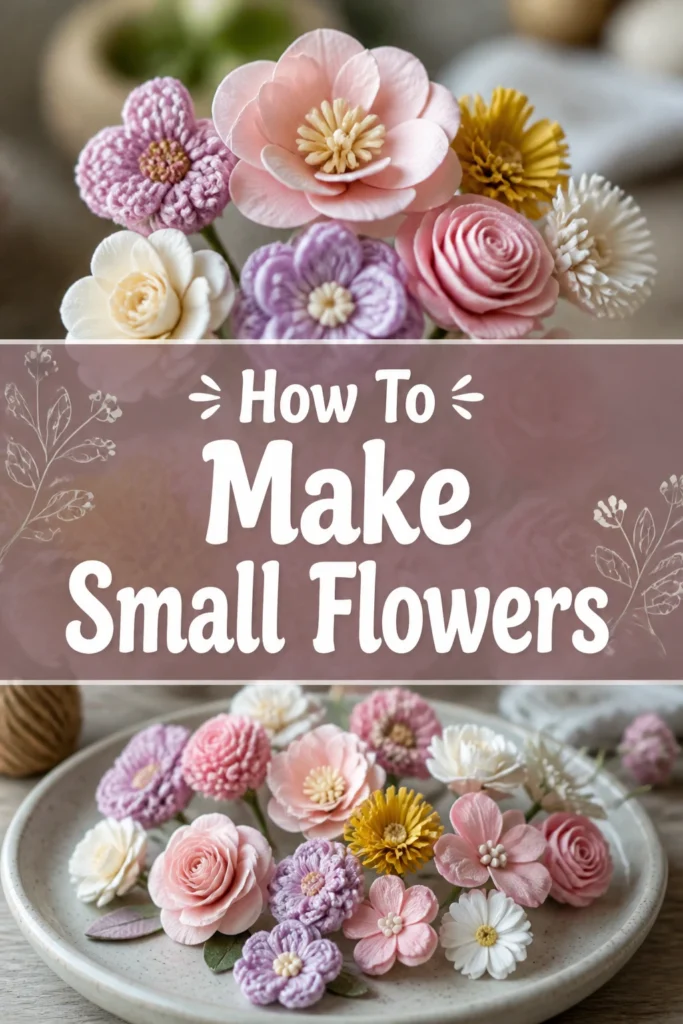
Quick Overview
You’re about to learn how to transform simple materials into charming, small flowers.
This process is highly adaptable, letting you create blossoms perfect for cards, scrapbooks, decor, or even jewelry.
- Time needed: 45-90 minutes (depending on complexity and number of flowers)
- Difficulty: Beginner
- What you’ll need: Paper, scissors, glue, tweezers, optional wire and shaping tools
Step-by-Step Instructions
Step 1: Gather Your Materials
Begin by collecting everything you’ll need for your small flower project.
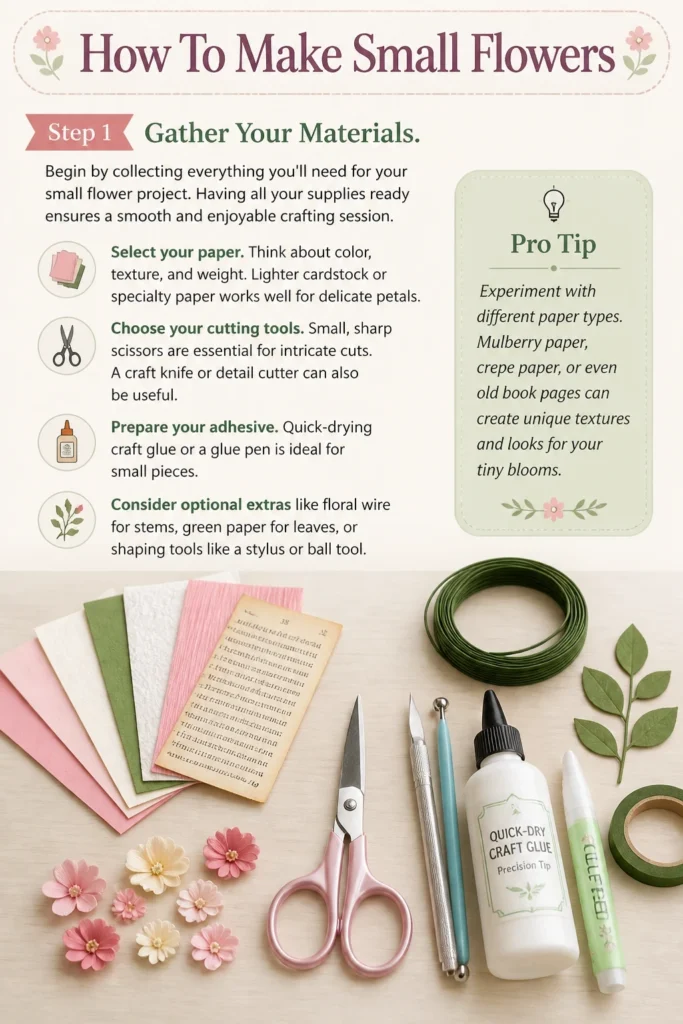
Having all your supplies ready ensures a smooth and enjoyable crafting session.
- Select your paper. Think about color, texture, and weight. Lighter cardstock or specialty paper works well for delicate petals.
- Choose your cutting tools. Small, sharp scissors are essential for intricate cuts. A craft knife or detail cutter can also be useful.
- Prepare your adhesive. Quick-drying craft glue or a glue pen is ideal for small pieces.
- Consider optional extras like floral wire for stems, green paper for leaves, or shaping tools like a stylus or ball tool.
Pro Tip: Experiment with different paper types. Mulberry paper, crepe paper, or even old book pages can create unique textures and looks for your tiny blooms.
Step 2: Prepare Your Petal Shapes
This step involves cutting out the basic forms that will become your flower’s petals.
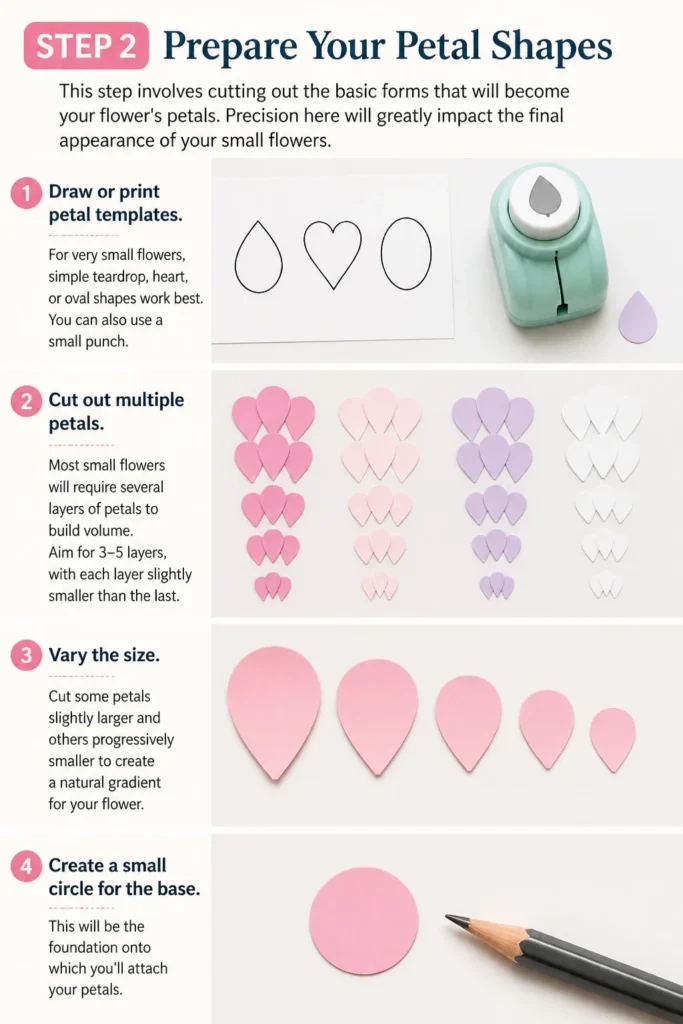
Precision here will greatly impact the final appearance of your small flowers.
- Draw or print petal templates. For very small flowers, simple teardrop, heart, or oval shapes work best. You can also use a small punch.
- Cut out multiple petals. Most small flowers will require several layers of petals to build volume. Aim for 3-5 layers, with each layer slightly smaller than the last.
- Vary the size. Cut some petals slightly larger and others progressively smaller to create a natural gradient for your flower.
- Create a small circle for the base. This will be the foundation onto which you’ll attach your petals.
Step 3: Add Texture and Dimension
Flat paper petals won’t look like real flowers. This step brings them to life with shape and curve.
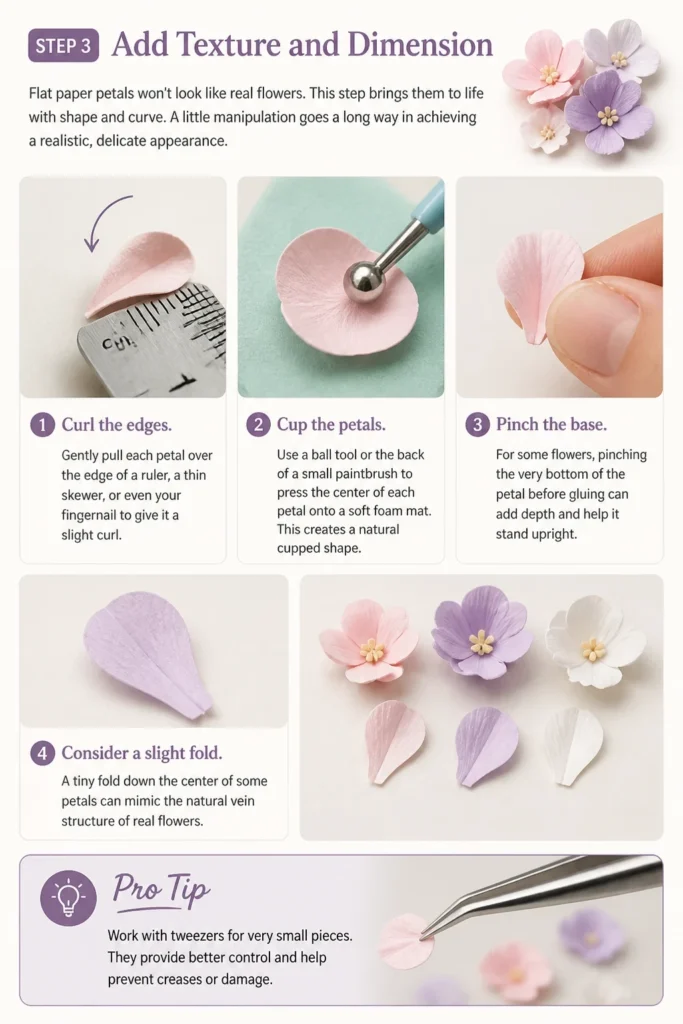
A little manipulation goes a long way in achieving a realistic, delicate appearance.
- Curl the edges. Gently pull each petal over the edge of a ruler, a thin skewer, or even your fingernail to give it a slight curl.
- Cup the petals. Use a ball tool or the back of a small paintbrush to press the center of each petal onto a soft foam mat. This creates a natural cupped shape.
- Pinch the base. For some flowers, pinching the very bottom of the petal before gluing can add depth and help it stand upright.
- Consider a slight fold. A tiny fold down the center of some petals can mimic the natural vein structure of real flowers.
Pro Tip: Work with tweezers for very small pieces. They provide better control and prevent your fingers from smudging glue or tearing delicate paper.
Step 4: Assemble the Center
The flower’s center is often the focal point and can define its type.
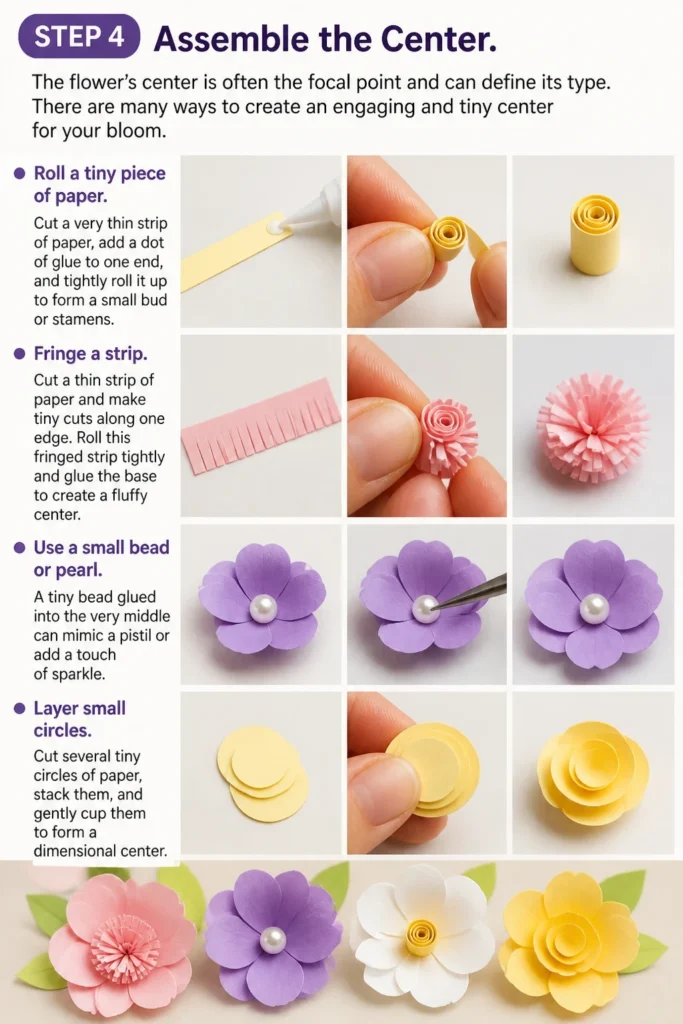
There are many ways to create an engaging and tiny center for your bloom.
- Roll a tiny piece of paper. Cut a very thin strip of paper, add a dot of glue to one end, and tightly roll it up to form a small bud or stamens.
- Fringe a strip. Cut a thin strip of paper and make tiny cuts along one edge. Roll this fringed strip tightly and glue the base to create a fluffy center.
- Use a small bead or pearl. A tiny bead glued into the very middle can mimic a pistil or add a touch of sparkle.
- Layer small circles. Cut several tiny circles of paper, stack them, and gently cup them to form a dimensional center.
Step 5: Attach the Petals
Now, it’s time to bring all your shaped petals together to form the flower.
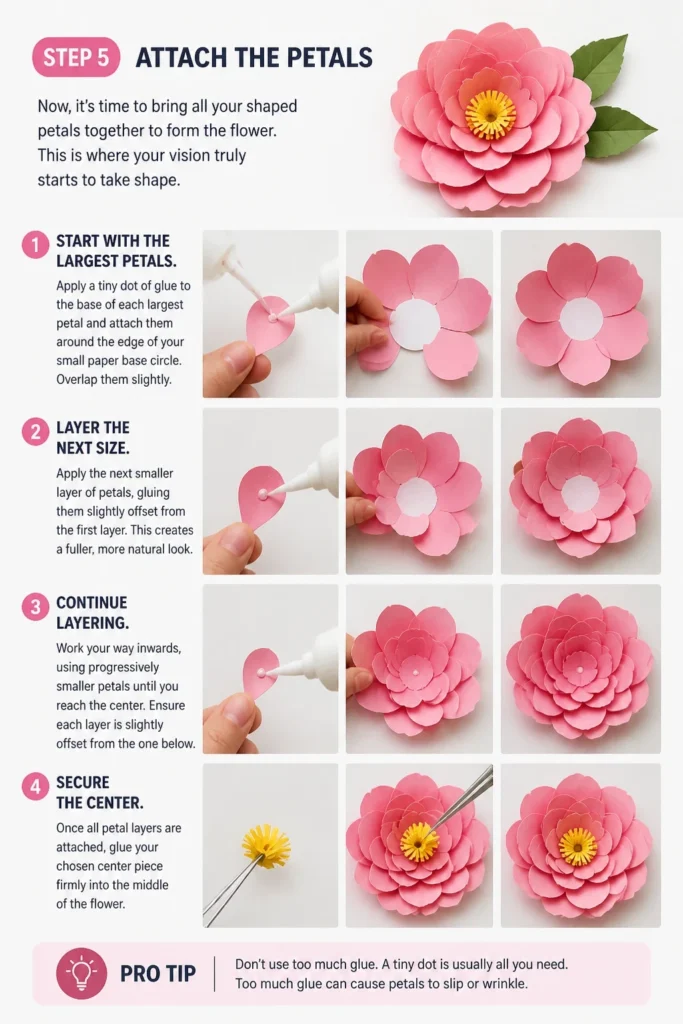
This is where your vision truly starts to take shape.
- Start with the largest petals. Apply a tiny dot of glue to the base of each largest petal and attach them around the edge of your small paper base circle. Overlap them slightly.
- Layer the next size. Apply the next smaller layer of petals, gluing them slightly offset from the first layer. This creates a fuller, more natural look.
- Continue layering. Work your way inwards, using progressively smaller petals until you reach the center. Ensure each layer is slightly offset from the one below.
- Secure the center. Once all petal layers are attached, glue your chosen center piece firmly into the middle of the flower.
Pro Tip: Don’t use too much glue. A tiny dot is usually enough for small paper flowers, preventing saturation and a messy finish. Less is definitely more.
Step 6: Form the STEM and Leaves (Optional)
Adding a stem and leaves can complete your small flower, especially if it’s for a bouquet or display.
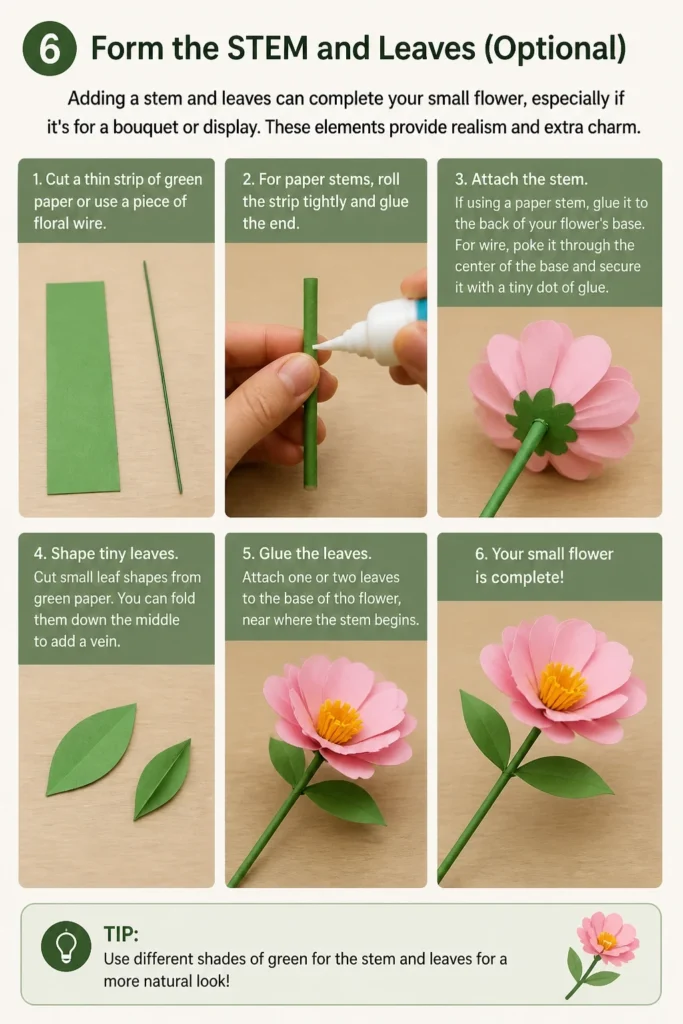
These elements provide realism and extra charm.
- Cut a thin strip of green paper or use a piece of floral wire. For paper stems, roll the strip tightly and glue the end.
- Attach the stem. If using a paper stem, glue it to the back of your flower’s base. For wire, poke it through the center of the base and secure it with a tiny dot of glue.
- Shape tiny leaves. Cut small leaf shapes from green paper. You can fold them down the middle to add a vein.
- Glue the leaves. Attach one or two leaves to the base of the flower, near where the stem begins.
Step 7: Add Finishing Touches
The final touches can elevate your small flower from good to exquisite.
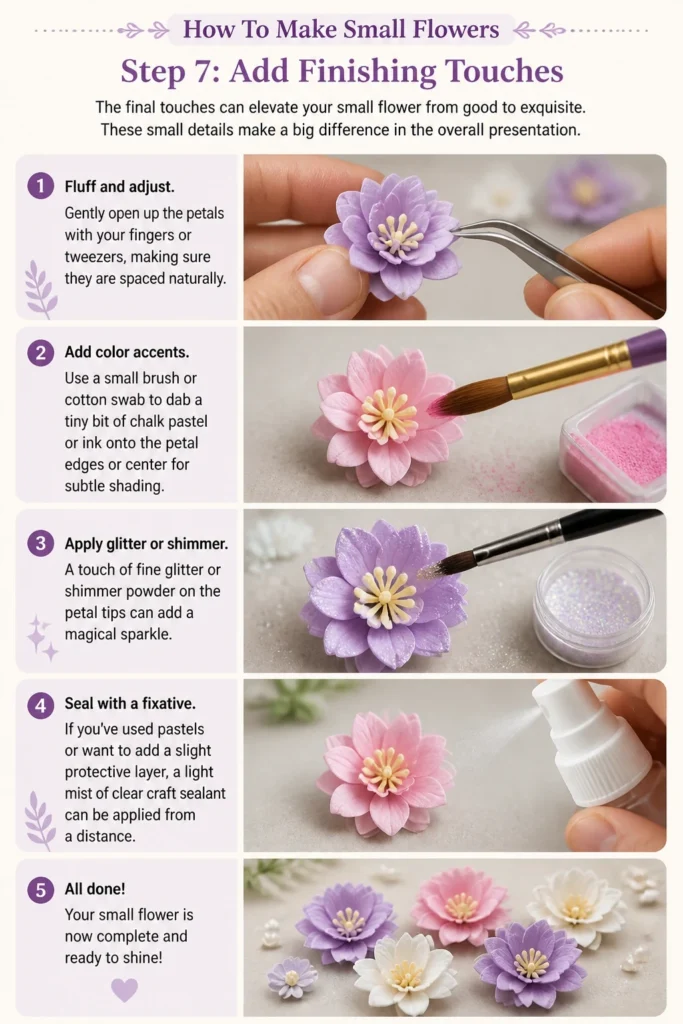
These small details make a big difference in the overall presentation.
- Fluff and adjust. Gently open up the petals with your fingers or tweezers, making sure they are spaced naturally.
- Add color accents. Use a small brush or cotton swab to dab a tiny bit of chalk pastel or ink onto the petal edges or center for subtle shading.
- Apply glitter or shimmer. A touch of fine glitter or shimmer powder on the petal tips can add a magical sparkle.
- Seal with a fixative. If you’ve used pastels or want to add a slight protective layer, a light mist of clear craft sealant can be applied from a distance.
Common Mistakes to Avoid
Using Too Much Glue
It’s easy to get carried away with glue, especially when working with tiny pieces. Excess glue can seep through the paper, leaving unsightly marks or making the paper soggy and prone to tearing. Always use the smallest dot possible, just enough to secure the pieces.
Cutting Uneven Petals
Inconsistent petal sizes or shapes can make your flower look lopsided or unnatural. Take your time when cutting, or use a template or punch for uniformity. Small variations are fine and can add character, but significant differences will be noticeable.
Forgetting to Shape Petals
Simply gluing flat petals together results in a very flat, two-dimensional flower. The shaping step is crucial for adding dimension and realism. Always curl, cup, or pinch your petals before assembly to give them a lifelike quality.
Rushing the Process
Making small flowers requires patience and a delicate touch. Rushing can lead to torn paper, misaligned petals, or messy glue. Enjoy the meditative aspect of the craft and allow yourself the time needed for precision.
Troubleshooting
My Petals Aren’t Holding Their Shape
If your petals flatten out after shaping, the paper might be too thin or too flexible. Try using a slightly heavier cardstock or a paper specifically designed for flower making. Also, ensure you are curling or cupping firmly but gently enough to create a lasting bend without creasing.
The Glue is Visible and Messy
Visible glue usually means too much was applied. Use a fine-tipped applicator, a toothpick, or a glue pen for precision. If a little glue does seep out, let it dry completely before attempting to gently scrape it away with a craft knife or cover it with a tiny bit of chalk or glitter.
My Flower Looks Flat and Lifeless
This often happens when petals aren’t adequately shaped or layered. Go back to Step 3 and really focus on giving each petal dimension. Also, ensure you are layering petals in an offset pattern and building up enough layers to create fullness. Gentle fluffing after assembly also helps.
Key Takeaways
- Gather all your materials before you begin to streamline your crafting.
- Precision in cutting and shaping petals is essential for realistic small flowers.
- Always add dimension to your petals through curling, cupping, or pinching.
- Use minimal glue to avoid mess and maintain the delicate nature of the flower.
- Layer petals carefully, offsetting each row for a fuller, more natural look.
- Don’t be afraid to experiment with different papers and finishing touches.
Frequently Asked Questions
What’s the best paper for small flowers?
Lightweight cardstock (65lb), specialty flower-making paper like mulberry or crepe paper, and even high-quality printer paper work well. The key is to choose paper that holds a shape but isn’t too stiff to manipulate or too thin to tear easily.
How can I make my flowers look more realistic?
Focus on shaping each petal individually, using varying petal sizes, and adding subtle shading with pastels or inks. Observing real flowers for their natural curves and color variations can also inspire your designs.
Can I use a cutting machine for these small flowers?
Absolutely! A craft cutting machine like a Cricut or Silhouette can precisely cut numerous tiny petals, saving a lot of time. Just be sure to use a sticky mat and a fine-point blade for the best results with delicate paper.
How do I store my handmade small flowers?
Store them in a sturdy box with tissue paper or cotton batting to prevent crushing. Keep them away from direct sunlight and humidity to preserve their color and shape. Small plastic organizers with compartments are also excellent for keeping them safe.
Our Top Recommended Finds
- Fine-Tip Craft Glue: Essential for precise application on tiny pieces, preventing mess.
- Detail Scissors: Small, sharp scissors with pointed tips are invaluable for intricate cuts.
- Ball Stylus Tool Set: Perfect for shaping and cupping petals, giving them a natural, three-dimensional look.
Let Your Creativity Blossom
You now have the knowledge and steps to create your own beautiful small flowers.
These tiny creations can add a personal touch to so many projects, from gifts to home decor.
Grab your materials today and start crafting these miniature marvels. Perhaps next, you’ll explore different flower types or even create a tiny floral wreath!