✨ How To Make Cute Stickers
There’s a special joy in personalizing your world with cute, custom stickers.
I’ve spent countless hours experimenting with different methods, papers, and tools to create my own unique designs.
This guide shares all my best tips and tricks, so you can easily make adorable stickers that truly stick.
Quick Overview
You’re about to discover how simple it is to transform your digital art into tangible, peel-and-stick delights.
We’ll cover everything from designing your stickers to cutting them out perfectly.
- Time needed: 1-3 hours (depending on design complexity and cutting method)
- Difficulty: Beginner
- What you’ll need: Design software, printer, sticker paper, cutting tool, laminate (optional)
Step-by-Step Instructions
Step 1: Design Your Vision
This is where your creativity truly shines. Think about what makes a sticker “cute” to you.
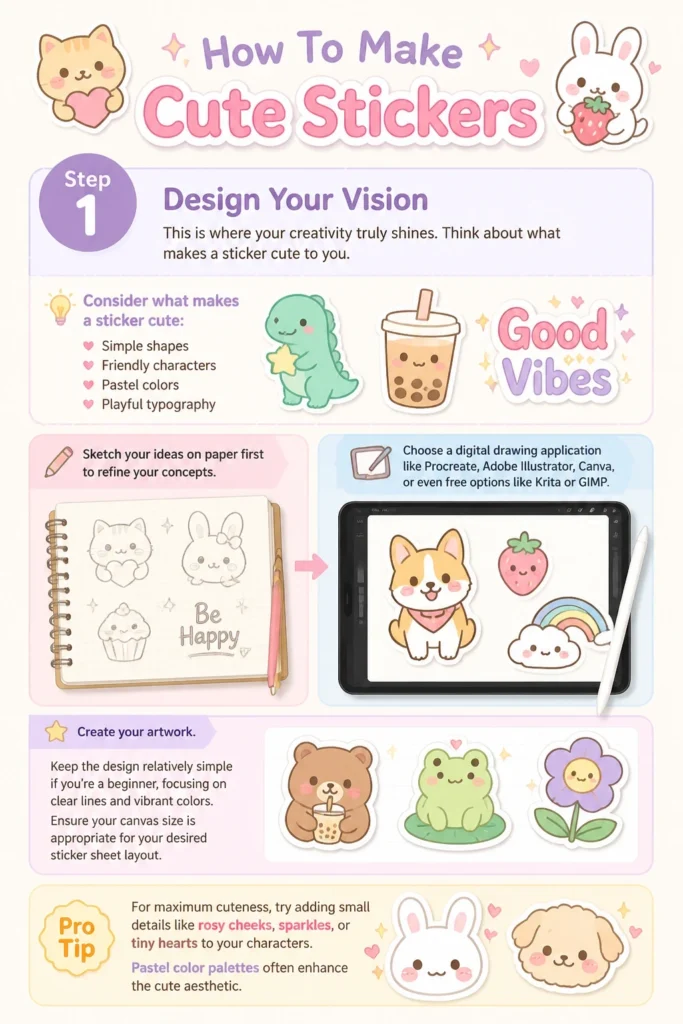
Consider simple shapes, friendly characters, pastel colors, or playful typography.
- Sketch your ideas on paper first to refine your concepts.
- Choose a digital drawing application like Procreate, Adobe Illustrator, Canva, or even free options like Krita or GIMP.
- Create your artwork. Keep the design relatively simple if you’re a beginner, focusing on clear lines and vibrant colors.
- Ensure your canvas size is appropriate for your desired sticker sheet layout.
Pro Tip: For maximum cuteness, try adding small details like rosy cheeks, sparkles, or tiny hearts to your characters. Pastel color palettes often enhance the cute aesthetic.
Step 2: Gather Your Materials
Having everything ready before you start printing makes the process much smoother.
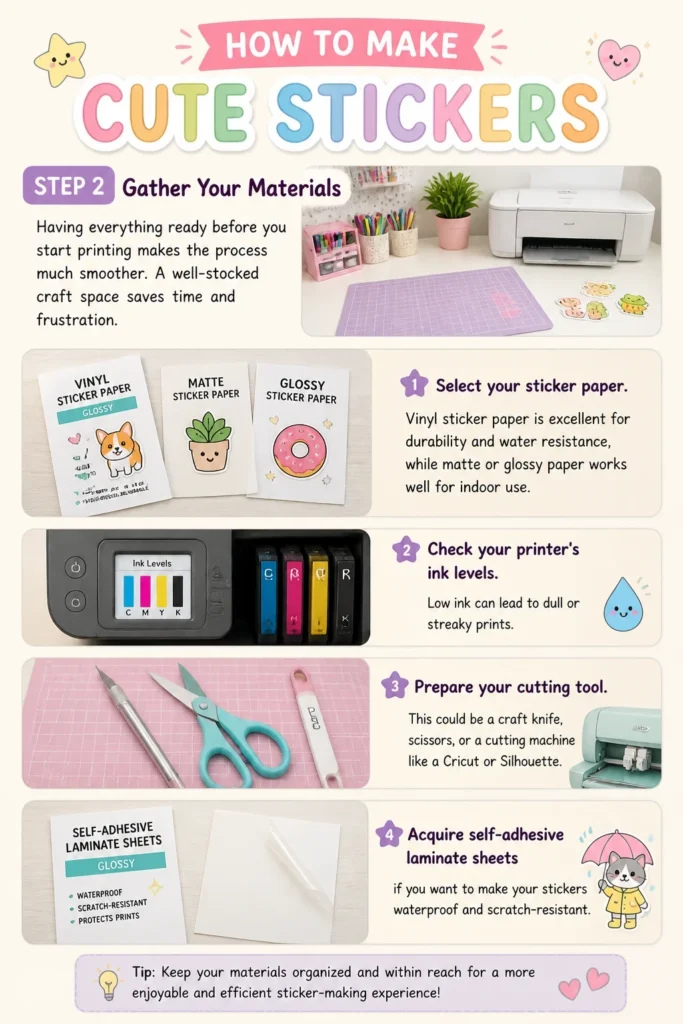
A well-stocked craft space saves time and frustration.
- Select your sticker paper. Vinyl sticker paper is excellent for durability and water resistance, while matte or glossy paper works well for indoor use.
- Check your printer’s ink levels. Low ink can lead to dull or streaky prints.
- Prepare your cutting tool. This could be a craft knife, scissors, or a cutting machine like a Cricut or Silhouette.
- Acquire self-adhesive laminate sheets if you want to make your stickers waterproof and scratch-resistant.
Step 3: Prepare Your Canvas
Before printing, optimize your digital design for the best quality.
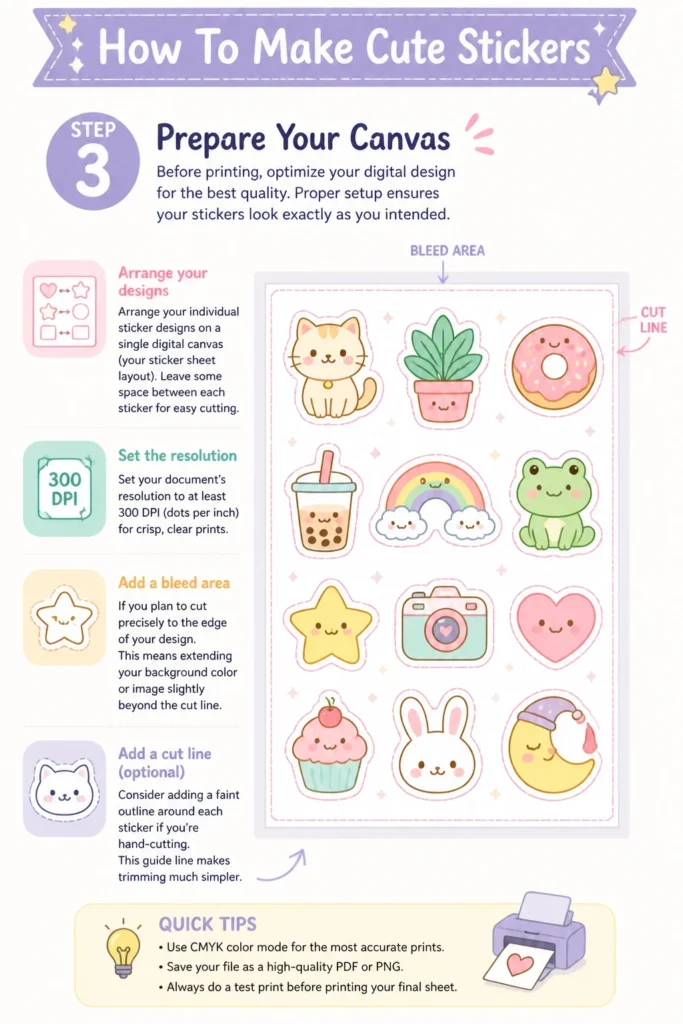
Proper setup ensures your stickers look exactly as you intended.
- Arrange your individual sticker designs on a single digital canvas (your sticker sheet layout). Leave some space between each sticker for easy cutting.
- Set your document’s resolution to at least 300 DPI (dots per inch) for crisp, clear prints.
- Add a “bleed” area if you plan to cut precisely to the edge of your design. This means extending your background color or image slightly beyond the cut line.
- Consider adding a faint outline around each sticker if you’re hand-cutting. This guide line makes trimming much simpler.
Step 4: Print Your Designs
This is the exciting part where your digital creations become physical.
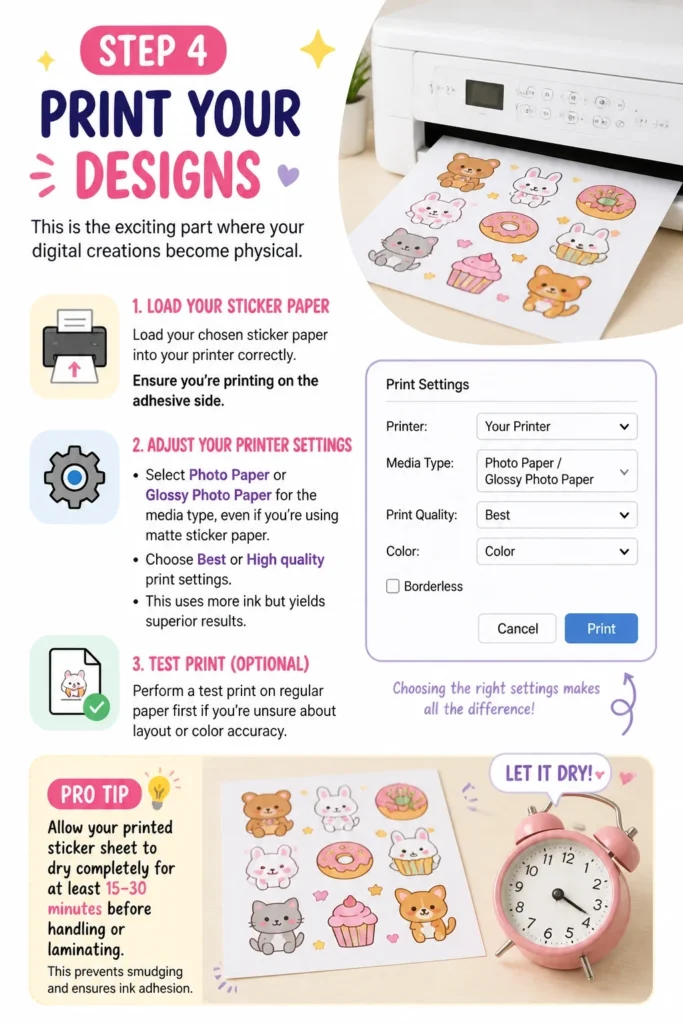
Print settings are crucial for achieving vibrant colors and sharp details.
- Load your chosen sticker paper into your printer correctly. Ensure you’re printing on the adhesive side.
- Adjust your printer settings. Select “Photo Paper” or “Glossy Photo Paper” for the media type, even if you’re using matte sticker paper.
- Choose “Best” or “High” quality print settings. This uses more ink but yields superior results.
- Perform a test print on regular paper first if you’re unsure about layout or color accuracy.
Pro Tip: Allow your printed sticker sheet to dry completely for at least 15-30 minutes before handling or laminating. This prevents smudging and ensures ink adhesion.
Step 5: Laminate for Durability
Lamination is an optional but highly recommended step, especially for cute stickers that will see a lot of use.
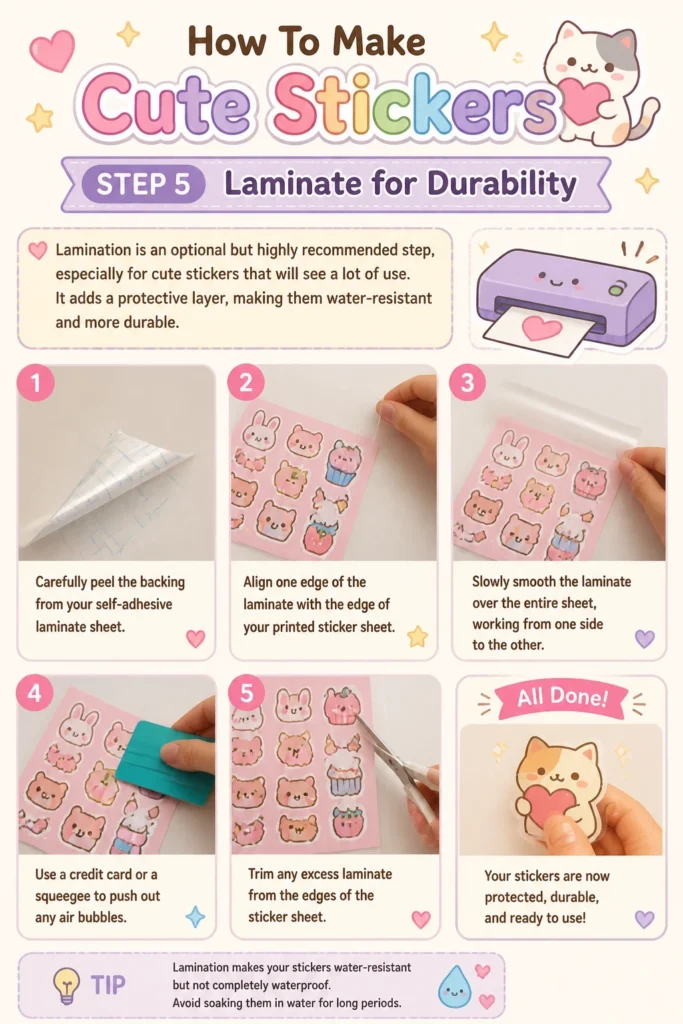
It adds a protective layer, making them water-resistant and more durable.
- Carefully peel the backing from your self-adhesive laminate sheet.
- Align one edge of the laminate with the edge of your printed sticker sheet.
- Slowly smooth the laminate over the entire sheet, working from one side to the other. Use a credit card or a squeegee to push out any air bubbles.
- Trim any excess laminate from the edges of the sticker sheet.
Step 6: Cut Them Out
Precision cutting is key to professional-looking stickers.
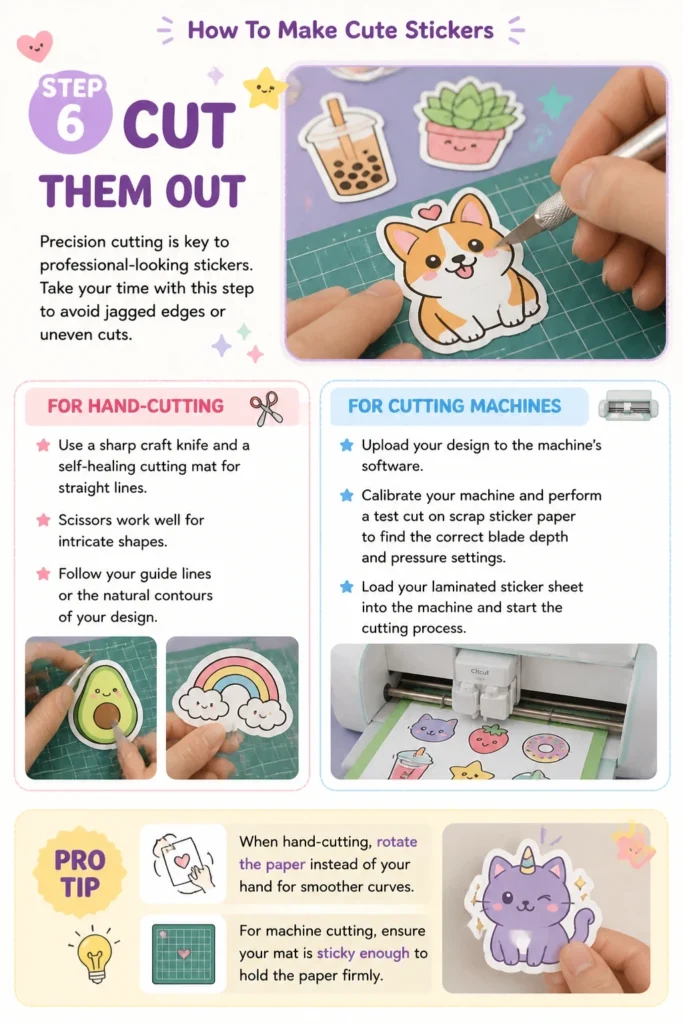
Take your time with this step to avoid jagged edges or uneven cuts.
- For hand-cutting: Use a sharp craft knife and a self-healing cutting mat for straight lines. Scissors work well for intricate shapes.
- Follow your guide lines or the natural contours of your design.
- For cutting machines (Cricut, Silhouette): Upload your design to the machine’s software.
- Calibrate your machine and perform a test cut on scrap sticker paper to find the correct blade depth and pressure settings.
- Load your laminated sticker sheet into the machine and start the cutting process.
Pro Tip: When hand-cutting, rotate the paper instead of your hand for smoother curves. For machine cutting, ensure your mat is sticky enough to hold the paper firmly.
Step 7: Store and Share
Once your cute stickers are cut, proper storage keeps them pristine until you’re ready to use them.
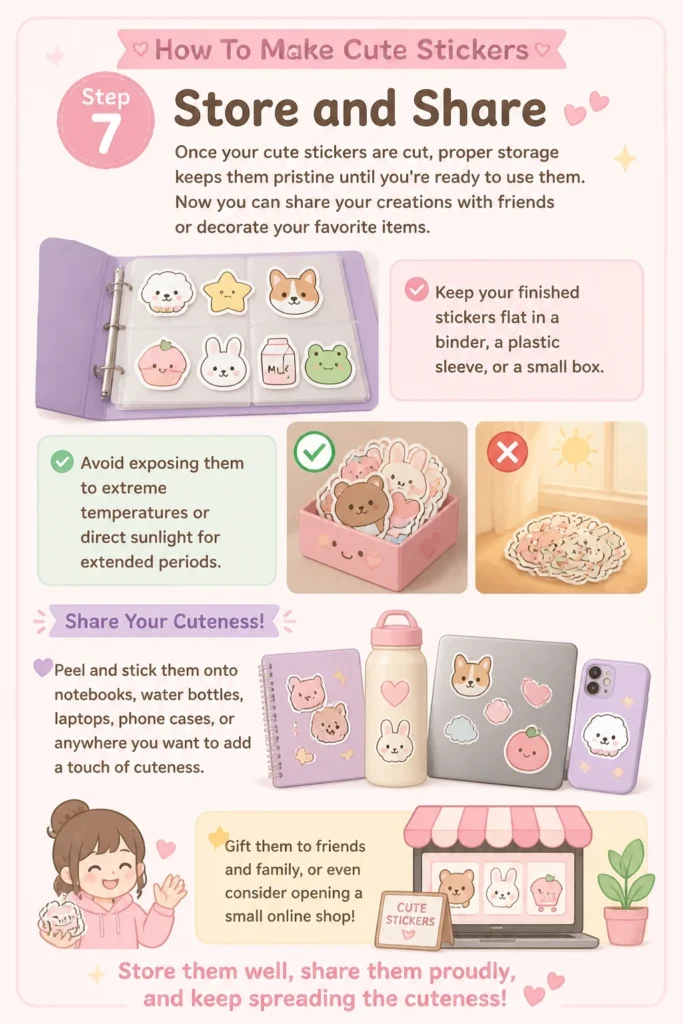
Now you can share your creations with friends or decorate your favorite items.
- Keep your finished stickers flat in a binder, a plastic sleeve, or a small box.
- Avoid exposing them to extreme temperatures or direct sunlight for extended periods.
- Peel and stick them onto notebooks, water bottles, laptops, phone cases, or anywhere you want to add a touch of cuteness.
- Gift them to friends and family, or even consider opening a small online shop!
Common Mistakes to Avoid
Printing on the Wrong Side
It’s surprisingly easy to load sticker paper incorrectly. This results in your design printing on the non-adhesive backing, wasting paper and ink. Always double-check which side is the printable surface before sending your job to the printer, often indicated by a slight sheen or specific texture.
Neglecting Lamination
Skipping the lamination step leaves your stickers vulnerable to scratches, fading, and water damage. While optional, a simple self-adhesive laminate significantly extends the life and vibrancy of your cute stickers, making them much more durable for everyday use.
Rushing the Cutting Process
Whether you’re using scissors or a machine, hurrying through the cutting stage often leads to crooked lines, jagged edges, or even cuts into your design. Slow down, use sharp tools, and ensure your cutting machine settings are perfectly calibrated for a clean, professional finish.
Overlooking Resolution
Designing at a low resolution (below 300 DPI) can make your printed stickers appear pixelated or blurry, especially if the design is complex. Always start your digital canvas with a high resolution to ensure crisp lines and clear details, resulting in sharp, professional-looking stickers.
Troubleshooting
Stickers Not Sticking Well
If your stickers aren’t adhering properly, the surface might be dirty, oily, or textured. Clean the application surface with rubbing alcohol and let it dry completely before applying the sticker. Also, ensure you are using appropriate sticker paper for the intended surface, as some papers have stronger adhesives than others.
Colors Look Different After Printing
Color discrepancies between your screen and print are common. This can be due to monitor calibration or incorrect printer settings. Try adjusting your printer settings to “Photo Paper” and “Best Quality,” even if using matte paper. Also, consider performing a test print on regular paper to check color accuracy before using your sticker sheets.
Jagged Edges When Cutting
Jagged edges often indicate dull cutting tools or incorrect machine settings. If hand-cutting, replace your craft knife blade or sharpen your scissors. For cutting machines, perform a blade calibration and adjust the pressure settings. A slightly slower cut speed can also improve precision for intricate designs.
Key Takeaways
- Design with a high resolution (300 DPI) for crisp prints.
- Always load sticker paper correctly to print on the adhesive side.
- Laminate your stickers for enhanced durability and water resistance.
- Take your time with cutting for clean, professional edges.
- Allow printed ink to dry completely before handling or laminating.
- Store finished stickers flat to prevent curling and damage.
Frequently Asked Questions
What’s the best type of paper for waterproof stickers?
For waterproof stickers, printable vinyl sticker paper combined with a self-adhesive laminate sheet is your best bet. The vinyl itself offers good water resistance, and the laminate layer provides an extra barrier against moisture and wear, making your stickers highly durable.
Can I make stickers without a special machine?
Absolutely! You can easily make stickers without a cutting machine. Design your stickers digitally, print them on sticker paper, and then use sharp scissors or a craft knife with a cutting mat to carefully cut them out by hand. Many beautiful stickers are made this way.
How do I make my stickers glossy?
To achieve a glossy finish, you have a couple of options. You can print directly onto glossy printable sticker paper. Alternatively, you can print on matte sticker paper and then apply a clear, self-adhesive glossy laminate sheet over the top, which also adds protection.
How do I make my stickers peel off easily?
The ease of peeling often depends on the sticker paper’s backing. Some sticker papers are designed with a scored or split backing that makes peeling very simple. If your paper doesn’t have this, try bending the sticker sheet slightly at a corner to help the sticker edge lift from the backing.
Our Top Recommended Finds
- Printable Vinyl Sticker Paper: This durable paper provides excellent print quality and water resistance, perfect for long-lasting stickers.
- Self-Adhesive Laminate Sheets: An essential for protecting your stickers from scratches, water, and UV fading, giving them a professional, finished look.
- Craft Knife and Self-Healing Cutting Mat: Indispensable tools for precise hand-cutting, allowing you to achieve clean lines and intricate shapes with ease.
Your Sticker Adventure Begins Now!
You now have all the knowledge and practical steps to start creating your own cute stickers.
From designing your first adorable character to peeling your finished creation, the process is rewarding and fun.
Don’t hesitate to experiment with different papers, laminates, and cutting techniques to find what works best for your unique style.
Grab your materials, fire up your printer, and start sticking your personality everywhere today!