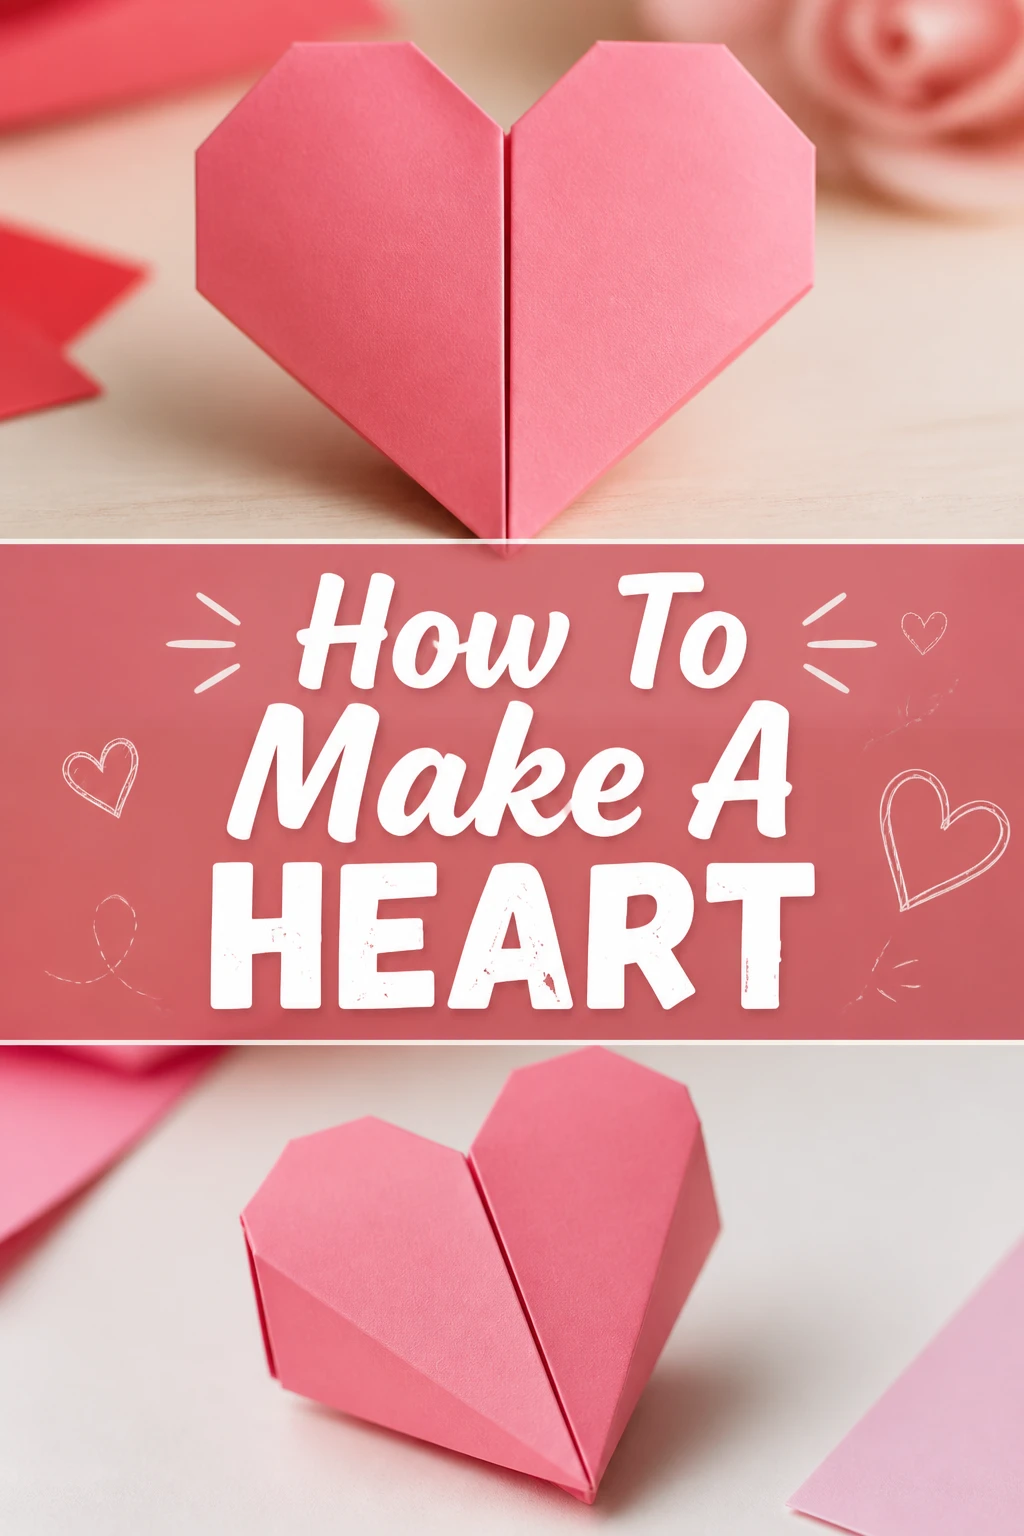
❤️ How To Make A Heart
Making a paper heart is one of the most rewarding ways to express affection through a simple, tactile craft.
I remember sitting at my kitchen table for hours as a child, perfecting the exact angle of every fold until the paper finally cooperated.
Over the years, I have taught hundreds of students how to master this specific origami design to ensure their results are crisp, symmetrical, and beautiful every time.
Quick Overview
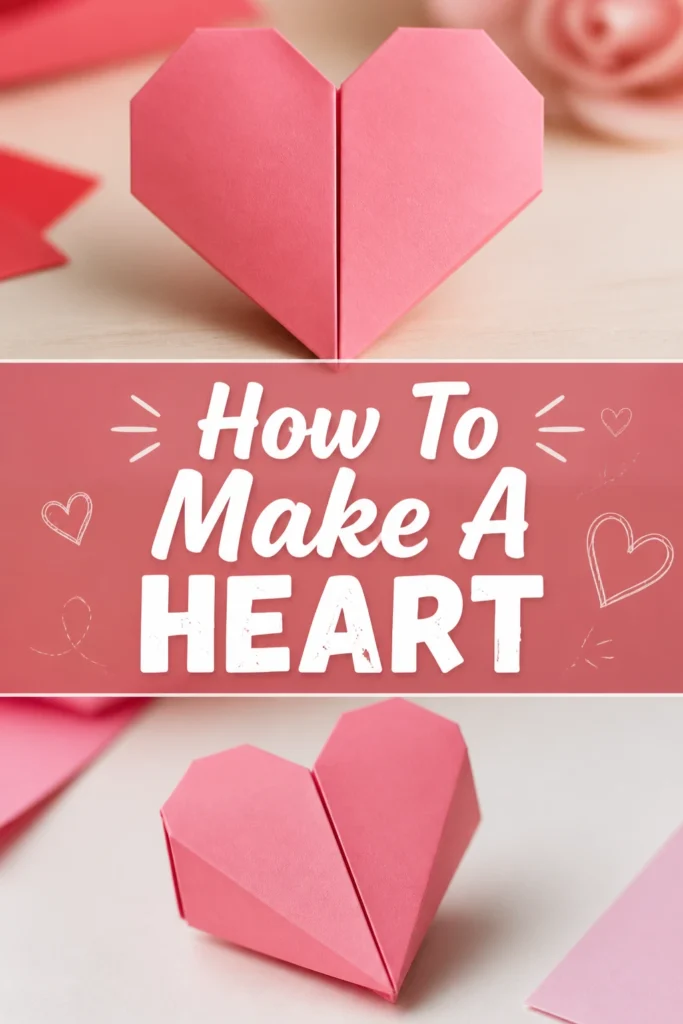
This guide focuses on creating a three-dimensional, “puffy” origami heart that stands out from flat cut-outs.
- Time needed: 10-15 minutes
- Difficulty: Intermediate
- What you’ll need: Square origami paper, a flat surface, and a steady hand.
Step-by-Step Instructions
Step 1: Select Your Paper
Choose a piece of paper that is perfectly square and has a manageable weight.
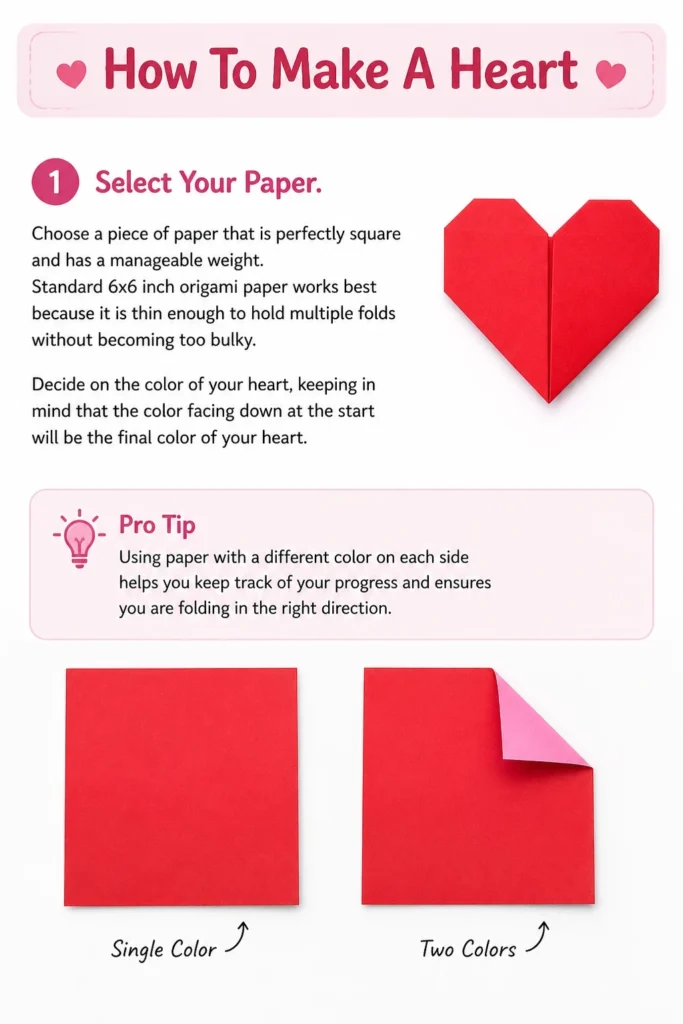
Standard 6×6 inch origami paper works best because it is thin enough to hold multiple folds without becoming too bulky.
Decide on the color of your heart, keeping in mind that the color facing down at the start will be the final color of your heart.
Pro Tip: Using paper with a different color on each side helps you keep track of your progress and ensures you are folding in the right direction.
Step 2: Create Initial Creases
Fold the paper in half diagonally to create a large triangle, making sure the corners align perfectly.
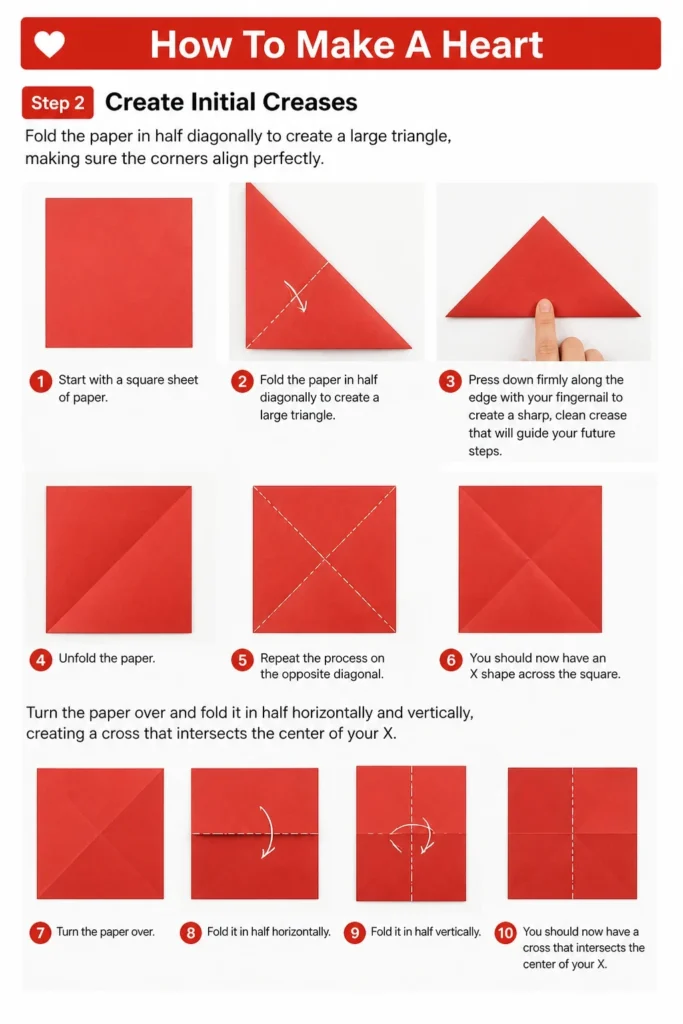
Press down firmly along the edge with your fingernail to create a sharp, clean crease that will guide your future steps.
Unfold the paper and repeat the process on the opposite diagonal so you have an “X” shape across the square.
Turn the paper over and fold it in half horizontally and vertically, creating a cross that intersects the center of your “X”.
Step 3: Form the Waterbomb Base
Collapse the paper along the creases you just made by pushing the left and right horizontal midpoints toward each other.
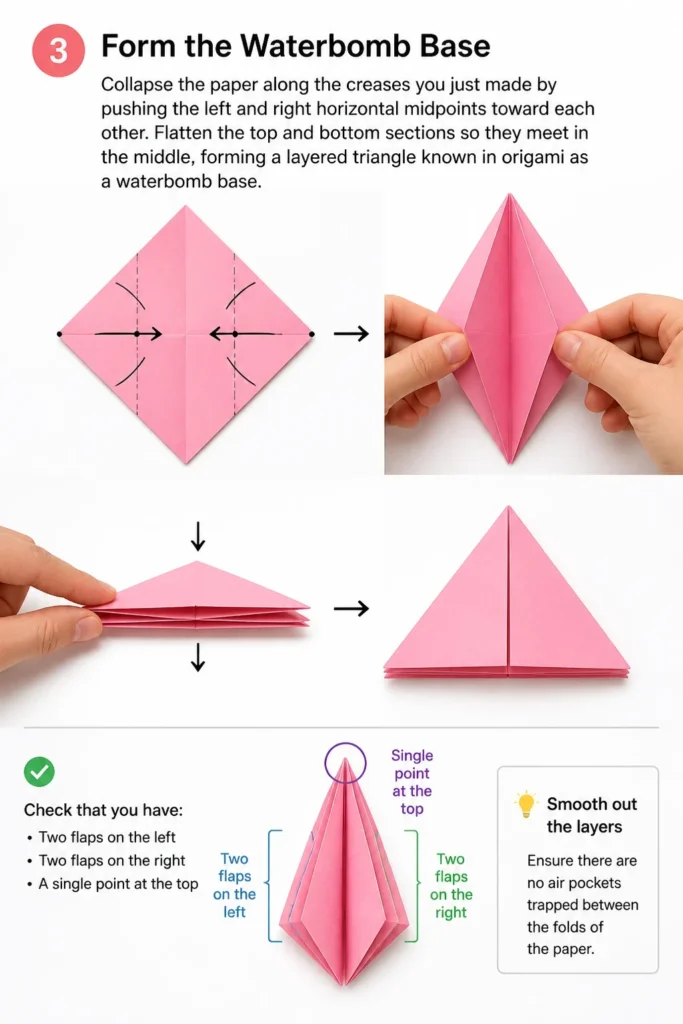
Flatten the top and bottom sections so they meet in the middle, forming a layered triangle known in origami as a “waterbomb base.”
Check that you have two flaps on the left and two flaps on the right, with a single point at the top.
Smooth out the layers to ensure there are no air pockets trapped between the folds of the paper.
Step 4: Fold the Bottom Flaps
Take the bottom right corner of the top layer and fold it up to meet the top peak of the triangle.
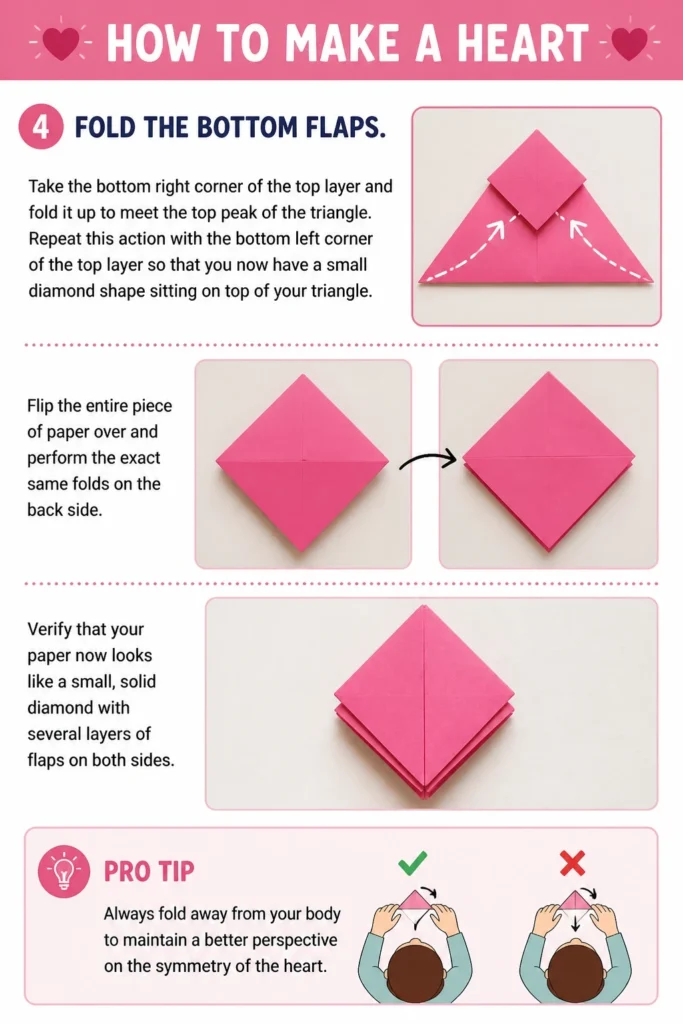
Repeat this action with the bottom left corner of the top layer so that you now have a small diamond shape sitting on top of your triangle.
Flip the entire piece of paper over and perform the exact same folds on the back side.
Verify that your paper now looks like a small, solid diamond with several layers of flaps on both sides.
Pro Tip: Always fold away from your body to maintain a better perspective on the symmetry of the heart.
Step 5: Create the Side Pockets
Identify the side corners of the diamond and fold them inward toward the center vertical line.
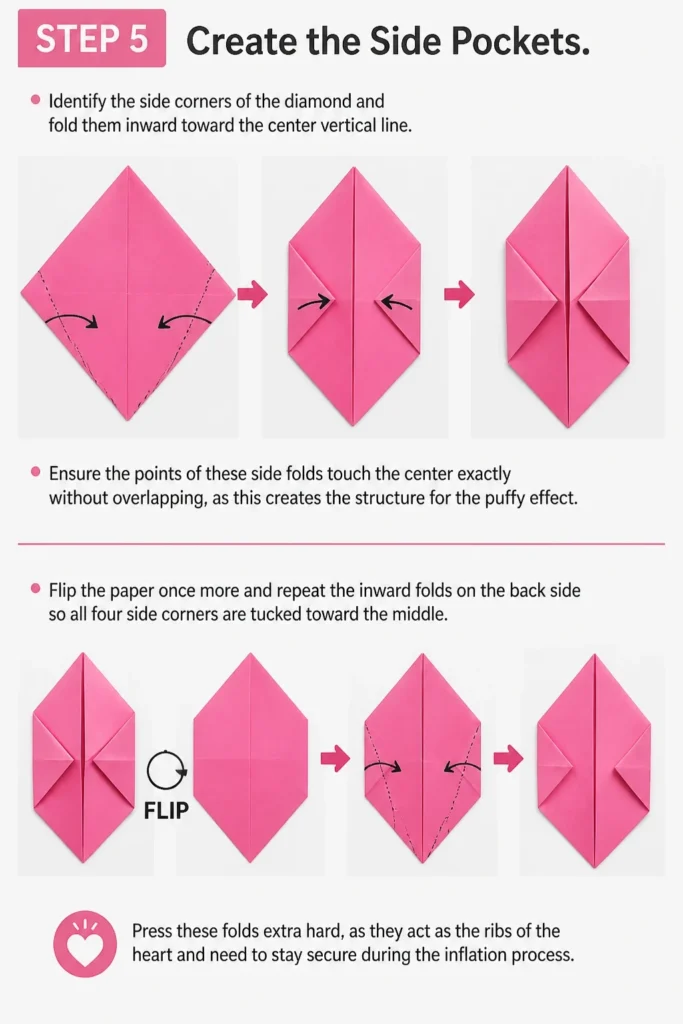
Ensure the points of these side folds touch the center exactly without overlapping, as this creates the structure for the “puffy” effect.
Flip the paper once more and repeat the inward folds on the back side so all four side corners are tucked toward the middle.
Press these folds extra hard, as they act as the “ribs” of the heart and need to stay secure during the inflation process.
Step 6: Tuck the Top Flaps
Look at the top of your diamond, where you will see four loose triangular flaps pointing upward.
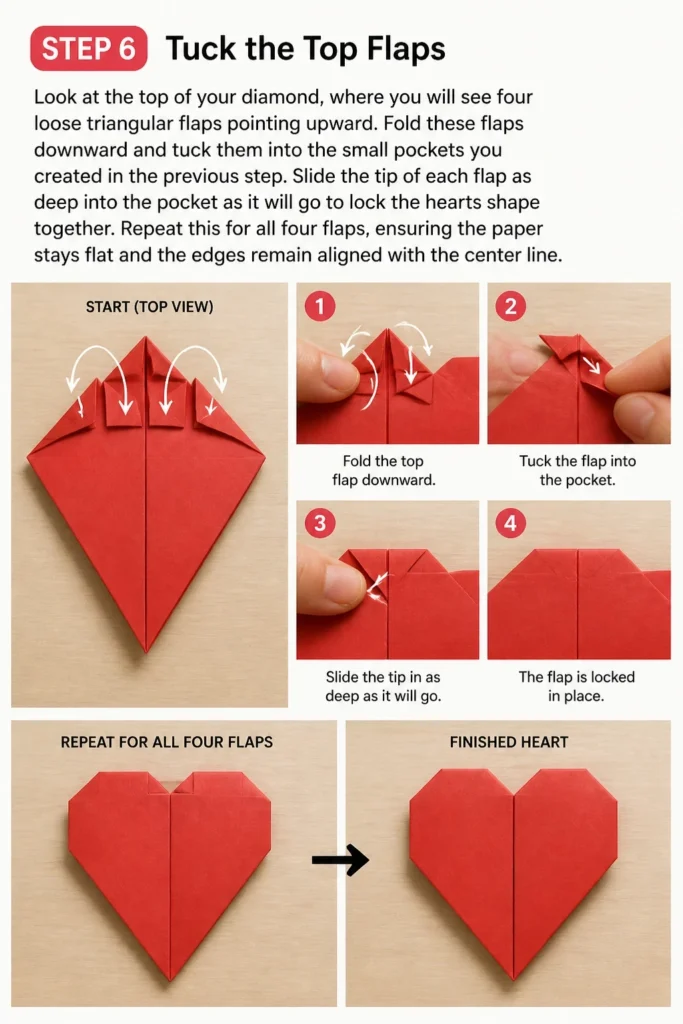
Fold these flaps downward and tuck them into the small pockets you created in the previous step.
Slide the tip of each flap as deep into the pocket as it will go to lock the heart’s shape together.
Repeat this for all four flaps, ensuring the paper stays flat and the edges remain aligned with the center line.
Step 7: Inflate the Heart
Locate the small hole at the very bottom point of the paper structure where all the folds meet.
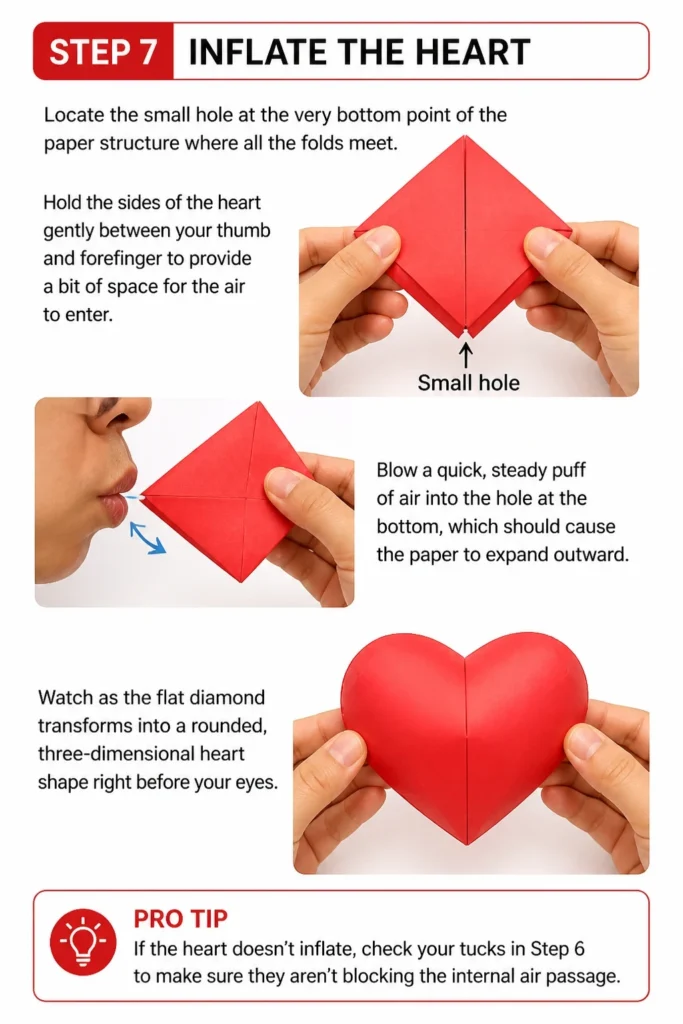
Hold the sides of the heart gently between your thumb and forefinger to provide a bit of space for the air to enter.
Blow a quick, steady puff of air into the hole at the bottom, which should cause the paper to expand outward.
Watch as the flat diamond transforms into a rounded, three-dimensional heart shape right before your eyes.
Pro Tip: If the heart doesn’t inflate, check your tucks in Step 6 to make sure they aren’t blocking the internal air passage.
Step 8: Shape the Lobes
Pinch the top center of the heart where the two lobes meet to define the classic “V” shape of the heart’s top.
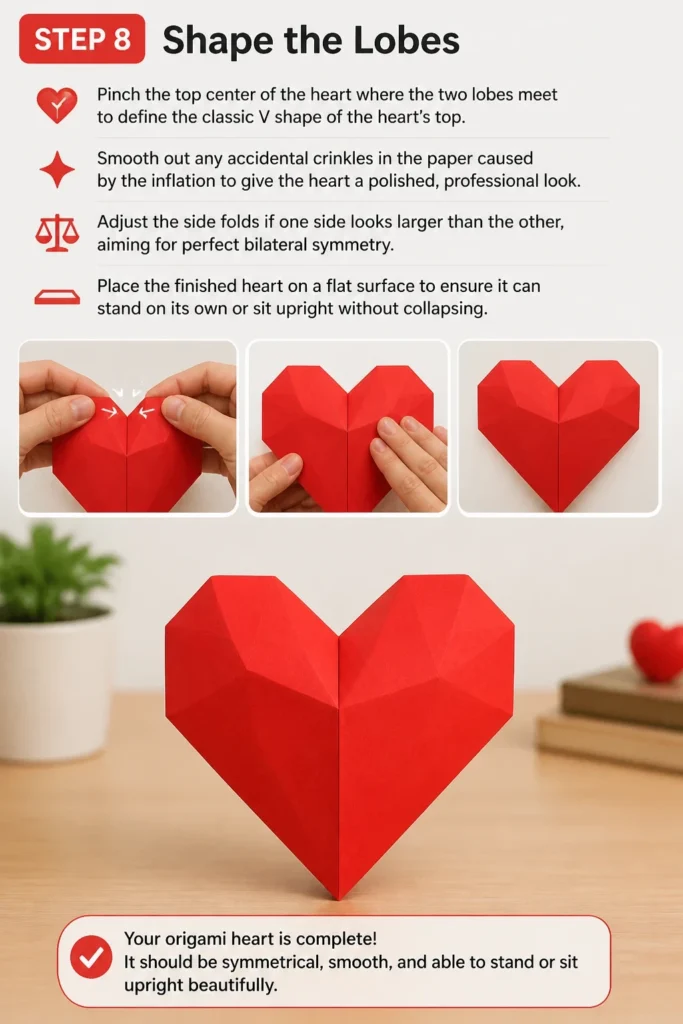
Smooth out any accidental crinkles in the paper caused by the inflation to give the heart a polished, professional look.
Adjust the side folds if one side looks larger than the other, aiming for perfect bilateral symmetry.
Place the finished heart on a flat surface to ensure it can stand on its own or sit upright without collapsing.
Common Mistakes to Avoid
Using Construction Paper
Construction paper is far too thick and fibrous for this specific project. The multiple layers involved in the waterbomb base and the tucking steps will cause the paper to tear or become impossible to fold accurately.
Stick to dedicated origami paper or thin gift wrap for the best results. If the paper is too stiff, it will not inflate properly, and you will end up with a crumpled mess instead of a heart.
Ignoring Crease Sharpness
Many beginners simply press the paper down with their thumbs, which creates soft, rounded edges. In origami, your creases need to be as sharp as a razor to ensure the geometry of the heart remains intact.
Use the back of a fingernail or a bone folder tool to burnish every single fold. Sharp creases make the final inflation step much easier because the paper knows exactly where it is supposed to bend.
Over-Inflating the Paper
It is tempting to blow as hard as possible to get the heart to pop open instantly. However, too much air pressure can force the tucked flaps out of their pockets or even burst the seams of the paper.
Use short, controlled breaths. It is better to blow several small puffs and manually adjust the shape than to risk destroying the integrity of the folds with one massive breath.
Troubleshooting
The Heart Won’t Stay Tucked
If the flaps keep popping out of the pockets, your folds in Step 5 might be too loose. Try unfolding the pockets slightly and re-creasing them more tightly toward the center line.
You can also use a tiny drop of glue or a small piece of double-sided tape inside the pocket if you plan on gifting the heart and want it to be extra durable. However, proper folding should usually be enough to hold the tension.
The Shape is Lopsided
Lopsidedness usually stems from the very first diagonal folds in Step 2. If those initial triangles weren’t perfectly aligned, every subsequent fold will be slightly off-center.
To fix this, look at which side is larger and gently massage the paper toward the center. If the discrepancy is significant, it is often faster and more satisfying to start over with a fresh square of paper, paying closer attention to the initial alignment.
Key Takeaways
- Precision is vital: Every fold must be perfectly aligned with the previous one to maintain symmetry.
- Paper weight matters: Thin, square paper is the only way to achieve the 3D puffy effect without tearing.
- Sharp creases save time: Using a hard edge to flatten folds ensures the heart holds its shape after inflation.
- Gentle inflation: Use small puffs of air to avoid dislodging the locking mechanisms of the paper.
- Symmetry check: Constantly compare the left side to the right side throughout the folding process.
Frequently Asked Questions
Can I use rectangular printer paper?
No, you cannot use standard rectangular paper directly for this guide. You must first trim the printer paper into a perfect square by folding one corner down to the opposite edge and cutting off the remaining strip. Once you have a perfect square, the instructions will work exactly as described.
What is the best size of paper for beginners?
A 6-inch by 6-inch (15cm) square is the “Goldilocks” size for beginners. It is large enough to handle easily without your fingers getting in the way, but small enough that the paper maintains enough structural integrity to stay puffy. Smaller paper requires much more finger dexterity and precision.
How do I make the heart look shiny?
To get a glossy finish, look for foil-backed origami paper or “kami” paper with a silk finish. Avoid using glitter paper, as the glitter often sheds and makes the creases thick and difficult to manage. A metallic red foil paper is particularly striking for this specific 3D heart design.
Can I write a message inside the heart?
Yes, you can write a small message on the center of the paper before you start folding. However, keep in mind that the message will be hidden inside the “puffy” part of the heart once it is finished. The recipient would have to carefully deflate or unfold the heart to read what you wrote.
Our Top Recommended Finds
- Tuttle Origami Paper: This brand offers a wide variety of double-sided colors and the perfect thickness for 3D folds.
- Bone Folder Tool: A small plastic or bone tool that helps you create professional-grade creases without hurting your fingertips.
- Self-Healing Cutting Mat: Great for ensuring your paper is perfectly square if you are cutting your own sheets from larger stock.
Taking Your Paper Craft To The Next Level
Now that you have mastered the 3D puffy heart, you can experiment with different sizes to create a whole collection of paper tokens. These hearts look fantastic when strung together as a garland or placed in a clear glass jar as a thoughtful gift.
If you enjoyed this process, you might want to try making an origami crane or a paper rose next. These projects use similar “base” folds but lead to entirely different geometric results.
Grab another sheet of paper right now and try making a second heart immediately. You will find that your hands remember the movements much better the second time around, and the result will be even cleaner than the first.