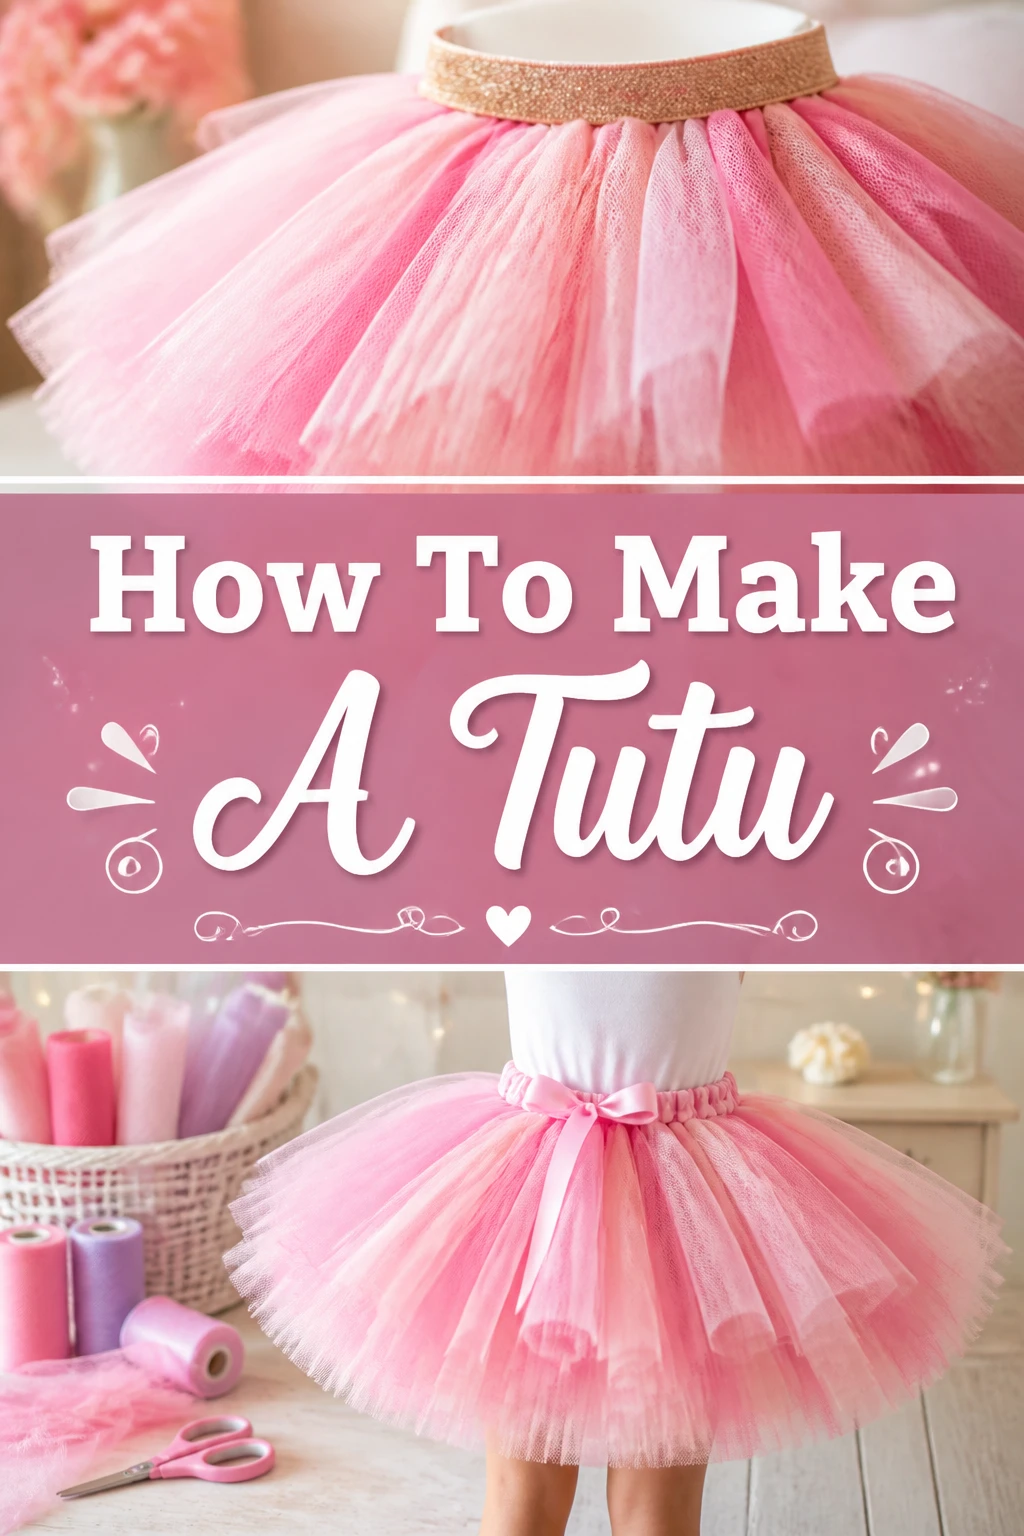
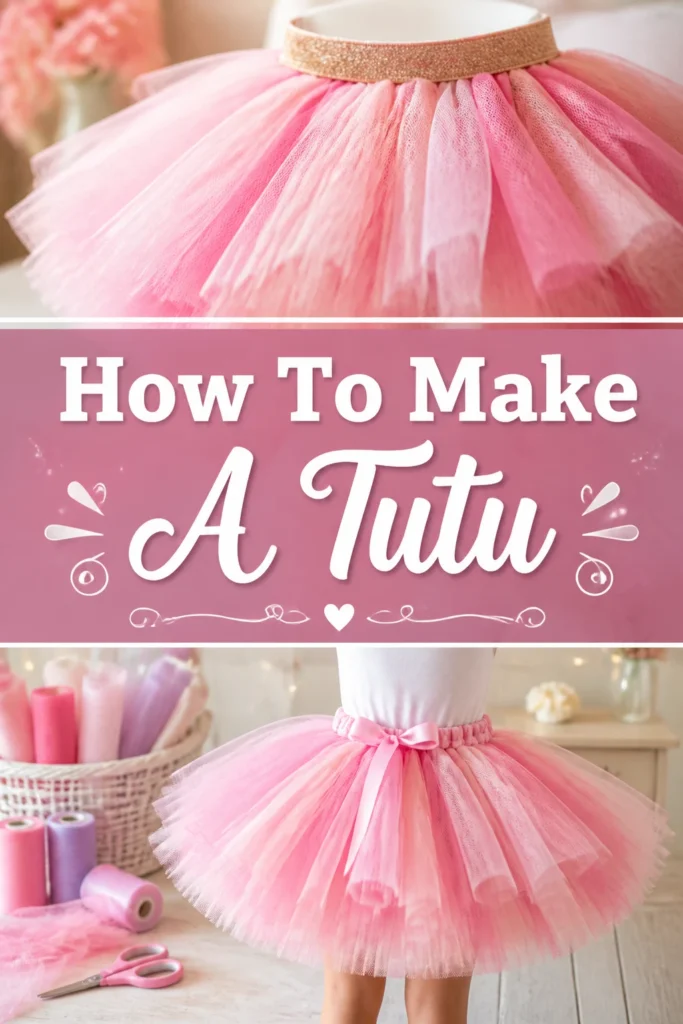
How To Make A Tutu
Creating a beautiful tutu can feel like a magical experience, bringing joy to anyone who wears it.
I remember the first time my niece saw a tutu I made; her eyes lit up, and she immediately started twirling. This guide will help you capture that same delight.
You can trust these instructions to be clear and practical, based on years of crafting fun and seeing what truly works.
Quick Overview
This guide will walk you through crafting a charming, no-sew tutu perfect for dress-up, parties, or even a unique gift.
You’ll learn how to select materials, cut tulle with precision, and assemble your tutu using a simple knotting technique.
- Time needed: 1-3 hours (depending on size and desired fullness)
- Difficulty: Beginner
- What you’ll need: Tulle, elastic, scissors, measuring tape
Step-by-Step Instructions
Step 1: Gather Your Materials
Before beginning, ensure you have all necessary items laid out and ready to use. This prevents interruptions and keeps your crafting flow smooth.
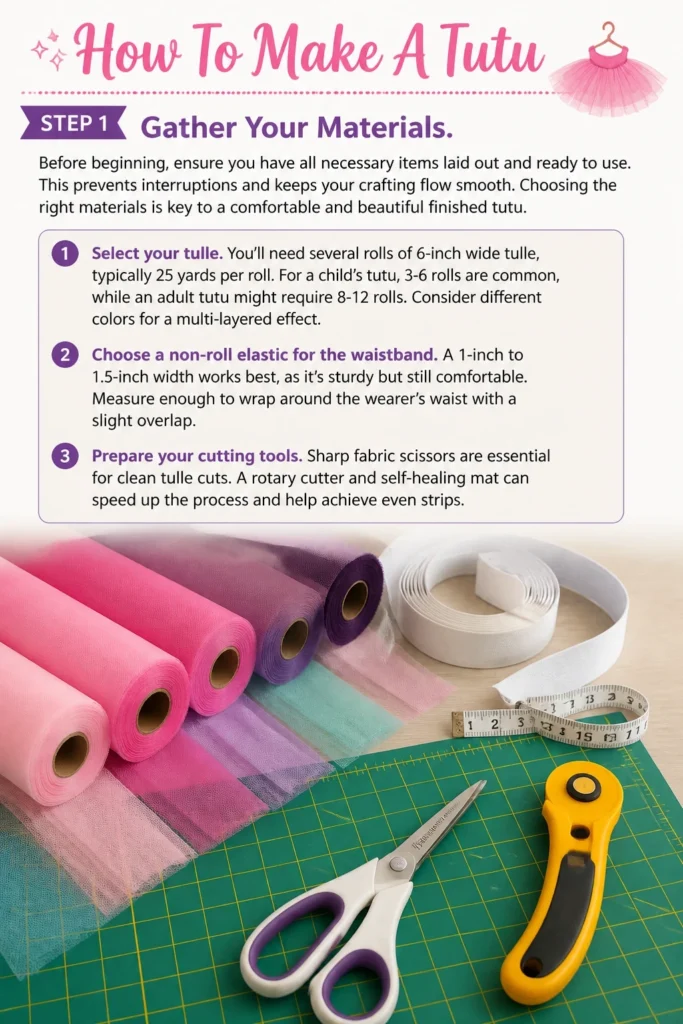
Choosing the right materials is key to a comfortable and beautiful finished tutu.
- Select your tulle. You’ll need several rolls of 6-inch wide tulle, typically 25 yards per roll. For a child’s tutu, 3-6 rolls are common, while an adult tutu might require 8-12 rolls. Consider different colors for a multi-layered effect.
- Choose a non-roll elastic for the waistband. A 1-inch to 1.5-inch width works best, as it’s sturdy but still comfortable. Measure enough to wrap around the wearer’s waist with a slight overlap.
- Prepare your cutting tools. Sharp fabric scissors are essential for clean tulle cuts. A rotary cutter and self-healing mat can speed up the process significantly if you have them.
- Grab a measuring tape. This will be crucial for accurately sizing your elastic and cutting your tulle strips to the correct length.
Pro Tip: Opt for a good quality, soft tulle. It drapes better and is less scratchy against the skin, making the tutu more comfortable to wear for extended periods.
Step 2: Measure and Cut the Elastic Waistband
The waistband forms the foundation of your tutu, so accuracy here is paramount for a good fit.
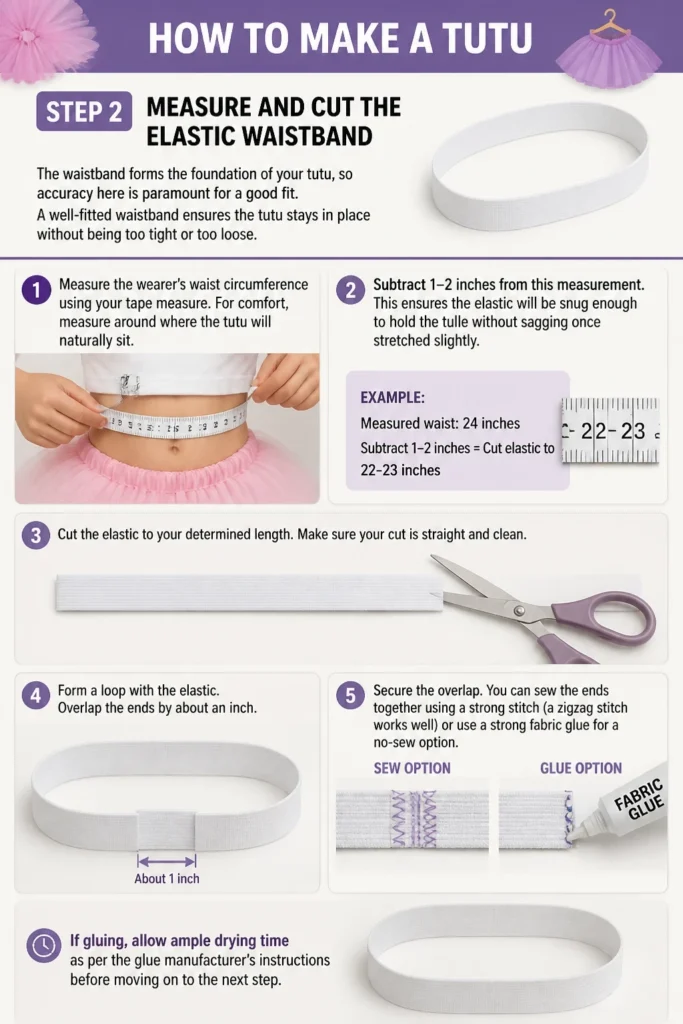
A well-fitted waistband ensures the tutu stays in place without being too tight or too loose.
- Measure the wearer’s waist circumference using your tape measure. For comfort, measure around where the tutu will naturally sit.
- Subtract 1-2 inches from this measurement. This ensures the elastic will be snug enough to hold the tulle without sagging once stretched slightly.
- Cut the elastic to your determined length. Make sure your cut is straight and clean.
- Form a loop with the elastic. Overlap the ends by about an inch.
- Secure the overlap. You can sew the ends together using a strong stitch (a zigzag stitch works well) or use a strong fabric glue for a no-sew option. If gluing, allow ample drying time before proceeding.
Pro Tip: If you’re unsure about the exact waist size, consider making the elastic slightly longer and using a safety pin to temporarily hold it. You can then adjust and permanently secure it once you’ve confirmed the perfect fit.
Step 3: Prepare Your Tulle Strips
Cutting the tulle strips consistently is important for a uniform and appealing tutu.
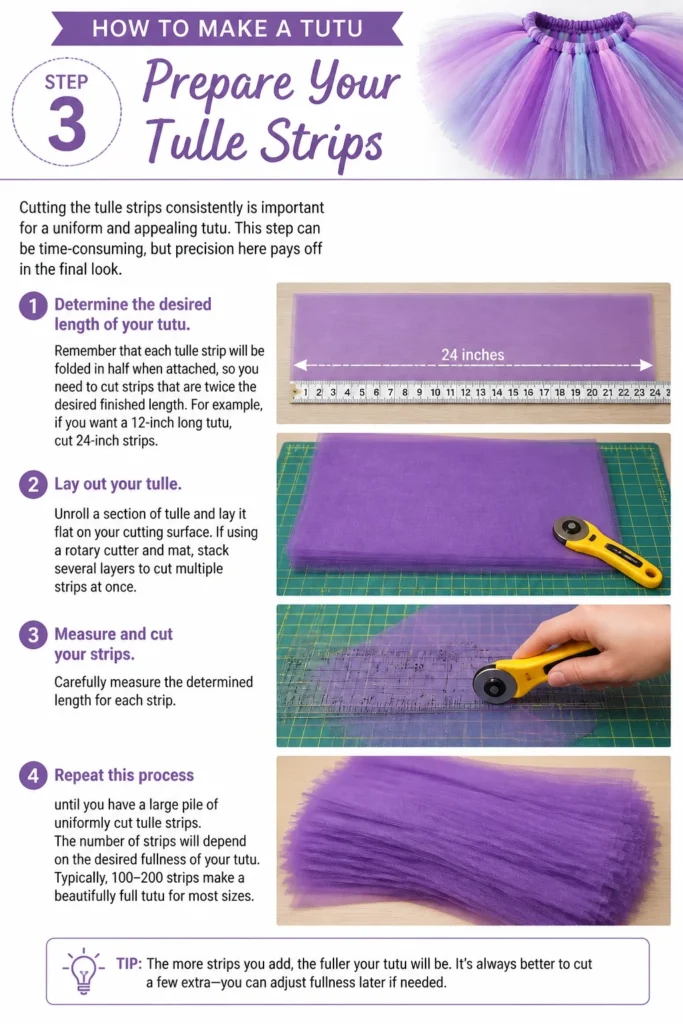
This step can be time-consuming, but precision here pays off in the final look.
- Determine the desired length of your tutu. Remember that each tulle strip will be folded in half when attached, so you need to cut strips that are twice the desired finished length. For example, if you want a 12-inch long tutu, cut 24-inch strips.
- Lay out your tulle. Unroll a section of tulle and lay it flat on your cutting surface. If using a rotary cutter and mat, stack several layers to cut multiple strips at once.
- Measure and cut your strips. Carefully measure the determined length for each strip.
- Repeat this process until you have a large pile of uniformly cut tulle strips. The number of strips will depend on the desired fullness and the size of the tutu. A good starting point is around 50-100 strips for a child’s tutu.
Pro Tip: For perfectly even strips, create a cardboard template. Cut a piece of cardboard to the exact length you need for your folded tulle strips. Wrap the tulle around the cardboard multiple times, then cut along both edges of the cardboard to get many identical strips quickly.
Step 4: Attach Tulle to the Waistband
This is where your tutu starts to take shape, using a simple yet effective knotting technique.
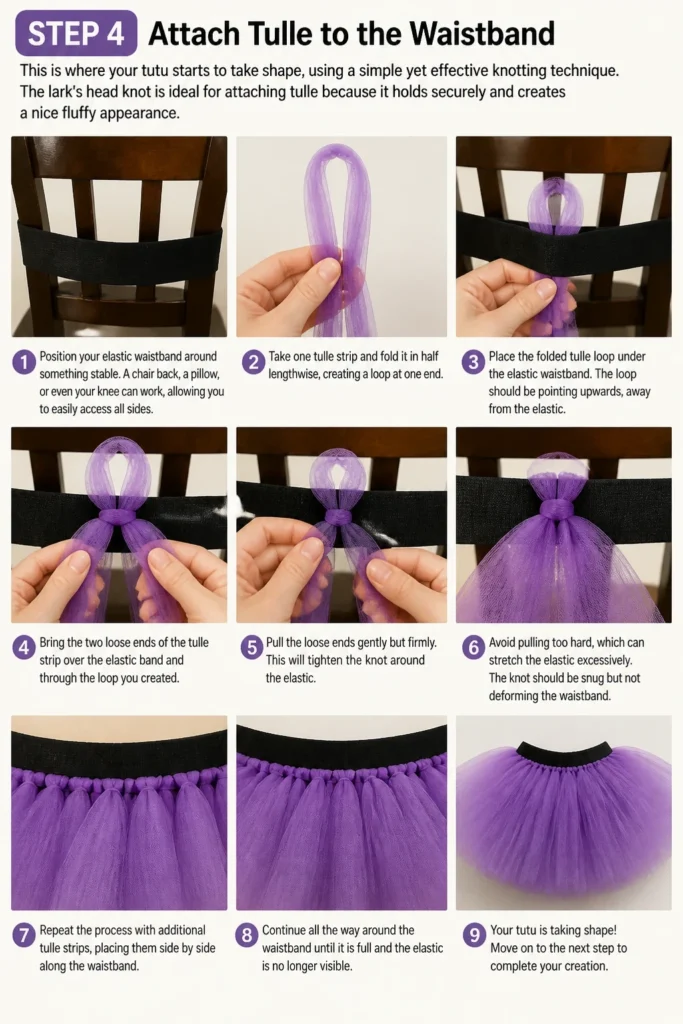
The lark’s head knot is ideal for attaching tulle because it holds securely and creates a nice fluffy appearance.
- Position your elastic waistband around something stable. A chair back, a pillow, or even your knee can work, allowing you to easily access all sides.
- Take one tulle strip and fold it in half lengthwise, creating a loop at one end.
- Place the folded tulle loop under the elastic waistband. The loop should be pointing upwards, away from the elastic.
- Bring the two loose ends of the tulle strip over the elastic band and through the loop you created.
- Pull the loose ends gently but firmly. This will tighten the knot around the elastic. Avoid pulling too hard, which can stretch the elastic excessively or tear the tulle.
- Slide the knot into place. Push it snugly against previously tied knots, ensuring there are no gaps between the tulle strips.
- Continue this process, attaching tulle strips one by one, until the entire elastic waistband is covered. Alternate colors if you’re creating a multi-colored tutu.
Pro Tip: For extra fullness, you can use two tulle strips at once for each knot. Fold both strips in half together and tie them as a single unit. This doubles the volume without doubling the number of knots.
Step 5: Fluff and Shape the Tutu
Once all the tulle strips are attached, your tutu will likely look a bit flat and disheveled.
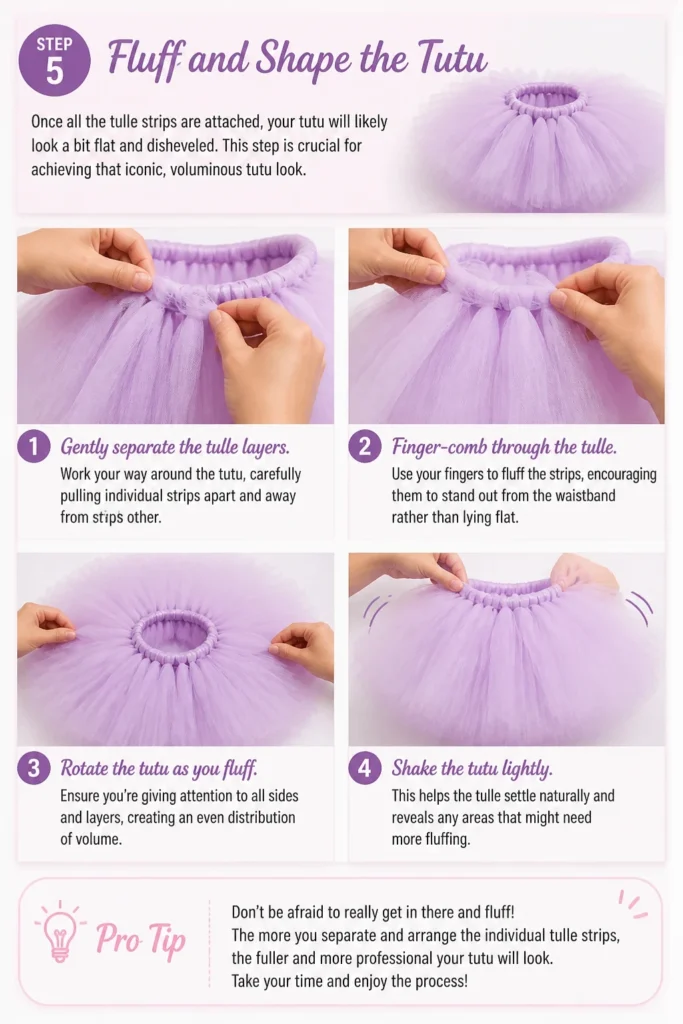
This step is crucial for achieving that iconic, voluminous tutu look.
- Gently separate the tulle layers. Work your way around the tutu, carefully pulling individual strips apart and away from each other.
- Finger-comb through the tulle. Use your fingers to fluff the strips, encouraging them to stand out from the waistband rather than lying flat.
- Rotate the tutu as you fluff. Ensure you’re giving attention to all sides and layers, creating an even distribution of volume.
- Shake the tutu lightly. This helps the tulle settle naturally and reveals any areas that might need more fluffing.
Pro Tip: Don’t be afraid to really get in there and fluff! The more you separate and arrange the individual tulle strips, the fuller and more whimsical your tutu will appear. Think of it like gently teasing hair for volume.
Step 6: Trim for Evenness (Optional)
Even with careful cutting, some tulle strips might appear longer or shorter than others once the tutu is fluffed.
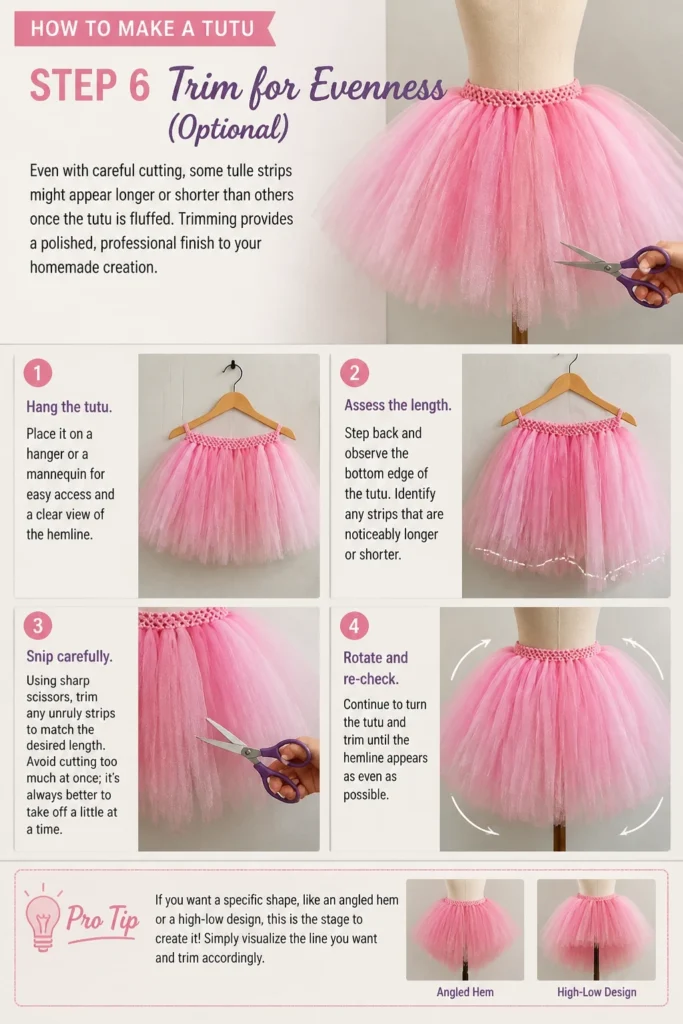
Trimming provides a polished, professional finish to your homemade creation.
- Hang the tutu. Place it on a hanger or a mannequin for easy access and a clear view of the hemline.
- Assess the length. Step back and observe the bottom edge of the tutu. Identify any strips that are noticeably longer or shorter.
- Snip carefully. Using sharp scissors, trim any unruly strips to match the desired length. Avoid cutting too much at once; it’s always better to take off a little at a time.
- Rotate and re-check. Continue to turn the tutu and trim until the hemline appears as even as possible.
Pro Tip: If you want a specific shape, like an angled hem or a high-low design, this is the stage to carefully sculpt the tulle with your scissors. Just remember to cut small amounts and continuously check your progress.
Step 7: Add Embellishments
Personalizing your tutu with embellishments makes it truly unique and reflects the wearer’s style.
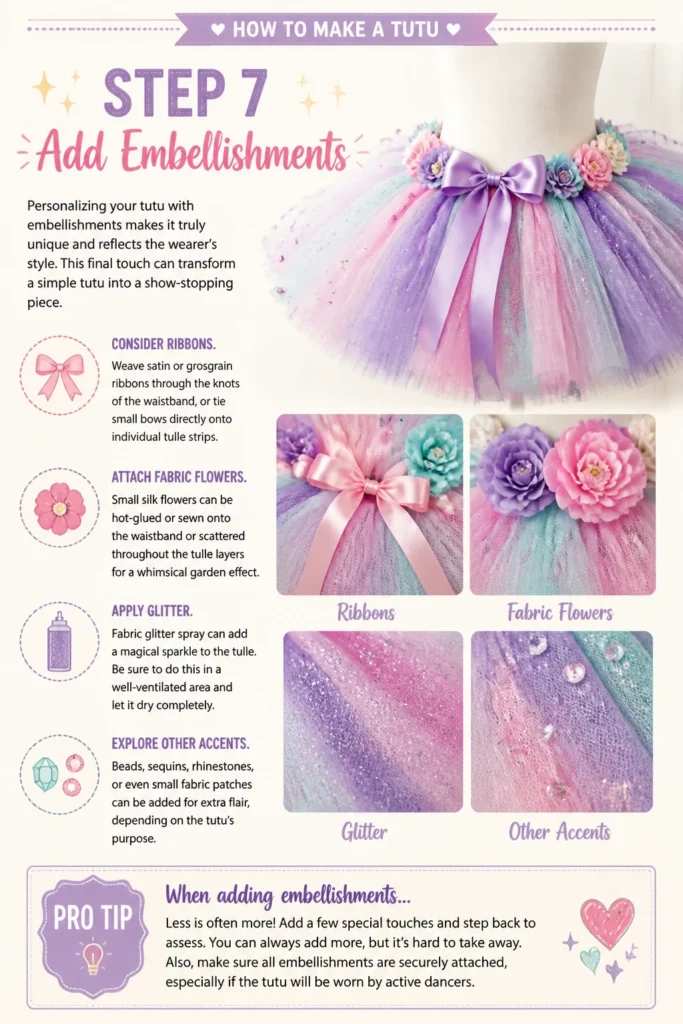
This final touch can transform a simple tutu into a show-stopping piece.
- Consider ribbons. Weave satin or grosgrain ribbons through the knots of the waistband, or tie small bows directly onto individual tulle strips.
- Attach fabric flowers. Small silk flowers can be hot-glued or sewn onto the waistband or scattered throughout the tulle layers for a whimsical garden effect.
- Apply glitter. Fabric glitter spray can add a magical sparkle to the tulle. Be sure to do this in a well-ventilated area and let it dry completely.
- Explore other accents. Beads, sequins, rhinestones, or even small fabric patches can be added for extra flair, depending on the tutu’s purpose.
Pro Tip: When adding embellishments, consider the age of the wearer. For very young children, avoid small, easily detachable items that could pose a choking hazard. Secure all additions very firmly.
Common Mistakes to Avoid
Using the Wrong Type of Elastic
Many beginners use thin, flimsy elastic or elastic that rolls easily. This can lead to a waistband that sags, stretches out quickly, or constantly rolls down, making the tutu uncomfortable and ill-fitting. Always choose a sturdy, non-roll elastic, typically 1 to 1.5 inches wide, to provide a stable and comfortable foundation for your tutu.
Inconsistent Tulle Strip Lengths
Cutting tulle strips by eye without careful measurement often results in an uneven hemline, even after trimming. This can make the tutu look messy and less professional. Take the time to measure each strip accurately or use a consistent method like a cardboard template to ensure all your tulle pieces are the same length before knotting.
Tying Knots Too Loosely or Too Tightly
Knots that are too loose can cause tulle strips to slip out or leave gaps, making the tutu sparse. Conversely, tying knots too tightly can overstretch the elastic waistband, causing it to lose its elasticity or become uncomfortable. Aim for a firm but gentle pull on the lark’s head knot, ensuring it’s snug against the elastic without distorting it.
Not Fluffing the Tutu Adequately
After attaching all the tulle, a tutu can appear flat and uninspired if it’s not properly fluffed. Many crafters skip or rush this crucial step. Taking the time to gently separate and arrange each tulle strip by hand will transform a flat collection of fabric into a voluminous, airy, and beautiful tutu.
Troubleshooting
Tutu Looks Sparse or Gappy
If your finished tutu appears thin or has noticeable gaps between the tulle strips, it’s likely due to not using enough tulle or not pushing the knots close enough together. To fix this, you can add more tulle strips by simply tying new knots into the existing spaces on the waistband. For future projects, plan to use more tulle than you think you’ll need, especially for a very full look.
Tutu is Uneven at the Bottom
An uneven hemline is a common issue, often resulting from inconsistent tulle strip cutting or variations in knot tightness. To remedy this, hang the tutu from a hook or a hanger at eye level. Carefully go around the entire hem, using sharp scissors to trim any longer pieces down to match the shortest strip, creating a more uniform appearance.
Elastic Waistband Rolls or Twists
If your elastic waistband tends to roll or twist when worn, it might be too thin or not sufficiently secured. To prevent this, ensure you are using a wider, non-roll elastic. If the issue persists, you can try stitching a few vertical lines through the elastic where the ends overlap to reinforce its structure and prevent it from folding.
Key Takeaways
- Always begin by carefully measuring the wearer’s waist to ensure a perfectly fitting elastic waistband.
- Precision in cutting tulle strips to the correct, consistent length is vital for a neat and even tutu.
- Utilize the lark’s head knot method for securely attaching tulle to the elastic, pulling firmly but not excessively.
- Dedicate time to thoroughly fluff and shape the tutu after assembly to achieve maximum volume and a beautiful silhouette.
- Don’t hesitate to personalize your tutu with ribbons, flowers, or glitter to make it truly unique.
- Check for and correct any unevenness in the hem by carefully trimming the tulle once the tutu is complete.
Frequently Asked Questions
Can I sew a tutu instead of using the no-sew method?
Absolutely, you can sew a tutu! A sewn tutu often involves gathering tulle onto a fabric waistband or directly onto a skirt base. This method can create a very durable and professional finish, but it does require basic sewing skills and a sewing machine. The no-sew method is generally preferred for its simplicity and speed.
How much tulle do I really need for a child’s tutu?
The amount of tulle needed depends on the desired fullness and the child’s size. For a standard knee-length child’s tutu, plan on using anywhere from 3 to 6 rolls of 6-inch wide, 25-yard tulle. If you want a very dense, fluffy tutu, it’s always better to have an extra roll on hand rather than running out midway through the project.
How do I wash a handmade tutu?
Handmade tutus, especially those made with delicate tulle and embellishments, should be spot cleaned or hand-washed very gently. Fill a basin with cool water and a mild detergent, then swish the tutu gently. Rinse thoroughly, then hang to air dry, allowing the tulle to drip without wringing. Avoid machine washing or drying, as this can damage the tulle and embellishments.
Can I make an adult-sized tutu using this method?
Yes, this no-sew method works perfectly for adult-sized tutus! The main differences will be the length of the elastic waistband and the sheer quantity of tulle required. You’ll need a much longer elastic and significantly more tulle rolls (typically 8-12 or more, depending on desired fullness and length). The steps for cutting and knotting remain the same.
Our Top Recommended Finds
- 6-inch Wide Tulle Rolls: Essential for a no-sew tutu, these rolls come in a vast array of colors and are easy to work with.
- Non-Roll Elastic (1.5 inches wide): Provides a sturdy and comfortable waistband that won’t twist or sag, ensuring your tutu stays put.
- Rotary Cutter and Self-Healing Mat: While optional, these tools drastically speed up the tulle cutting process and ensure perfectly straight, even strips.
Your Tutu Adventure Awaits
You now have all the knowledge and practical steps to create a beautiful, custom tutu.
The satisfaction of crafting something by hand, especially something so whimsical, is incredibly rewarding.
Don’t stop here! Consider making tutus in different colors, lengths, or for various occasions. Each one is an opportunity to express creativity.
Embrace the joy of making and see where your imagination takes you next. Why not start gathering your materials today?