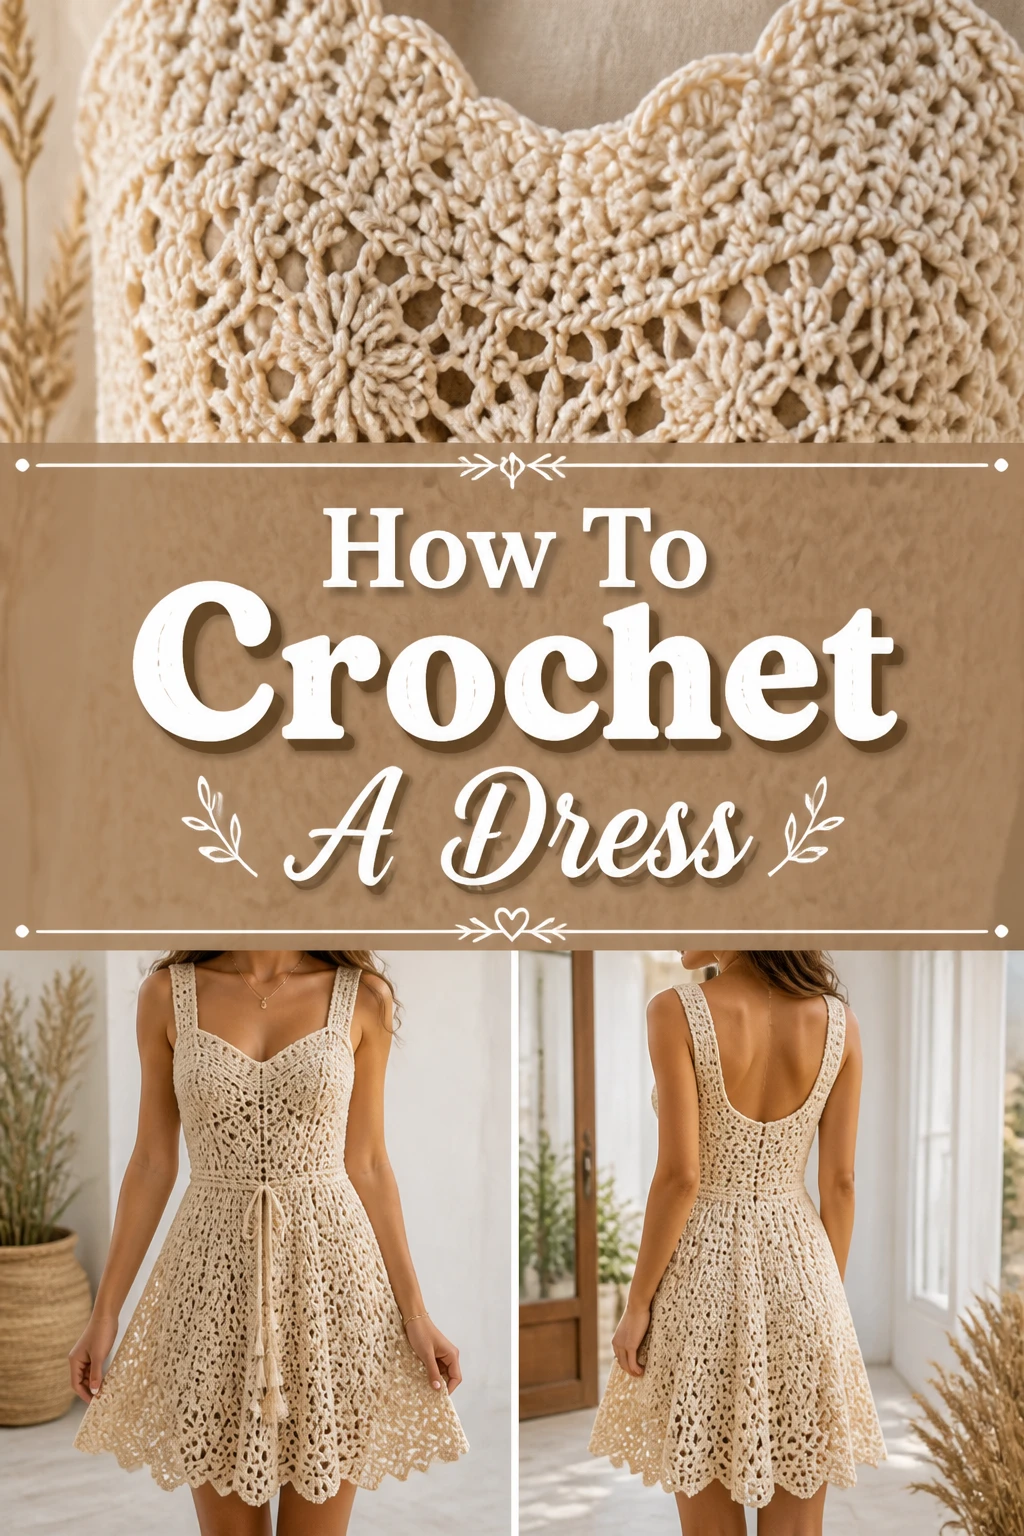
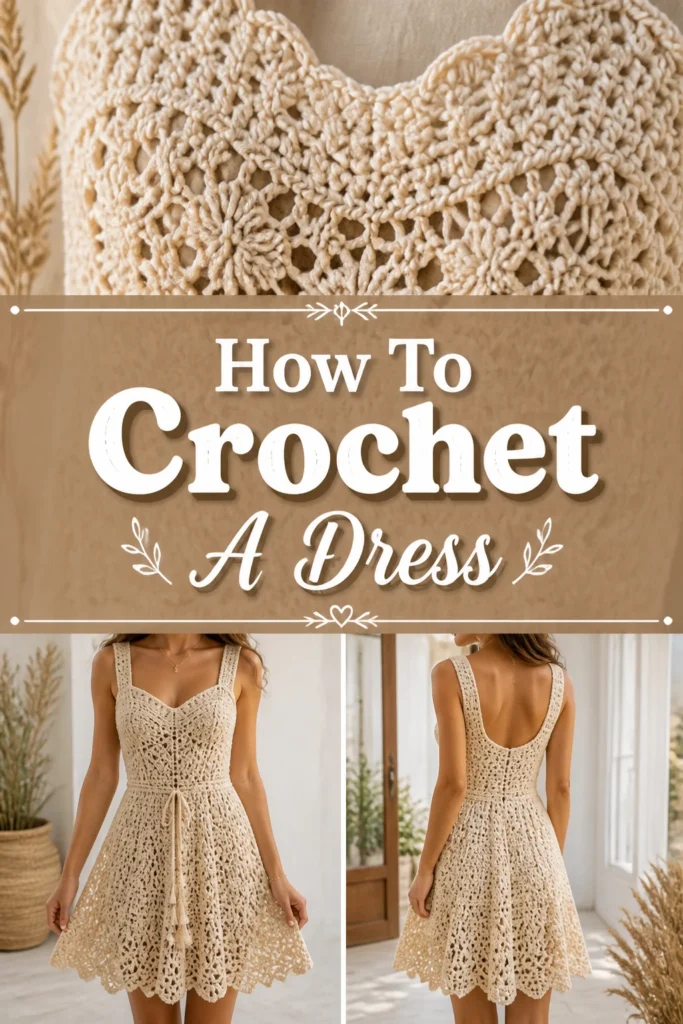
👗 How To Crochet A Dress
Dreaming of a beautiful, handmade dress that fits you perfectly? Crocheting your own garment might seem daunting, but it’s an incredibly rewarding journey. I remember the thrill of completing my first wearable piece – a simple summer top – and realizing the endless possibilities.
This guide will walk you through each stitch and decision, building your confidence to create a stunning crocheted dress. You’ll gain the skills to craft a unique, stylish piece you’ll be proud to wear.
Quick Overview
Creating a crocheted dress involves careful planning, consistent tension, and a bit of patience. You’ll learn how to choose the right yarn, take accurate measurements, and assemble your garment.
- Time needed: 40-80 hours (spread over several weeks, depending on complexity and speed)
- Difficulty: Intermediate
- What you’ll need: Yarn, crochet hooks, measuring tape, stitch markers, scissors, yarn needle.
Step-by-Step Instructions
Step 1: Gather Your Inspiration and Supplies
Before you even pick up a hook, visualize the dress you want to make. Consider the style, length, and overall feel. Look at patterns online or in books to get ideas.
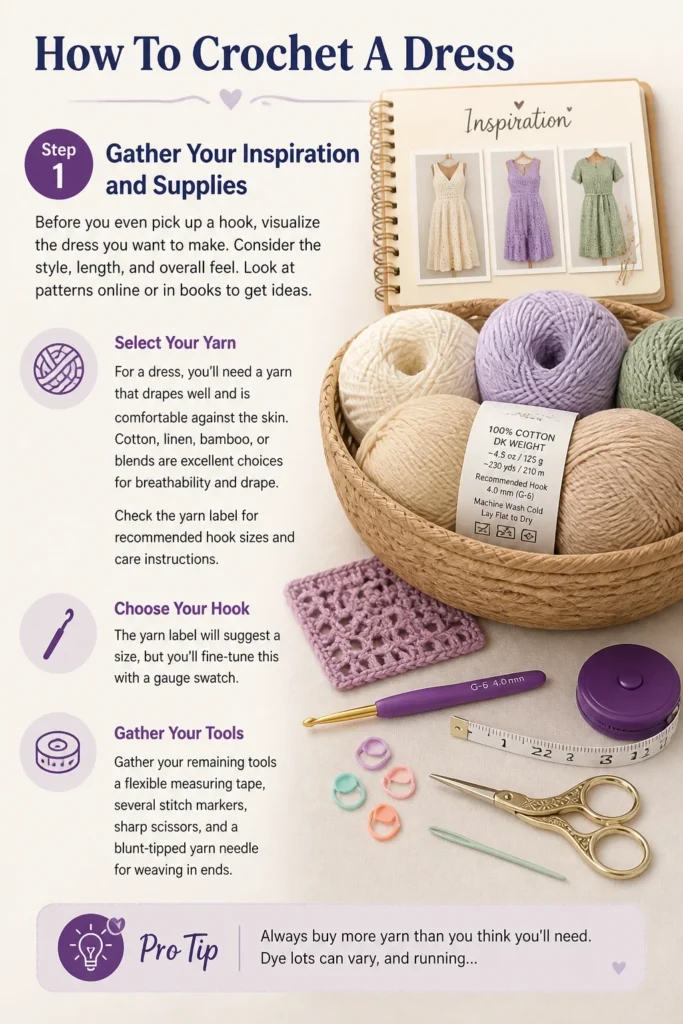
Once you have a vision, select your yarn. For a dress, you’ll need a yarn that drapes well and is comfortable against the skin. Cotton, linen, bamboo, or blends are excellent choices for breathability and drape. Check the yarn label for recommended hook sizes and care instructions.
Next, choose your crochet hook. The yarn label will suggest a size, but you’ll fine-tune this with a gauge swatch. Gather your remaining tools: a flexible measuring tape, several stitch markers, sharp scissors, and a blunt-tipped yarn needle for weaving in ends.
Pro Tip: Always buy more yarn than you think you’ll need. Dye lots can vary, and running out mid-project is frustrating. It’s better to have a little extra than not enough.
Step 2: Take Accurate Measurements
A well-fitting dress starts with precise measurements. Grab your measuring tape and ask a friend for help if possible, as some measurements are hard to take alone.
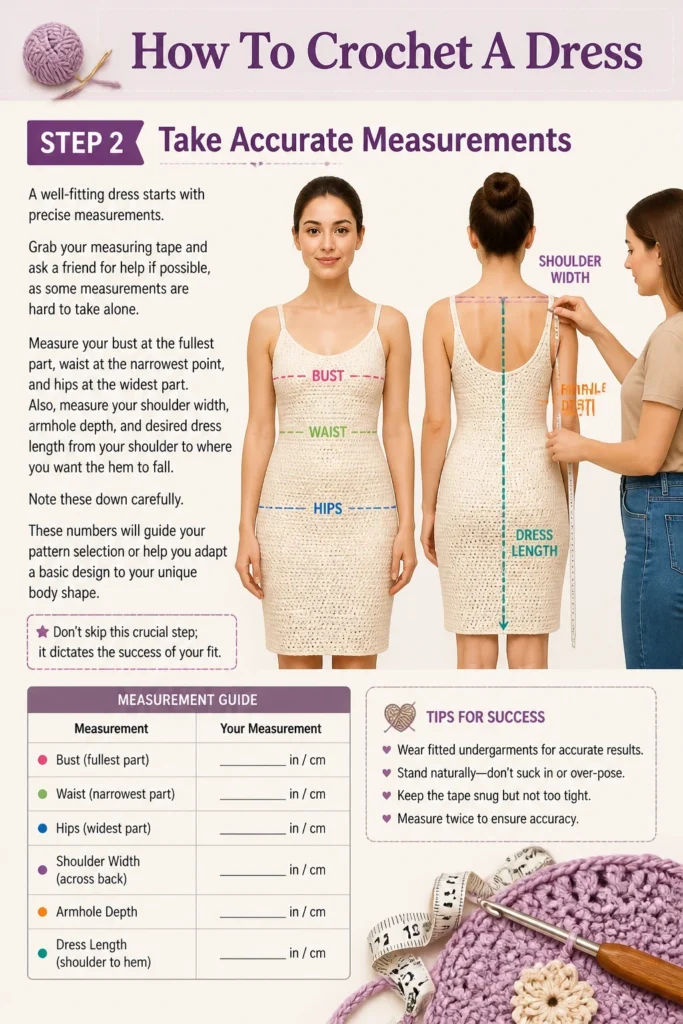
Measure your bust at the fullest part, waist at the narrowest point, and hips at the widest part. Also, measure your shoulder width, armhole depth, and desired dress length from your shoulder to where you want the hem to fall. Note these down carefully.
These numbers will guide your pattern selection or help you adapt a basic design to your unique body shape. Don’t skip this crucial step; it dictates the success of your fit.
Step 3: Create a Gauge Swatch
This is arguably the most important step for a successful garment. Crochet a swatch using your chosen yarn and hook, at least 4×4 inches (10×10 cm) square. Use the stitch pattern you plan for your dress.
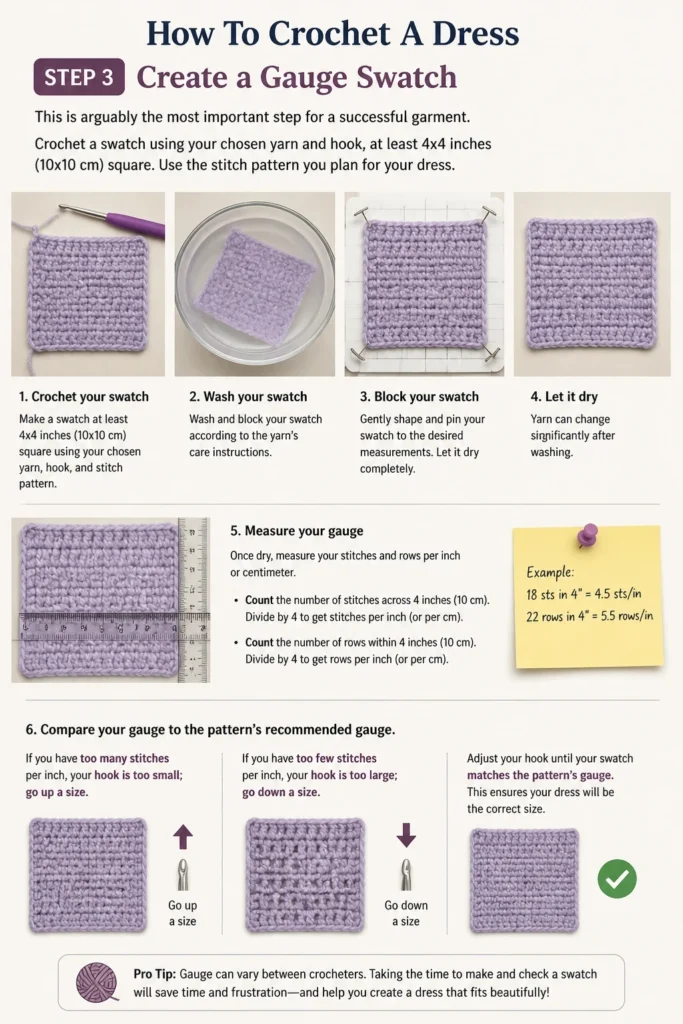
Wash and block your swatch according to the yarn’s care instructions. Yarn can change significantly after washing. Once dry, measure your stitches and rows per inch or centimeter.
Compare your gauge to the pattern’s recommended gauge. If you have too many stitches per inch, your hook is too small; go up a size. If you have too few, your hook is too large; go down a size. Adjust your hook until your swatch matches the pattern’s gauge. This ensures your dress will be the correct size.
Step 4: Choose or Adapt a Pattern
With your measurements and gauge established, it’s time to select a suitable pattern. For beginners, a top-down, seamless dress pattern is often easiest, as you can try it on as you go. Alternatively, a pattern made in panels that are later seamed can also work well.
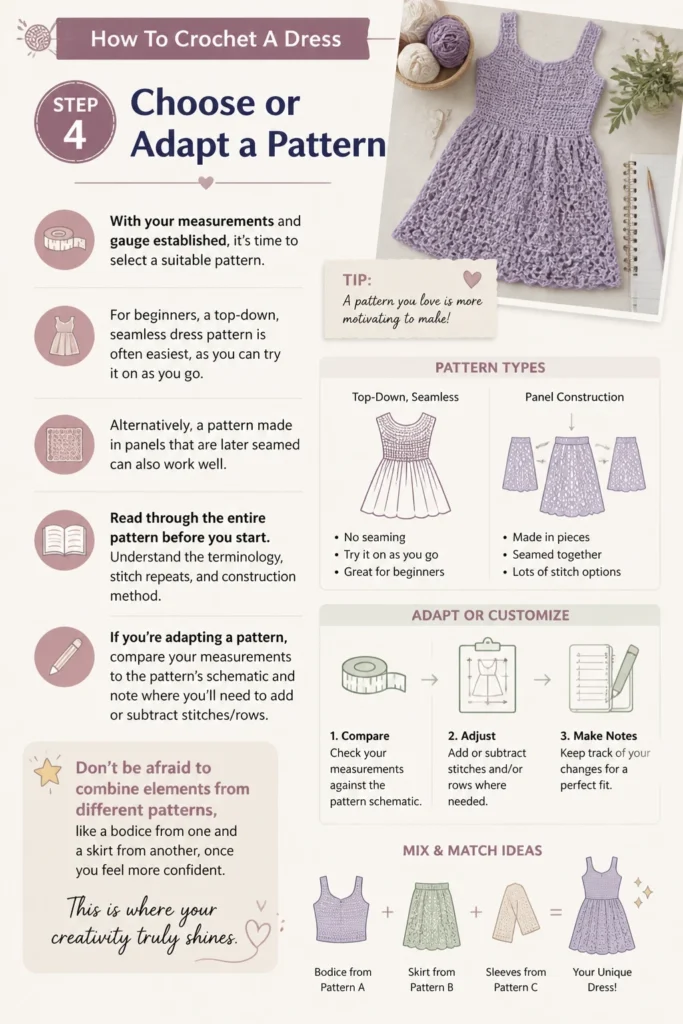
Read through the entire pattern before you start. Understand the terminology, stitch repeats, and construction method. If you’re adapting a pattern, compare your measurements to the pattern’s schematic and note where you’ll need to add or subtract stitches/rows.
Don’t be afraid to combine elements from different patterns, like a bodice from one and a skirt from another, once you feel more confident. This is where your creativity truly shines.
Step 5: Begin Crocheting the Bodice
Most dresses start with the bodice, either from the bottom up or top down. If working top-down, you’ll start with a foundation chain that fits around your neck or shoulders, or use a magic ring for a circular yoke.
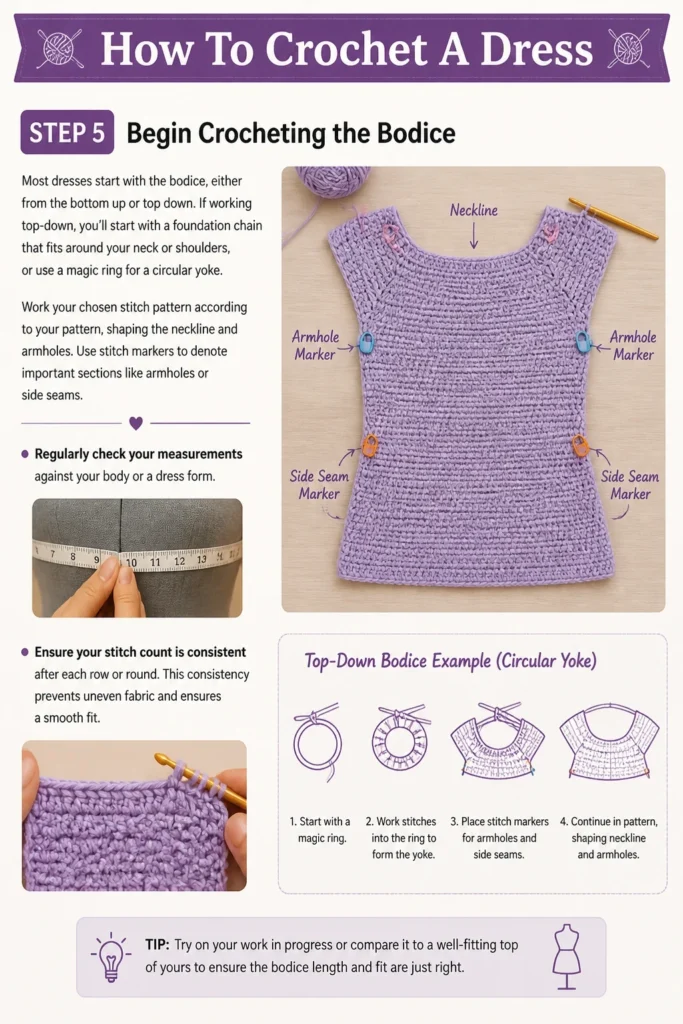
Work your chosen stitch pattern according to your pattern, shaping the neckline and armholes. Use stitch markers to denote important sections like armholes or side seams. Regularly check your measurements against your body or a dress form.
Ensure your stitch count is consistent after each row or round. This consistency prevents uneven fabric and ensures a smooth fit.
Step 6: Shape the Waist and Hips
As you move past the bust, you’ll need to shape the dress to fit your waist and hips. Patterns will typically instruct you to decrease stitches for the waist and then increase for the hips.
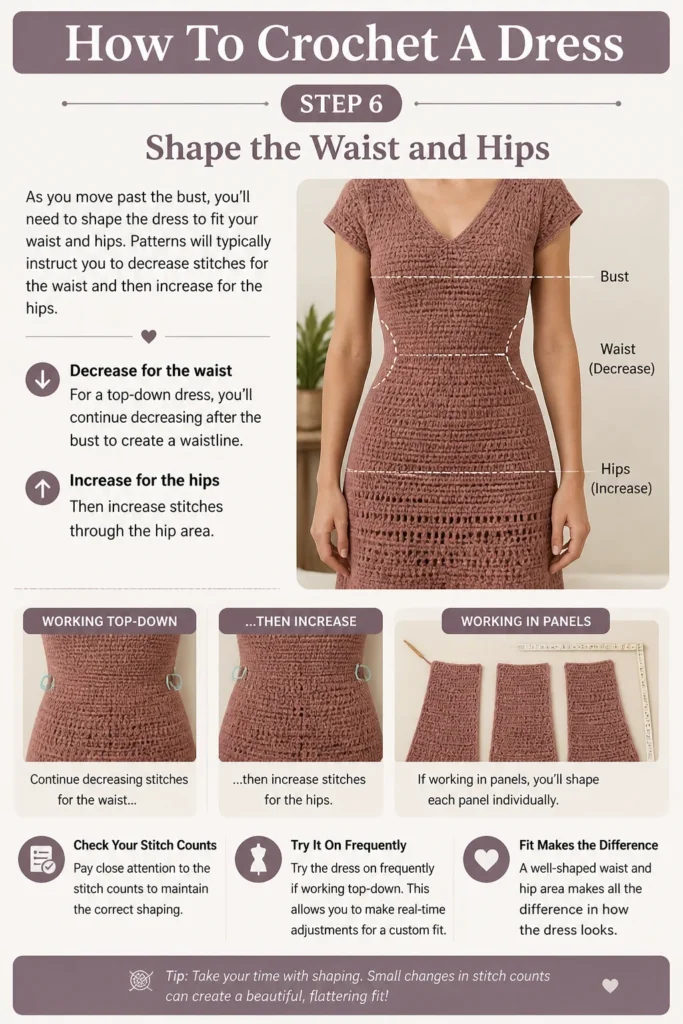
For a top-down dress, you’ll continue decreasing after the bust to create a waistline, then increase stitches through the hip area. If working in panels, you’ll shape each panel individually. Pay close attention to the stitch counts to maintain the correct shaping.
Try the dress on frequently if working top-down. This allows you to make real-time adjustments for a custom fit. A well-shaped waist and hip area makes all the difference in how the dress looks.
Step 7: Crochet the Skirt
Once the bodice and shaping are complete, you’ll work on the skirt portion of the dress. This is often the longest part of the project. You can choose a straight, A-line, or fuller skirt design.
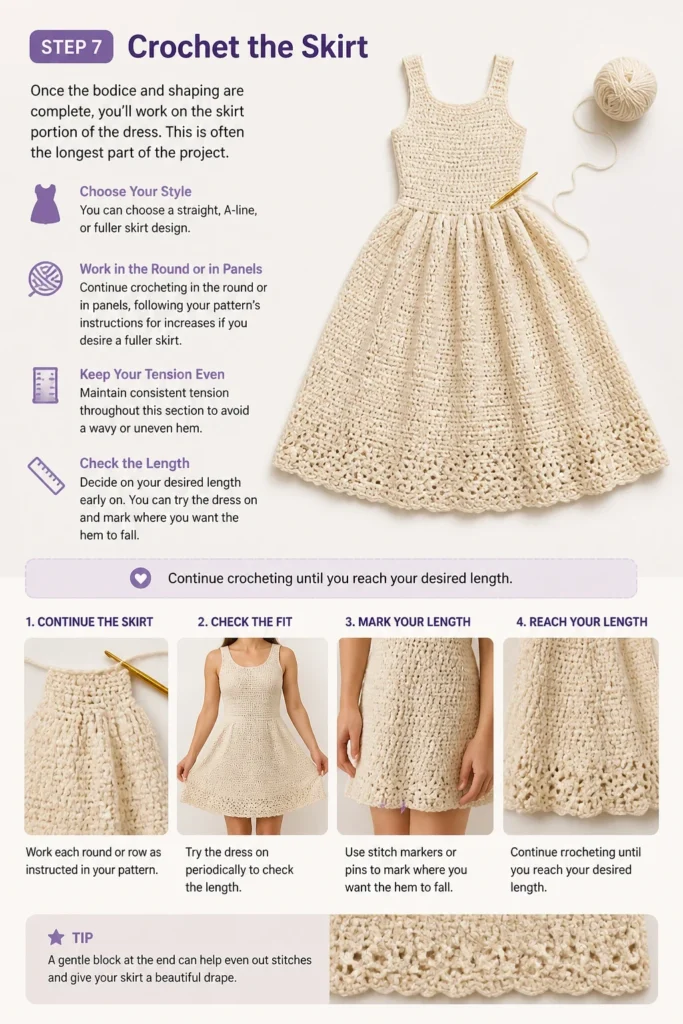
Continue crocheting in the round or in panels, following your pattern’s instructions for increases if you desire a fuller skirt. Maintain consistent tension throughout this section to avoid a wavy or uneven hem.
Decide on your desired length early on. You can try the dress on and mark where you want the hem to fall. Continue crocheting until you reach that length.
Step 8: Finish the Hem and Edges
When you’ve reached your desired length for the skirt, it’s time to finish the hem. A simple border of single crochet or a decorative shell stitch can provide a clean, polished edge.
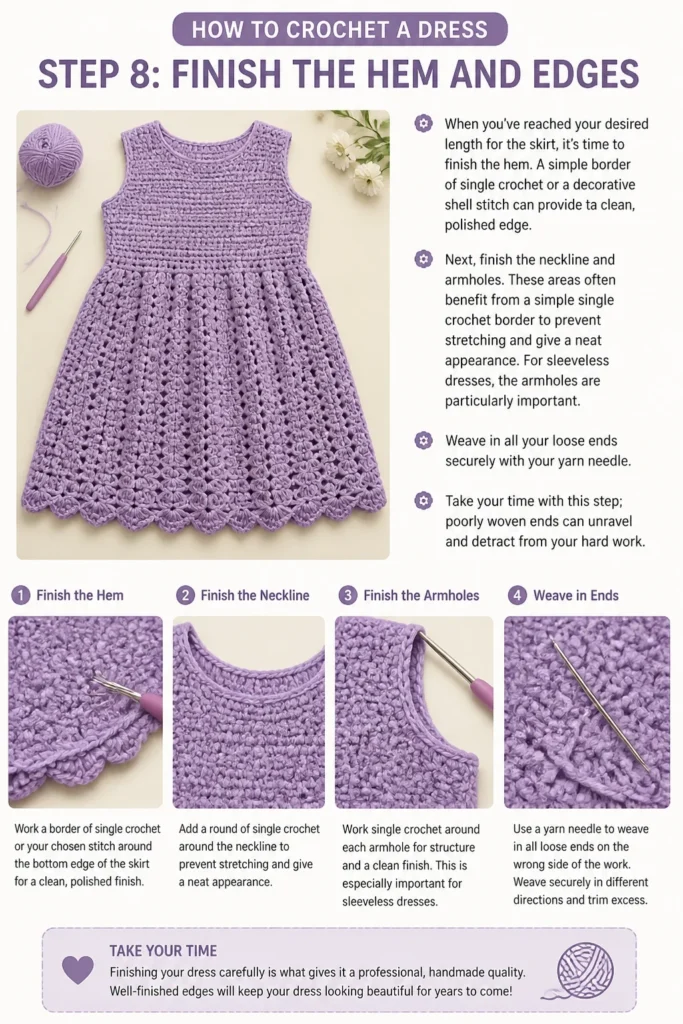
Next, finish the neckline and armholes. These areas often benefit from a simple single crochet border to prevent stretching and give a neat appearance. For sleeveless dresses, the armholes are particularly important.
Weave in all your loose ends securely with your yarn needle. Take your time with this step; poorly woven ends can unravel and detract from your hard work.
Step 9: Block Your Dress
Blocking is the magical final step that transforms your crocheted fabric. Gently wash your dress according to your yarn’s care instructions. Roll it in a towel to remove excess water.
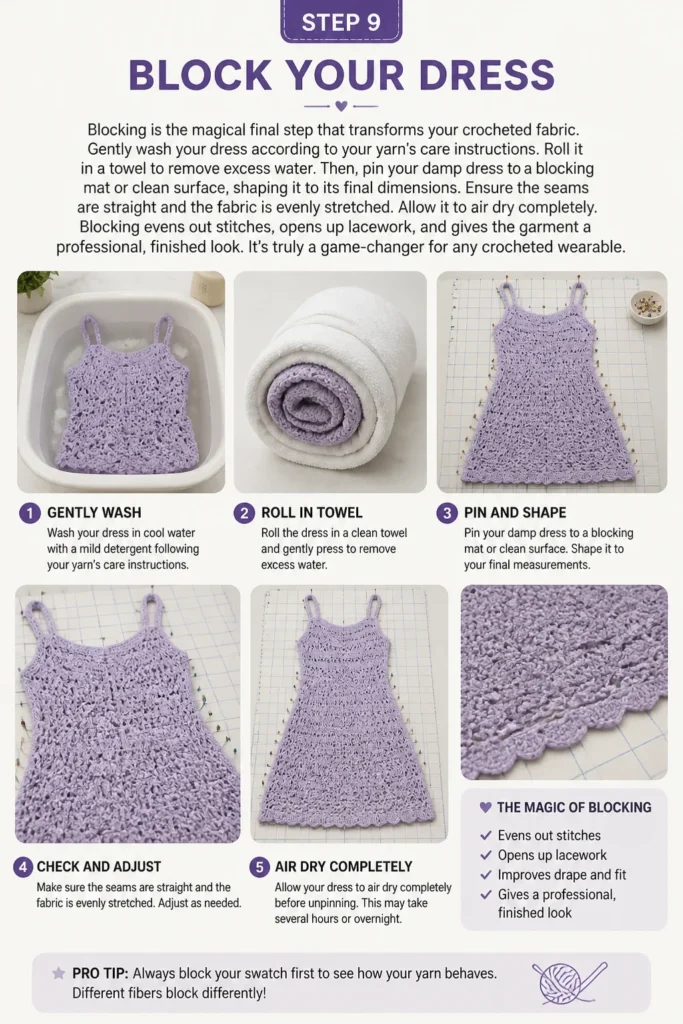
Then, pin your damp dress to a blocking mat or clean surface, shaping it to its final dimensions. Ensure the seams are straight and the fabric is evenly stretched. Allow it to air dry completely.
Blocking evens out stitches, opens up lacework, and gives the garment a professional, finished look. It’s truly a game-changer for any crocheted wearable.
Common Mistakes to Avoid
Skipping the Gauge Swatch
Many crocheters skip making a gauge swatch because it feels like an extra, unnecessary step. However, neglecting this step is the most common reason why crocheted garments don’t fit. Your dress could end up too large, too small, or simply not drape as intended. Always make, wash, and measure your swatch to ensure your finished dress will match the pattern’s size.
Inconsistent Tension
Throughout your project, your tension might fluctuate, especially if you’re tired or distracted. This leads to uneven stitches, areas that are tighter or looser, and an overall inconsistent fabric. Try to maintain a relaxed grip on your hook and yarn, and take breaks if your hands start to cramp or your tension changes noticeably. Practice helps build muscle memory for consistent stitching.
Not Trying On as You Go
Especially with top-down or seamless designs, not trying on your dress periodically means you might discover fit issues too late. You could find the waist is too wide, the armholes are too tight, or the length is off only after you’ve completed a large section. Regularly trying on the piece allows for adjustments while they are still easy to make, saving you from extensive frogging (unraveling).
Poor Seaming (if applicable)
If your dress is made in panels, the way you seam them together dramatically affects the final look and fit. Using an incorrect seaming method or uneven stitches can create bulky, visible seams that detract from the garment’s appearance. Learn invisible seaming techniques like the mattress stitch for a professional finish that blends seamlessly with your crocheted fabric.
Troubleshooting
Dress is too big/small
This is almost always a gauge issue. If your dress is too big, your gauge was likely too loose (too few stitches per inch), meaning you should have used a smaller hook. If it’s too small, your gauge was too tight (too many stitches per inch), and a larger hook was needed. Unfortunately, for a complete dress, this often means frogging and restarting with the correct hook size after a new swatch. For slight discrepancies, strategic blocking might help slightly stretch or shrink the fabric.
Fabric is stiff or doesn’t drape well
If your dress feels rigid, your tension might be too tight, or your hook size is too small for the yarn. The yarn itself might also be too stiff for a garment that requires drape. To fix this, try going up a hook size or two to create a looser fabric. For future projects, choose yarns known for their drape, like bamboo, Tencel, or softer cottons, and ensure your gauge swatch produces a supple fabric.
Edges are wavy or uneven
Wavy edges, especially on the hem or a straight-edged panel, often indicate too many stitches were added, or tension was inconsistent. If the edges pull in, too few stitches were made. Carefully count your stitches at the end of each row or round. For wavy hems, a round of single crochet or crab stitch (reverse single crochet) can sometimes help stabilize and flatten the edge. For future work, use stitch markers frequently to track counts.
Key Takeaways
- Gauge is paramount: Always make, wash, and measure a gauge swatch to ensure your dress fits correctly.
- Measure accurately: Precise body measurements are crucial for a well-fitting garment.
- Choose the right yarn: Select yarns with good drape and comfort for wearables.
- Try on frequently: Make adjustments as you go, especially with top-down designs.
- Block your finished piece: This final step significantly improves the look and drape of your dress.
- Practice consistency: Maintain even tension and stitch counts for a professional finish.
Frequently Asked Questions
Can a beginner crochet a dress?
While crocheting a dress is considered an intermediate project, an ambitious beginner with a few simple projects under their belt can certainly try. Start with a very straightforward pattern, possibly a simple A-line shape with basic stitches, and be prepared to learn new techniques and potentially frog some sections. Patience and persistence are key.
How do I choose the right yarn weight for a dress?
The best yarn weight depends on the desired drape and season. For lightweight, flowing dresses, fingering (1) or sport (2) weight yarns are excellent. For more structured or warmer dresses, DK (3) or worsted (4) weights work well. Always consider the fiber content for breathability and comfort.
What if my dress stretches out over time?
Some yarns, especially those with less memory like cotton or rayon, can stretch with wear. Blocking your dress correctly can help set the stitches and minimize future stretching. For future projects, consider incorporating a small percentage of elastic fiber or choosing yarns like wool or acrylic blends that have more resilience. Proper storage (folded, not hung) also helps prevent stretching.
How much yarn do I need for a crocheted dress?
The amount of yarn varies greatly depending on the dress size, length, stitch pattern, and yarn weight. Most patterns will specify a yardage estimate. As a general rule, for an adult dress, you might need anywhere from 1500 to 3000 yards (or even more for larger sizes or very long dresses). Always buy extra to be safe, especially if dye lots are a concern.
Our Top Recommended Finds
- Ergonomic Crochet Hook Set: A comfortable set reduces hand fatigue, allowing you to crochet for longer periods without discomfort. Look for handles designed for a natural grip.
- Blocking Mats with Grids: These interlocking foam mats help you pin your finished dress precisely to its measurements, ensuring professional shaping and a crisp finish.
- Soft, Mercerized Cotton Yarn: Ideal for dresses, mercerized cotton has a lovely sheen, great stitch definition, and beautiful drape, making it comfortable against the skin.
Your Masterpiece Awaits!
You now have a comprehensive roadmap to crochet your very own dress. This project is a wonderful way to expand your skills, express your creativity, and create a truly unique garment. Imagine the satisfaction of wearing something you made with your own hands!
Don’t let the scope intimidate you. Take it one stitch, one row, one section at a time. Your next step is to find that perfect pattern and begin your yarn selection. Start today, and soon you’ll be twirling in your stunning, handmade creation.