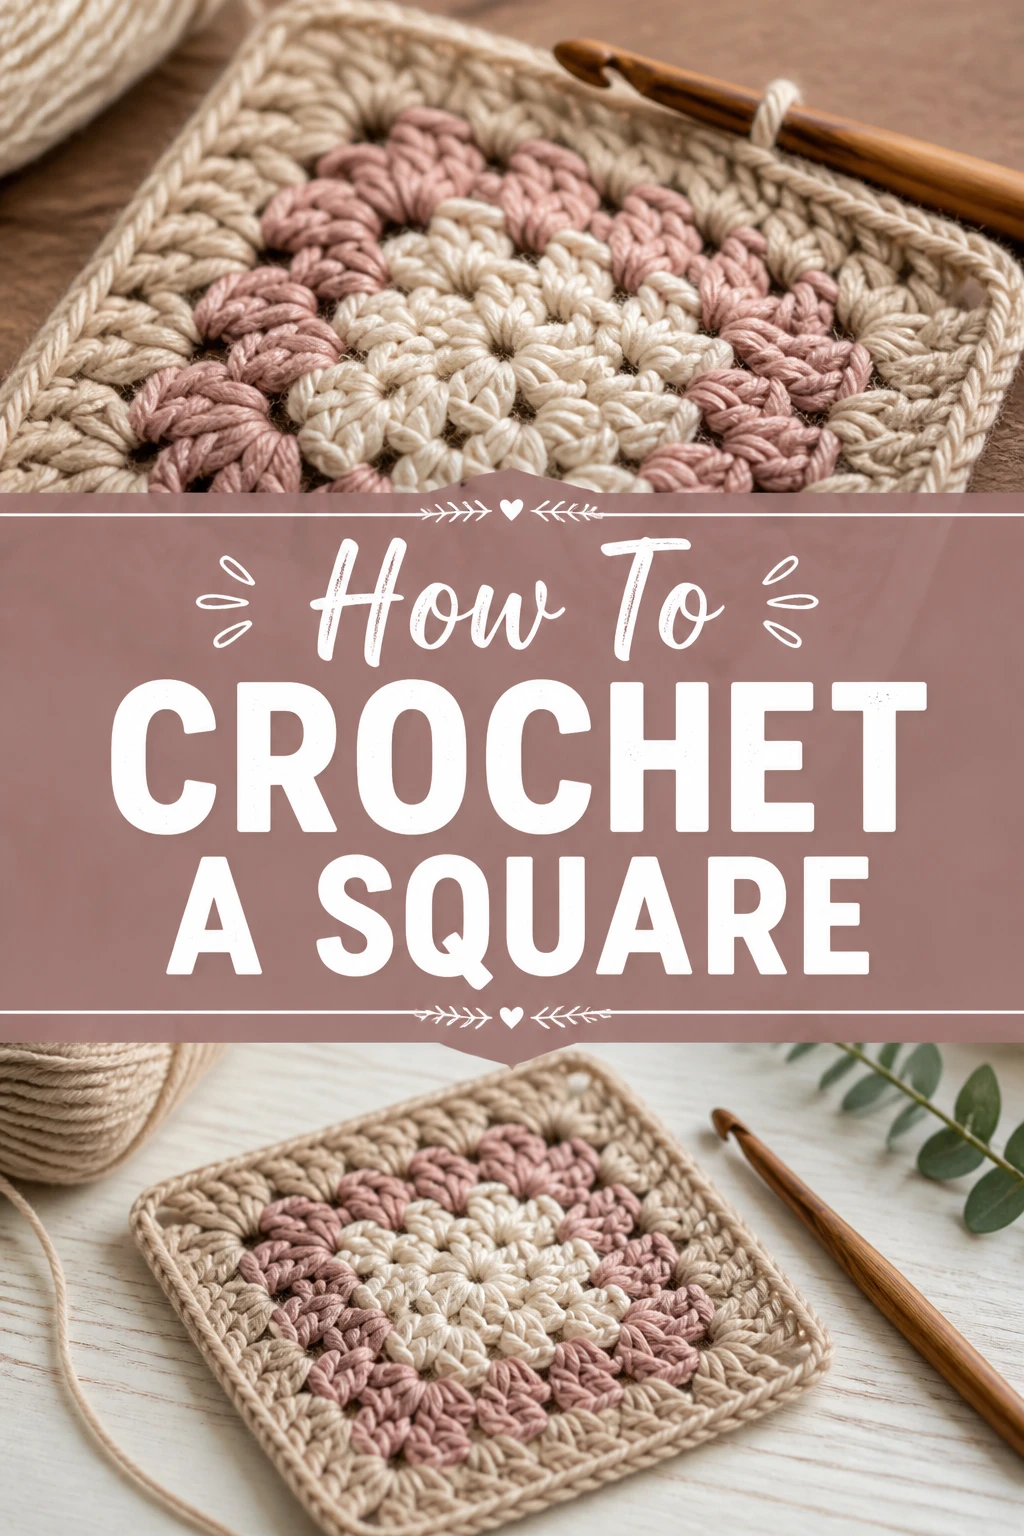
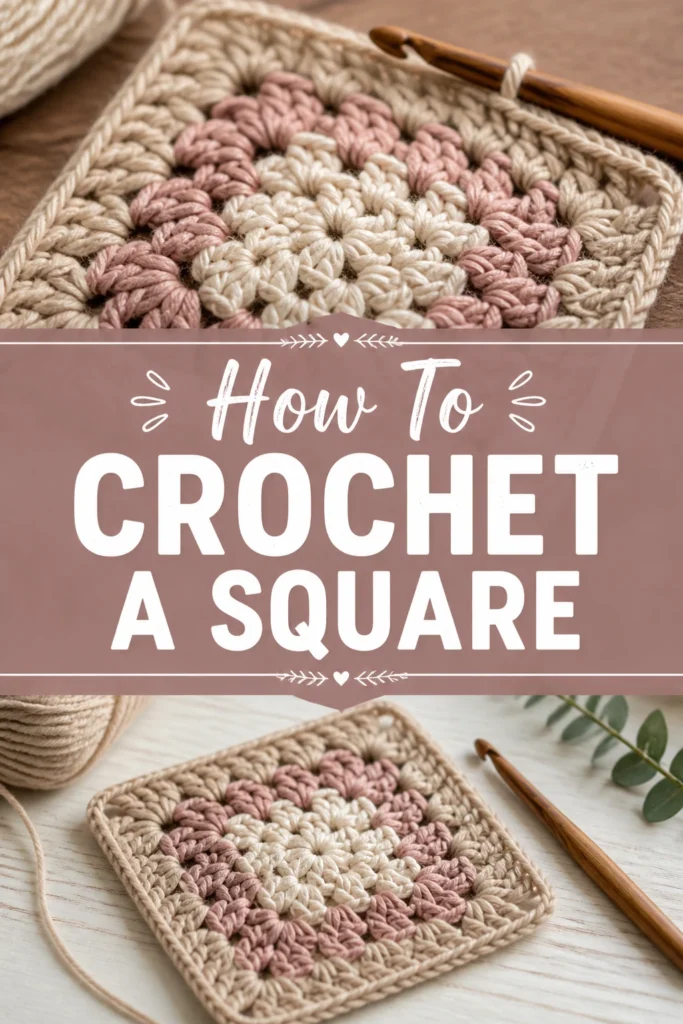
🧶 How To Crochet A Square
Learning to crochet a square is a fundamental skill that opens up a world of creative possibilities.
I remember the pure joy of making my very first perfectly formed square; it felt like magic.
This guide will walk you through each stitch, ensuring you gain the confidence to create beautiful, even squares every time.
Quick Overview
You’re about to embark on a delightful crafting journey to create your very first crochet square.
By the end of this guide, you’ll have a tangible piece of crochet fabric, ready for countless projects.
- Time needed: 30-60 minutes for your first square, much faster with practice.
- Difficulty: Beginner
- What you’ll need: Yarn, a crochet hook, scissors, and a tapestry needle.
Step-by-Step Instructions
Step 1: Gather Your Supplies
Before you begin any crochet project, it’s essential to have all your tools within reach.
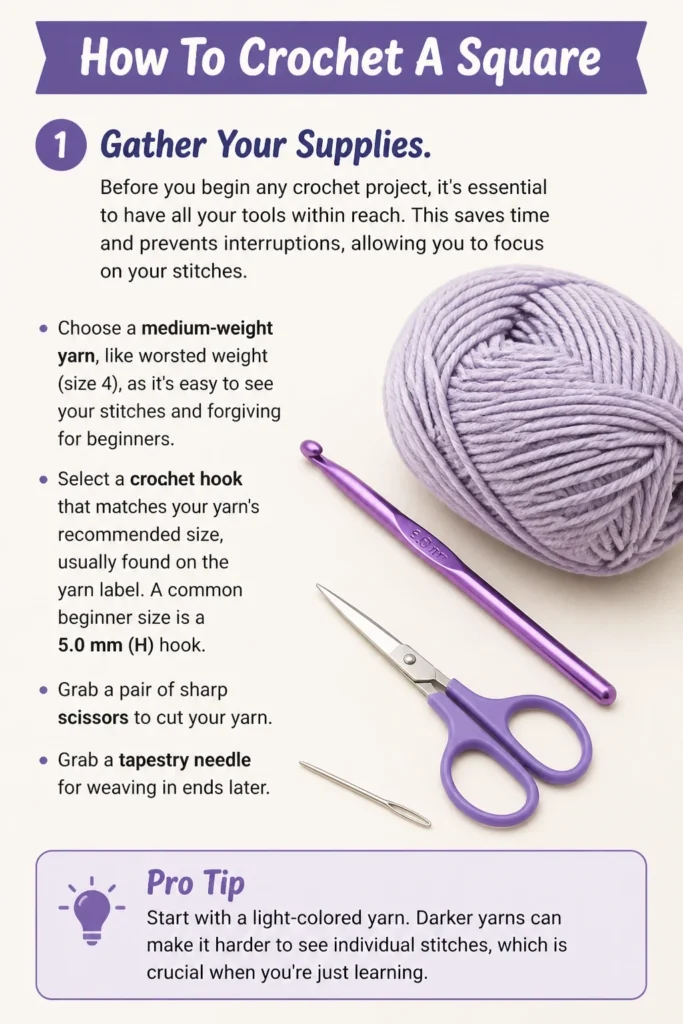
This saves time and prevents interruptions, allowing you to focus on your stitches.
Choose a medium-weight yarn, like worsted weight (size 4), as it’s easy to see your stitches and forgiving for beginners.
Select a crochet hook that matches your yarn’s recommended size, usually found on the yarn label. A common beginner size is a 5.0 mm (H) hook.
Grab a pair of sharp scissors to cut your yarn and a tapestry needle for weaving in ends later.
Pro Tip: Start with a light-colored yarn. Darker yarns can make it harder to see individual stitches, which is crucial when you’re just learning.
Step 2: Create Your Slip Knot
Every crochet project begins with a slip knot, which secures your yarn to the hook.
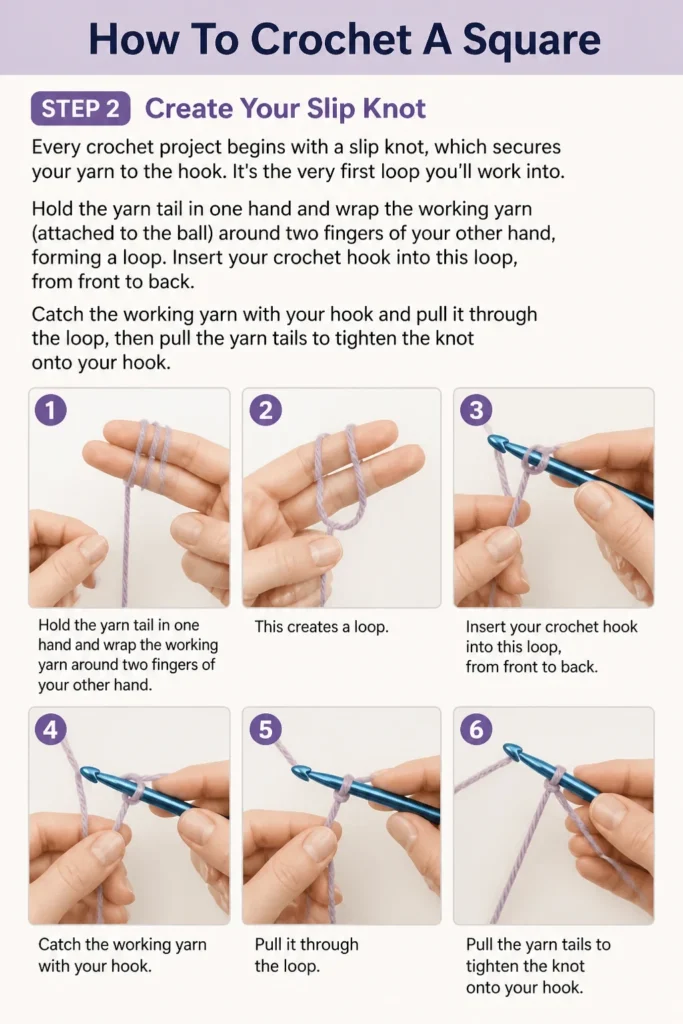
It’s the very first loop you’ll work into.
Hold the yarn tail in one hand and wrap the working yarn (attached to the ball) around two fingers of your other hand, forming a loop.
Insert your crochet hook into this loop, from front to back.
Catch the working yarn with your hook and pull it through the loop, then pull the yarn tails to tighten the knot onto your hook.
Step 3: Chain Your Foundation
The foundation chain forms the base of your crochet square.
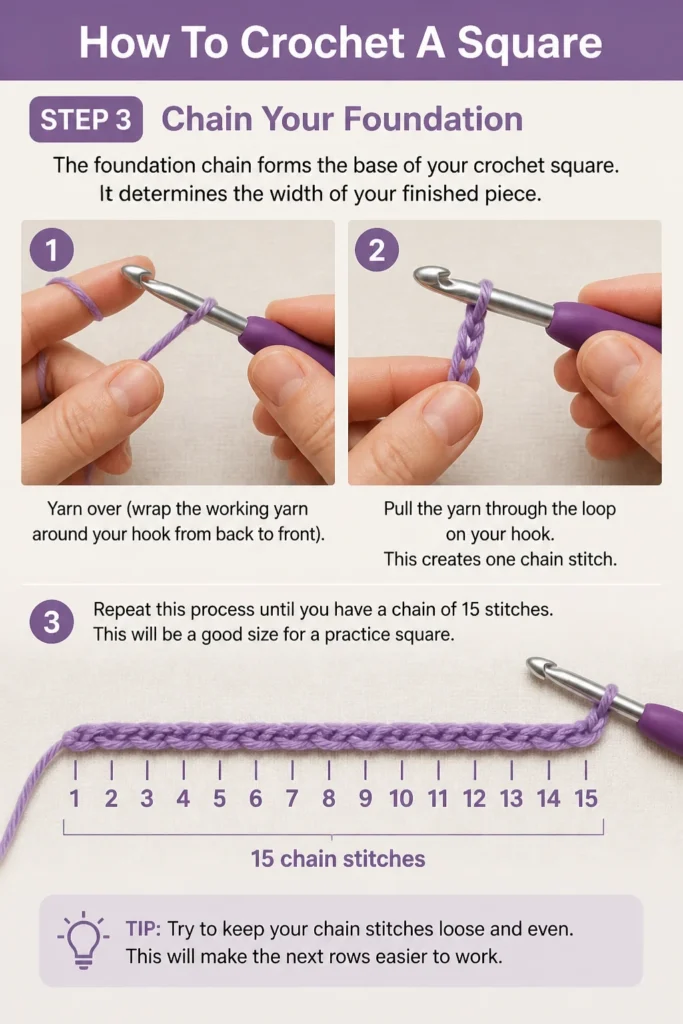
It determines the width of your finished piece.
Yarn over (wrap the working yarn around your hook from back to front).
Pull the yarn through the loop on your hook. This creates one chain stitch.
Repeat this process until you have a chain of 15 stitches. This will be a good size for a practice square.
Step 4: Work Your First Row (Single Crochet)
The single crochet (sc) stitch is one of the most basic and versatile stitches in crochet, perfect for beginners.
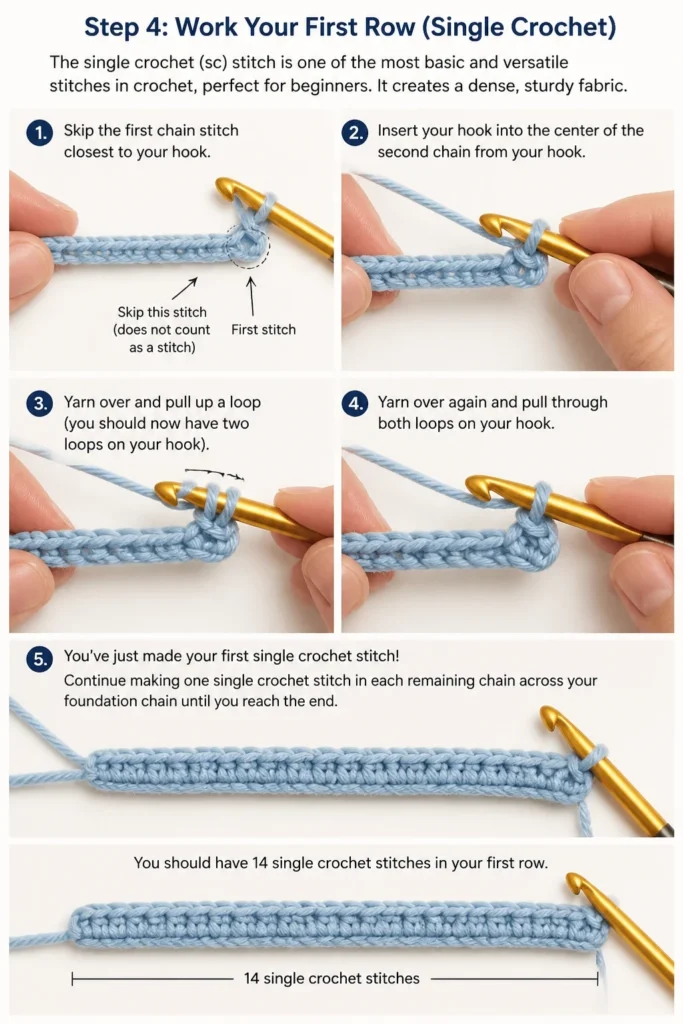
It creates a dense, sturdy fabric.
Skip the first chain stitch closest to your hook. This skipped stitch acts as a turning chain and doesn’t count as a stitch.
Insert your hook into the center of the second chain from your hook.
Yarn over and pull up a loop (you should now have two loops on your hook).
Yarn over again and pull through both loops on your hook. You’ve just made your first single crochet stitch!
Continue making one single crochet stitch in each remaining chain across your foundation chain until you reach the end.
You should have 14 single crochet stitches in your first row.
Step 5: Turn and Continue Crocheting Rows
Turning your work is essential to build height and create a flat fabric.
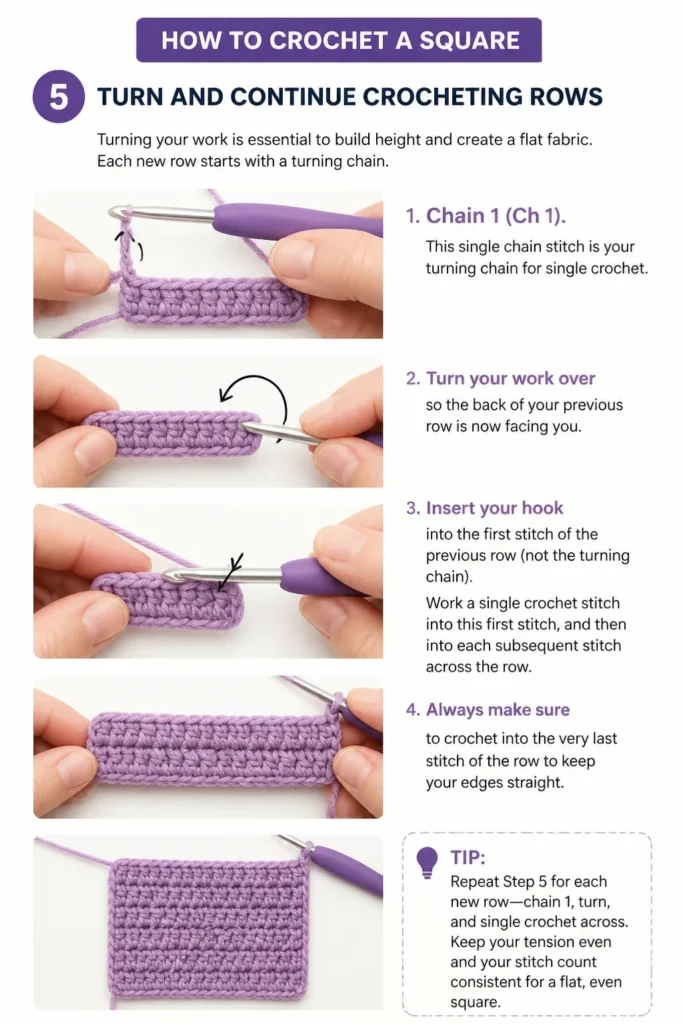
Each new row starts with a turning chain.
Chain 1 (Ch 1). This single chain stitch is your turning chain for single crochet.
Turn your work over so the back of your previous row is now facing you.
Insert your hook into the first stitch of the previous row (not the turning chain).
Work a single crochet stitch into this first stitch, and then into each subsequent stitch across the row.
Always make sure to crochet into the very last stitch of the row to keep your edges straight.
Step 6: Maintain Consistent Tension
Consistent tension is the secret to a neat and even crochet square.
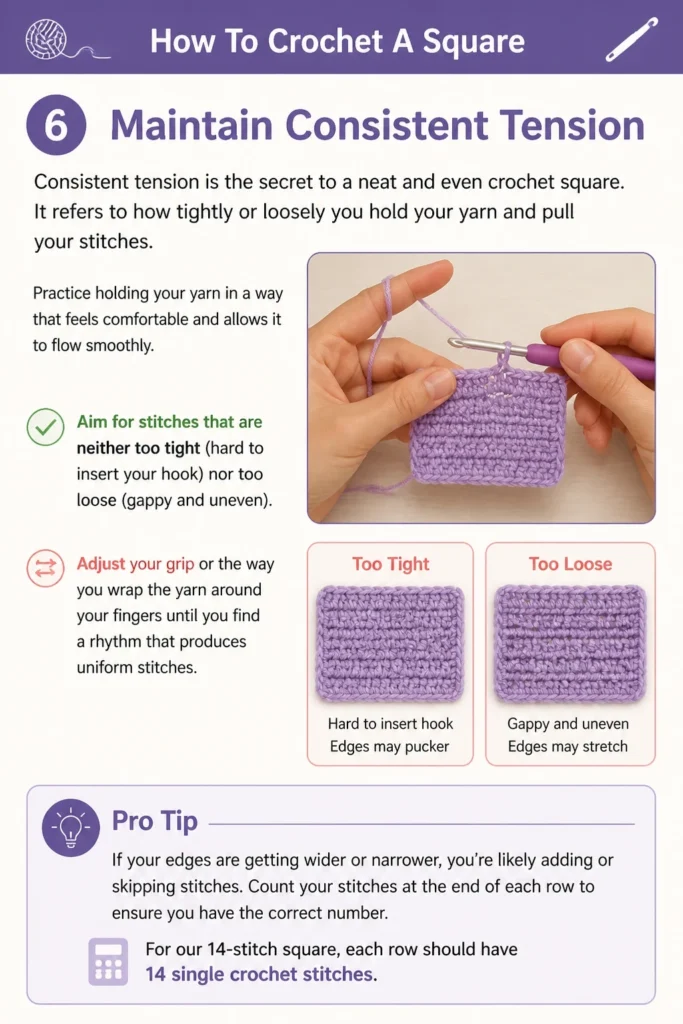
It refers to how tightly or loosely you hold your yarn and pull your stitches.
Practice holding your yarn in a way that feels comfortable and allows it to flow smoothly.
Aim for stitches that are neither too tight (hard to insert your hook) nor too loose (gappy and uneven).
Adjust your grip or the way you wrap the yarn around your fingers until you find a rhythm that produces uniform stitches.
Pro Tip: If your edges are getting wider or narrower, you’re likely adding or skipping stitches. Count your stitches at the end of each row to ensure you have the correct number. For our 14-stitch square, each row should have 14 single crochet stitches.
Step 7: Fasten Off Your Work
Once your square reaches your desired size, it’s time to secure your stitches so they don’t unravel.
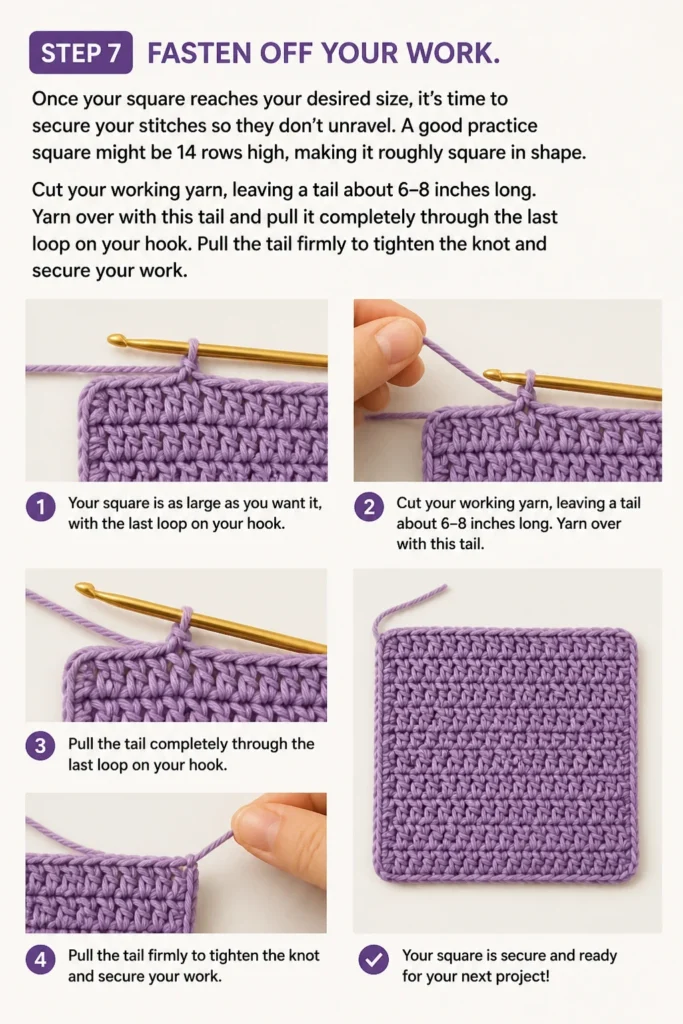
A good practice square might be 14 rows high, making it roughly square in shape.
Cut your working yarn, leaving a tail about 6-8 inches long.
Yarn over with this tail and pull it completely through the last loop on your hook.
Pull the tail firmly to tighten the knot and secure your work.
Step 8: Weave In Loose Ends
Weaving in ends creates a polished finish and prevents your work from unraveling over time.
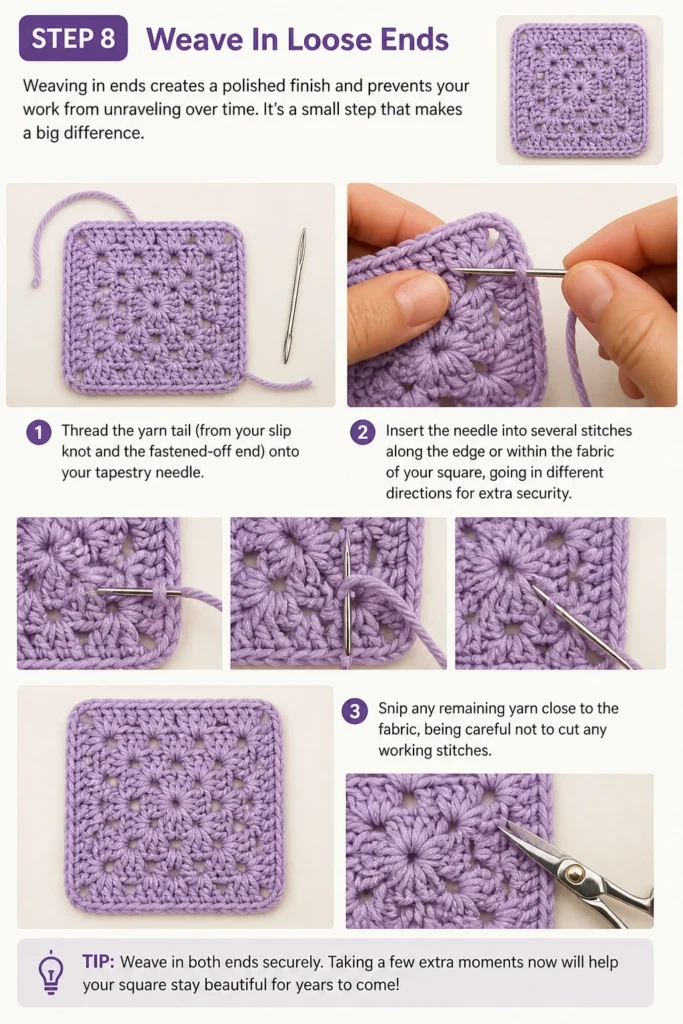
It’s a small step that makes a big difference.
Thread the yarn tail (from your slip knot and the fastened-off end) onto your tapestry needle.
Insert the needle into several stitches along the edge or within the fabric of your square, going in different directions for extra security.
Snip any remaining yarn close to the fabric, being careful not to cut any working stitches.
Step 9: Block for Perfection (Optional)
Blocking is a finishing technique that can transform your crochet square, giving it a professional look.
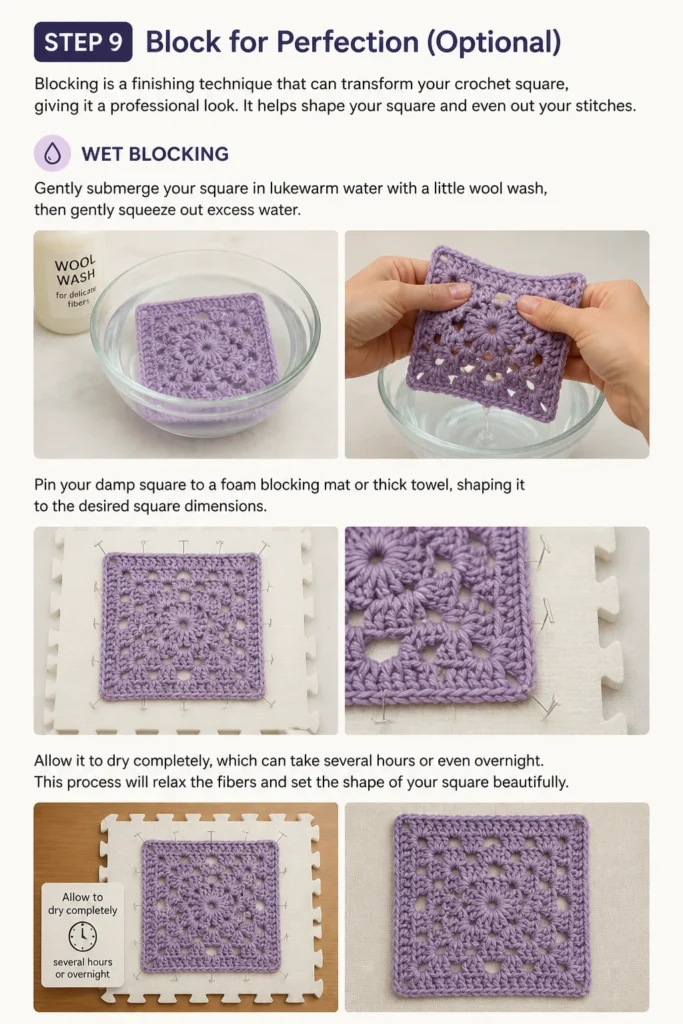
It helps shape your square and even out your stitches.
Wet Blocking: Gently submerge your square in lukewarm water with a little wool wash, then gently squeeze out excess water.
Pin your damp square to a foam blocking mat or thick towel, shaping it to the desired square dimensions.
Allow it to dry completely, which can take several hours or even overnight.
This process will relax the fibers and set the shape of your square beautifully.
Common Mistakes to Avoid
Inconsistent Stitch Count
A common pitfall for beginners is having a varying number of stitches in each row.
This leads to slanted or uneven edges, making your square look more like a trapezoid.
Always count your stitches at the end of every row, especially when you’re starting out. Ensure you crochet into the very first and very last stitch of each row.
Too Tight or Too Loose Tension
Holding the yarn too tightly can make your fabric stiff and difficult to work into the next row.
Conversely, too loose tension results in a floppy, gappy fabric that lacks structure.
Experiment with different ways of holding your yarn until you find a comfortable method that produces even, consistent stitches. Practice is key to finding your ideal tension.
Skipping the Turning Chain or Crocheting Into It
The turning chain is crucial for maintaining the height and straightness of your edges.
For single crochet, you chain 1 and skip the first stitch of the previous row (as the chain 1 acts as the height of the first stitch).
If you crochet into the turning chain, you’ll add extra stitches. If you don’t account for it correctly, you’ll lose stitches. Always ensure you’re working into the actual stitches of the previous row.
Troubleshooting
My Edges Are Crooked and Uneven
Crooked edges are almost always a sign of an inconsistent stitch count per row.
You might be accidentally adding extra stitches at the beginning or end of rows, or missing stitches.
The solution is to count your stitches diligently at the end of every single row. If you find a mistake, gently unravel (frog) back to the error and re-crochet that section.
My Fabric Is Too Stiff or Too Loose
This issue points directly to your yarn tension or possibly your hook size not being quite right for your yarn.
If your fabric is too stiff, try loosening your grip on the yarn, or switch to a larger crochet hook.
If it’s too loose and gappy, try holding your yarn a bit tighter, or switch to a smaller hook to create denser stitches.
I Can’t See Where to Insert My Hook
This is a very common challenge for beginners, especially in the first few rows or with dark yarn.
The “V” shape at the top of each stitch is where you typically insert your hook.
Try using a lighter colored yarn for practice. Also, ensure your stitches aren’t too tight. If they are, practice loosening your tension slightly to make the stitch loops more visible.
Key Takeaways
- Practice the slip knot and chain stitch until they feel natural.
- Mastering the single crochet stitch is fundamental for many projects.
- Always count your stitches at the end of each row to maintain straight edges.
- Consistent tension is vital for an even and aesthetically pleasing fabric.
- Don’t be afraid to unravel mistakes; it’s part of the learning process.
- Weaving in ends creates a professional and durable finish for your work.
Frequently Asked Questions
Can I use different types of yarn for crocheting a square?
Absolutely! While worsted weight yarn is recommended for beginners, you can use any yarn weight once you’re comfortable with the basic stitches. Just be sure to match your hook size to the yarn weight for best results.
What’s the difference between single crochet and double crochet?
The main difference lies in height and density. A single crochet (sc) stitch is shorter and creates a denser fabric. A double crochet (dc) stitch is taller, requiring an extra yarn over at the start, and results in a looser, more open fabric.
How do I make a larger or smaller square?
To make a larger square, simply start with a longer foundation chain and crochet more rows. For a smaller square, begin with fewer chain stitches and crochet fewer rows. The principle remains the same, just adjust the quantity.
My square isn’t perfectly square, what went wrong?
Often, this is due to an inconsistent stitch count or tension, leading to uneven edges. Blocking can help immensely to correct minor imperfections. For more significant issues, focus on counting stitches and practicing consistent tension.
Our Top Recommended Finds
- Ergonomic Crochet Hook Set: These hooks often have comfortable handles, reducing hand fatigue during long crafting sessions. They make a big difference for comfort.
- Stitch Markers: Small plastic clips that help you mark specific stitches or the beginning of a row, preventing missed stitches and making counting easier.
- Yarn Winder and Swift: If you buy yarn in hanks, these tools quickly transform them into neat cakes, preventing tangles and making storage a breeze.
Your Next Creative Adventure Awaits
You’ve just completed your first crochet square, a fantastic achievement!
This simple square is the building block for so many incredible projects.
Consider trying a granny square next, or perhaps joining several squares together to create a coaster, a dishcloth, or even a beautiful blanket.
Embrace your newfound skill and let your creativity flourish today!