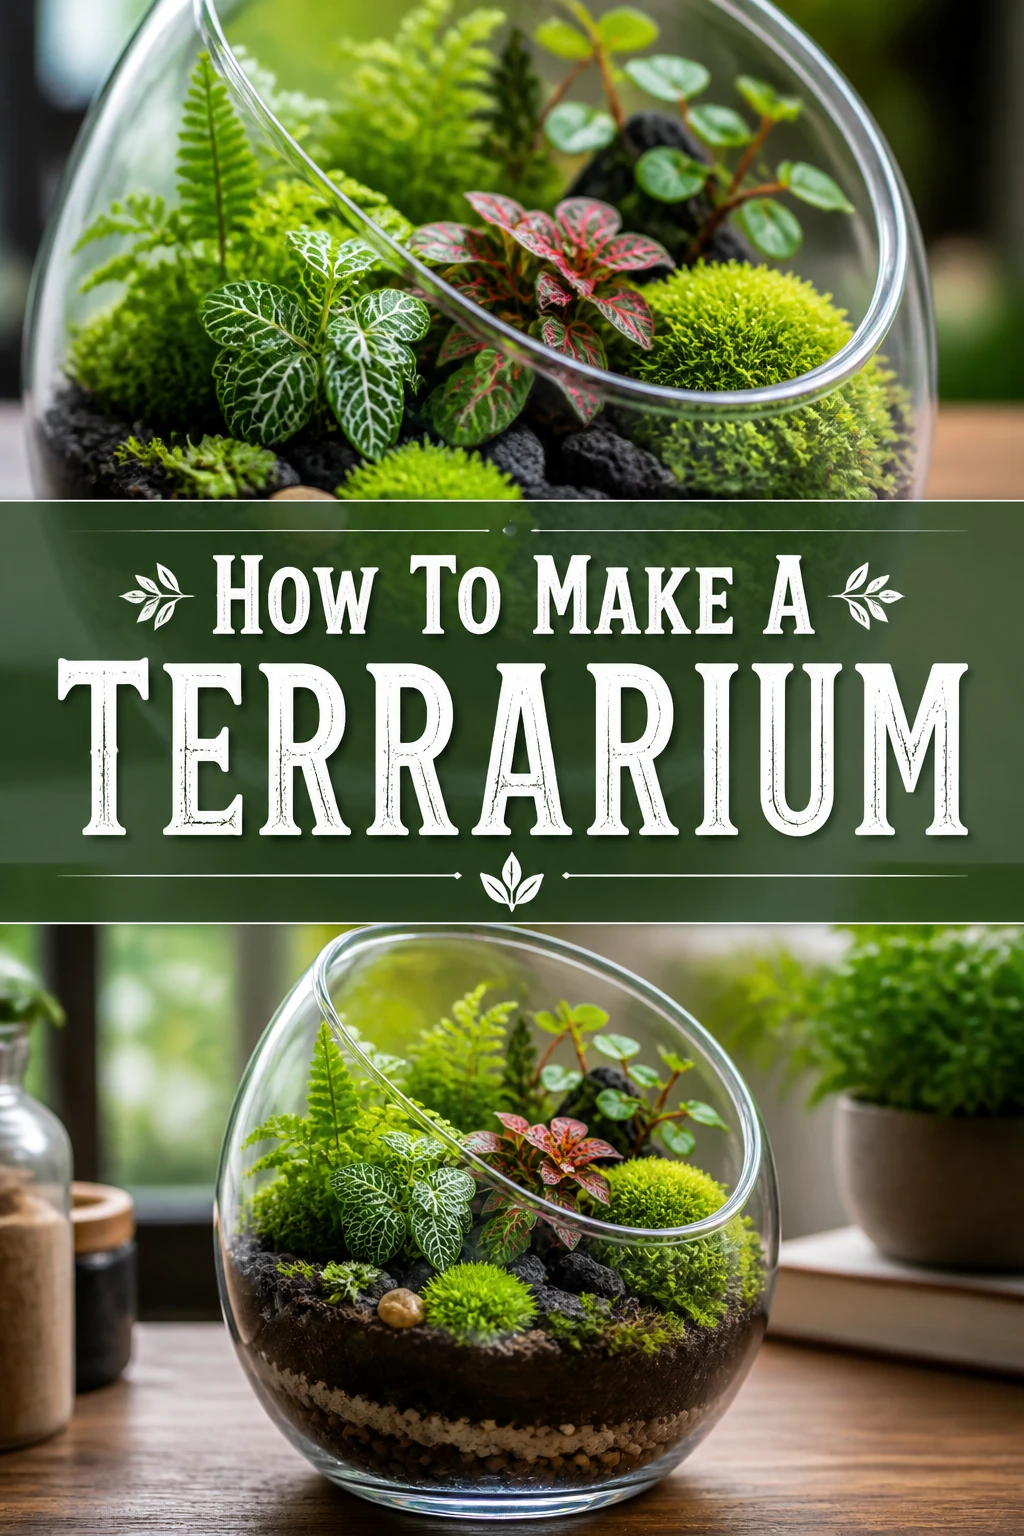
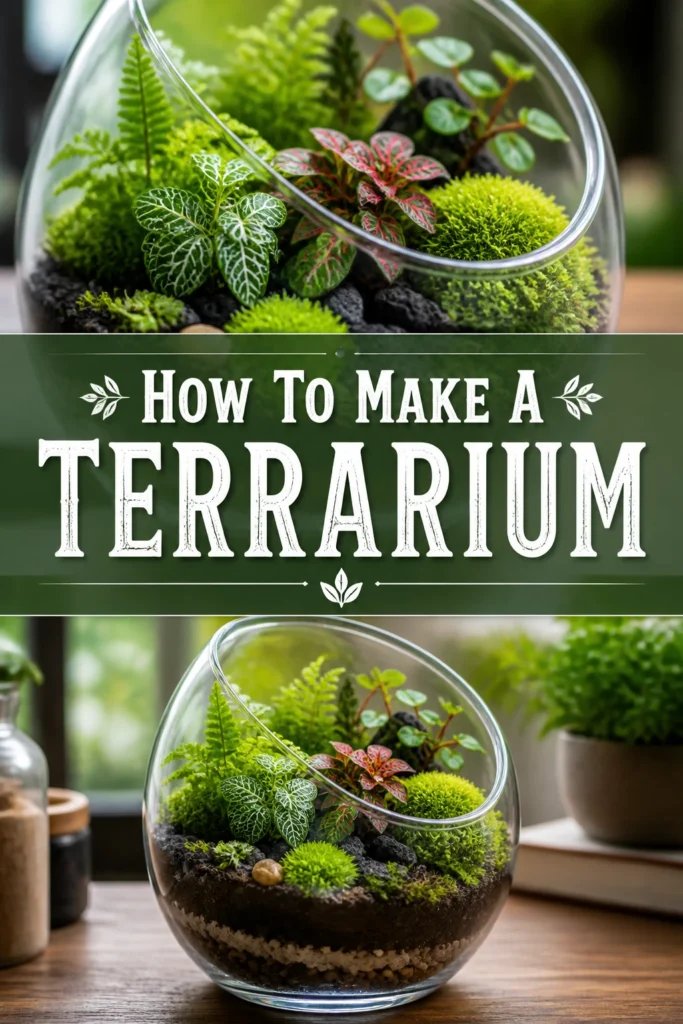
🌱 How To Make A Terrarium
I remember the first time I built a terrarium; it felt like creating a tiny, self-sustaining world.
There’s a unique satisfaction in watching a miniature ecosystem flourish under your care.
This guide shares my hands-on experience to help you craft your own thriving green sanctuary.
Quick Overview
You’re about to embark on a delightful project, creating a beautiful, self-contained garden that adds a touch of nature to any space.
A well-made terrarium requires minimal maintenance once established, making it a perfect indoor gardening solution.
- Time needed: 1-2 hours (initial setup), minimal ongoing care
- Difficulty: Beginner
- What you’ll need: A clear container, drainage material, activated charcoal, potting mix, small plants, and a few simple tools.
Step-by-Step Instructions
Step 1: Gather Your Materials
Before you begin, collect all the necessary components for your terrarium. Having everything ready makes the assembly process smooth and enjoyable.
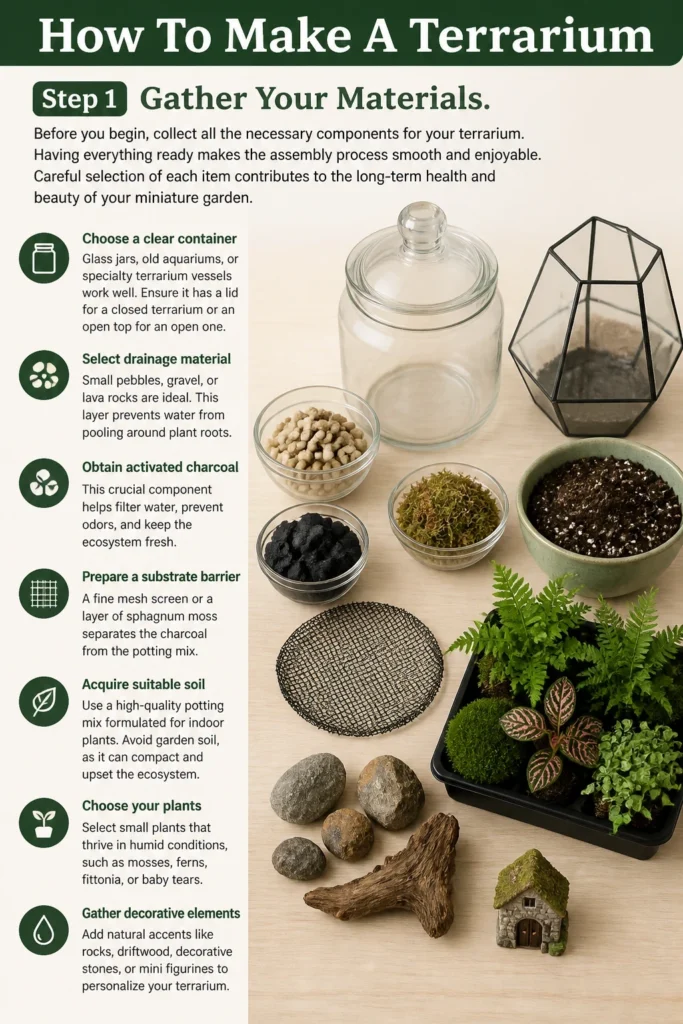
Careful selection of each item contributes to the long-term health and beauty of your miniature garden.
- Choose a clear container: Glass jars, old aquariums, or specialty terrarium vessels work well. Ensure it has a lid for a closed terrarium or an open top for an open one.
- Select drainage material: Small pebbles, gravel, or lava rocks are ideal. This layer prevents water from pooling around plant roots.
- Obtain activated charcoal: This crucial component helps filter water, prevent odors, and keep the ecosystem fresh.
- Prepare a substrate barrier: A fine mesh screen or a layer of sphagnum moss separates the charcoal from the potting mix.
- Acquire suitable potting mix: A well-draining soil specific for houseplants or terrariums is best.
- Pick appropriate plants: Small, slow-growing plants that thrive in humidity are perfect for closed terrariums. Succulents and cacti suit open terrariums.
- Gather your tools: Long-handled tweezers, a small spade or spoon, a spray bottle, and a soft brush will be very helpful.
- Consider decorations: Small stones, driftwood, figurines, or decorative moss can personalize your terrarium.
Step 2: Clean and Prepare Your Container
A clean container is vital for a healthy terrarium. Any residue can introduce unwanted bacteria or chemicals to your delicate ecosystem.
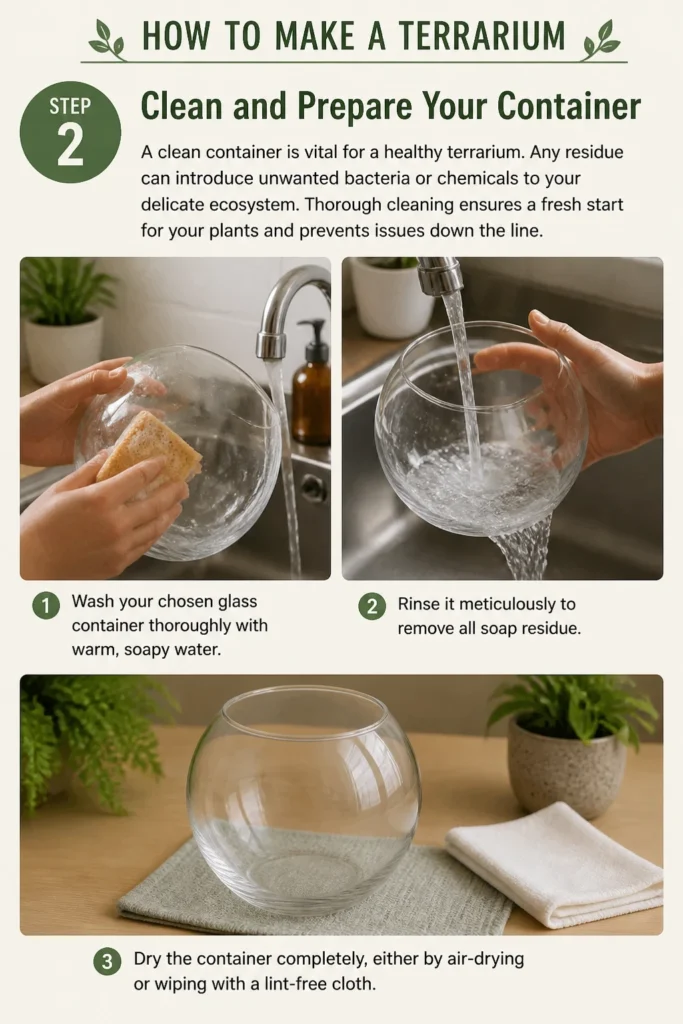
Thorough cleaning ensures a fresh start for your plants and prevents issues down the line.
- Wash your chosen glass container thoroughly with warm, soapy water.
- Rinse it meticulously to remove all soap residue.
- Dry the container completely, either by air-drying or wiping with a lint-free cloth.
Step 3: Create the Drainage Layer
The drainage layer is the foundation of your terrarium, preventing root rot by allowing excess water to collect away from the soil.
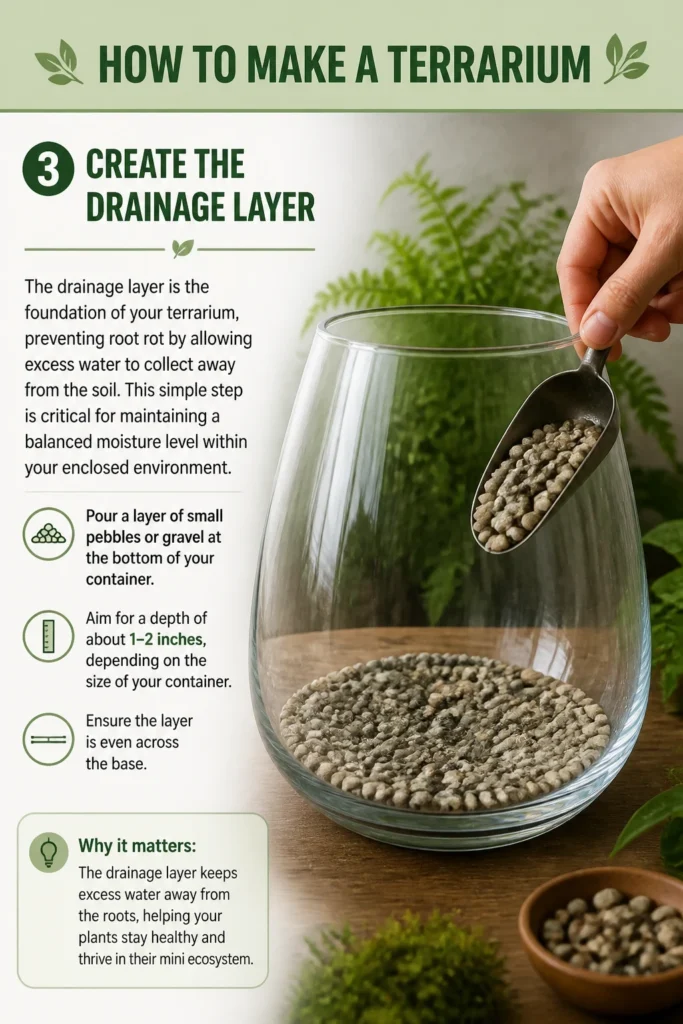
This simple step is critical for maintaining a balanced moisture level within your enclosed environment.
- Pour a layer of small pebbles or gravel at the bottom of your container.
- Aim for a depth of about 1-2 inches, depending on the size of your container.
- Ensure the layer is even across the base.
Step 4: Add the Activated Charcoal
Activated charcoal acts as a natural filter, absorbing toxins and odors that can build up in a closed terrarium environment.
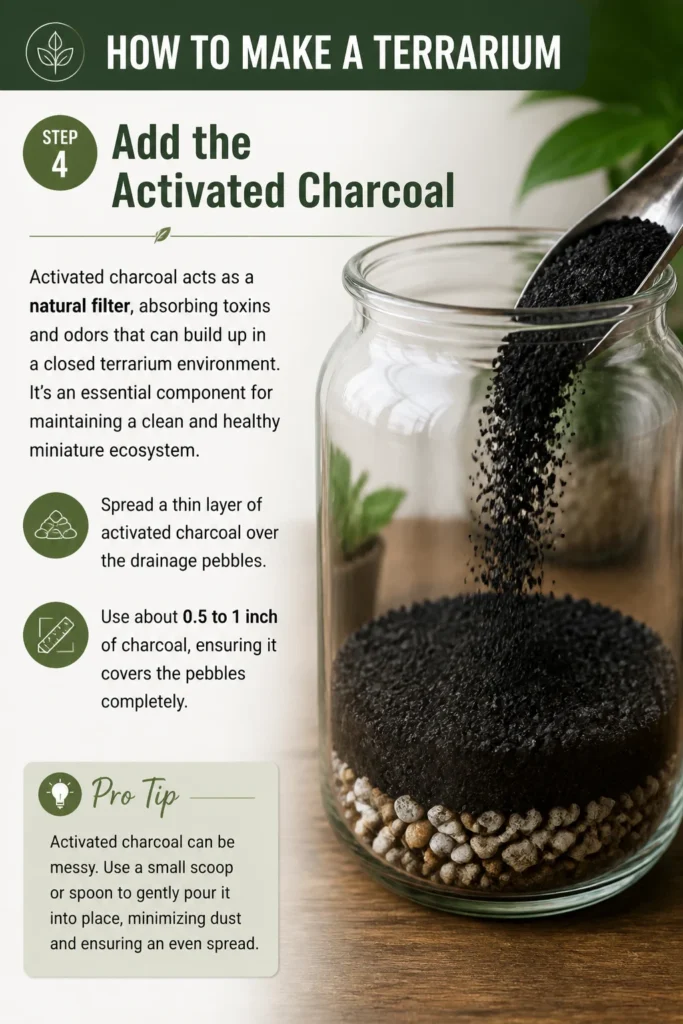
It’s an essential component for maintaining a clean and healthy miniature ecosystem.
- Spread a thin layer of activated charcoal over the drainage pebbles.
- Use about 0.5 to 1 inch of charcoal, ensuring it covers the pebbles completely.
Pro Tip: Activated charcoal can be messy. Use a small scoop or spoon to gently pour it into place, minimizing dust and ensuring an even spread.
Step 5: Lay Down the Substrate Barrier
This barrier prevents the potting mix from sifting down into the drainage and charcoal layers.
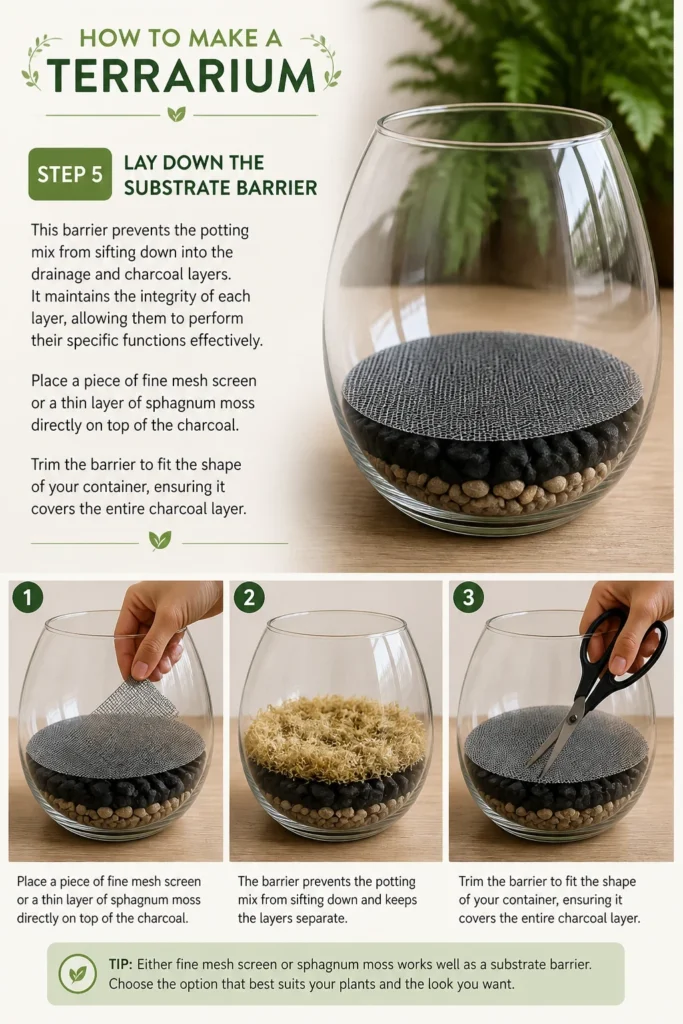
It maintains the integrity of each layer, allowing them to perform their specific functions effectively.
- Place a piece of fine mesh screen or a thin layer of sphagnum moss directly on top of the charcoal.
- Trim the barrier to fit the shape of your container, ensuring it covers the entire charcoal layer.
Step 6: Introduce Your Potting Mix
The right potting mix provides the essential nutrients and support for your chosen plants.
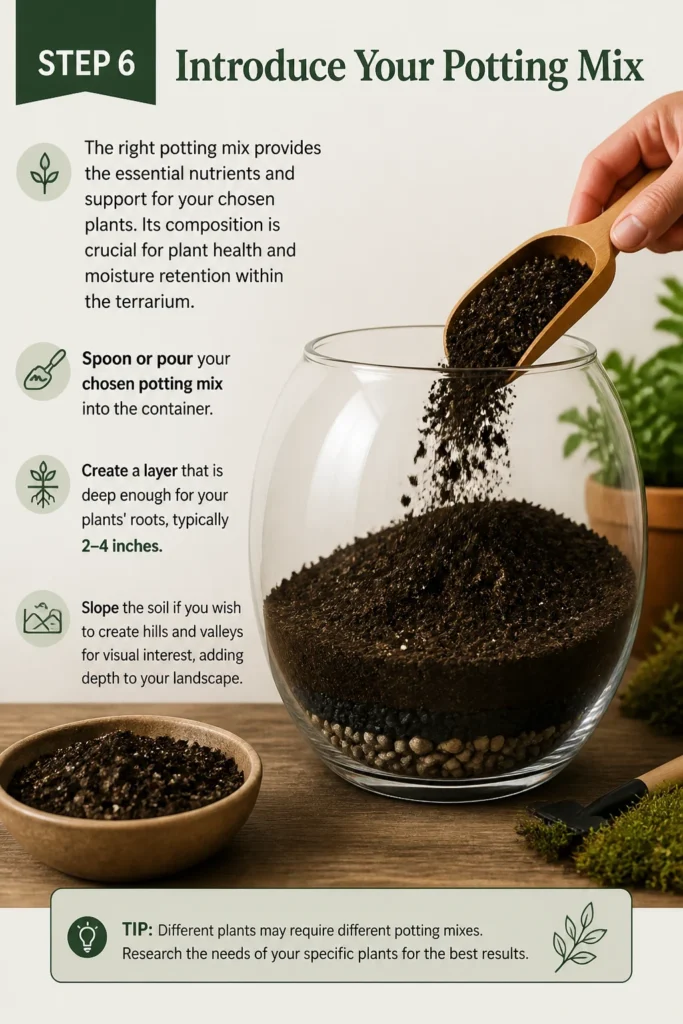
Its composition is crucial for plant health and moisture retention within the terrarium.
- Spoon or pour your chosen potting mix into the container.
- Create a layer that is deep enough for your plants’ roots, typically 2-4 inches.
- Slope the soil if you wish to create hills and valleys for visual interest, adding depth to your landscape.
Step 7: Plant Your Greenery
This is where your terrarium truly comes to life. Careful planting ensures your plants thrive and look their best.
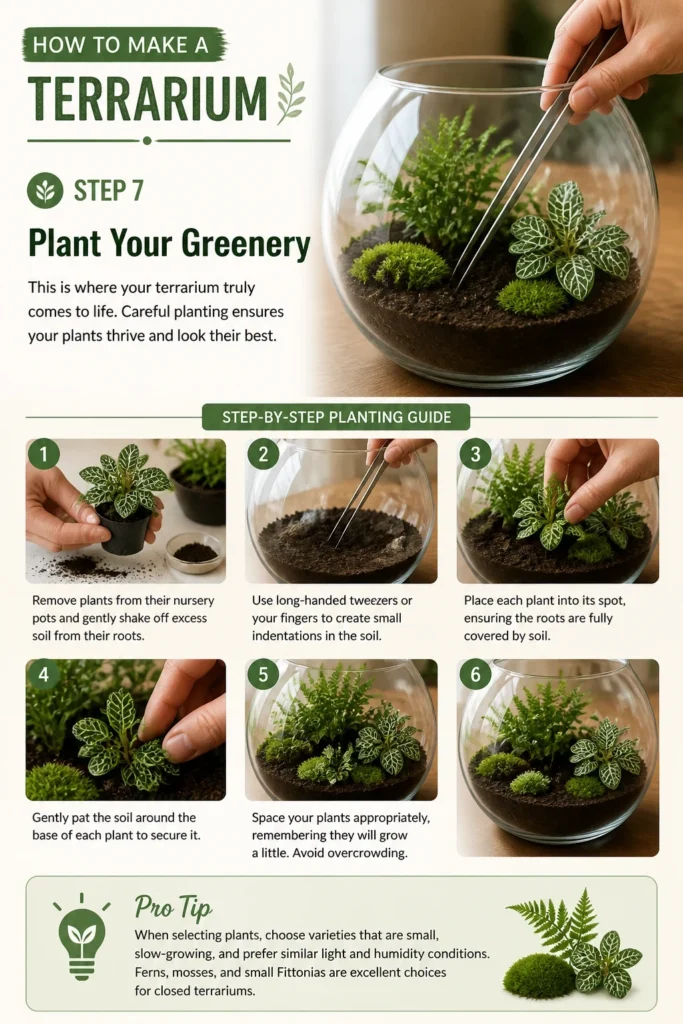
Consider the final arrangement before you start placing each plant.
- Remove plants from their nursery pots and gently shake off excess soil from their roots.
- Use long-handled tweezers or your fingers to create small indentations in the soil.
- Place each plant into its spot, ensuring the roots are fully covered by soil.
- Gently pat the soil around the base of each plant to secure it.
- Space your plants appropriately, remembering they will grow a little. Avoid overcrowding.
Pro Tip: When selecting plants, choose varieties that are small, slow-growing, and prefer similar light and humidity conditions. Ferns, mosses, and small Fittonias are excellent choices for closed terrariums.
Step 8: Decorate and Personalize
Adding decorative elements gives your terrarium character and reflects your personal style.
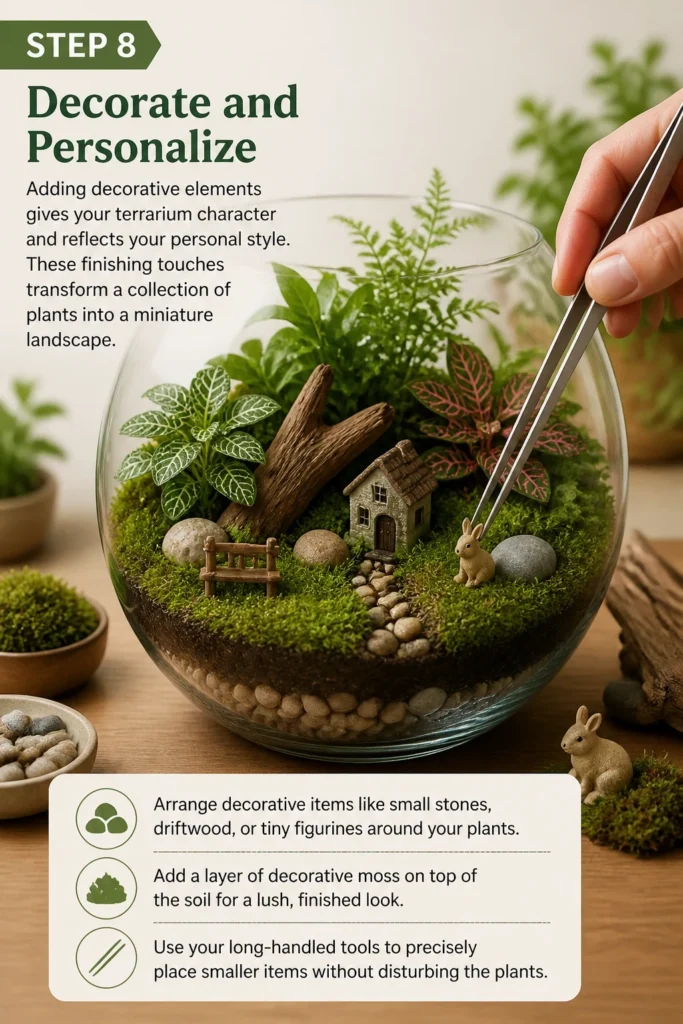
These finishing touches transform a collection of plants into a miniature landscape.
- Arrange decorative items like small stones, driftwood, or tiny figurines around your plants.
- Add a layer of decorative moss on top of the soil for a lush, finished look.
- Use your long-handled tools to precisely place smaller items without disturbing the plants.
Step 9: Water Your Terrarium
Initial watering is important, but careful not to overdo it, especially in a closed system.
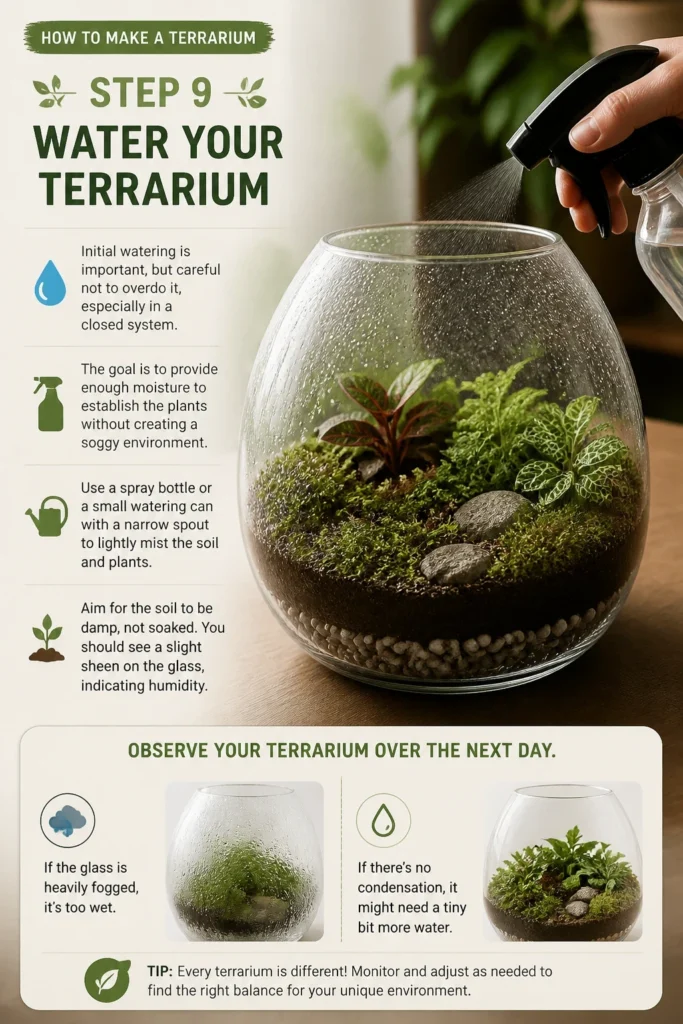
The goal is to provide enough moisture to establish the plants without creating a soggy environment.
- Use a spray bottle or a small watering can with a narrow spout to lightly mist the soil and plants.
- Aim for the soil to be damp, not soaked. You should see a slight sheen on the glass, indicating humidity.
- Observe the terrarium over the next day. If the glass is heavily fogged, it’s too wet; if there’s no condensation, it might need a tiny bit more water.
Step 10: Find the Perfect Spot
The location of your terrarium greatly impacts its health and longevity.
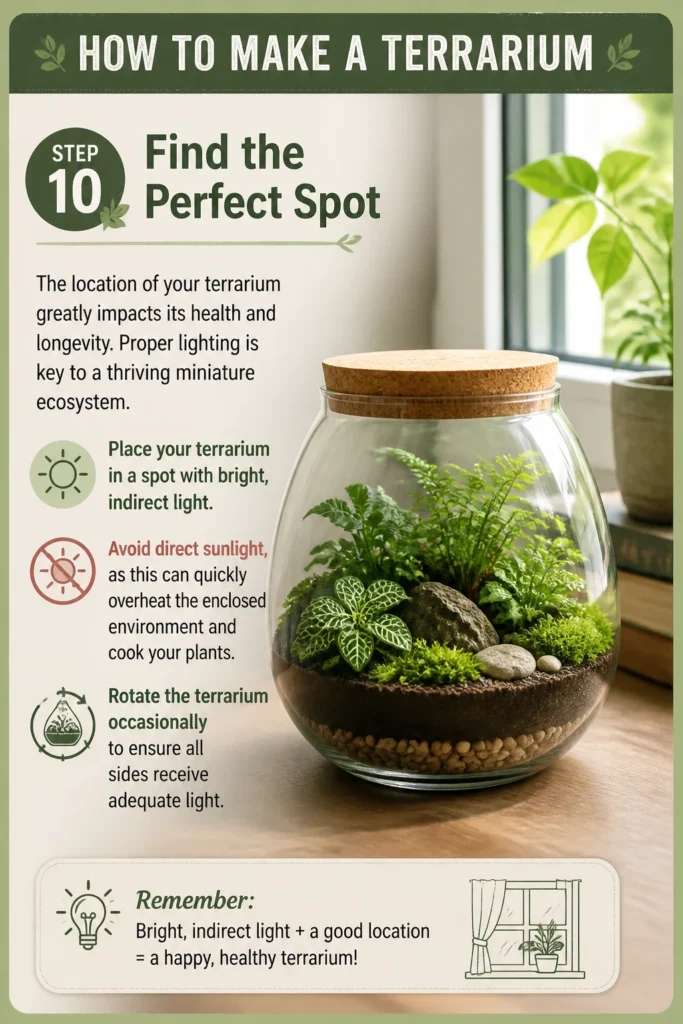
Proper lighting is key to a thriving miniature ecosystem.
- Place your terrarium in a spot with bright, indirect light.
- Avoid direct sunlight, as this can quickly overheat the enclosed environment and “cook” your plants.
- Rotate the terrarium occasionally to ensure all sides receive adequate light.
Common Mistakes to Avoid
Overwatering
One of the most frequent mistakes is giving your terrarium too much water. A closed terrarium creates its own mini-rain cycle, so it needs very little external watering.
Excess water leads to soggy soil, which suffocates roots and promotes mold and fungal growth, ultimately killing your plants.
Using the Wrong Plants
Not all plants are suited for terrarium life, especially closed ones. Mixing plants with vastly different humidity or light requirements can lead to some thriving while others struggle.
Always research the specific needs of your chosen plants and ensure they are compatible with each other and the terrarium environment you’re creating.
Lack of Drainage/Charcoal
Skipping the drainage layer or activated charcoal is a recipe for disaster. Without proper drainage, water stagnates at the bottom, leading to root rot and foul odors.
The charcoal is essential for filtering the air and water, keeping your terrarium fresh and preventing the buildup of harmful toxins.
Too Much Direct Sunlight
While plants need light, direct sunlight can turn a closed terrarium into a miniature oven. The magnified heat can quickly scorch and kill your plants.
Always place your terrarium in a location with bright, indirect light to ensure your plants get the energy they need without overheating.
Troubleshooting
Foggy Glass / Excessive Condensation
If your terrarium glass is constantly covered in heavy condensation, it likely means there’s too much moisture inside. This can lead to mold and plant rot.
To fix this, simply remove the lid for a few hours, or even overnight, to allow some of the excess moisture to evaporate. Repeat if necessary until condensation levels are balanced.
Mold or Fungus Growth
The appearance of mold or fungus is often a sign of too much moisture, poor air circulation, or decaying organic matter. It usually looks like white fuzzy patches on soil or plants.
Gently remove any affected plant parts or dead leaves with tweezers. Increase ventilation by opening the lid for a day or two, and ensure you’re not overwatering. A small springtail colony can also help by eating mold.
Plants Dying / Wilting
Wilting, yellowing, or browning leaves can indicate several issues. It could be too much or too little water, insufficient light, or even too much direct sunlight causing scorching.
Check the soil moisture; if it’s bone dry, add a small amount of water. If it’s soggy, open the lid to dry it out. Assess the light conditions and move the terrarium if it’s getting too much or too little light.
Key Takeaways
- Proper layering, including drainage and activated charcoal, is fundamental for a healthy terrarium.
- Select plants that are small, slow-growing, and compatible with the terrarium’s specific environment.
- Avoid overwatering at all costs; terrariums require very little external moisture once established.
- Position your terrarium in bright, indirect light, steering clear of harsh direct sunlight.
- Terrariums are self-sustaining ecosystems that thrive with minimal but observant care.
- Regularly observe your terrarium for signs of imbalance and address issues promptly.
Frequently Asked Questions
What’s the difference between open and closed terrariums?
Closed terrariums have a lid, creating a humid, self-sustaining environment ideal for tropical plants that love moisture. They require very infrequent watering.
Open terrariums have no lid, allowing for air circulation and lower humidity. They are perfect for plants like succulents and cacti that prefer drier conditions and need more frequent, but still light, watering.
How often do I need to water a terrarium?
For closed terrariums, watering is very rare, often only every few weeks or even months. Observe the condensation; if the glass is consistently clear for days, a light mist might be needed.
Open terrariums need watering more frequently, perhaps once a week or every two weeks, depending on the plants and environment. Always check the soil for dryness before watering.
Can I use any plant in a terrarium?
No, not all plants are suitable. For closed terrariums, choose small, slow-growing plants that thrive in high humidity, such as ferns, mosses, and Fittonia.
For open terrariums, select drought-tolerant plants like succulents, cacti, or air plants. Always avoid large or fast-growing plants that will quickly outgrow the space.
How long do terrariums last?
With proper care and maintenance, a terrarium can last for many years, sometimes even decades. Some historical terrariums have survived for over 50 years.
The key is balance: maintaining appropriate moisture, light, and occasionally pruning to keep plants healthy and within bounds. Your terrarium is a living, evolving ecosystem.
Our Top Recommended Finds
- Long-Handled Terrarium Tool Kit: Essential for precise planting and maintenance in deep or narrow containers.
- Activated Charcoal for Terrariums: Ensures a fresh, odor-free environment by filtering water and air.
- Specialty Terrarium Potting Mix: Formulated for optimal drainage and aeration, crucial for root health in enclosed spaces.
Start Your Miniature Garden Today
Crafting a terrarium is more than just a project; it’s an invitation to connect with nature on a small, intimate scale.
The sense of accomplishment from creating a thriving miniature world is truly rewarding, and the ongoing joy of its presence is immeasurable.
Don’t wait to bring a piece of living artistry into your home or office. Gather your materials and begin your terrarium journey today!