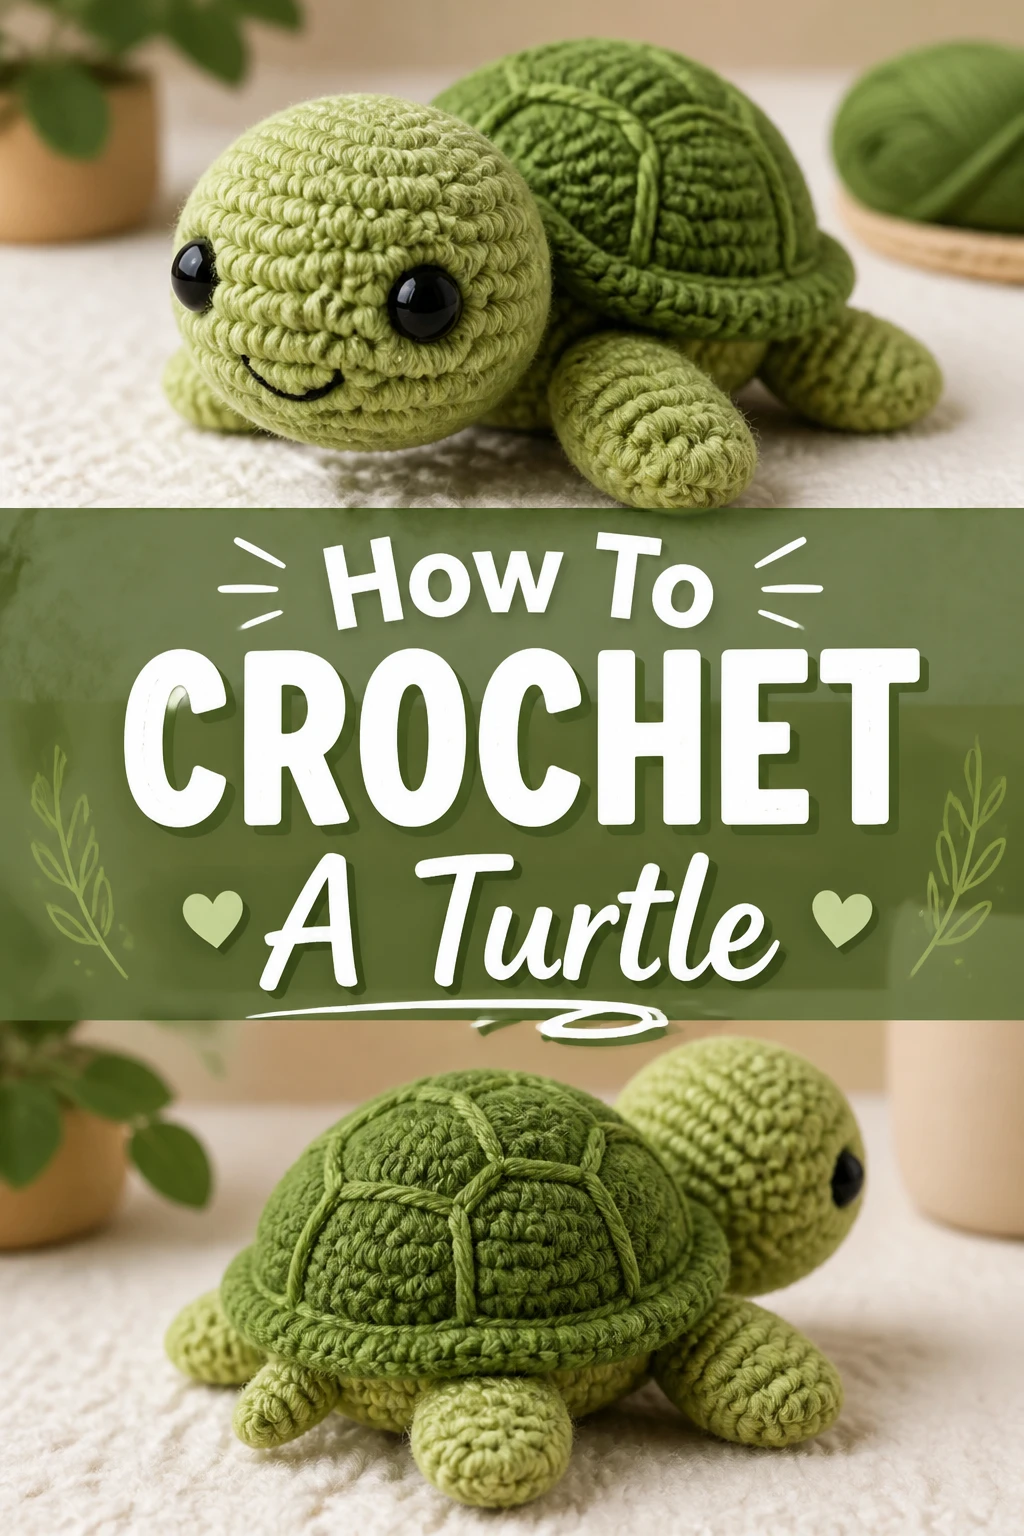
🐢 How To Crochet A Turtle
There’s something truly special about creating a little friend with your own hands.
I remember the joy of finishing my very first amigurumi project, a small, wonky turtle that still holds a cherished spot on my shelf.
This guide shares the practical steps and insights I’ve gathered to help you crochet your own adorable turtle.
Quick Overview
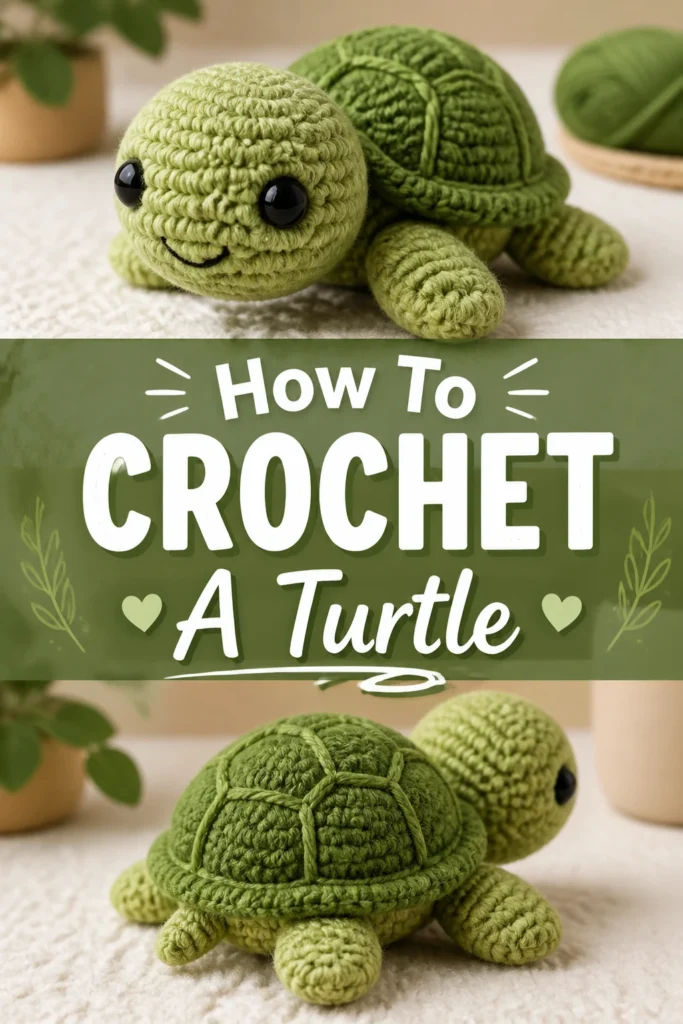
You’re about to embark on a delightful crafting journey. By the end, you’ll have a charming, handmade crochet turtle, perfect for gifting or keeping.
- Time needed: 3-6 hours (depending on experience level)
- Difficulty: Beginner to Intermediate
- What you’ll need: Yarn, crochet hook, stuffing, safety eyes, tapestry needle, scissors, stitch marker.
Step-by-Step Instructions
Step 1: Gather Your Supplies
Before you begin, ensure you have everything ready. This prevents interruptions and keeps your creative flow going.
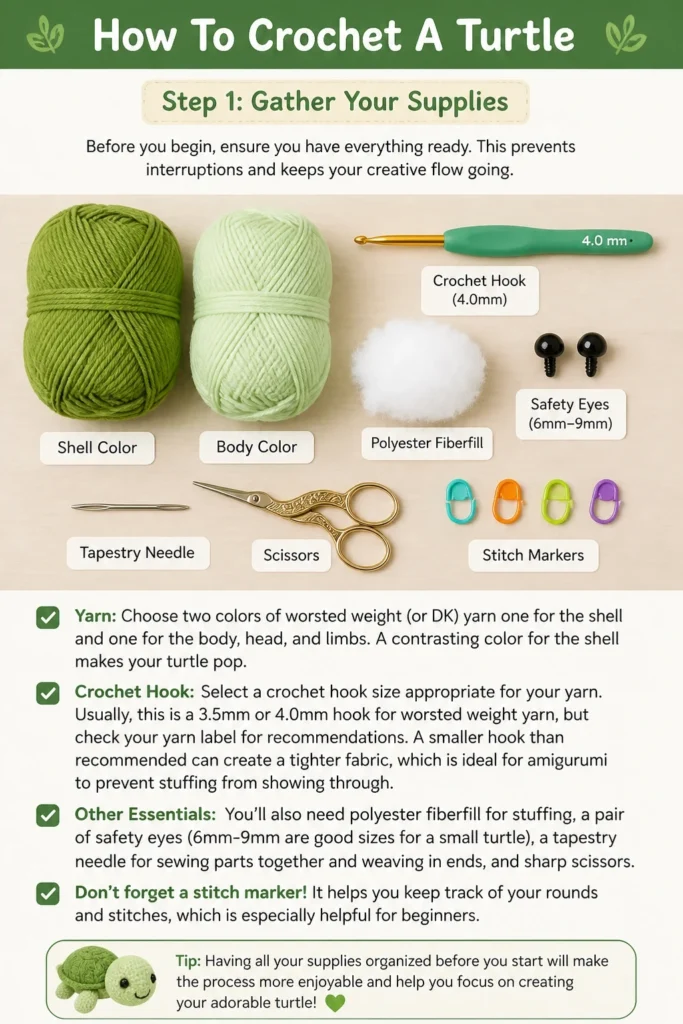
Choose two colors of worsted weight (or DK) yarn: one for the shell and one for the body, head, and limbs. A contrasting color for the shell makes your turtle pop.
Select a crochet hook size appropriate for your yarn. Usually, this is a 3.5mm or 4.0mm hook for worsted weight yarn, but check your yarn label for recommendations. A smaller hook than recommended can create a tighter fabric, which is ideal for amigurumi to prevent stuffing from showing through.
You’ll also need polyester fiberfill for stuffing, a pair of safety eyes (6mm-9mm are good sizes for a small turtle), a tapestry needle for sewing parts together and weaving in ends, and sharp scissors.
Don’t forget a stitch marker! This is crucial when working in continuous rounds to keep track of your first stitch.
Pro Tip: Always make a small swatch if you’re unsure about your hook size. A tight, even fabric is key for durable amigurumi.
Step 2: Crochet the Top Shell
Let’s start with the most distinctive part of your turtle. The top shell is worked in continuous rounds, building up from a magic ring.
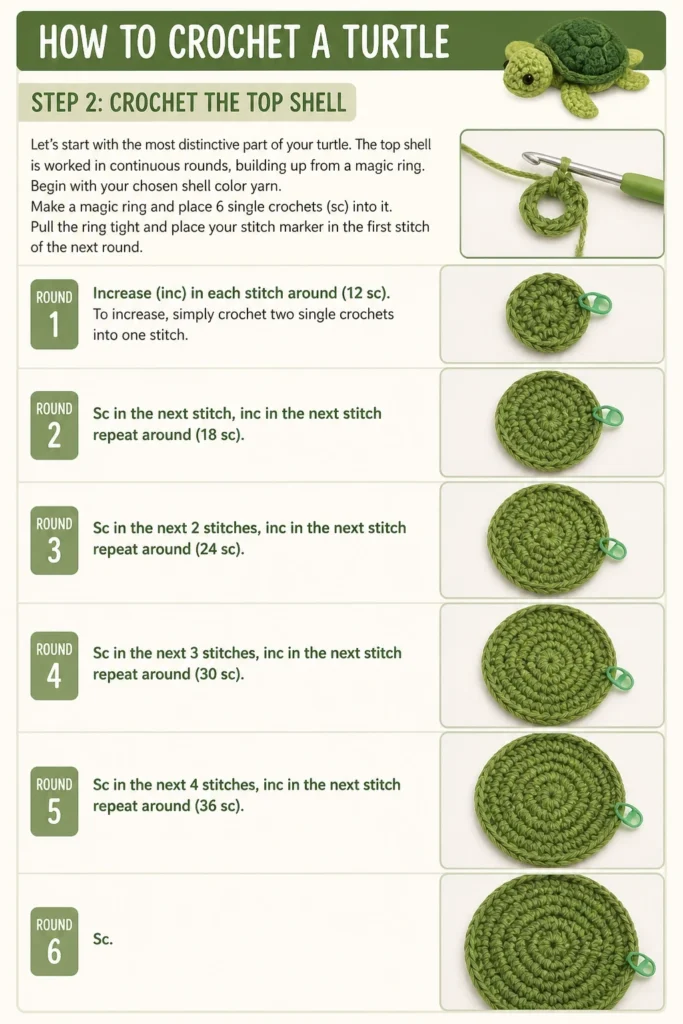
Begin with your chosen shell color yarn. Make a magic ring and place 6 single crochets (sc) into it. Pull the ring tight and place your stitch marker in the first stitch of the next round.
Round 1: Increase (inc) in each stitch around (12 sc). To increase, simply crochet two single crochets into one stitch.
Round 2: Sc in the next stitch, inc in the next stitch repeat around (18 sc).
Round 3: Sc in the next 2 stitches, inc in the next stitch repeat around (24 sc).
Round 4: Sc in the next 3 stitches, inc in the next stitch repeat around (30 sc).
Round 5: Sc in the next 4 stitches, inc in the next stitch repeat around (36 sc).
Round 6: Sc in the next 5 stitches, inc in the next stitch repeat around (42 sc).
Round 7-9: Sc in each stitch around (42 sc). Work these rounds without any increases to give the shell its dome shape.
Fasten off, leaving a long tail for sewing. This tail will be used to attach the top shell to the bottom shell and body later.
Step 3: Crochet the Bottom Shell
The bottom shell, or plastron, is flatter than the top. It’s usually made in the same color as the body for a seamless look.
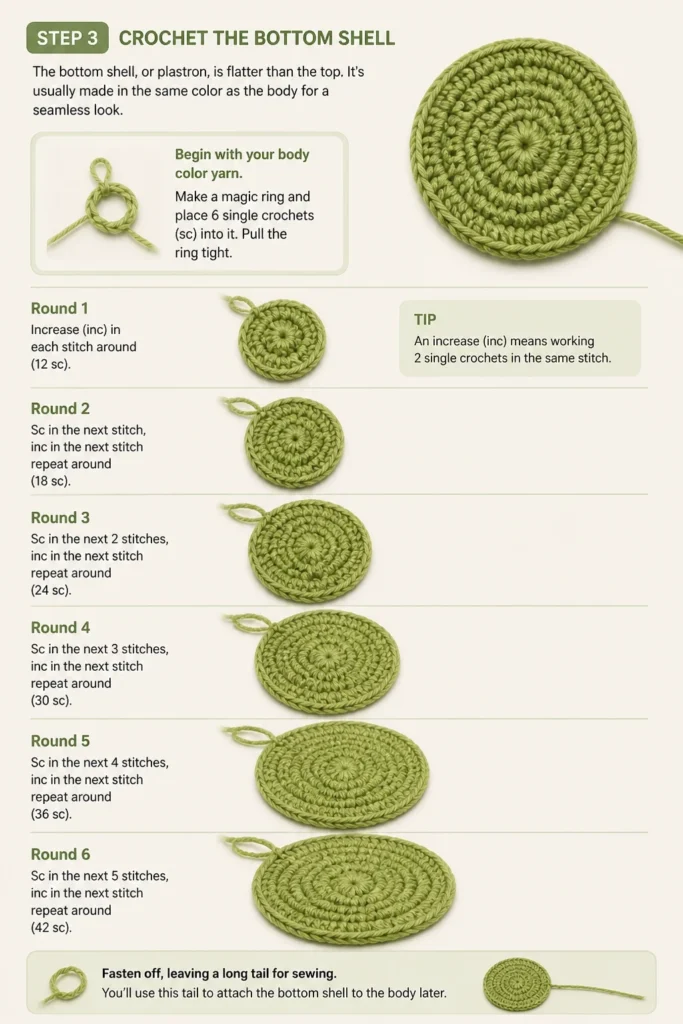
Begin with your body color yarn. Make a magic ring and place 6 single crochets (sc) into it. Pull the ring tight.
Round 1: Increase (inc) in each stitch around (12 sc).
Round 2: Sc in the next stitch, inc in the next stitch repeat around (18 sc).
Round 3: Sc in the next 2 stitches, inc in the next stitch repeat around (24 sc).
Round 4: Sc in the next 3 stitches, inc in the next stitch repeat around (30 sc).
Round 5: Sc in the next 4 stitches, inc in the next stitch repeat around (36 sc).
Round 6: Sc in the next 5 stitches, inc in the next stitch repeat around (42 sc).
Fasten off, leaving a long tail for sewing. You’ll use this to attach the bottom shell to the top shell, enclosing the body.
Pro Tip: When making two identical pieces like the shell halves, count your stitches meticulously in each round. A single missed stitch can throw off the alignment later.
Step 4: Create the Body and Head
This part forms the main structure of your turtle, from its neck to its tail. It’s worked as one continuous piece.
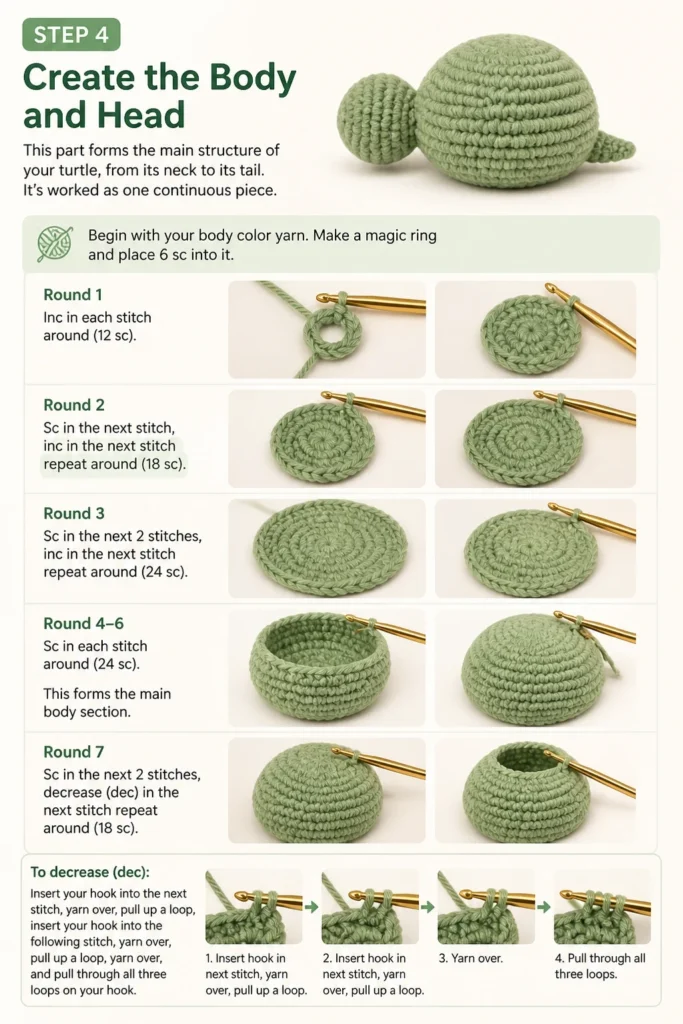
Begin with your body color yarn. Make a magic ring and place 6 sc into it.
Round 1: Inc in each stitch around (12 sc).
Round 2: Sc in the next stitch, inc in the next stitch repeat around (18 sc).
Round 3: Sc in the next 2 stitches, inc in the next stitch repeat around (24 sc).
Round 4-6: Sc in each stitch around (24 sc). This forms the main body section.
Round 7: Sc in the next 2 stitches, decrease (dec) in the next stitch repeat around (18 sc). To decrease, insert your hook into the next stitch, yarn over, pull up a loop, insert your hook into the following stitch, yarn over, pull up a loop, yarn over, and pull through all three loops on your hook.
Round 8: Sc in each stitch around (18 sc). This begins to shape the neck.
Round 9: Sc in the next stitch, dec in the next stitch repeat around (12 sc).
Round 10-12: Sc in each stitch around (12 sc). This creates the neck and head structure. Lightly stuff the body and neck as you go.
Attach the safety eyes between Rounds 10 and 11, about 4-5 stitches apart. Secure the washers firmly on the inside.
Round 13: Dec in the next 2 stitches repeat around (6 sc). Stuff the head firmly before completely closing.
Fasten off, leaving a short tail. Use your tapestry needle to weave the tail through the front loop of the remaining 6 stitches and pull tight to close the opening. Weave in the end.
Step 5: Make the Legs and Tail
These smaller parts bring your turtle to life. You’ll make four identical legs and one tiny tail.
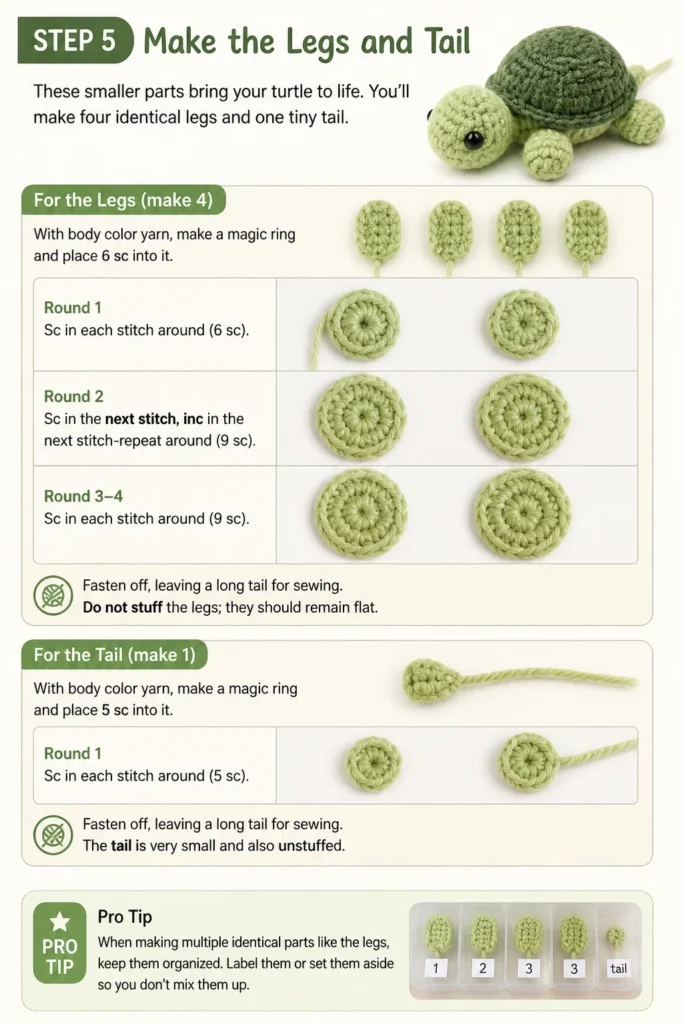
For the Legs (make 4): With body color yarn, make a magic ring and place 6 sc into it.
Round 1: Sc in each stitch around (6 sc).
Round 2: Sc in the next stitch, inc in the next stitch repeat around (9 sc).
Round 3-4: Sc in each stitch around (9 sc).
Fasten off, leaving a long tail for sewing. Do not stuff the legs; they should remain flat.
For the Tail (make 1): With body color yarn, make a magic ring and place 5 sc into it.
Round 1: Sc in each stitch around (5 sc).
Fasten off, leaving a long tail for sewing. The tail is very small and also unstuffed.
Pro Tip: When making multiple identical parts like the legs, keep them organized. Label them or set them aside carefully to avoid confusion during assembly.
Step 6: Assemble Your Turtle
Now comes the exciting part: bringing all the pieces together to form your turtle.
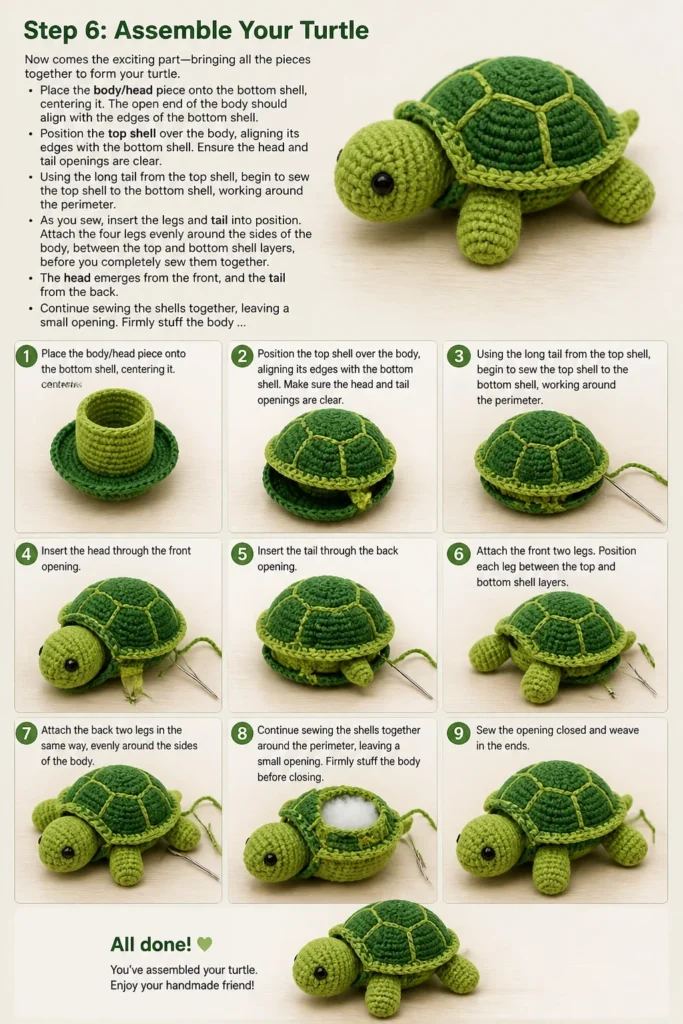
Place the body/head piece onto the bottom shell, centering it. The open end of the body should align with the edges of the bottom shell.
Position the top shell over the body, aligning its edges with the bottom shell. Ensure the head and tail openings are clear.
Using the long tail from the top shell, begin to sew the top shell to the bottom shell, working around the perimeter. As you sew, insert the legs and tail into position.
Attach the four legs evenly around the sides of the body, between the top and bottom shell layers, before you completely sew them together. The head emerges from the front, and the tail from the back.
Continue sewing the shells together, leaving a small opening. Firmly stuff the body and head through this opening if you haven’t already. Ensure an even, firm stuffing to give your turtle a good shape.
Close the remaining opening with your tapestry needle, securing all stitches. Weave in any remaining ends. Make sure all limbs and the head are securely attached.
Step 7: Add Finishing Touches
A few final details can make your turtle truly shine.
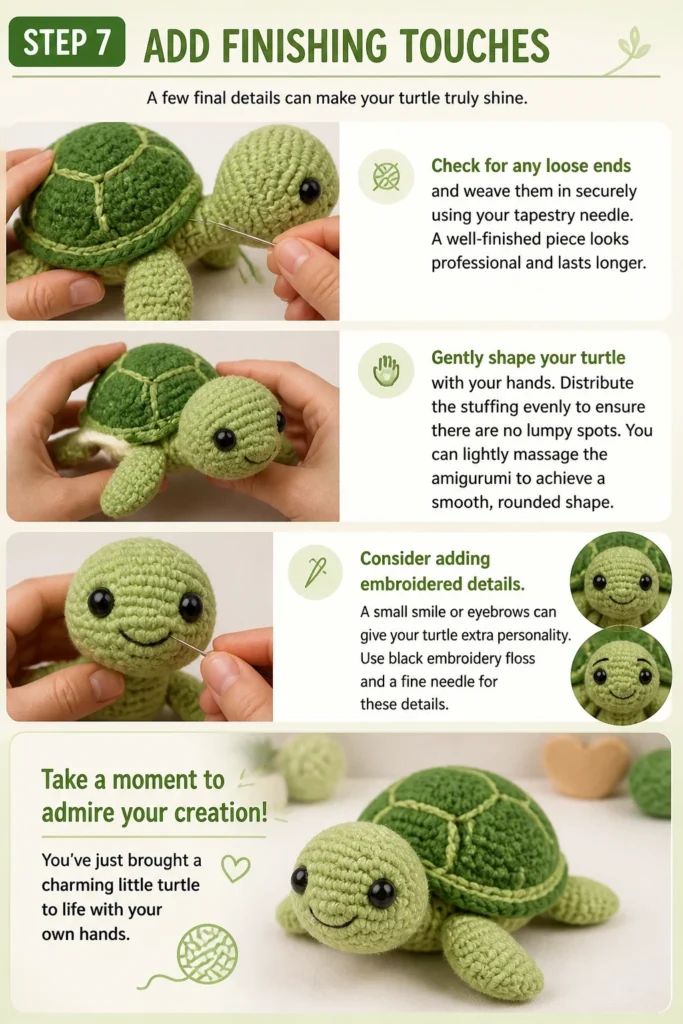
Check for any loose ends and weave them in securely using your tapestry needle. A well-finished piece looks professional and lasts longer.
Gently shape your turtle with your hands. Distribute the stuffing evenly to ensure there are no lumpy spots. You can lightly “massage” the amigurumi to achieve a smooth, rounded shape.
Consider adding embroidered details. A small smile or eyebrows can give your turtle extra personality. Use black embroidery floss and a fine needle for these details.
Take a moment to admire your creation! You’ve just brought a charming little turtle to life with your own hands.
Common Mistakes to Avoid
Crocheting Too Loosely
Using too large a hook or having loose tension can result in gaps in your stitches. This allows the stuffing to show through, which detracts from the finished look of your amigurumi. Aim for a tight, consistent tension that still allows you to insert your hook easily.
Forgetting Your Stitch Marker
When working in continuous rounds, it’s incredibly easy to lose track of where a round begins and ends. This leads to incorrect stitch counts and a lopsided or misshapen piece. Always use a stitch marker in the first stitch of each new round.
Under-stuffing or Over-stuffing
An under-stuffed turtle will feel flimsy and lose its shape over time, while an over-stuffed one might bulge and strain the stitches. Aim for firm but not rock-hard stuffing. Gradually add fiberfill, shaping as you go, to achieve a smooth, even density.
Skipping the Magic Ring
The magic ring creates a tight, neat center for your amigurumi pieces. Using a chain-2 method and working into the second chain often leaves a small hole in the center. While acceptable for some projects, the magic ring is preferred for a seamless look in amigurumi.
Troubleshooting
My stitches look uneven or gappy.
This usually indicates that your tension is inconsistent or too loose. Try using a smaller crochet hook size than recommended for your yarn. Practice maintaining a consistent tension by focusing on how tightly you hold the yarn and how you pull up your loops.
I keep losing count of my stitches.
The most common culprit here is not using a stitch marker, or not moving it up with each round. Make sure to place your stitch marker in the very first stitch of every new round. If you’re still struggling, try pausing after every few stitches to count them before continuing.
My turtle looks lumpy after stuffing.
This often happens when stuffing is added in large clumps. Instead, pull off small pieces of fiberfill and insert them gradually, using the back of your hook or a blunt tool to push them into tight spots. Gently massage the piece as you stuff to distribute the fiberfill evenly and smooth out any lumps.
Key Takeaways
- Consistent tension and a smaller hook create a neat, durable amigurumi fabric.
- Always use a stitch marker when working in continuous rounds to maintain accurate stitch counts.
- Stuff your turtle firmly and evenly to give it a pleasing, lasting shape.
- The magic ring is essential for a clean, closed center in amigurumi pieces.
- Take your time during assembly to ensure all parts are securely and symmetrically attached.
- Don’t be afraid to add personal touches like embroidered facial features to make your turtle unique.
Frequently Asked Questions
Can I use different yarn weights?
Absolutely! Using a different yarn weight will change the size of your finished turtle. Just be sure to match your crochet hook size to the yarn weight you choose. A good rule of thumb is to use a hook one or two sizes smaller than what the yarn label suggests for amigurumi.
What if I don’t have safety eyes?
You can easily embroider eyes onto your turtle using black embroidery floss and a tapestry needle. This is a great alternative, especially for baby toys, as embroidered eyes pose no choking hazard. You can create simple French knots or straight lines for sleepy eyes.
How do I make my turtle bigger or smaller?
To make a bigger turtle, use a thicker yarn and a larger crochet hook. To make it smaller, use thinner yarn and a smaller hook. The pattern’s stitch counts remain the same, only the scale changes. You can also adjust the number of increase rounds in the shell and body to modify the overall size.
Is it okay to wash a crochet turtle?
Yes, most crochet turtles can be hand-washed gently with mild soap and cool water. Squeeze out excess water without twisting, then lay flat on a towel to air dry. Avoid machine washing and drying, as this can distort the shape and damage the yarn.
Our Top Recommended Finds
- Ergonomic Crochet Hook Set: Comfortable handles reduce hand fatigue, making long crafting sessions more enjoyable.
- Stitch Marker Assortment: Having various colors helps you keep track of rounds, increases, or decreases easily.
- Polyester Fiberfill: Essential for stuffing, look for hypoallergenic options for sensitive individuals.
Your Little Friend Awaits
You’ve navigated through each step, from the first magic ring to the final stitch, bringing your charming crochet turtle to life.
This isn’t just a guide; it’s a pathway to creating something tangible and heartwarming.
Now that you’ve mastered the turtle, why not explore other amigurumi projects? Perhaps a friendly octopus or a tiny whale could be your next adventure.
Pick up your hook and yarn today and continue your journey into the wonderful world of crochet!