
🌿 How To Make Rosemary Oil
Have you ever wished you could harness the power of nature right from your kitchen? Crafting your own rosemary oil is not just simple, it’s incredibly rewarding. I remember the first time I made a batch; the aroma filled my home, and I knew I had unlocked something special.
This guide will walk you through every step, ensuring your homemade rosemary oil is potent and perfect. You’ll soon have a versatile elixir ready for hair care, aromatherapy, or even culinary adventures.

Quick Overview
This guide will empower you to create your very own batch of potent rosemary oil from fresh or dried herbs. You’ll learn the safest and most effective methods to extract the beneficial compounds. By the end, you’ll have a beautiful, aromatic oil ready for various uses.
- Time needed: 2-6 weeks (infusion method) or 2-3 hours (slow cooker/double boiler method)
- Difficulty: Beginner
- What you’ll need: Rosemary, carrier oil, glass jar, fine mesh strainer, dark glass bottle
Step-by-Step Instructions
Step 1: Gather Your Ingredients and Tools
Before you begin, ensure you have everything laid out. This makes the process smooth and enjoyable. A little preparation goes a long way in ensuring success.
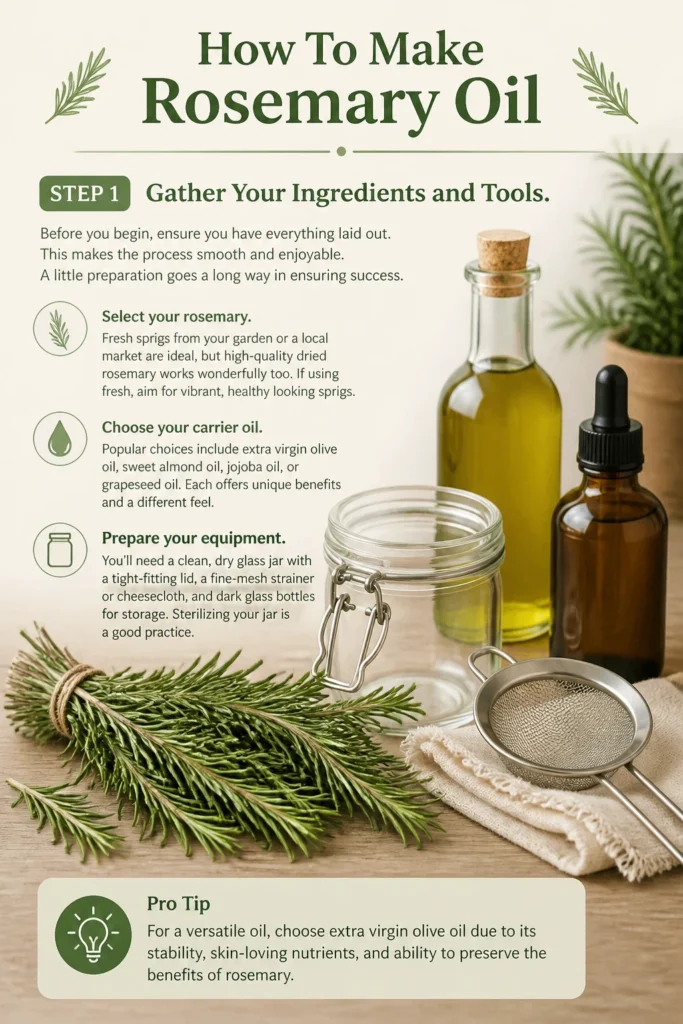
Select your rosemary. Fresh sprigs from your garden or a local market are ideal, but high-quality dried rosemary works wonderfully too. If using fresh, aim for vibrant, healthy looking sprigs.
Choose your carrier oil. Popular choices include extra virgin olive oil, sweet almond oil, jojoba oil, or grapeseed oil. Each offers unique benefits and a different feel.
Prepare your equipment. You’ll need a clean, dry glass jar with a tight-fitting lid, a fine-mesh strainer or cheesecloth, and dark glass bottles for storage. Sterilizing your jar is a good practice.
Pro Tip: For a versatile oil, choose extra virgin olive oil due to its stability and complementary scent profile with rosemary. For hair care, jojoba or sweet almond oil are excellent choices.
Step 2: Prepare the Rosemary
Proper preparation of the rosemary is crucial for maximizing oil extraction and preventing spoilage. This step ensures your oil is potent and safe. Take your time here.
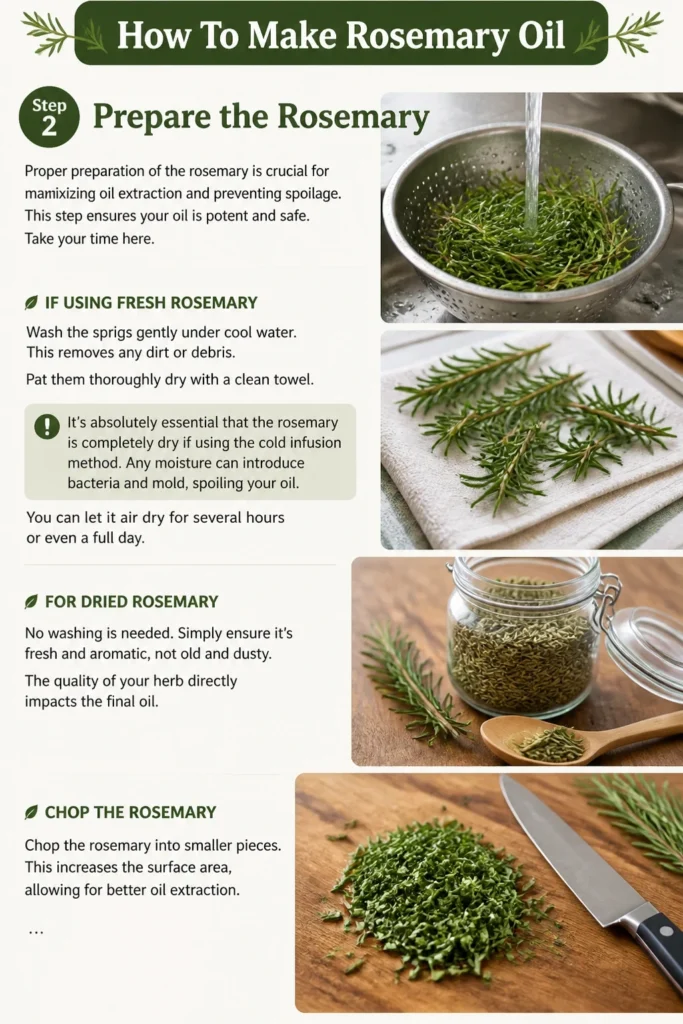
If using fresh rosemary, wash the sprigs gently under cool water. This removes any dirt or debris. Pat them thoroughly dry with a clean towel.
It’s absolutely essential that the rosemary is completely dry if using the cold infusion method. Any moisture can introduce bacteria and mold, spoiling your oil. You can let it air dry for several hours or even a full day.
For dried rosemary, no washing is needed. Simply ensure it’s fresh and aromatic, not old and dusty. The quality of your herb directly impacts the final oil.
Chop the rosemary into smaller pieces. This increases the surface area, allowing for better oil extraction. Break off the leaves from the woody stems, then roughly chop them.
Step 3: Combine Rosemary and Carrier Oil (Cold Infusion Method)
This is the most traditional and simplest method, though it requires patience. It’s excellent for preserving the delicate compounds of the rosemary. The gentle infusion creates a high-quality oil.
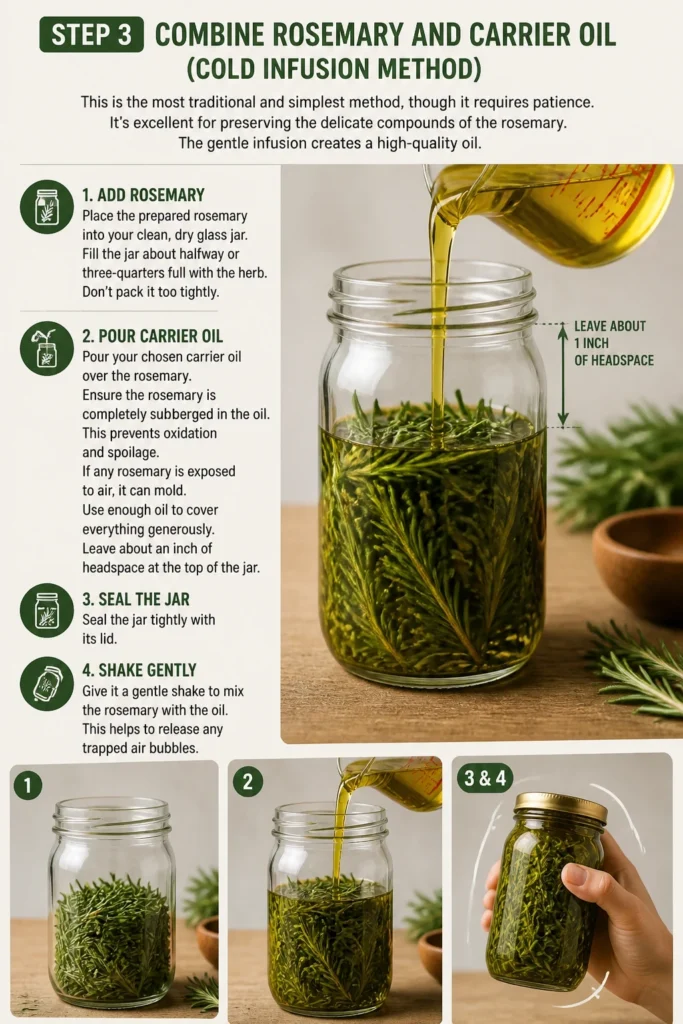
Place the prepared rosemary into your clean, dry glass jar. Fill the jar about halfway or three-quarters full with the herb. Don’t pack it too tightly.
Pour your chosen carrier oil over the rosemary. Ensure the rosemary is completely submerged in the oil. This prevents oxidation and spoilage.
If any rosemary is exposed to air, it can mold. Use enough oil to cover everything generously. Leave about an inch of headspace at the top of the jar.
Seal the jar tightly with its lid. Give it a gentle shake to mix the rosemary with the oil. This helps to release any trapped air bubbles.
Step 4: Infuse the Oil
Patience is key with the cold infusion method. This slow process allows the beneficial properties to gradually seep into the oil. The waiting period is well worth it.
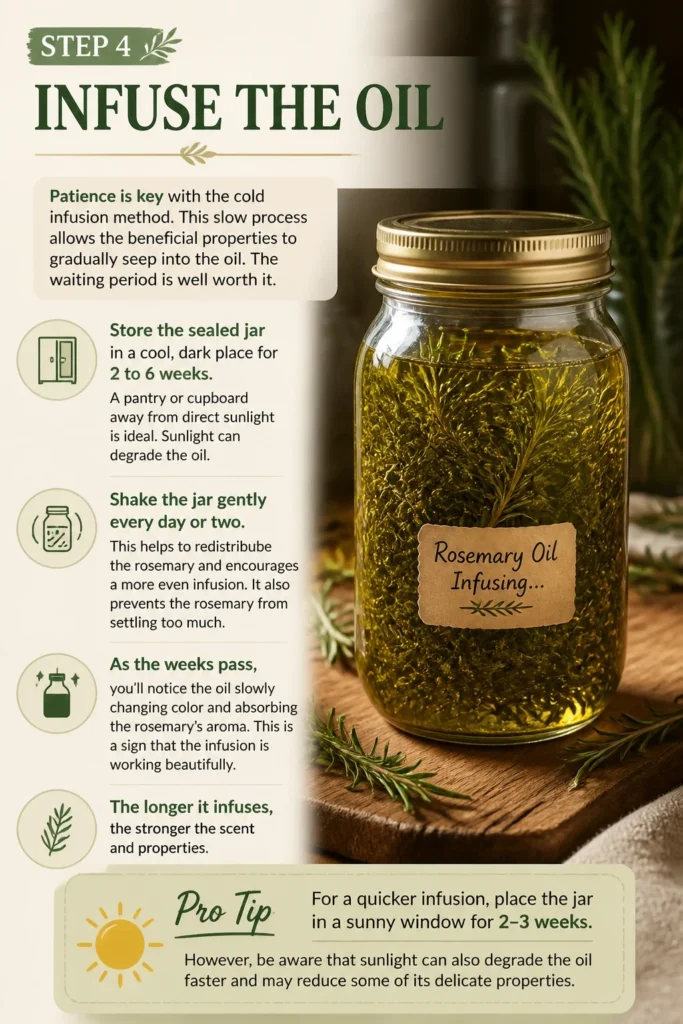
Store the sealed jar in a cool, dark place for 2 to 6 weeks. A pantry or cupboard away from direct sunlight is ideal. Sunlight can degrade the oil.
Shake the jar gently every day or two. This helps to redistribute the rosemary and encourages a more even infusion. It also prevents the rosemary from settling too much.
As the weeks pass, you’ll notice the oil slowly changing color and absorbing the rosemary’s aroma. This is a sign that the infusion is working beautifully. The longer it infuses, the stronger the scent and properties.
Pro Tip: For a quicker infusion, place the jar in a sunny window for 2-3 weeks. However, be aware that direct sunlight can sometimes degrade the oil over time, so a dark, warm spot is often preferred for long-term stability.
Step 5: Strain the Oil
Once your infusion period is complete, it’s time to separate the herb from the oil. This step is crucial for a clean, stable final product. You want pure, clear oil.
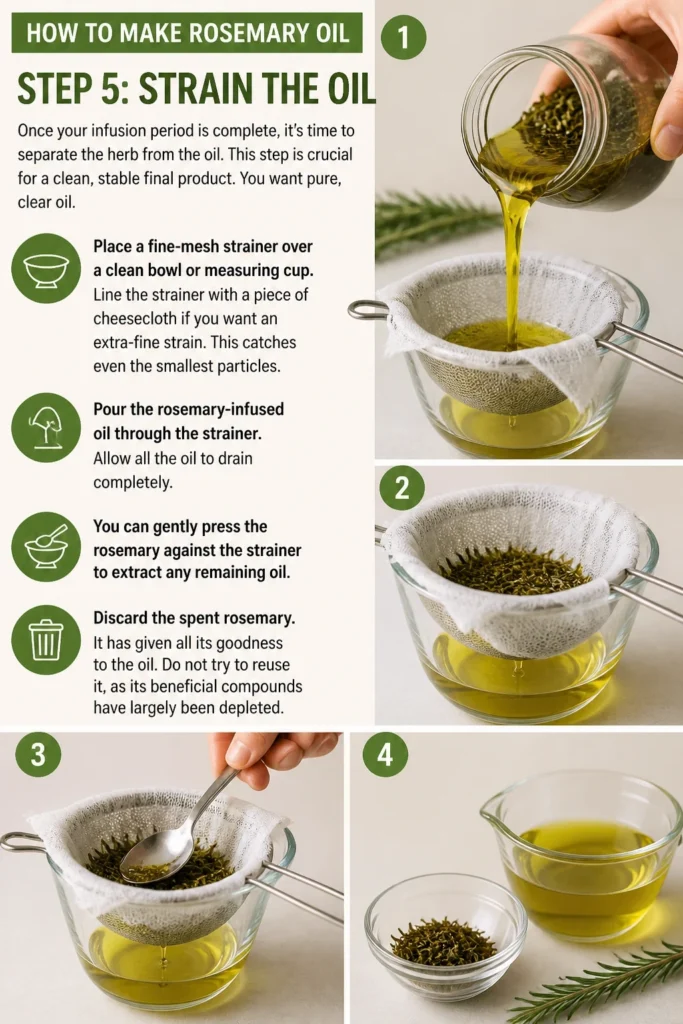
Place a fine-mesh strainer over a clean bowl or measuring cup. Line the strainer with a piece of cheesecloth if you want an extra-fine strain. This catches even the smallest particles.
Pour the rosemary-infused oil through the strainer. Allow all the oil to drain completely. You can gently press the rosemary against the strainer to extract any remaining oil.
Discard the spent rosemary. It has given all its goodness to the oil. Do not try to reuse it, as its beneficial compounds have largely been depleted.
Step 6: Bottle and Store Your Rosemary Oil
Proper storage ensures your homemade rosemary oil remains fresh and potent for as long as possible. Dark glass and a cool environment are your best friends. This protects its integrity.
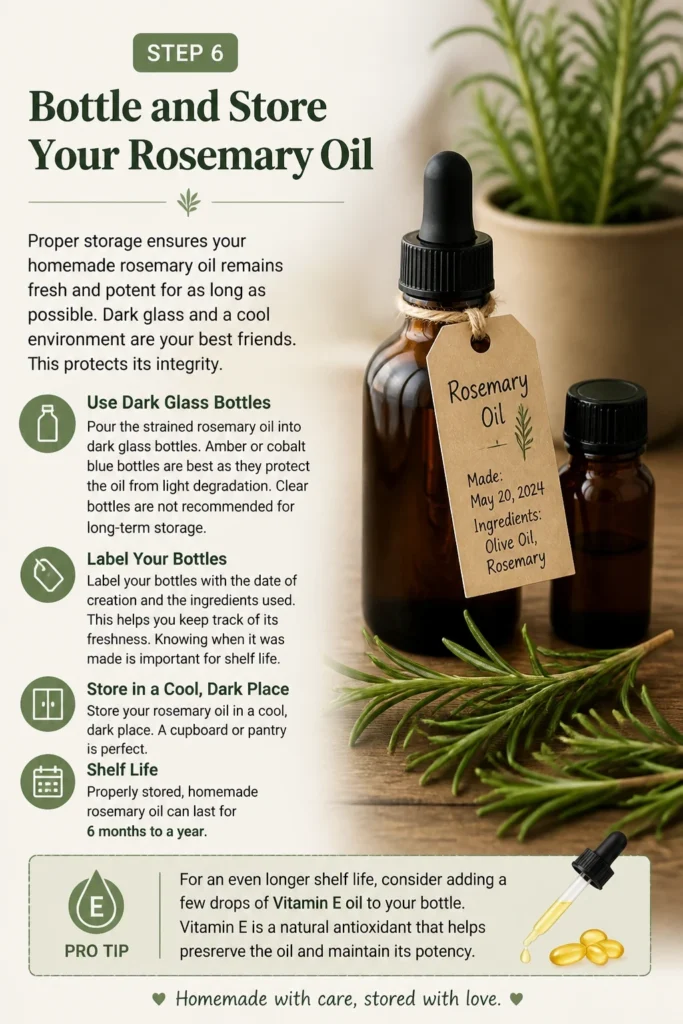
Pour the strained rosemary oil into dark glass bottles. Amber or cobalt blue bottles are best as they protect the oil from light degradation. Clear bottles are not recommended for long-term storage.
Label your bottles with the date of creation and the ingredients used. This helps you keep track of its freshness. Knowing when it was made is important for shelf life.
Store your rosemary oil in a cool, dark place. A cupboard or pantry is perfect. Properly stored, homemade rosemary oil can last for 6 months to a year.
Pro Tip: For an even longer shelf life, consider adding a few drops of Vitamin E oil to your batch. Vitamin E is a natural antioxidant that helps prevent rancidity.
Common Mistakes to Avoid
Using Wet Rosemary
One of the most common pitfalls is using rosemary that isn’t completely dry. Any lingering moisture introduces water into your oil, creating a breeding ground for bacteria and mold. This will quickly spoil your entire batch, rendering it unusable and potentially harmful. Always ensure fresh rosemary is thoroughly air-dried for at least 24 hours before infusing.
Not Submerging the Rosemary
If bits of rosemary are left exposed to the air within the jar, they can oxidize and become moldy. This contamination can spread throughout your oil, spoiling it. Always use enough carrier oil to completely cover all the rosemary, ensuring every piece is fully submerged to prevent spoilage.
Storing in Clear Glass or Direct Sunlight
Light, especially direct sunlight, can degrade the beneficial compounds in your rosemary oil and cause the carrier oil to go rancid faster. Storing your oil in clear glass bottles or in a sunny spot will significantly reduce its shelf life and potency. Always use dark amber or cobalt blue bottles and store them in a cool, dark cupboard.
Skipping the Straining Step
Leaving the spent rosemary plant material in the oil after infusion can lead to premature spoilage. Over time, these plant particles can break down, introducing impurities and potentially mold. Straining thoroughly ensures you have a clean, pure oil that will last longer and be more effective.
Troubleshooting
My Oil Smells Off or Rancid
If your rosemary oil develops an unpleasant, sour, or “old crayon” smell, it has likely gone rancid. This can happen if moisture was introduced during infusion, or if the oil was exposed to too much heat or light. Unfortunately, once oil is rancid, it cannot be salvaged and should be discarded to prevent potential skin irritation or other issues.
There’s Mold Growing in My Jar
Mold growth is almost always a sign that the rosemary was not completely dry before being added to the oil. Even a tiny bit of water can allow mold to flourish in an oil environment. If you see any mold, no matter how small, discard the entire batch immediately. Do not try to skim it off, as mold spores are often invisible and widespread.
My Oil Isn’t Very Potent
If your rosemary oil lacks a strong aroma or doesn’t seem to have the desired effects, it might be due to a short infusion time or using low-quality rosemary. For a stronger oil, extend the cold infusion period to the full 6 weeks, or consider using the gentle heat method (double boiler) for a few hours. Ensure your rosemary is fresh and aromatic.
Key Takeaways
- Thoroughly Dry Rosemary: Always ensure fresh rosemary is completely dry to prevent mold and spoilage.
- Submerge Completely: Ensure all rosemary is fully covered by carrier oil during infusion to avoid oxidation.
- Choose Quality Ingredients: Use fresh, aromatic rosemary and a good quality carrier oil for best results.
- Patience with Cold Infusion: Allow ample time (2-6 weeks) for the cold infusion method to yield potent oil.
- Proper Storage: Store your finished oil in dark glass bottles in a cool, dark place to extend its shelf life.
- Strain Thoroughly: Remove all plant material after infusion to maintain the purity and stability of the oil.
Frequently Asked Questions
Can I use dried rosemary for this recipe?
Yes, absolutely! Dried rosemary works very well for making infused oil. In fact, some people prefer it because it eliminates the concern of moisture spoiling the batch. Just ensure your dried rosemary is fresh and aromatic for the best potency.
What’s the shelf life of homemade rosemary oil?
When stored properly in a cool, dark place in a dark glass bottle, homemade rosemary oil can last from 6 months to a year. The shelf life largely depends on the freshness of your carrier oil and how well it was prepared and stored. If it smells rancid, discard it.
Can I use a different carrier oil than olive oil?
Certainly! While olive oil is a popular choice, you can use various carrier oils. Sweet almond oil, jojoba oil, grapeseed oil, and avocado oil are all excellent alternatives, each offering unique benefits. Choose one that suits your intended use and skin type.
How can I make rosemary oil faster?
For a quicker infusion, you can use a gentle heat method. Place your rosemary and oil in a double boiler or slow cooker on the lowest setting for 2-3 hours. Be very careful not to overheat the oil, as high temperatures can degrade the rosemary’s beneficial compounds and the oil itself.
Embrace Your Inner Alchemist
You’ve just embarked on a journey to create something truly special and beneficial. Making your own rosemary oil is a testament to natural living and self-sufficiency. It connects you more deeply with the herbs and plants around us.
Imagine the satisfaction of reaching for your homemade oil, knowing exactly what’s in it and the care that went into its creation. It’s a small act of rebellion against mass-produced goods. This simple skill opens up a world of possibilities for natural wellness.
Don’t wait another day to experience the magic. Gather your ingredients and start your first batch of rosemary oil today. Your hair, skin, and senses will thank you for it.