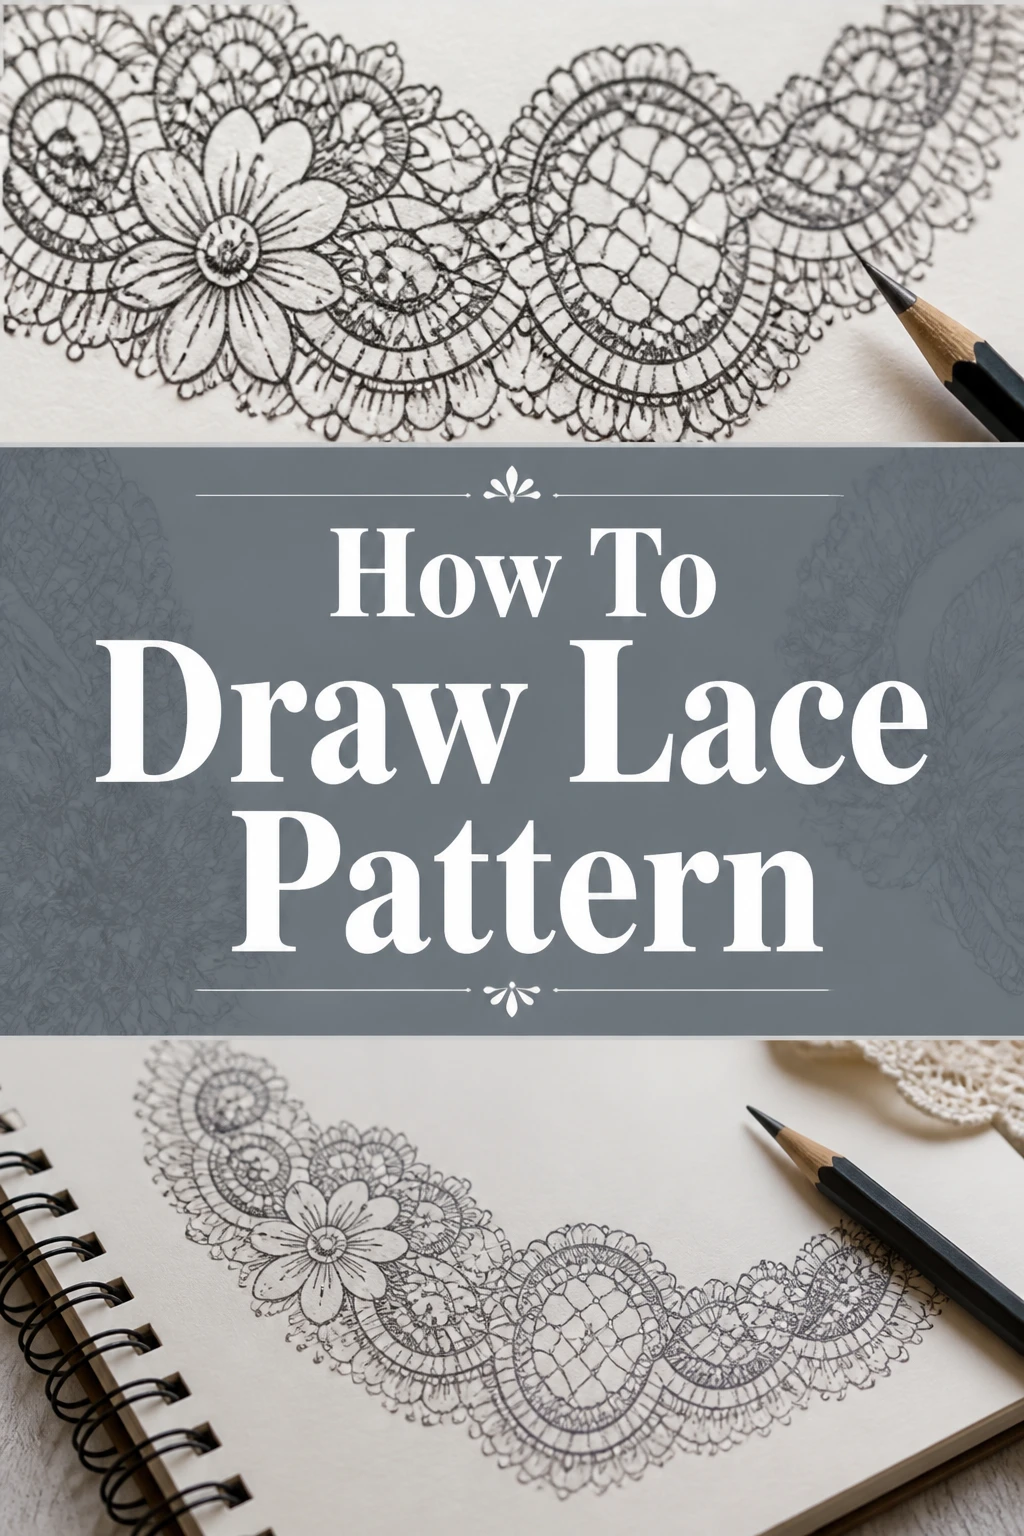
🎨 How To Draw Lace Pattern
Drawing lace used to feel like an impossible puzzle until I realized it is just a series of tiny, repeated shapes.
I have spent a decade illustrating delicate fabrics for wedding stationery and textile designs.
This guide breaks down that complexity into a manageable process that anyone can follow with a little patience.
Quick Overview
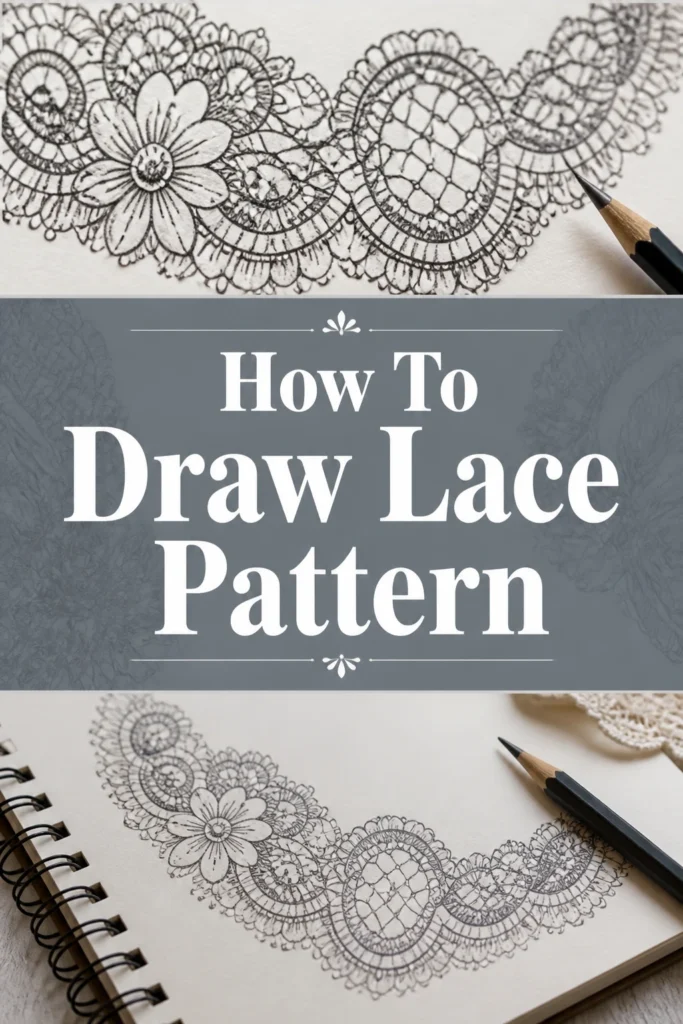
Lace is defined by its negative space and repetitive motifs. Once you understand the structure, you can create anything from vintage doilies to modern fashion details.
- Time needed: 45 to 60 minutes
- Difficulty: Intermediate
- What you’ll need: Fine-liner pens (0.05 to 0.3), graphite pencil, eraser, and smooth drawing paper.
Step-by-Step Instructions
Step 1: Sketch the Basic Framework
Start by drawing the outer boundary of your lace using a very light graphite pencil. This might be a straight edge for a trim or a circular shape for a doily.
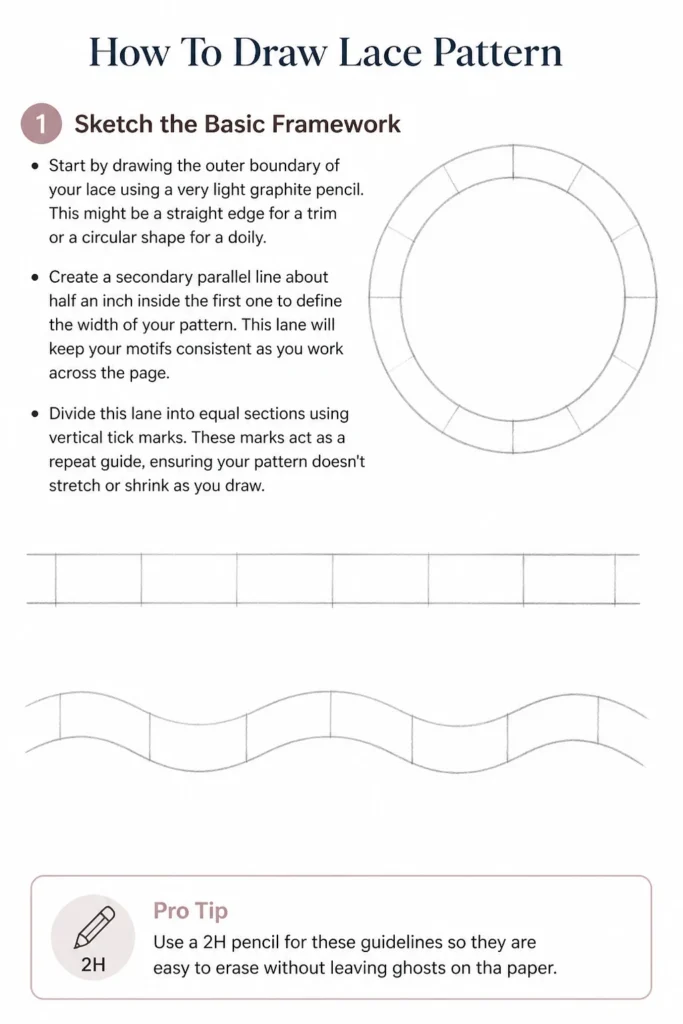
Create a secondary parallel line about half an inch inside the first one to define the width of your pattern. This “lane” will keep your motifs consistent as you work across the page.
Divide this lane into equal sections using vertical tick marks. These marks act as a “repeat” guide, ensuring your pattern doesn’t stretch or shrink as you draw.
Pro Tip: Use a 2H pencil for these guidelines so they are easy to erase without leaving ghosts on the paper.
Step 2: Map Out the Focal Motifs
Identify the center of each repeat section you created in the previous step. This is where your largest design elements, like flowers or geometric stars, will sit.
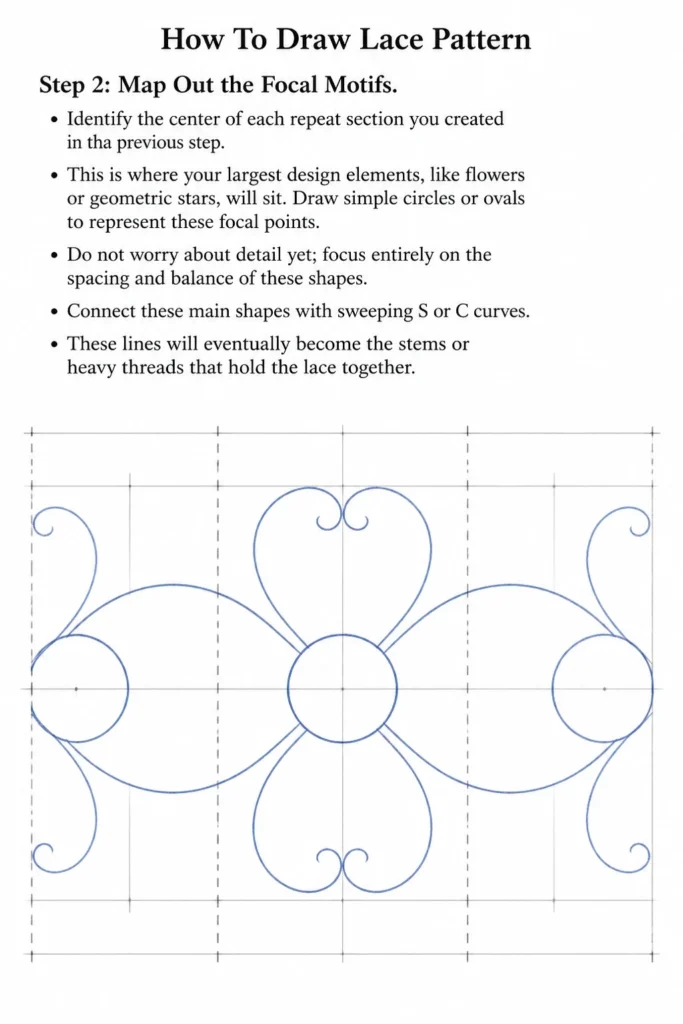
Draw simple circles or ovals to represent these focal points. Do not worry about detail yet; focus entirely on the spacing and balance of these shapes.
Connect these main shapes with sweeping “S” or “C” curves. These lines will eventually become the stems or heavy threads that hold the lace together.
Step 3: Define the Scalloped Edge
Move to the very outer edge of your framework. Lace rarely has a perfectly straight edge, so you want to create a series of small, rhythmic bumps.
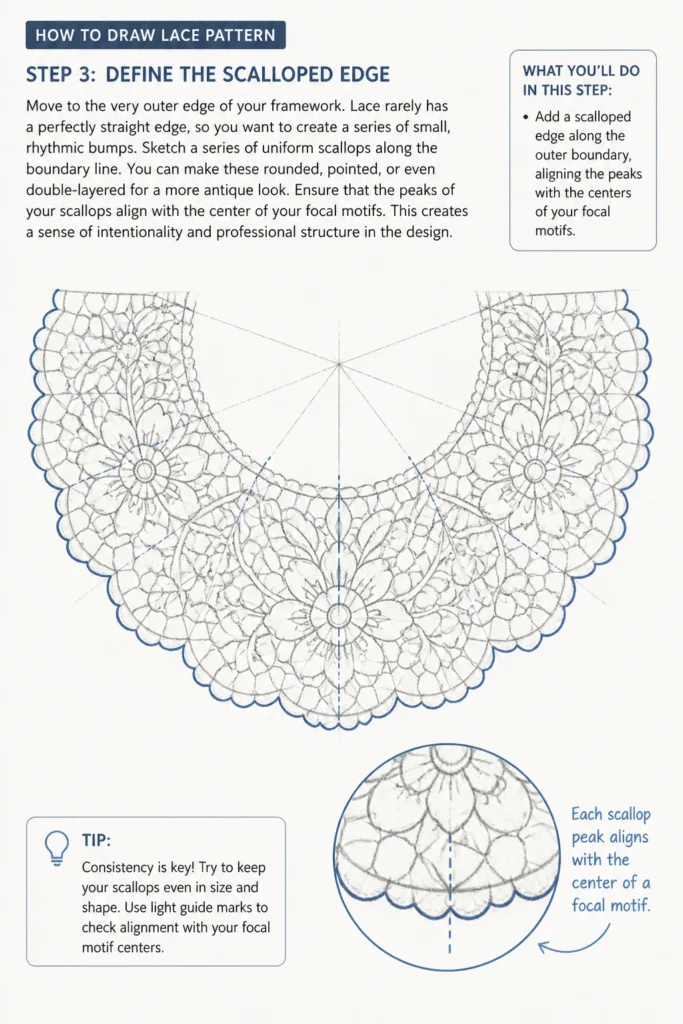
Sketch a series of uniform scallops along the boundary line. You can make these rounded, pointed, or even double-layered for a more antique look.
Ensure that the peaks of your scallops align with the center of your focal motifs. This creates a sense of intentionality and professional structure in the design.
Step 4: Ink the Primary Outlines
Switch to a medium-weight fine-liner pen, such as a 0.3 or 0.5. You are now going to solidify the most important parts of the pattern.
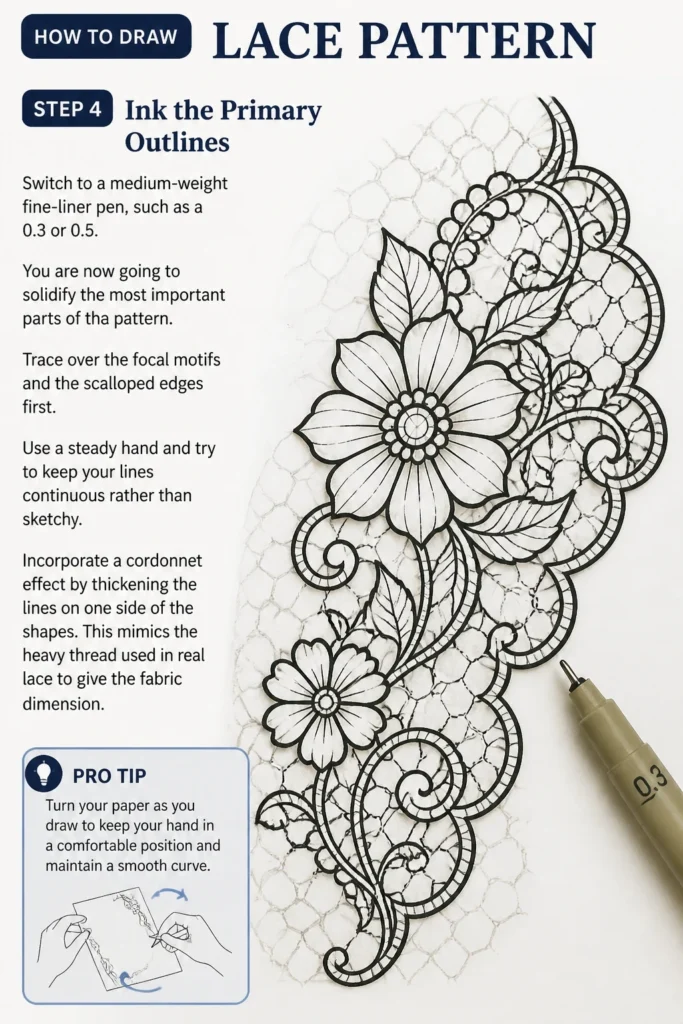
Trace over the focal motifs and the scalloped edges first. Use a steady hand and try to keep your lines continuous rather than sketchy.
Incorporate a “cordonnet” effect by thickening the lines on one side of the shapes. This mimics the heavy thread used in real lace to give the fabric dimension.
Pro Tip: Turn your paper as you draw to keep your hand in a comfortable position and maintain a smooth curve.
Step 5: Build the Internal Mesh
Look at the empty spaces between your focal motifs and the edges. In real lace, this is the “reseau” or the netting that provides the structural base.
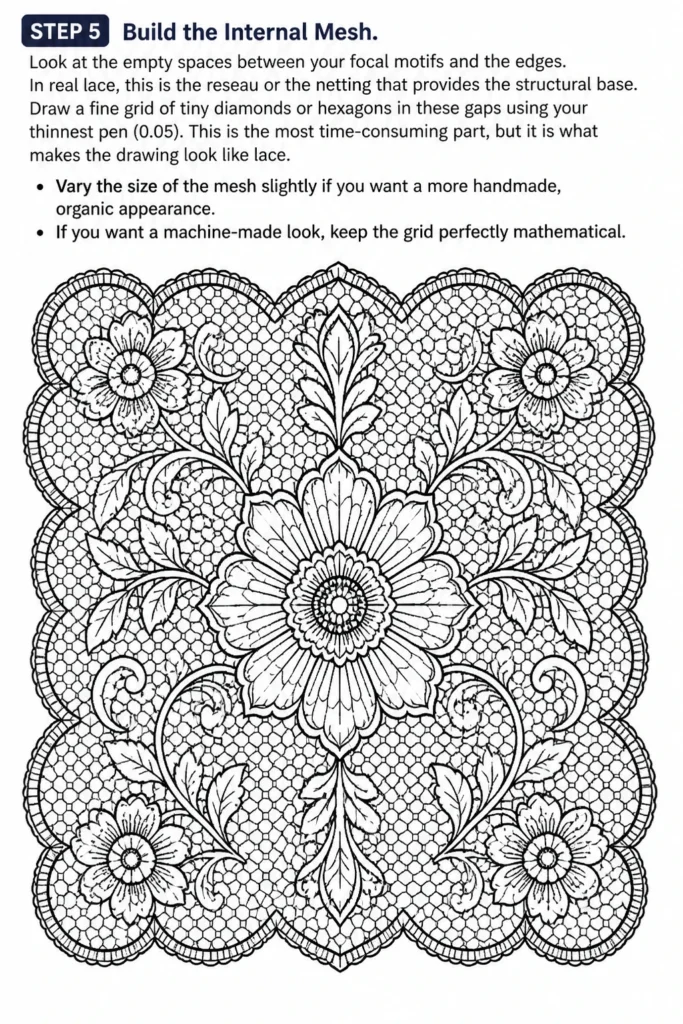
Draw a fine grid of tiny diamonds or hexagons in these gaps using your thinnest pen (0.05). This is the most time-consuming part, but it is what makes the drawing look like lace.
Vary the size of the mesh slightly if you want a more handmade, organic appearance. If you want a machine-made look, keep the grid perfectly mathematical.
Step 6: Add the Picot Details
Locate the very outer edges of your scallops. Real lace often has tiny loops of thread called “picots” that fringe the border.
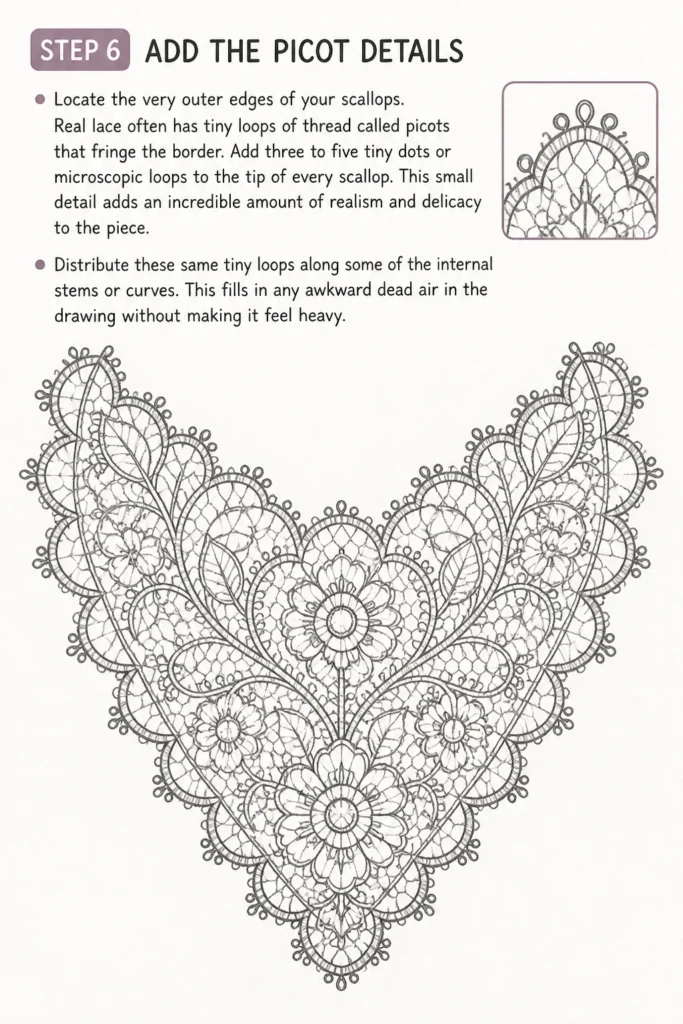
Add three to five tiny dots or microscopic loops to the tip of every scallop. This small detail adds an incredible amount of realism and delicacy to the piece.
Distribute these same tiny loops along some of the internal “stems” or curves. This fills in any awkward “dead air” in the drawing without making it feel heavy.
Step 7: Refine the Negative Space
Evaluate the balance of black and white in your drawing. Lace is beautiful because of the holes, so you want to make sure your “holes” look intentional.
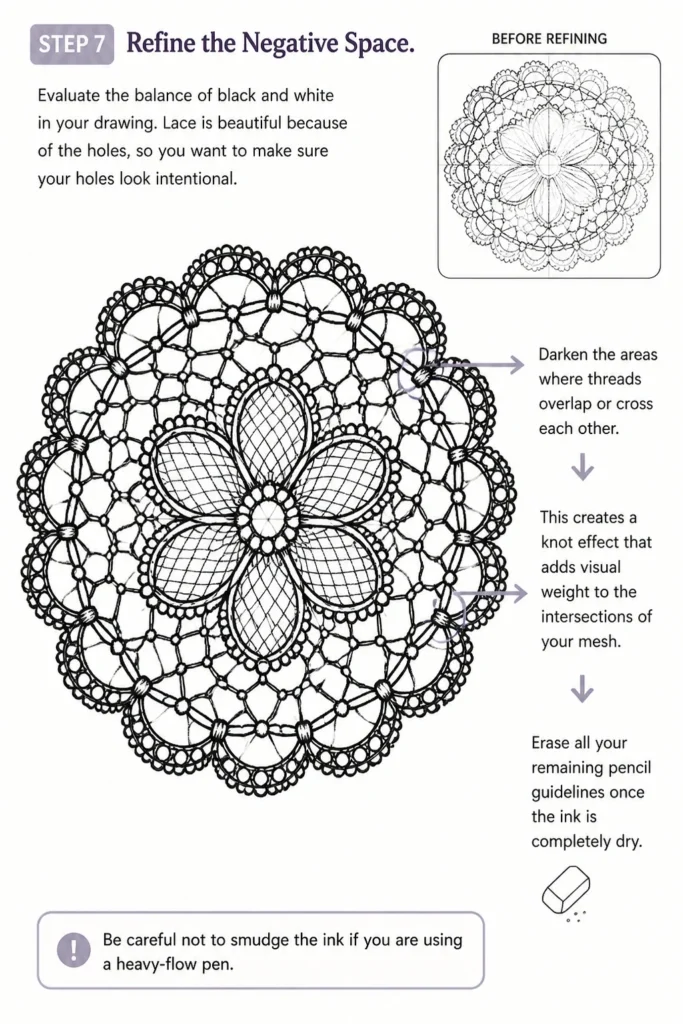
Darken the areas where threads overlap or cross each other. This creates a “knot” effect that adds visual weight to the intersections of your mesh.
Erase all your remaining pencil guidelines once the ink is completely dry. Be careful not to smudge the ink if you are using a heavy-flow pen.
Step 8: Introduce Shading and Depth
Identify which parts of the lace should appear “on top” of others. Even though lace is thin, the motifs often overlap slightly.
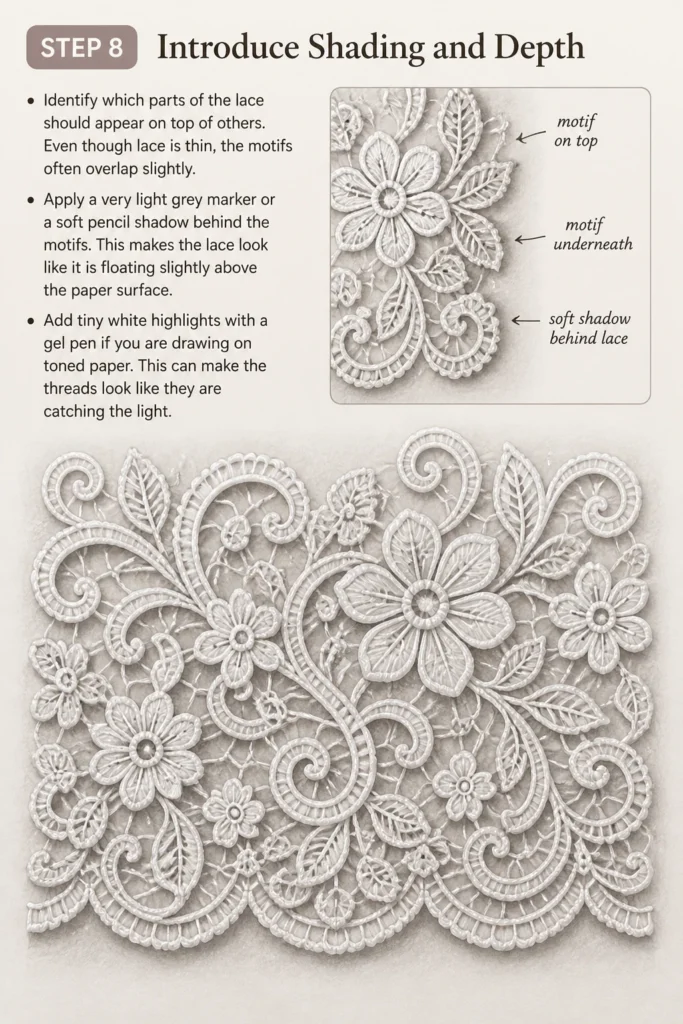
Apply a very light grey marker or a soft pencil shadow behind the motifs. This makes the lace look like it is floating slightly above the paper surface.
Add tiny white highlights with a gel pen if you are drawing on toned paper. This can make the “threads” look like they are catching the light.
Common Mistakes to Avoid
Making Lines Too Thick
If you use a thick marker for the entire drawing, the lace will look like a heavy wrought-iron fence. Lace is defined by its lightness and transparency.
Always use your thinnest pens for the background mesh. Reserve thicker lines only for the “cordonnet” or the very outer edges of the main flowers.
Ignoring the Grid Structure
Many beginners try to freehand the mesh background without a plan. This usually results in a messy, tangled look that lacks the geometric beauty of real lace.
Take the time to lightly pencil in a grid or a series of dots before you ink. Even a slightly irregular grid is better than no grid at all.
Overcrowding the Design
It is tempting to fill every millimeter of the paper with detail. However, lace needs “breathing room” to be recognizable as a fabric.
Make sure at least 30 to 40 percent of your design consists of open space. This contrast between the “solid” thread and the “empty” air creates the signature lace look.
Troubleshooting
The Pattern Looks “Clunky” or Heavy
This usually happens when there is not enough contrast between the motifs and the background mesh. To fix this, try making the mesh even thinner or more spread out.
You can also try adding more “picots” (those tiny loops) to the edges. These tiny details break up the solid lines and make the whole piece feel softer.
The Repeat Doesn’t Line Up
If you are drawing a long strip of lace and the ends don’t meet correctly, your initial measurements were likely off. Use a ruler to mark out your repeat sections before you start drawing.
If you have already started, you can “cheat” the transition by adding a small leaf or a decorative flourish. This hides the inconsistency and blends the two sections together.
Hand Cramping During the Mesh Step
Drawing hundreds of tiny hexagons is physically demanding for your hand. This often leads to shaky lines that ruin the delicate look of the lace.
Take a break every fifteen minutes to stretch your fingers. Work in small sections rather than trying to finish the entire background in one sitting.
Key Takeaways
- Start with a light framework to ensure your pattern stays symmetrical and balanced across the page.
- Use varying line weights to distinguish between the heavy structural threads and the delicate background mesh.
- Incorporate picots and scallops to give your drawing the signature “fringed” look of real fabric.
- Prioritize negative space so the drawing feels airy and transparent rather than solid and heavy.
- Work in layers by finishing the main motifs before moving on to the time-consuming background netting.
- Practice patience because the beauty of lace comes from the repetition of tiny, precise details.
Frequently Asked Questions
What is the best pen for drawing lace?
Fine-liner pens with archival ink are the best choice for this type of work. Look for sizes like 0.03 or 0.05 for the mesh and 0.1 or 0.3 for the main outlines. Brands like Sakura Pigma Micron or Copic Multiliner are popular because they don’t bleed into the paper.
How do I draw lace on a curved surface like a dress?
You must first draw the folds and shadows of the fabric. Once the “shape” of the dress is finished, you wrap your lace grid around those curves. The pattern will look smaller and more compressed inside the folds and wider on the flat areas.
Can I draw lace digitally?
Yes, and it is often much faster because you can use “brushes” or “pattern stamps.” You can draw one section of the lace and then use the “step and repeat” function to create a perfectly symmetrical border. However, drawing it by hand first helps you understand the logic of the pattern.
What are the different styles of lace I can draw?
Chantilly lace is known for its fine mesh and floral patterns, while Alençon lace features heavier outlines around the motifs. You can also explore “Point d’Esprit,” which is a simple mesh with small dots scattered throughout. Each style requires a different balance of line weights.
Our Top Recommended Finds
- Sakura Pigma Micron Multi-Pack: Having a range of sizes from 005 to 08 allows you to create the necessary depth and contrast in your lace patterns.
- Translucent Tracing Paper: This is perfect for practicing your “repeats” or for layering a lace pattern over a character sketch without ruining the original drawing.
- LED Light Pad: A thin light box makes it incredibly easy to trace your pencil framework with clean ink lines while keeping the original sketch visible underneath.
Refining Your Artistic Style
Now that you have mastered the basic structure of a lace pattern, you can start experimenting with your own motifs. Try incorporating non-traditional shapes like stars, geometric patterns, or even tiny insects into the design.
You might also want to explore how lace looks when it is draped over different colors. Drawing white lace on black paper using a white gel pen creates a stunning, high-contrast effect that looks very sophisticated.
Pick up your favorite pen and try drawing a simple one-inch strip of lace today. The more you practice the “rhythm” of the mesh, the more natural and fluid your drawings will become.