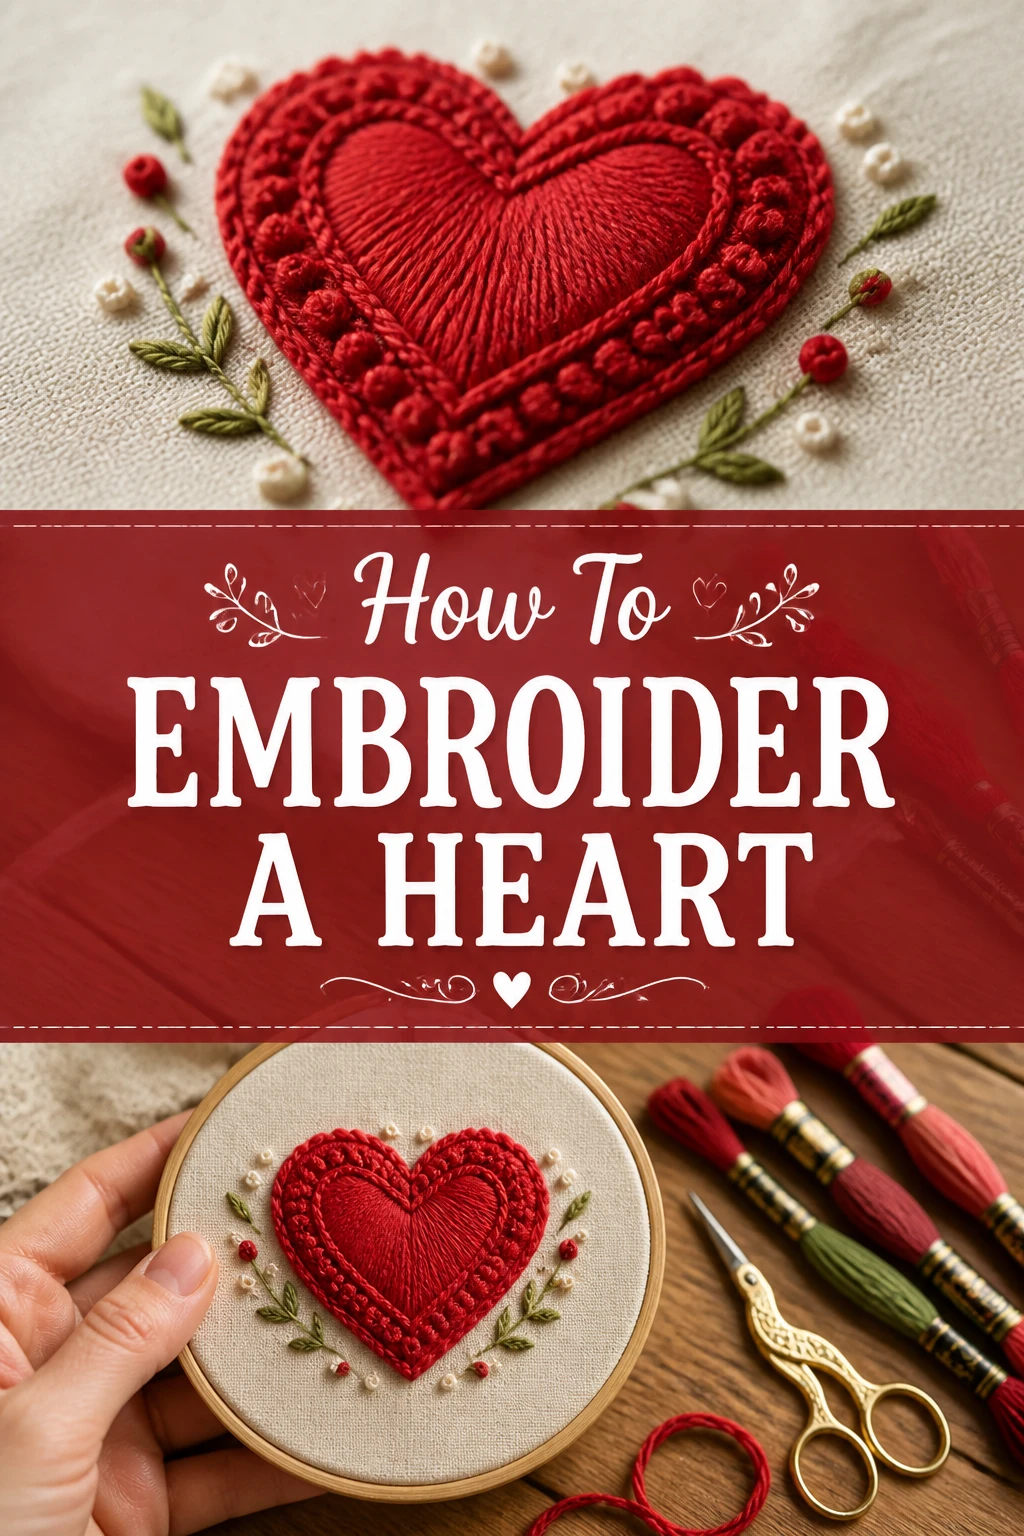
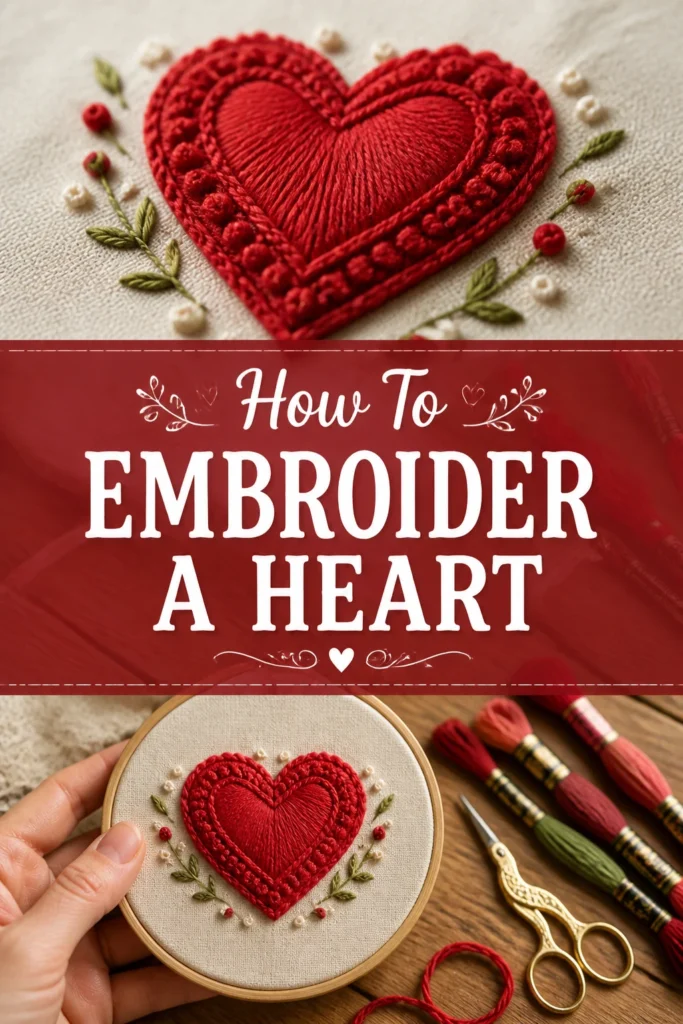
❤️ How To Embroider A Heart
There’s something uniquely heartwarming about creating a small, stitched token of affection. Learning to embroider a heart allows you to add a personal touch to gifts, clothing, or home decor. I remember stitching my very first heart onto a plain tea towel, and the satisfaction of seeing it come to life was truly special.
This guide will walk you through each step, ensuring you gain the confidence to create beautiful, hand-embroidered hearts. You’ll learn the techniques I use to achieve neat and charming results every time. Let’s get started on your embroidery journey.
Quick Overview
You’re about to embark on a delightful creative project that will leave you with a beautiful, hand-stitched heart. This guide covers everything from gathering your tools to finishing your piece, making the process enjoyable and straightforward.
- Time needed: 1-3 hours (depending on size and complexity)
- Difficulty: Beginner
- What you’ll need: Embroidery hoop, fabric, embroidery floss, needle, scissors, fabric marker, pattern (optional)
Step-by-Step Instructions
Step 1: Gather Your Materials
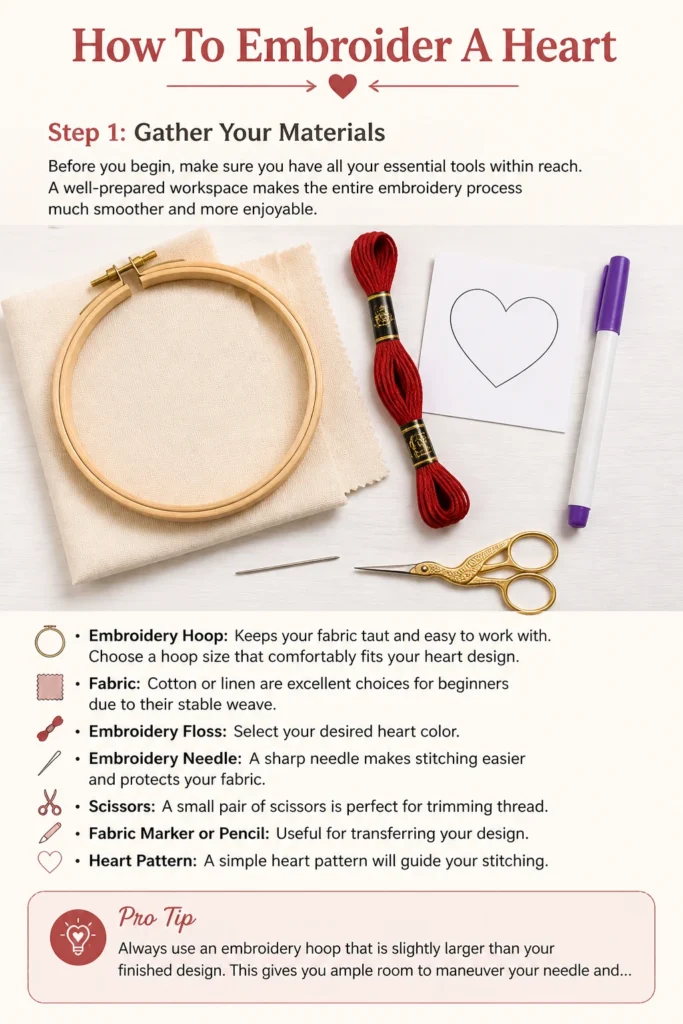
Before you begin, make sure you have all your essential tools within reach. A well-prepared workspace makes the entire embroidery process much smoother and more enjoyable.
You will need an embroidery hoop, which keeps your fabric taut and easy to work with. Choose a hoop size that comfortably fits your heart design.
Select your fabric; cotton or linen are excellent choices for beginners due to their stable weave. You’ll also need embroidery floss in your desired heart color, a sharp embroidery needle, and a small pair of scissors.
A fabric marker or pencil is useful for transferring your design, and a simple heart pattern will guide your stitching.
Pro Tip: Always use an embroidery hoop that is slightly larger than your finished design. This gives you ample room to maneuver your needle and keep the fabric taut evenly.
Step 2: Prepare Your Fabric and Transfer the Design
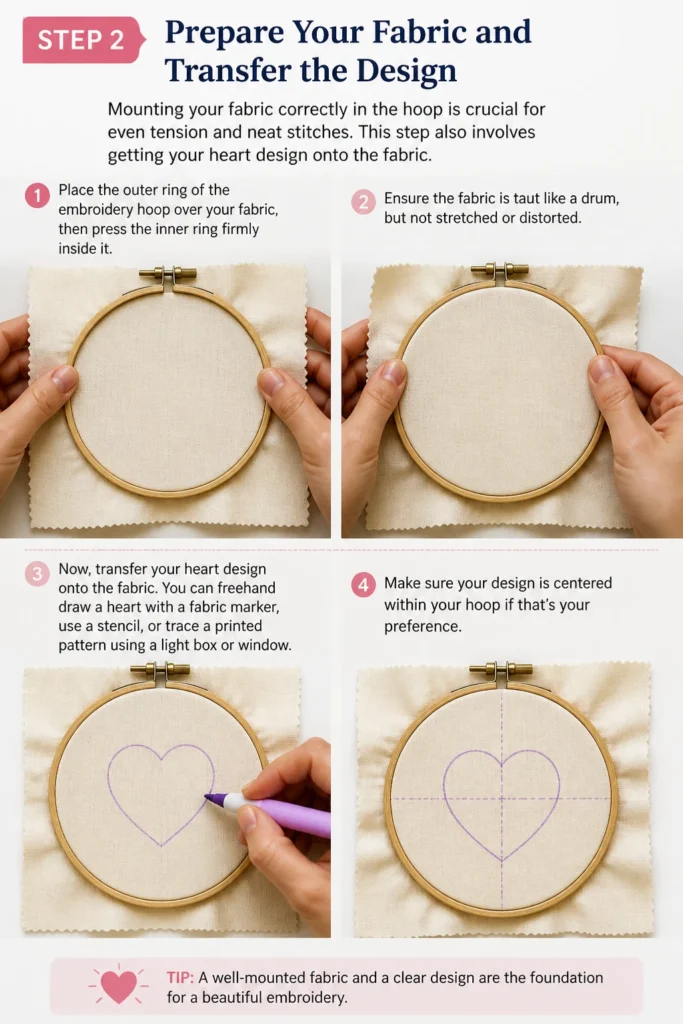
Mounting your fabric correctly in the hoop is crucial for even tension and neat stitches. This step also involves getting your heart design onto the fabric.
Place the outer ring of the embroidery hoop over your fabric, then press the inner ring firmly inside it. Ensure the fabric is taut like a drum, but not stretched or distorted.
Now, transfer your heart design onto the fabric. You can freehand draw a heart with a fabric marker, use a stencil, or trace a printed pattern using a light box or window. Make sure your design is centered within your hoop if that’s your preference.
Step 3: Thread Your Needle and Prepare Your Floss
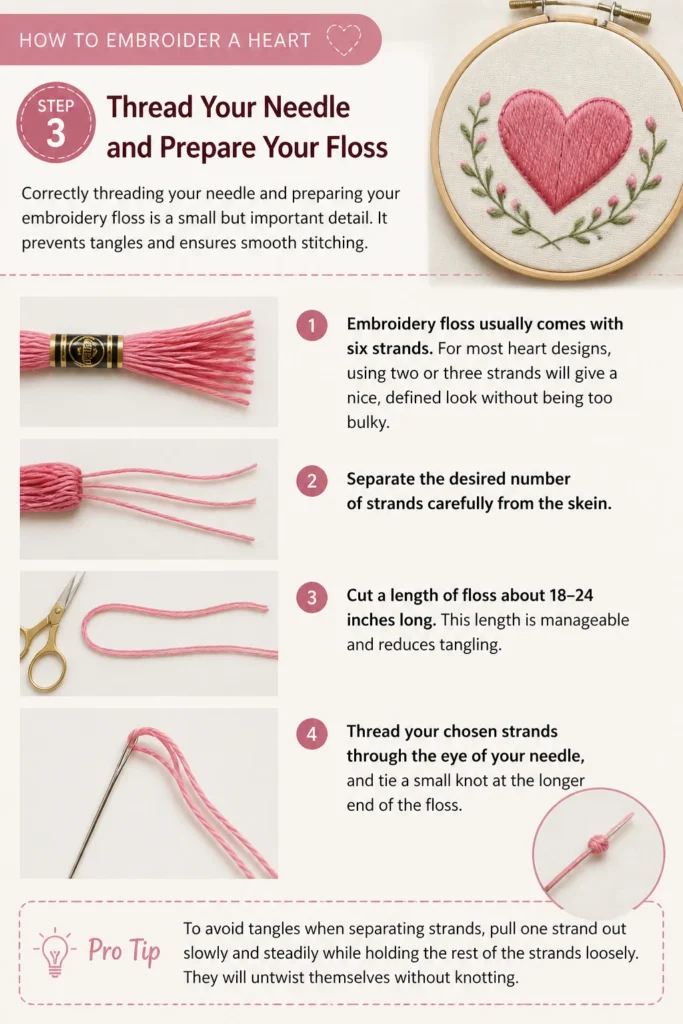
Correctly threading your needle and preparing your embroidery floss is a small but important detail. It prevents tangles and ensures smooth stitching.
Embroidery floss usually comes with six strands. For most heart designs, using two or three strands will give a nice, defined look without being too bulky. Separate the desired number of strands carefully from the skein.
Cut a length of floss about 18-24 inches long. This length is manageable and reduces tangling. Thread your chosen strands through the eye of your needle, and tie a small knot at the longer end of the floss.
Pro Tip: To avoid tangles when separating strands, pull one strand out slowly and steadily while holding the rest of the strands loosely. They will untwist themselves without knotting.
Step 4: Outline Your Heart with Backstitch
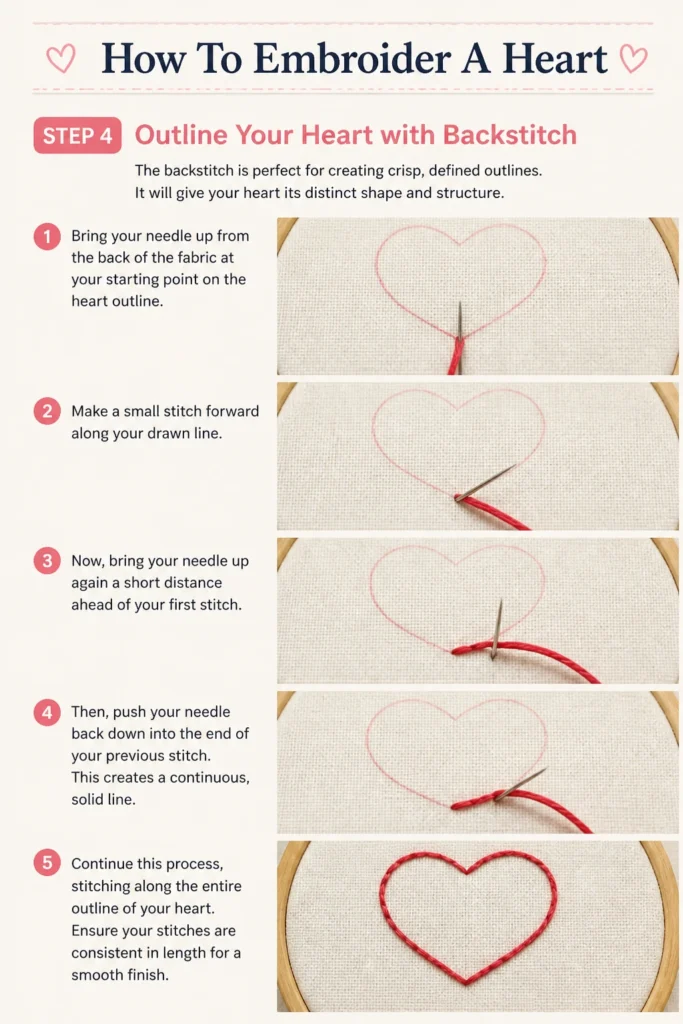
The backstitch is perfect for creating crisp, defined outlines. It will give your heart its distinct shape and structure.
Bring your needle up from the back of the fabric at your starting point on the heart outline. Make a small stitch forward along your drawn line.
Now, bring your needle up again a short distance ahead of your first stitch. Then, push your needle back down into the end of your previous stitch. This creates a continuous, solid line.
Continue this process, stitching along the entire outline of your heart. Ensure your stitches are consistent in length for a smooth finish.
Step 5: Fill Your Heart with Satin Stitch
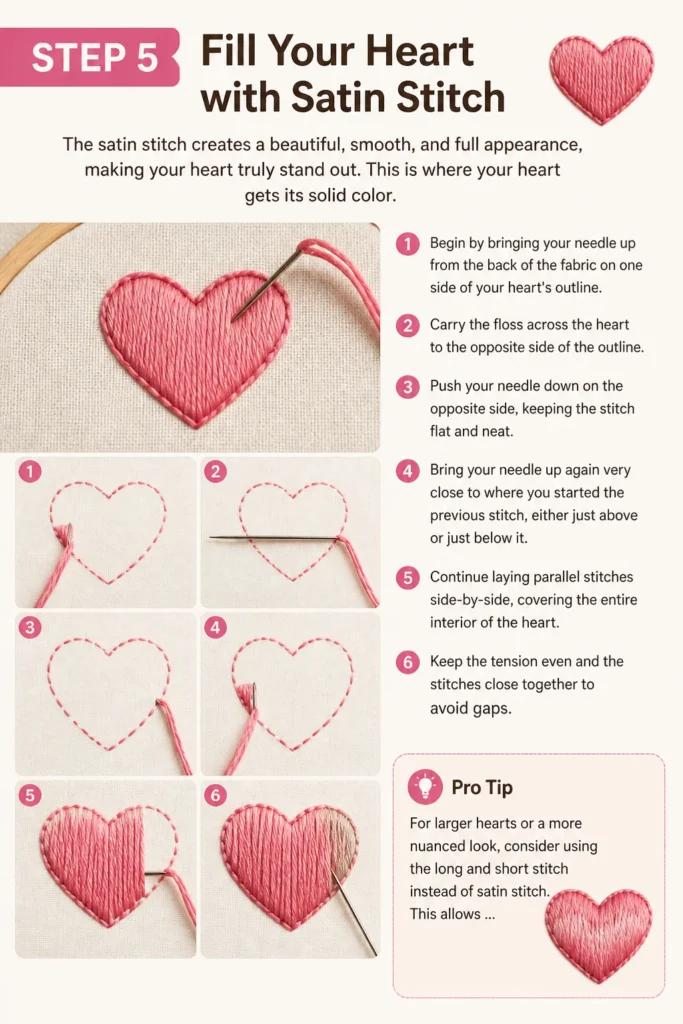
The satin stitch creates a beautiful, smooth, and full appearance, making your heart truly stand out. This is where your heart gets its solid color.
Begin by bringing your needle up from the back of the fabric on one side of your heart’s outline. Carry the floss across the heart to the opposite side of the outline.
Push your needle down on the opposite side, keeping the stitch flat and neat. Bring your needle up again very close to where you started the previous stitch, either just above or just below it.
Continue laying parallel stitches side-by-side, covering the entire interior of the heart. Keep the tension even and the stitches close together to avoid gaps.
Pro Tip: For larger hearts or a more nuanced look, consider using the long and short stitch instead of satin stitch. This allows for smoother color blending and works better on curves. It involves varying stitch lengths to fill areas.
Step 6: Secure Your Stitches
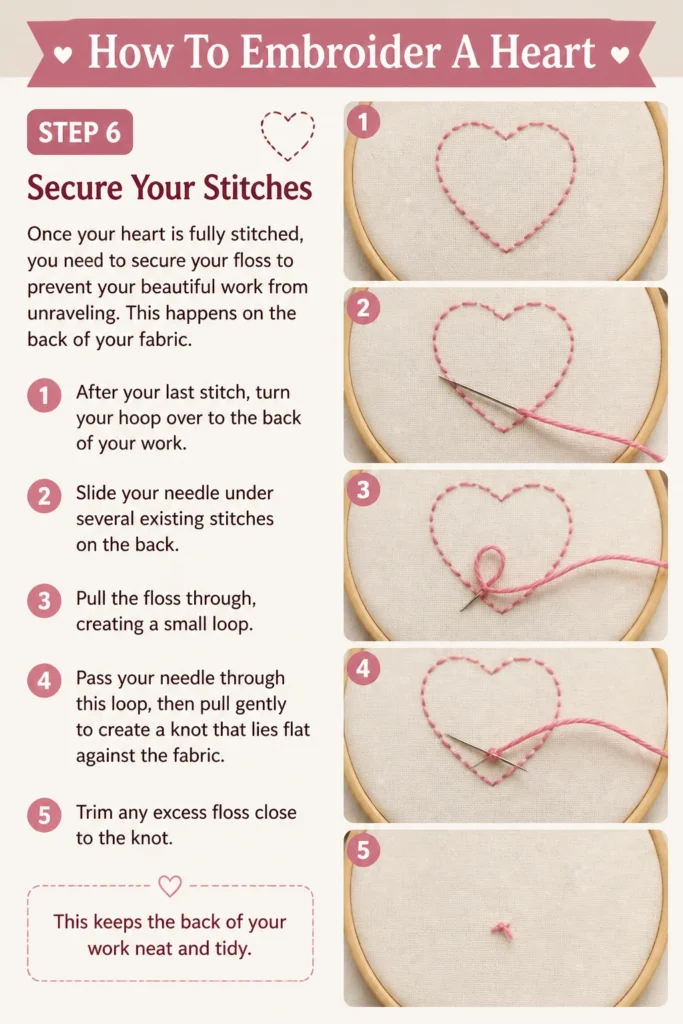
Once your heart is fully stitched, you need to secure your floss to prevent your beautiful work from unraveling. This happens on the back of your fabric.
After your last stitch, turn your hoop over to the back of your work. Slide your needle under several existing stitches on the back.
Pull the floss through, creating a small loop. Pass your needle through this loop, then pull gently to create a knot that lies flat against the fabric.
Trim any excess floss close to the knot. This keeps the back of your work neat and tidy.
Step 7: Finish and Display Your Creation
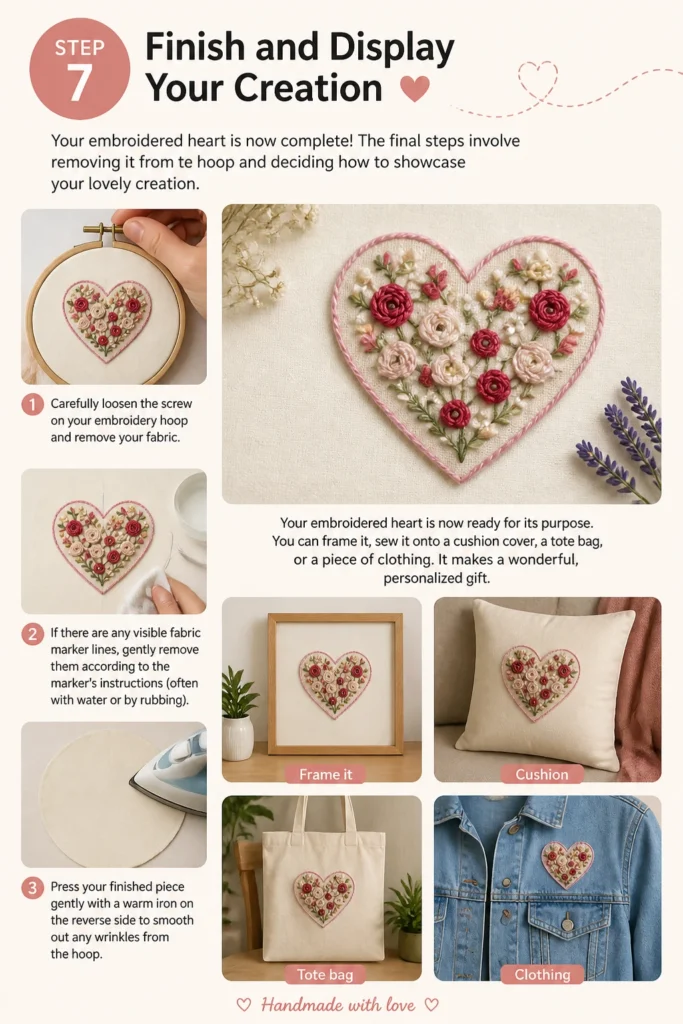
Your embroidered heart is now complete! The final steps involve removing it from the hoop and deciding how to showcase your lovely creation.
Carefully loosen the screw on your embroidery hoop and remove your fabric. If there are any visible fabric marker lines, gently remove them according to the marker’s instructions (often with water or by rubbing).
Press your finished piece gently with a warm iron on the reverse side to smooth out any wrinkles from the hoop. Your embroidered heart is now ready for its purpose.
You can frame it, sew it onto a cushion cover, a tote bag, or a piece of clothing. It makes a wonderful, personalized gift.
Common Mistakes to Avoid
Embroidery is a forgiving craft, but knowing common pitfalls can save you time and frustration.
Uneven Fabric Tension
One frequent issue is not having the fabric taut enough in the hoop. If your fabric is loose, your stitches will be uneven, causing puckering or distortion in your design. Always ensure your fabric is drum-tight before you start stitching, and periodically check the tension as you work.
Using Floss Too Long
Cutting your embroidery floss too long (over 24 inches) leads to tangling and fraying. This can be incredibly frustrating and waste your precious floss. Keep your floss lengths manageable; it’s better to re-thread your needle more often than to battle persistent knots.
Pulling Stitches Too Tight
Over-tightening your stitches can cause the fabric to pucker and distort, especially with satin stitch. This makes your finished piece look wrinkled and uneven. Aim for consistent, gentle tension that allows the stitches to lie flat on the fabric without pulling it.
Incorrect Needle Size
Using a needle that is too large or too small for your fabric and floss can cause problems. A needle that is too thick will leave large holes, while one that is too thin will be difficult to thread and struggle to pass through the fabric. Match your needle size to your floss and fabric weight for optimal results.
Troubleshooting
Even experienced embroiderers encounter small hiccups. Here are solutions to common problems.
Fabric Puckering
If your fabric starts to pucker, it’s often due to either pulling stitches too tightly or uneven tension in the hoop. First, check your hoop; loosen and re-tighten the fabric, ensuring it’s evenly taut. Then, consciously try to relax your grip on the floss and pull stitches with less force. Sometimes, a gentle steam iron on the back can also help relax minor puckers after the work is complete.
Floss Tangles and Knots
Tangles and knots usually happen when your floss is too long or you’re pulling it through the fabric too quickly. Try shortening your floss length to no more than 18-20 inches. Also, after each stitch, pull the floss through slowly and steadily, allowing it to untwist naturally. If a knot forms, gently try to pick it apart with your needle tip before pulling it tight.
Stitches Not Lying Flat
If your satin stitches aren’t lying smoothly and evenly, it might be due to inconsistent tension or stitches that are too far apart. Ensure each stitch is laid directly next to the previous one, without gaps. Practice maintaining consistent tension; aim for stitches that are firm but not tight, allowing them to sit flat against the fabric surface.
Key Takeaways
- Always prepare your workspace and materials thoroughly before you begin stitching.
- Ensure your fabric is drum-tight in the embroidery hoop for the best results.
- Use an appropriate length of embroidery floss (18-24 inches) to prevent tangling and fraying.
- Master the backstitch for clear outlines and the satin stitch for smooth, full fills.
- Maintain consistent tension in your stitches to avoid puckering and achieve a neat finish.
- Secure your threads properly on the back of your work to ensure durability.
Frequently Asked Questions
What kind of fabric is best for beginners?
For beginners, cotton or linen fabrics with a medium weave are ideal. They are stable, easy to pierce with a needle, and hold stitches well without stretching or fraying excessively. Avoid very stretchy or loosely woven fabrics when you’re just starting.
How many strands of floss should I use?
The number of floss strands depends on the desired look. For a delicate heart, 1-2 strands work well. For a more prominent, bolder heart, 3-4 strands are common. Most projects use 2-3 strands for a good balance of detail and coverage.
Can I wash my embroidered item?
Yes, most embroidered items can be gently washed. Use cold water and a mild detergent, and hand wash if possible. Avoid harsh scrubbing or wringing. Lay flat to air dry. Always check the care instructions for your specific fabric and floss, especially if using specialty threads.
What if my stitches aren’t perfect?
Don’t worry about perfection, especially when you’re starting out. Hand embroidery is meant to have a unique, handmade charm. Embrace the slight variations; they add character to your piece. With practice, your stitches will naturally become more consistent.
Our Top Recommended Finds
- DMC Embroidery Floss: Widely available, high-quality, and comes in an incredible range of colors, perfect for any heart design.
- Wooden Embroidery Hoops: Durable and effective at keeping fabric taut, essential for neat stitches. Look for ones with a sturdy screw mechanism.
- Embroidery Needles (Assorted Pack): Having a variety of needle sizes ensures you always have the right tool for different floss thicknesses and fabrics.
Your Next Stitching Adventure Awaits
You’ve successfully embroidered a beautiful heart! This simple yet classic design is a fantastic foundation for many other projects. You now possess the skills to add a personal, hand-stitched touch to so many items.
Consider exploring other basic stitches next, like the stem stitch for delicate lines or French knots for charming accents. Don’t let your needle sit idle; pick a new project, experiment with colors, and let your creativity flow. The world of embroidery is vast and incredibly rewarding.