👟 How To Tie A Shoe
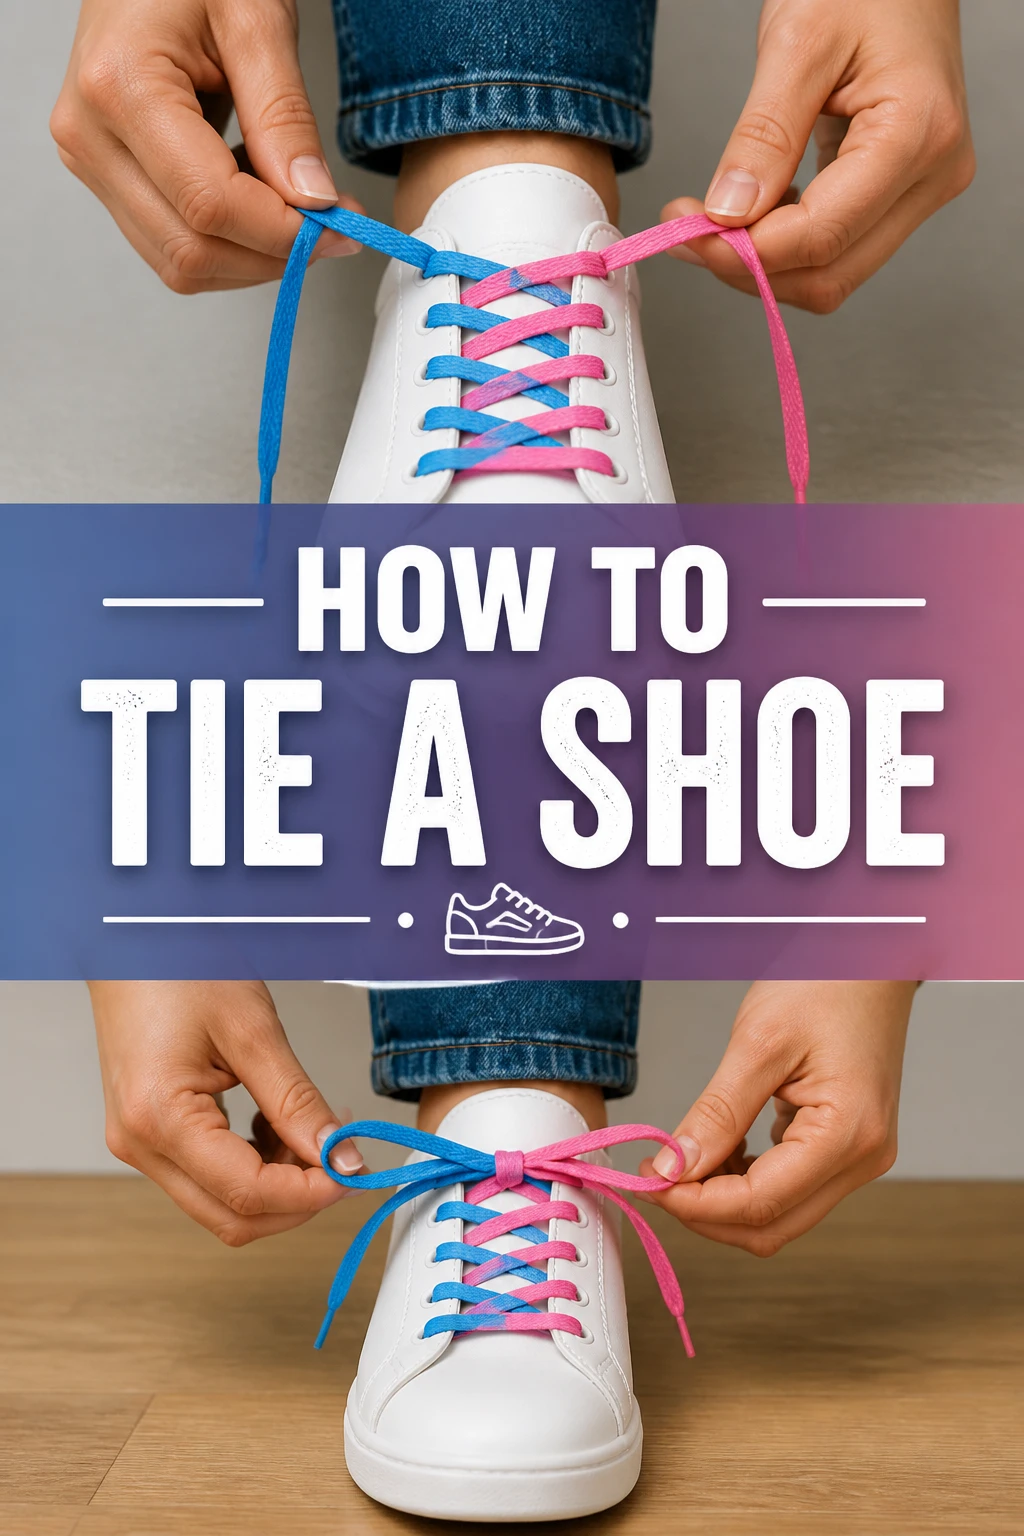
Learning to tie your shoes is a small step that opens up a world of independence.
I remember the sheer joy and accomplishment I felt the first time my laces stayed put all day long.
This guide shares the patient, step-by-step method that worked for me and countless others, ensuring your knots are strong and reliable.
Quick Overview
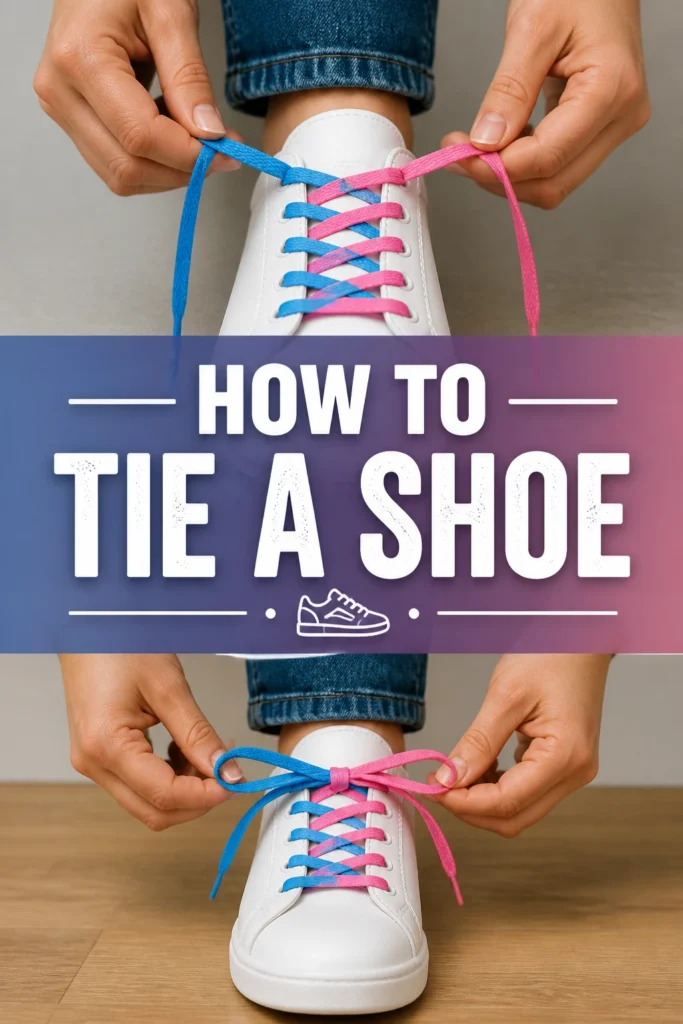
This guide will walk you through the classic method of tying shoelaces, ensuring you master a neat, secure knot every time.
You’ll gain confidence and a practical life skill that lasts a lifetime.
- Time needed: 5-10 minutes for initial learning, then seconds for daily practice.
- Difficulty: Beginner
- What you’ll need: A pair of shoes with laces, a comfortable place to sit, and a little patience.
Step-by-Step Instructions
Step 1: Prepare Your Laces
Sit comfortably with your shoes on your feet or placed on a stable surface in front of you.
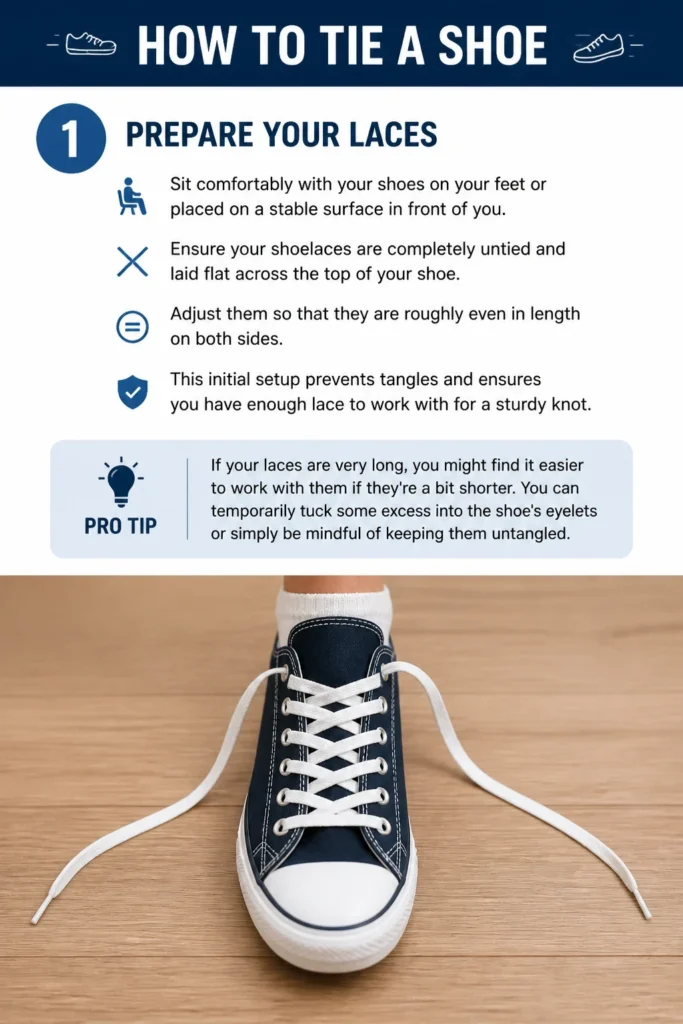
Ensure your shoelaces are completely untied and laid flat across the top of your shoe.
Adjust them so that they are roughly even in length on both sides.
This initial setup prevents tangles and ensures you have enough lace to work with for a sturdy knot.
Pro Tip: If your laces are very long, you might find it easier to work with them if they’re a bit shorter. You can temporarily tuck some excess into the shoe’s eyelets or simply be mindful of keeping them untangled.
Step 2: Make the First Knot (The Starting Cross)
Hold one lace in each hand.
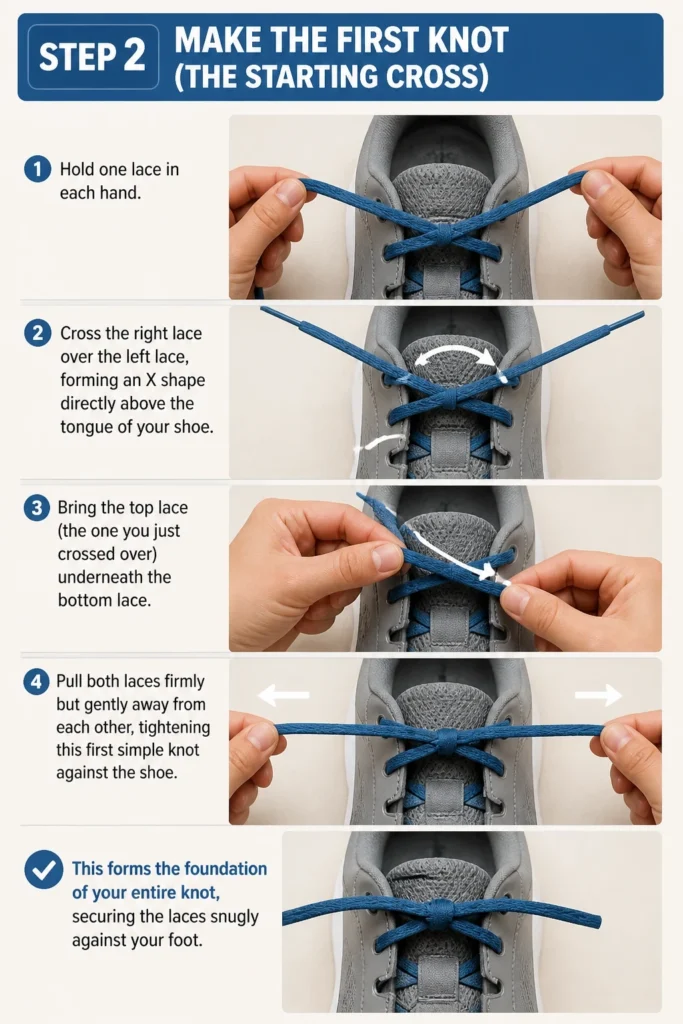
Cross the right lace over the left lace, forming an “X” shape directly above the tongue of your shoe.
Bring the top lace (the one you just crossed over) underneath the bottom lace.
Pull both laces firmly but gently away from each other, tightening this first simple knot against the shoe.
This forms the foundation of your entire knot, securing the laces snugly against your foot.
Step 3: Form the First Loop (The Bunny Ear)
Take one of the laces, let’s say the right one, and fold it into a loop.
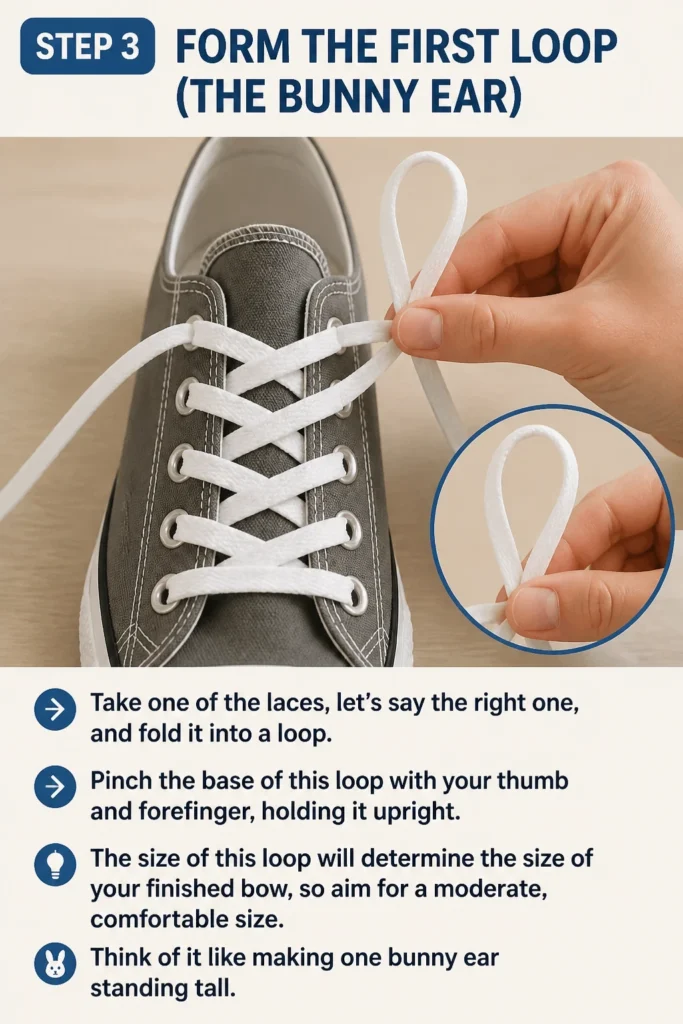
Pinch the base of this loop with your thumb and forefinger, holding it upright.
The size of this loop will determine the size of your finished bow, so aim for a moderate, comfortable size.
Think of it like making one “bunny ear” standing tall.
Step 4: Form the Second Loop
Repeat the process with the other lace (the left one).
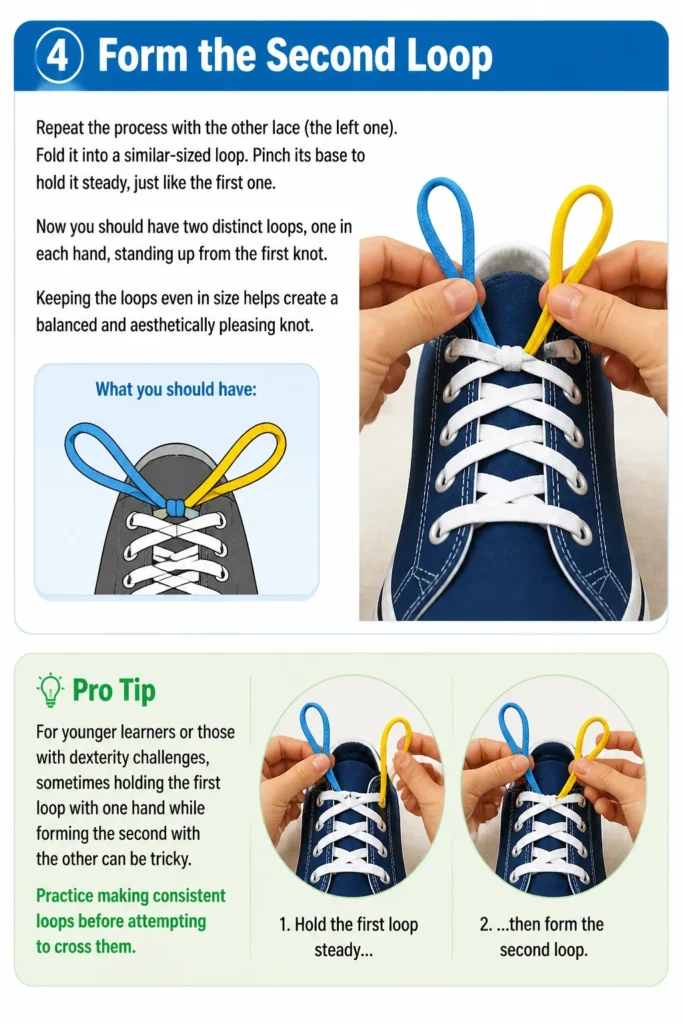
Fold it into a similar-sized loop.
Pinch its base to hold it steady, just like the first one.
Now you should have two distinct loops, one in each hand, standing up from the first knot.
Keeping the loops even in size helps create a balanced and aesthetically pleasing knot.
Pro Tip: For younger learners or those with dexterity challenges, sometimes holding the first loop with one hand while forming the second with the other can be tricky. Practice making consistent loops before attempting to cross them.
Step 5: Cross the Loops
Bring the two loops together.
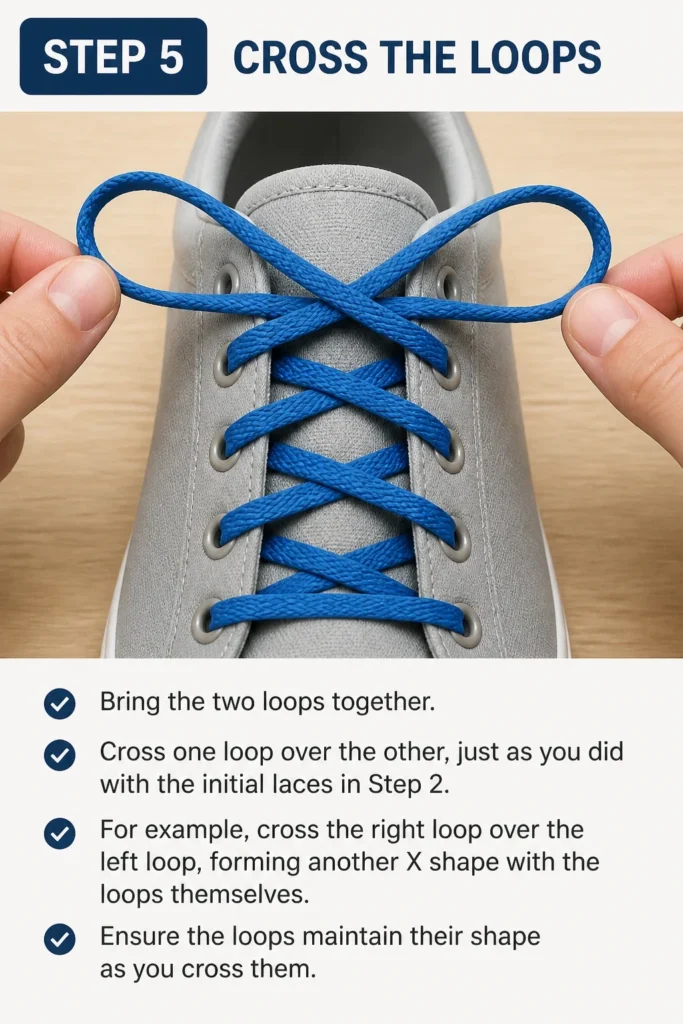
Cross one loop over the other, just as you did with the initial laces in Step 2.
For example, cross the right loop over the left loop, forming another “X” shape with the loops themselves.
Ensure the loops maintain their shape as you cross them.
Step 6: Push One Loop Under the Other
Take the top loop (the one you just crossed over) and gently push it underneath the bottom loop.
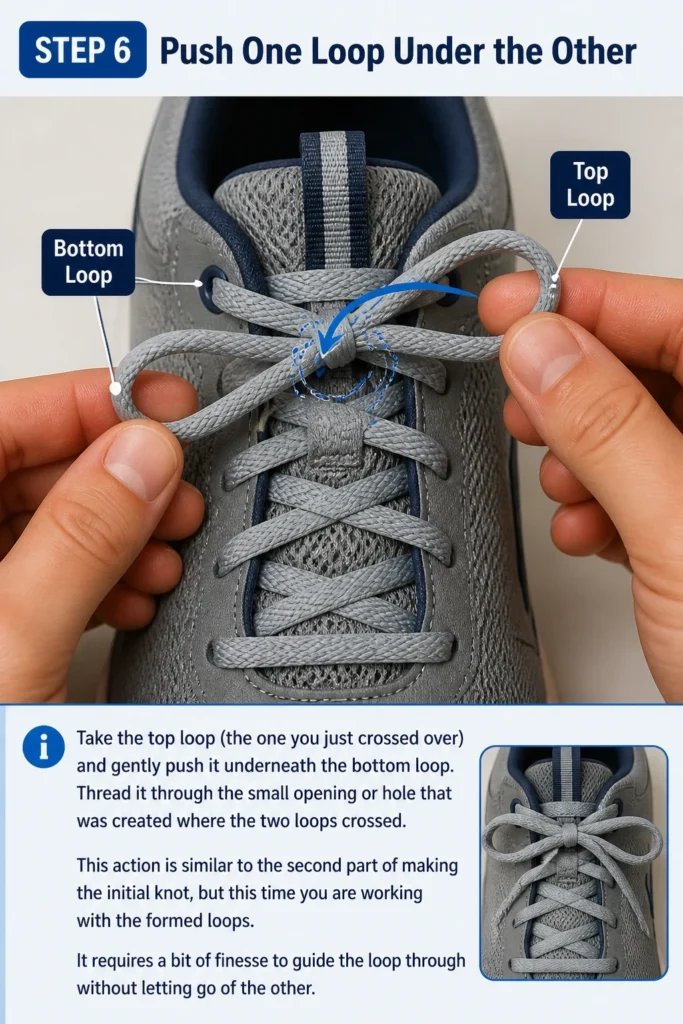
Thread it through the small opening or “hole” that was created where the two loops crossed.
This action is similar to the second part of making the initial knot, but this time you are working with the formed loops.
It requires a bit of finesse to guide the loop through without letting go of the other.
Step 7: Pull Tight
Grasp both loops firmly, one in each hand.
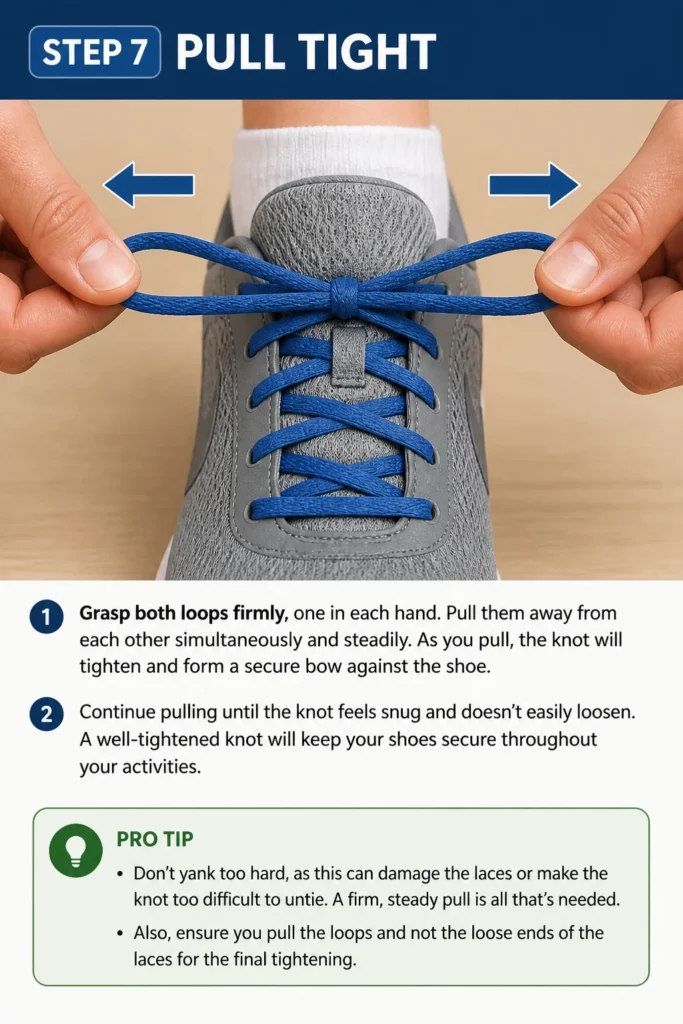
Pull them away from each other simultaneously and steadily.
As you pull, the knot will tighten and form a secure bow against the shoe.
Continue pulling until the knot feels snug and doesn’t easily loosen.
A well-tightened knot will keep your shoes secure throughout your activities.
Pro Tip: Don’t yank too hard, as this can damage the laces or make the knot too difficult to untie. A firm, steady pull is all that’s needed. Also, ensure you pull the loops and not the loose ends of the laces for the final tightening.
Step 8: Check Your Knot
Inspect your newly tied knot.
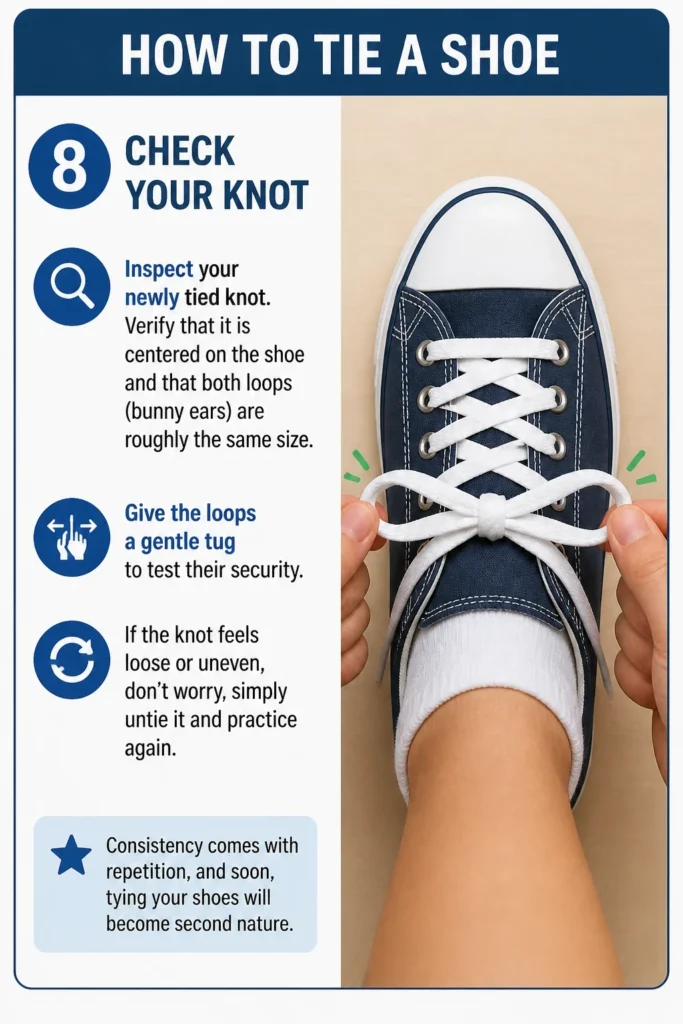
Verify that it is centered on the shoe and that both loops (bunny ears) are roughly the same size.
Give the loops a gentle tug to test their security.
If the knot feels loose or uneven, don’t worry, simply untie it and practice again.
Consistency comes with repetition, and soon, tying your shoes will become second nature.
Common Mistakes to Avoid
Uneven Laces at the Start
Beginning with one lace significantly longer than the other can lead to a lopsided knot or running out of lace on one side.
Always take a moment in Step 1 to ensure your laces are balanced before making the first cross.
This simple check saves frustration later on and ensures a neat, functional bow.
Not Tightening the First Knot
If your initial cross-over knot (from Step 2) isn’t pulled tight, the entire structure of the bow will be loose and prone to coming undone.
Make sure that first knot is snug against the shoe before you even think about making loops.
It’s the anchor for everything that follows.
Pulling the Wrong Ends
After creating your loops and threading one through the other, it’s crucial to pull the actual loops (the ‘bunny ears’) to tighten the final bow.
Many beginners mistakenly pull the loose ends of the laces instead, which will not tighten the knot properly and might even unravel it.
Always grip the formed loops for the final pull.
Twisted Laces
Sometimes, laces can twist and turn as you’re forming loops or making the final knot.
This can make the knot look messy and less secure.
Take your time with each step, gently smoothing out any twists before proceeding, especially when forming your loops.
Troubleshooting
My Knots Keep Coming Undone
If your laces constantly untie, the most common culprit is not pulling the final knot tight enough or using a “granny knot” instead of a “reef knot.”
Ensure you’re pulling the loops firmly in Step 7, and try reversing the initial cross if your bow sits vertically instead of horizontally.
A reef knot (where the second cross mirrors the first) is much more secure.
The Bow Looks Lopsided or Uneven
An uneven bow often stems from making one loop significantly larger than the other in Steps 3 and 4.
Focus on creating two loops that are as close to identical in size as possible.
Practice forming consistent loops before trying to cross and tie them.
I Can’t Get the Lace Through the Hole
This usually happens in Step 6 when threading one loop under the other.
The “hole” might be too small, or you might be trying to force the loop through at an awkward angle.
Ensure you’ve crossed the loops loosely enough to create a visible opening, and then gently guide the loop through.
Don’t be afraid to slightly loosen the cross if needed before tightening.
Key Takeaways
- Start Even: Always begin with laces of equal length for a balanced knot.
- Tighten the Base: A firm first knot is essential for overall security.
- Consistent Loops: Aim for two similarly sized “bunny ears” for a neat bow.
- Pull the Loops: Tighten the final knot by pulling on the created loops, not the loose ends.
- Practice Makes Perfect: Repetition builds muscle memory and speed.
- Be Patient: Learning new skills takes time and a positive attitude.
Frequently Asked Questions
What’s the difference between a granny knot and a reef knot?
A granny knot occurs when you cross the laces the same way both times (e.g., right over left, then right loop over left loop).
It’s prone to coming undone easily and sits vertically on your shoe.
A reef knot, which this guide teaches, involves crossing the laces in opposite directions (e.g., right over left, then left loop over right loop), creating a flat, secure knot that sits horizontally.
How can I teach a child to tie their shoes more easily?
Start with larger, thicker laces or even rope to make them easier to grip.
Use contrasting colors for each lace (or color-code the ends) so they can differentiate between left and right.
Break down each step into very small, manageable actions and celebrate every success.
The “bunny ears” method is often preferred for its visual simplicity.
My laces are too slippery; what can I do?
Some laces, especially those made of synthetic materials, can be quite slick.
Consider replacing them with cotton or textured laces, which offer more grip.
You can also try a double knot for added security, though this can be harder to untie.
Sometimes, a bit of hairspray or clear nail polish on the knot can temporarily increase friction.
How do I untie a really tight knot?
First, try to locate the “ears” of the knot and pull them gently outwards to loosen the center.
If that doesn’t work, look for the two ends that disappear into the knot and try to pull them in opposite directions.
For extremely stubborn knots, a thin, blunt object like a knitting needle or a pen tip can help carefully pry apart the loops.
Our Top Recommended Finds
- Flat Cotton Shoelaces: These provide better grip than round or synthetic laces, making them easier to tie and less likely to come undone.
- Shoe Tying Practice Board: A wooden board with a shoe cutout and laces, perfect for hands-on learning without needing to wear a shoe.
- Elastic No-Tie Laces: For those who prefer convenience or have dexterity issues, these laces convert any tie-shoe into a slip-on.
Mastering Your Footwear
You’ve just walked through the essential steps to tying your shoes, a skill that brings confidence and practicality to your daily life.
Remember, consistency is key, and every practice session brings you closer to effortless mastery.
Don’t stop here! Once you’ve perfected this classic knot, you might explore different lacing patterns for style or even learn how to tie a double knot for extra security.
Take a moment today to practice on your favorite pair of shoes, and feel the satisfaction of a perfectly tied knot.