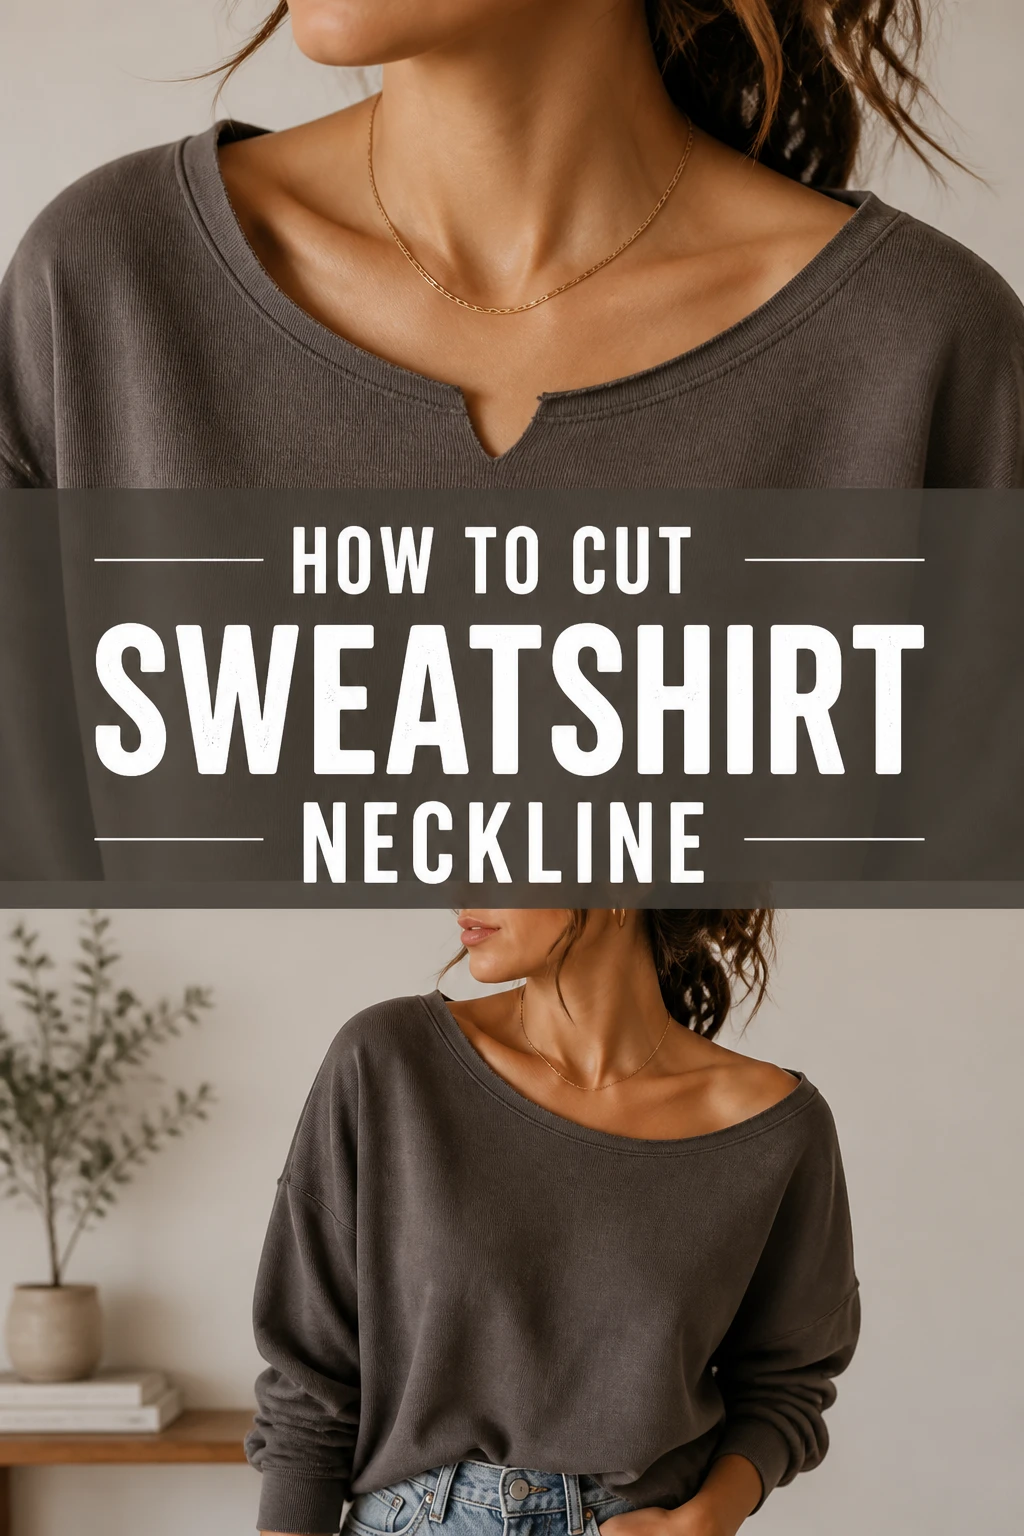
✂️ How To Cut Sweatshirt Neckline
I remember the first time I tried to customize a sweatshirt. It was an old, shapeless relic, and I wanted to give it a fresh, stylish look. Cutting the neckline seemed simple enough, but I quickly learned it’s an art that requires precision and a little know-how.
This guide shares everything I’ve learned from countless attempts, ensuring your next DIY project is a success. You can transform a basic garment into a unique, comfortable piece. It’s truly satisfying to wear something you’ve personalized.
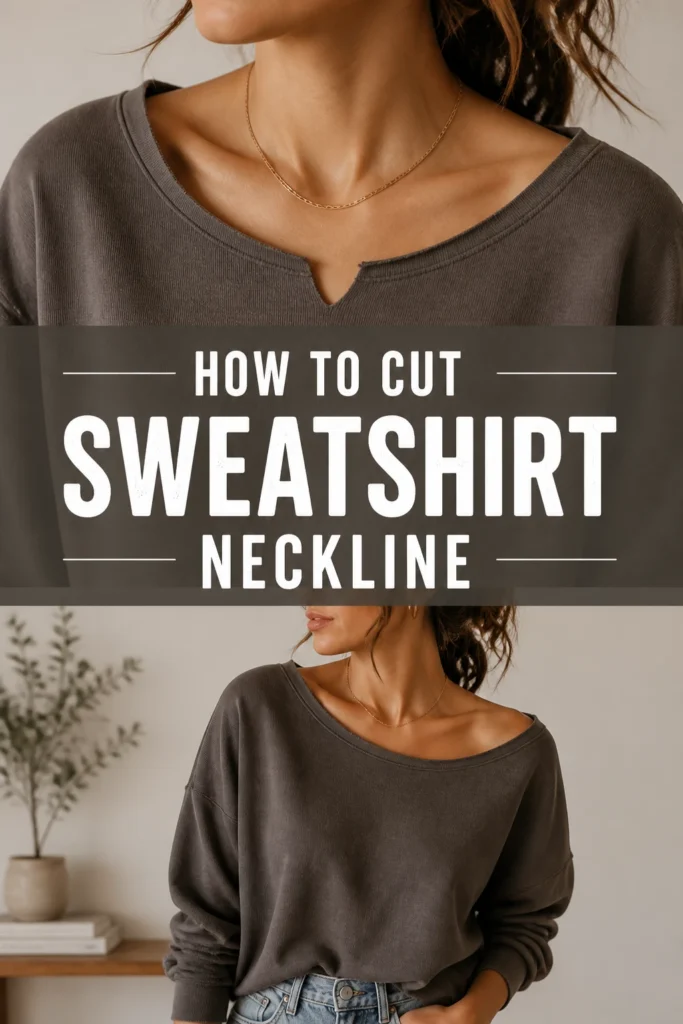
Quick Overview
Transforming your sweatshirt neckline is a rewarding project that adds a custom touch to your wardrobe. You’ll learn how to create a variety of styles, making an old favorite feel brand new. This guide covers everything from preparation to the final touches.
- Time needed: 30-60 minutes (depending on desired complexity)
- Difficulty: Beginner
- What you’ll need: Sweatshirt, sharp fabric scissors, tailor’s chalk or fabric marker, ruler or measuring tape, pins, an old t-shirt or paper for a template (optional)
Step-by-Step Instructions
Step 1: Gather Your Tools and Prepare Your Workspace
Before you begin, lay out all your materials on a clean, flat surface. A large table is ideal for spreading out your sweatshirt without wrinkles. Good lighting is also very helpful for accurate marking and cutting.
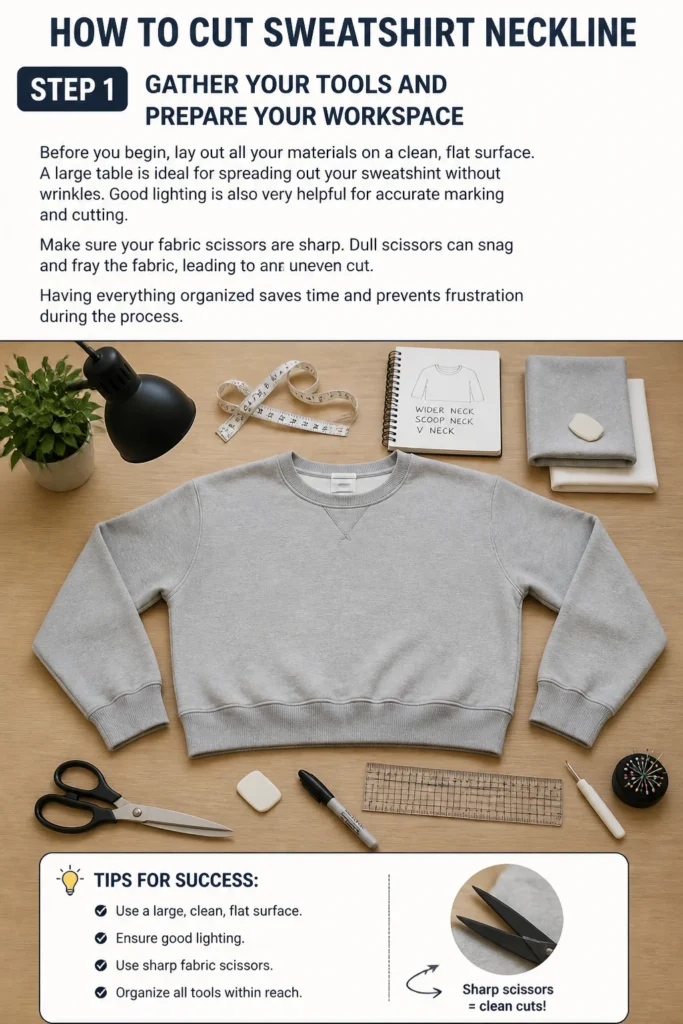
Make sure your fabric scissors are sharp. Dull scissors can snag and fray the fabric, leading to an uneven cut. Having everything organized saves time and prevents frustration during the process.
Step 2: Wash and Dry Your Sweatshirt
Always wash and dry your sweatshirt before cutting. This pre-shrinks the fabric, preventing any surprises after you’ve made your modifications. Cotton blends, especially, can shrink significantly.
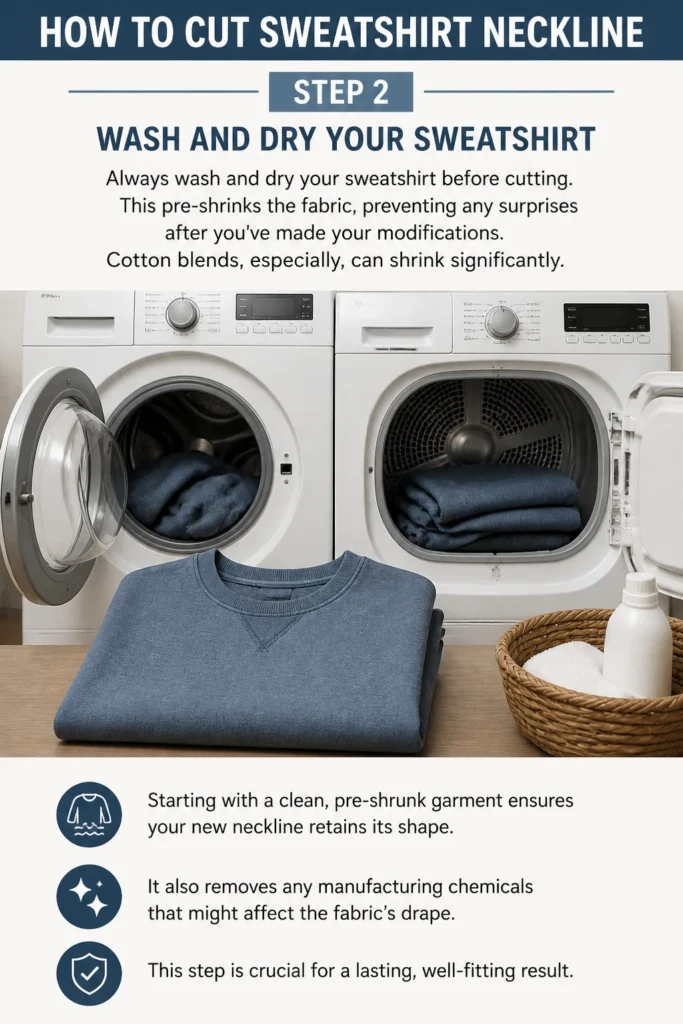
Starting with a clean, pre-shrunk garment ensures your new neckline retains its shape. It also removes any manufacturing chemicals that might affect the fabric’s drape. This step is crucial for a lasting, well-fitting result.
Step 3: Decide on Your Neckline Style
Consider what kind of look you want to achieve. Do you prefer a wide boat neck, an off-the-shoulder style, a deep V-neck, or a simple raw edge crew neck? Each style offers a different aesthetic and level of comfort.
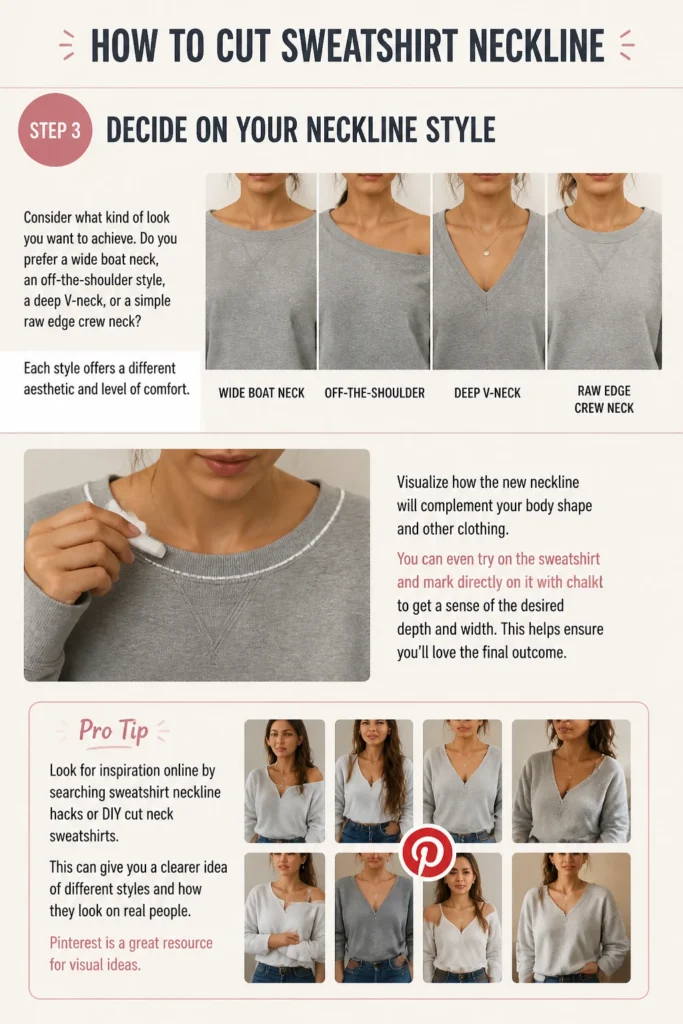
Visualize how the new neckline will complement your body shape and other clothing. You can even try on the sweatshirt and mark directly on it with chalk to get a sense of the desired depth and width. This helps ensure you’ll love the final outcome.
Pro Tip: Look for inspiration online by searching “sweatshirt neckline hacks” or “DIY cut neck sweatshirts.” This can give you a clearer idea of different styles and how they look on real people. Pinterest is a great resource for visual ideas.
Step 4: Mark Your Cutting Lines
Lay your sweatshirt flat and smooth out any wrinkles. Use tailor’s chalk or a fabric marker to draw your cutting lines. Start by marking the center front and center back of the existing neckline.
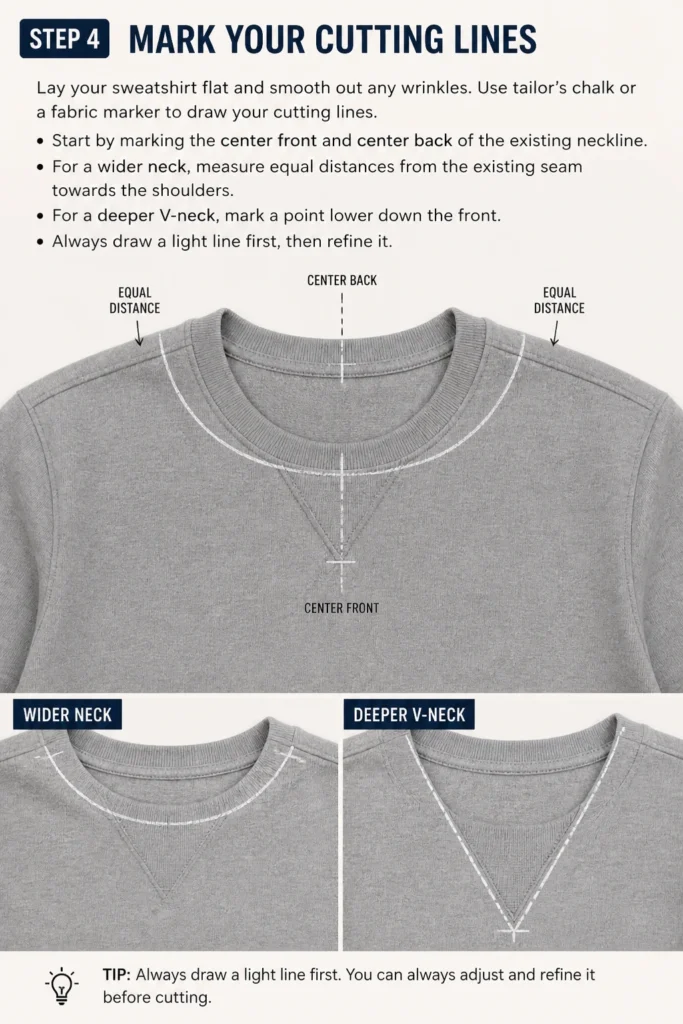
For a wider neck, measure equal distances from the existing seam towards the shoulders. For a deeper V-neck, mark a point lower down the front. Always draw a light line first, then refine it.
Step 5: Create a Template (Optional but Recommended)
If you’re aiming for a symmetrical or specific shape, creating a template can be incredibly useful. You can use an old t-shirt with a neckline you like or simply draw your desired shape on a piece of paper. Fold the template in half to ensure perfect symmetry.
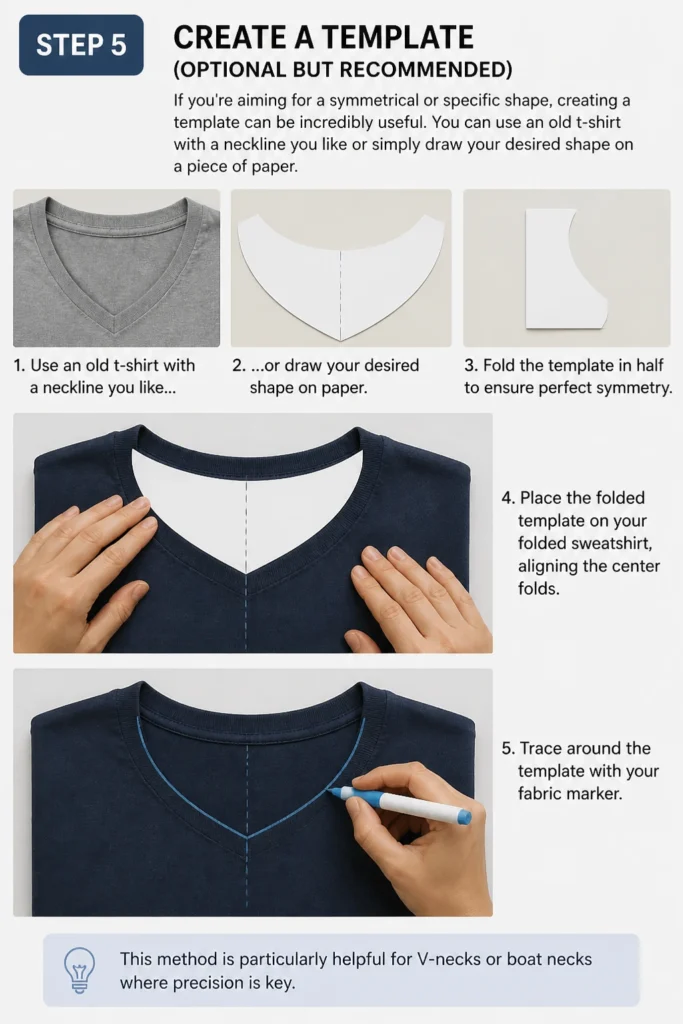
Place the folded template on your folded sweatshirt, aligning the center folds. Trace around the template with your fabric marker. This method is particularly helpful for V-necks or boat necks where precision is key.
Step 6: Pin Along Your Marked Lines
Once your cutting lines are finalized, use pins to secure the layers of fabric together. Place pins every few inches along the line you intend to cut. This prevents the fabric from shifting while you’re cutting.
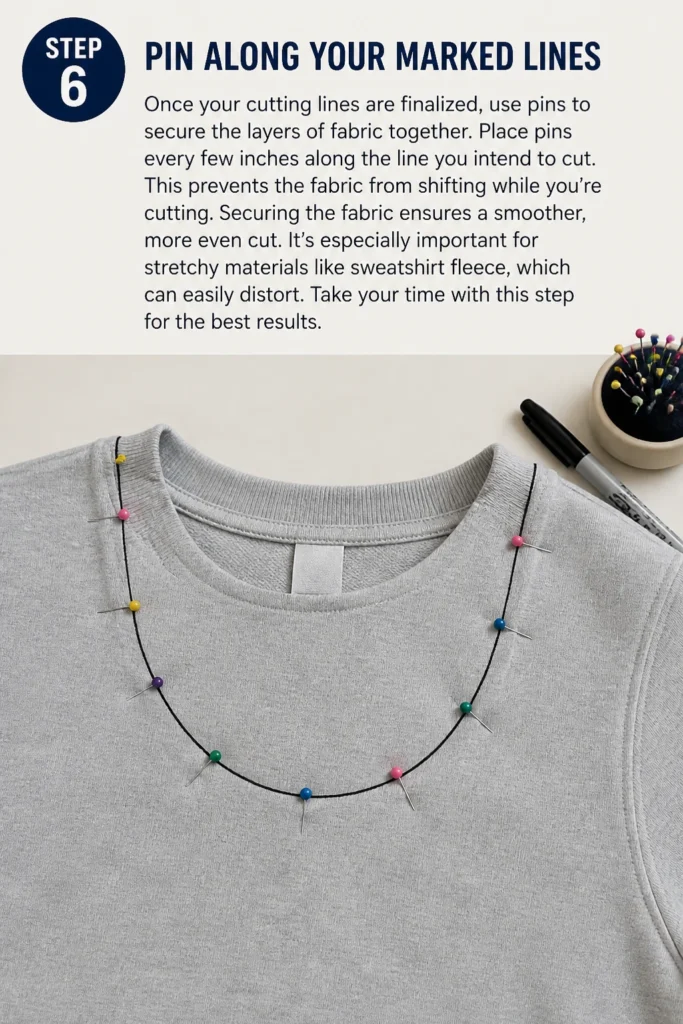
Securing the fabric ensures a smoother, more even cut. It’s especially important for stretchy materials like sweatshirt fleece, which can easily distort. Take your time with this step for the best results.
Step 7: Carefully Cut the Neckline
With your sharp fabric scissors, begin cutting along your marked line. Use long, smooth strokes rather than short, choppy snips. This helps create a clean, even edge.
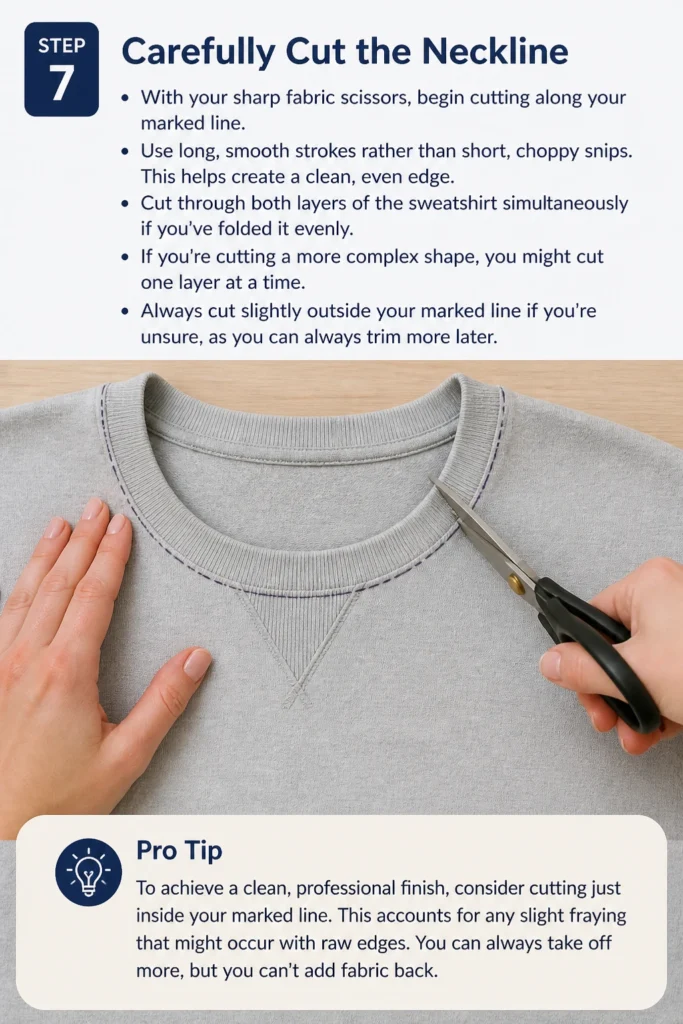
Cut through both layers of the sweatshirt simultaneously if you’ve folded it evenly. If you’re cutting a more complex shape, you might cut one layer at a time. Always cut slightly outside your marked line if you’re unsure, as you can always trim more later.
Pro Tip: To achieve a clean, professional finish, consider cutting just inside your marked line. This accounts for any slight fraying that might occur with raw edges. You can always take off more, but you can’t add fabric back.
Step 8: Test the Fit and Make Adjustments
After the initial cut, try on your sweatshirt. Assess the new neckline. Does it sit where you want it to? Is it too tight, too loose, or just right?
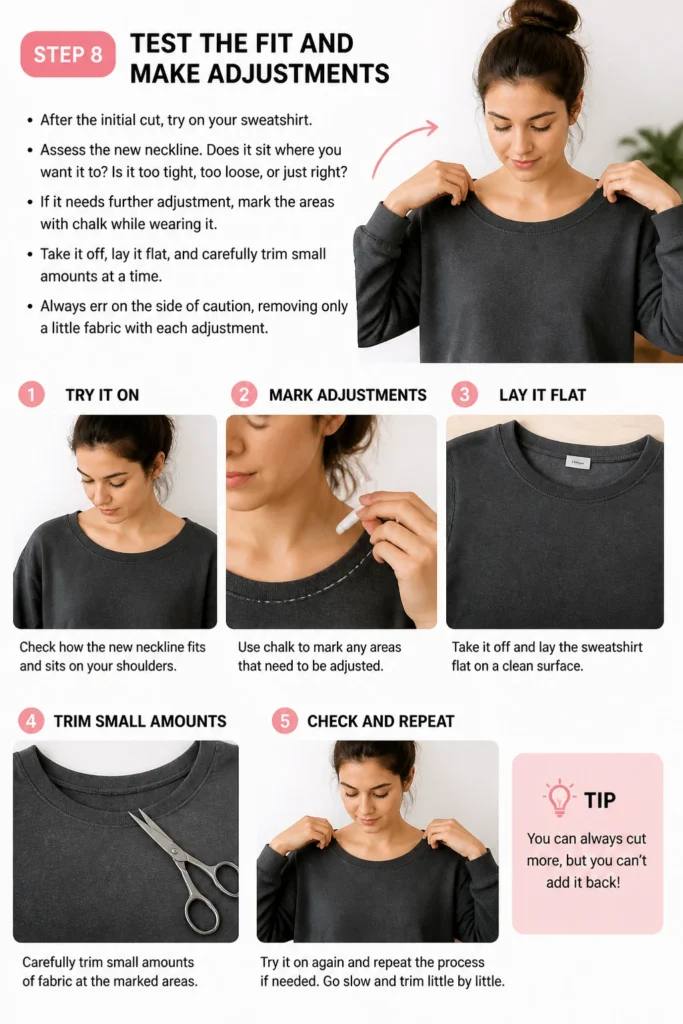
If it needs further adjustment, mark the areas with chalk while wearing it. Take it off, lay it flat, and carefully trim small amounts at a time. Always err on the side of caution, removing only a little fabric with each adjustment.
Step 9: Finish the Raw Edge (Optional)
You have a few options for finishing the raw edge. For a casual, distressed look, you can leave it as is; the fabric will naturally roll or fray slightly after washing. This is a popular choice for many DIY projects.
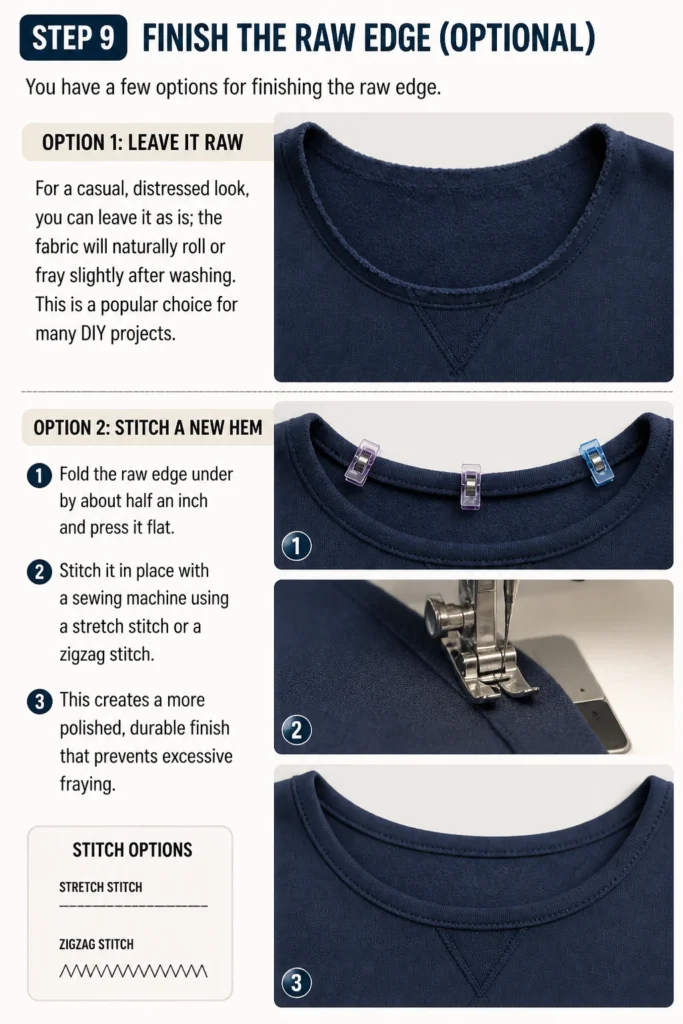
Alternatively, you can stitch a new hem. Fold the raw edge under by about half an inch and press it flat. Stitch it in place with a sewing machine using a stretch stitch or a zigzag stitch. This creates a more polished, durable finish that prevents excessive fraying.
Step 10: Wash Again to “Set” the Cut
After you’re satisfied with your new neckline, wash and dry the sweatshirt one more time. This helps to soften the raw edge and encourages any natural rolling or slight fraying to occur. It “sets” the new look.
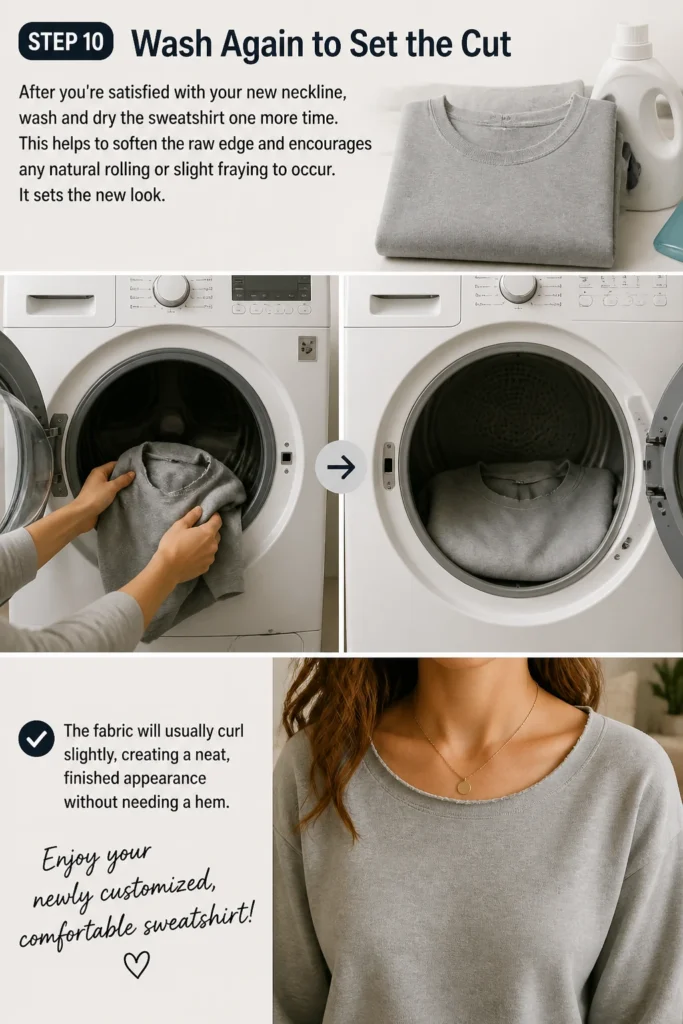
The fabric will usually curl slightly, creating a neat, finished appearance without needing a hem. Enjoy your newly customized, comfortable sweatshirt!
Common Mistakes to Avoid
Cutting Too Much Too Soon
One of the most frequent errors is cutting off too much fabric in the initial cut. Once the fabric is gone, it’s impossible to put it back. This often leads to a neckline that’s too wide, too deep, or simply doesn’t sit right.
Always start by cutting less than you think you need. You can always trim more later. Make small, incremental cuts and try on the sweatshirt after each adjustment to ensure you achieve the perfect fit. Patience here prevents regret.
Using Dull Scissors
Attempting to cut fabric with dull scissors is a recipe for disaster. Dull blades chew through the fabric, creating jagged, uneven edges and frustrating fraying. This can make the finished neckline look messy and unprofessional.
Invest in a good pair of sharp fabric scissors specifically for textiles. Keep them separate from paper scissors to maintain their sharpness. A clean, precise cut is fundamental to a neat finish.
Not Pre-Washing the Sweatshirt
Skipping the pre-wash step can lead to significant disappointment. Many fabrics, especially cotton and cotton blends, will shrink when washed for the first time. If you cut the neckline before washing, it might shrink disproportionately afterward.
Always wash and dry your sweatshirt according to its care instructions before you start cutting. This ensures that any shrinking happens beforehand, and your customized neckline will maintain its intended size and shape.
Ignoring Fabric Grain
Cutting against the fabric grain can cause the neckline to stretch out of shape or sag unevenly. The grain refers to the direction of the yarns in the fabric. Cutting on the bias (diagonally) can be intentional for certain drapes, but usually, you want to cut perpendicular to the grain for stability.
When marking your lines, pay attention to how the fabric stretches. For most stable necklines, try to cut along the cross-grain (perpendicular to the selvedge edge) or parallel to the original neckline seam. This helps the new edge hold its form better.
Troubleshooting
Neckline is Uneven
An uneven neckline is a common issue, especially for beginners. This can happen if the fabric shifted during cutting or if your initial markings weren’t perfectly symmetrical. Don’t panic; it’s usually fixable.
Lay the sweatshirt flat and identify the uneven areas. Fold the sweatshirt in half lengthwise, aligning the shoulders. This will highlight any discrepancies. Carefully trim small amounts from the longer side until both sides match. Use a ruler or template for accuracy.
Raw Edge is Fraying Excessively
Some fraying is normal for a raw edge, but excessive fraying can be a nuisance. This often occurs with loosely woven fabrics or if the cut wasn’t perfectly clean. There are a couple of ways to address this.
You can apply a small amount of fabric glue or fray check along the inside of the raw edge. This clear liquid hardens the fibers and prevents further unraveling. Alternatively, you can opt for a machine-stitched hem to completely enclose the raw edge.
Sweatshirt Feels Too Tight Around the Neck After Cutting
If your new neckline feels restrictive, you might not have cut enough fabric. This can happen if you were too cautious or misjudged the desired opening. It’s frustrating, but there’s a simple solution.
Carefully try on the sweatshirt and mark the areas where it feels tight. Take it off and extend your cutting lines slightly outwards, or deepen the V-neck if that’s your style. Cut small amounts, re-try, and repeat until comfortable.
Key Takeaways
- Always pre-wash and dry your sweatshirt to account for shrinkage before cutting.
- Use sharp fabric scissors for clean, precise cuts to avoid fraying and jagged edges.
- Start by cutting less than you think you need, as you can always remove more fabric later.
- Mark your cutting lines clearly with tailor’s chalk or a fabric marker for accuracy.
- Consider using a template or folding your sweatshirt to ensure a symmetrical neckline.
- Try on the sweatshirt after the initial cut to make any necessary adjustments for the perfect fit.
- Decide on your desired finish: a raw edge for a casual look or a stitched hem for durability.
Frequently Asked Questions
Can I cut any type of sweatshirt fabric?
Most sweatshirt fabrics, typically cotton or cotton blends, are suitable for cutting necklines. Fleece and jersey materials also work well. Very delicate or intricately woven fabrics might not hold a raw edge as nicely and could require a stitched finish. Always consider the fabric’s stretch and how it will fray.
Will the raw edge keep fraying after washing?
A raw edge will typically fray a little after the first wash, and then it tends to stabilize. The fibers will curl and create a soft, rolled edge. If you’re concerned about excessive fraying, applying fray check or stitching a small hem will prevent it entirely. The initial wash helps “set” the new edge.
How do I make a perfect off-the-shoulder neckline?
For an off-the-shoulder look, you’ll want to cut a wider, deeper curve than a standard boat neck. Mark a point several inches below the original neckline on both shoulders and a comfortable depth at the center front/back. Connect these points with a smooth, wide curve. Ensure the opening is wide enough to comfortably slide over your shoulders.
What if I make a mistake and cut too much?
If you accidentally cut too much, it can be challenging to fully reverse. However, you might be able to salvage it. For a too-wide neckline, you could add decorative fabric inserts or gather the fabric with elastic to create a new, smaller opening. For a too-deep cut, you might layer it over a camisole or add a decorative trim along the edge. Sometimes, a “mistake” can lead to a unique, new design element.
Our Top Recommended Finds
- Fiskars Fabric Scissors: These are known for their sharpness and ergonomic design, making precise cuts easy and comfortable.
- Dritz Tailor’s Chalk: Essential for clear, temporary markings on various fabric types, and it brushes away easily.
- Dritz Fray Check: A clear liquid sealant that prevents fabric edges from fraying, perfect for maintaining a clean raw edge.
Unleash Your Inner Designer
You now have all the tools and knowledge to confidently transform your old sweatshirts. Don’t let a tired neckline hold back your style. This simple customization can breathe new life into your wardrobe and express your unique personality.
Grab that forgotten sweatshirt from your closet and start your creative journey today. Experiment with different styles, embrace the process, and enjoy the satisfaction of wearing something truly your own. Your next favorite garment is just a few cuts away!