📐 How To Make A Cone
I’ve spent countless hours in workshops, cutting and shaping materials, and one fundamental form that always comes up is the cone.
Whether for a party hat, a funnel, or a decorative accent, mastering this shape is incredibly useful.
This guide distills years of practical experience into simple, actionable steps, ensuring you can create perfect cones every time.
Quick Overview
This guide will walk you through creating a basic cone from paper or cardstock. You’ll learn how to measure, cut, and assemble your cone with precision.
By the end, you’ll have a sturdy, well-formed cone ready for any project or purpose.
- Time needed: 30-60 minutes (depending on precision and material)
- Difficulty: Beginner
- What you’ll need: Paper or cardstock, ruler, pencil, compass (or string/thumbtack), scissors, adhesive (glue stick, craft glue, or tape).
Step-by-Step Instructions
Step 1: Gather Your Materials
Before you begin, lay out all your necessary tools and materials on a clean, flat surface. This ensures you have everything at hand and can work efficiently without interruptions.
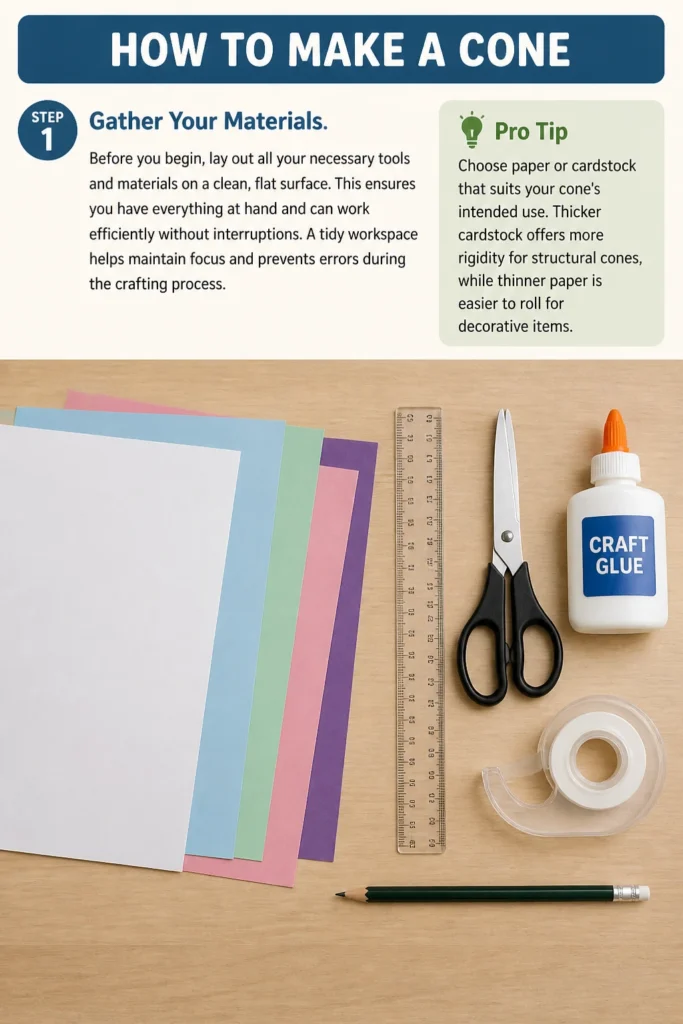
A tidy workspace helps maintain focus and prevents errors during the crafting process.
Pro Tip: Choose paper or cardstock that suits your cone’s intended use. Thicker cardstock offers more rigidity for structural cones, while thinner paper is easier to roll for decorative items.
Step 2: Determine Your Cone’s Dimensions
Decide on the approximate size of your finished cone. You need to think about how tall you want it and how wide the base should be.
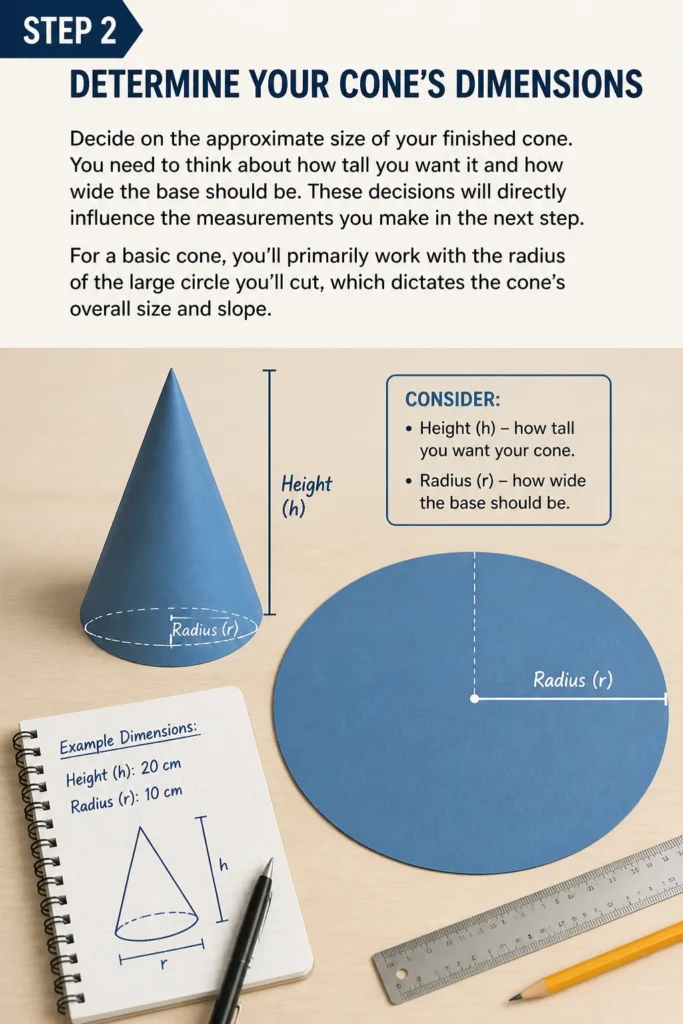
These decisions will directly influence the measurements you make in the next step.
For a basic cone, you’ll primarily work with the radius of the large circle you’ll cut, which dictates the cone’s overall size and slope.
Step 3: Draw the Large Arc (The Sector)
Take your paper or cardstock and place it flat. Using your compass, draw a large arc, which is part of a circle.
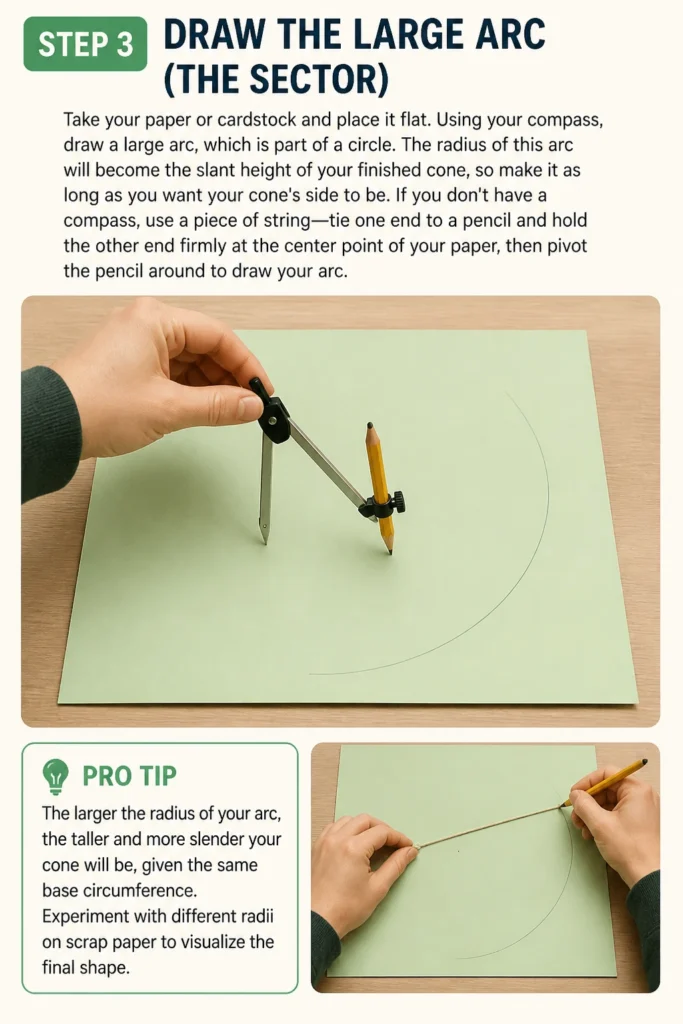
The radius of this arc will become the slant height of your finished cone, so make it as long as you want your cone’s side to be.
If you don’t have a compass, use a piece of string: tie one end to a pencil and hold the other end firmly at the center point of your paper, then pivot the pencil around to draw your arc.
Pro Tip: The larger the radius of your arc, the taller and more slender your cone will be, given the same base circumference. Experiment with different radii on scrap paper to visualize the final shape.
Step 4: Mark and Draw the Cut Line
From the center point where you started your arc, draw two straight lines outwards to meet the arc. These lines will form the sides of the sector you’ll cut out.
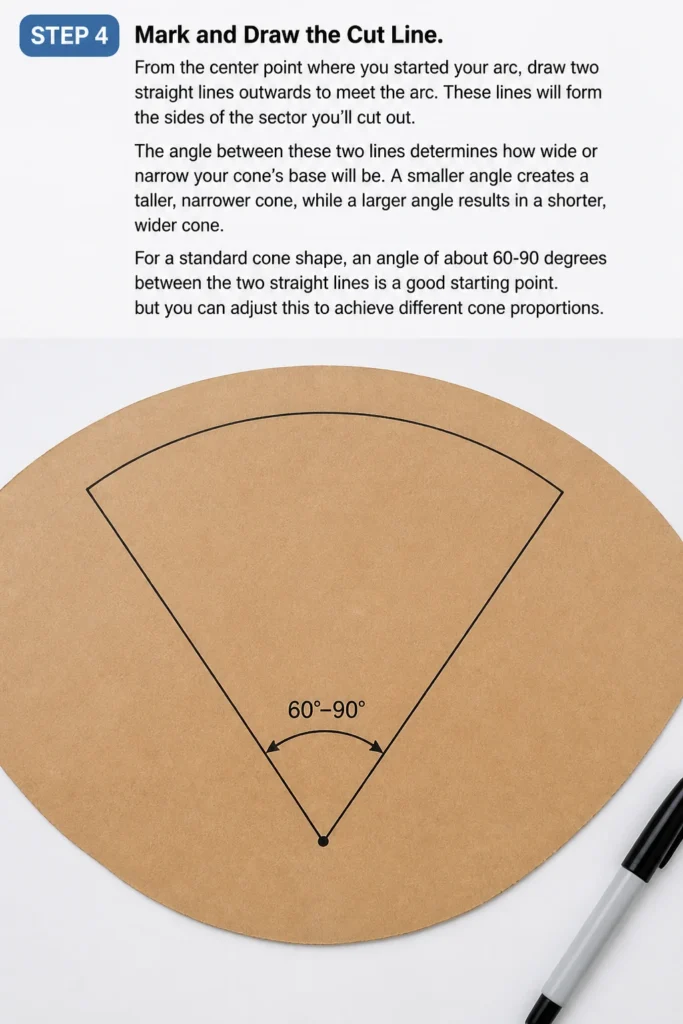
The angle between these two lines determines how wide or narrow your cone’s base will be.
A smaller angle creates a taller, narrower cone, while a larger angle results in a shorter, wider cone.
For a standard cone shape, an angle of about 60-90 degrees between the two straight lines is a good starting point, but you can adjust this to achieve different cone proportions.
Step 5: Cut Out the Sector
Carefully use your scissors to cut along the arc and the two straight lines you just drew. Take your time to make smooth, precise cuts.
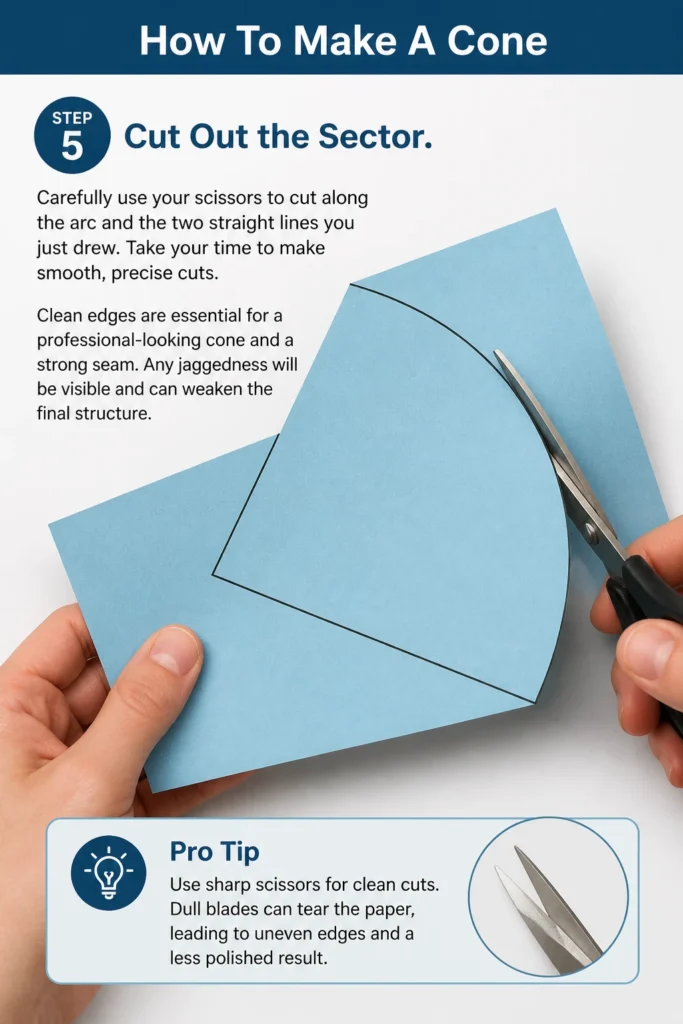
Clean edges are essential for a professional-looking cone and a strong seam.
Any jaggedness will be visible and can weaken the final structure.
Pro Tip: Use sharp scissors for clean cuts. Dull blades can tear the paper, leading to uneven edges and a less polished result.
Step 6: Form the Cone Shape
Gently bring one straight edge of your cut-out sector towards the other straight edge. You’ll see the paper begin to curl and form a cone shape.
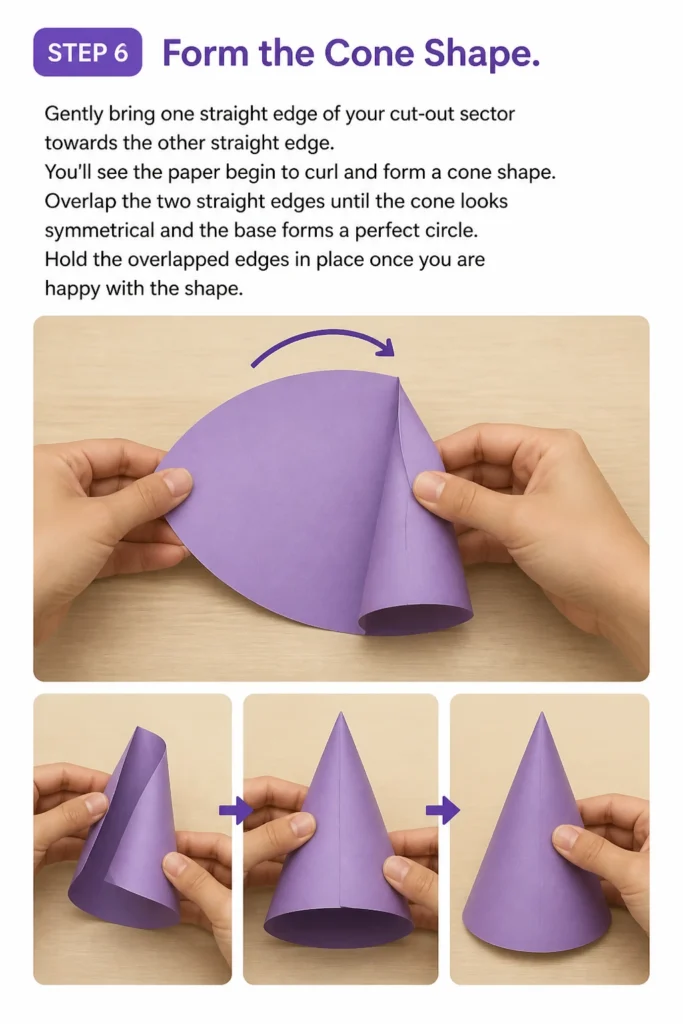
Overlap the two straight edges until the cone looks symmetrical and the base forms a perfect circle.
Hold the overlapped edges in place once you are happy with the shape.
Step 7: Apply Adhesive to Secure the Seam
Once you have the cone shape just right, apply your chosen adhesive along one of the overlapped edges. A thin, even bead of craft glue or a strip of strong double-sided tape works best.
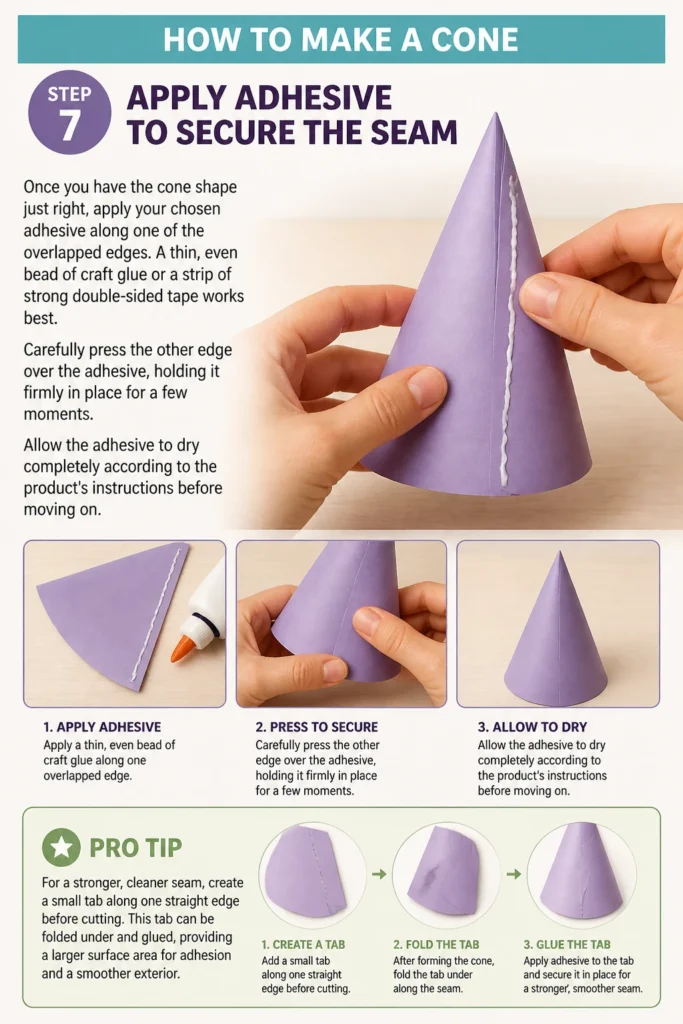
Carefully press the other edge over the adhesive, holding it firmly in place for a few moments.
Allow the adhesive to dry completely according to the product’s instructions before moving on.
Pro Tip: For a stronger, cleaner seam, create a small tab along one straight edge before cutting. This tab can be folded under and glued, providing a larger surface area for adhesion and a smoother exterior.
Step 8: Trim the Base (Optional)
Sometimes, the base of your newly formed cone might not be perfectly level. To fix this, place the cone upright on a flat surface.
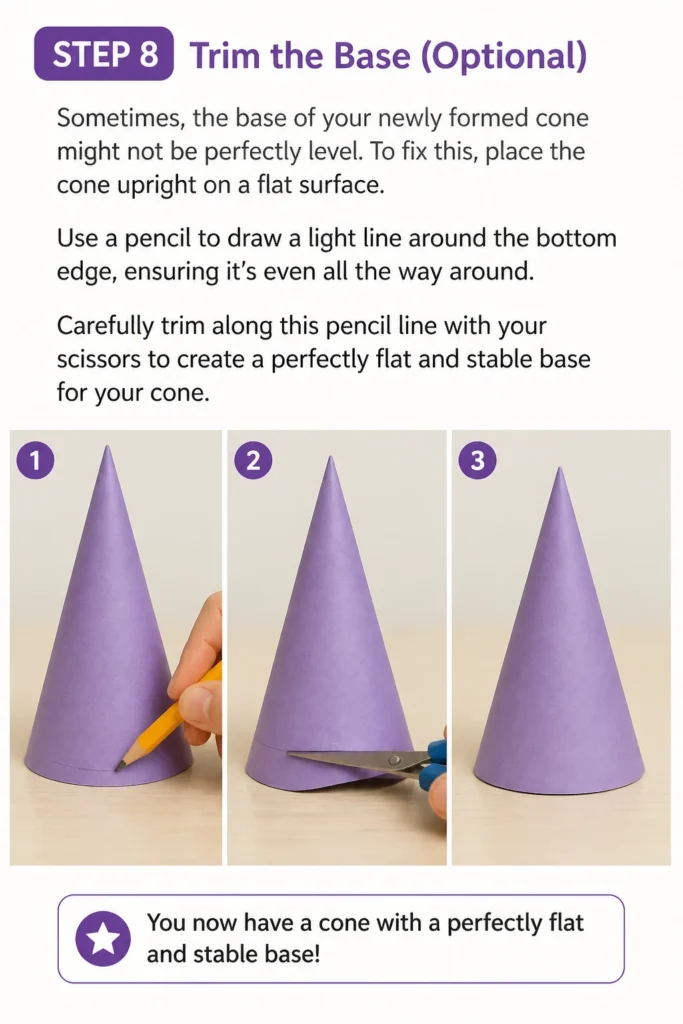
Use a pencil to draw a light line around the bottom edge, ensuring it’s even all the way around.
Carefully trim along this pencil line with your scissors to create a perfectly flat and stable base for your cone.
Step 9: Decorate Your Cone (Optional)
Now that your cone is constructed, it’s ready for decoration! You can paint it, cover it with glitter, glue on fabric, or add any other embellishments.
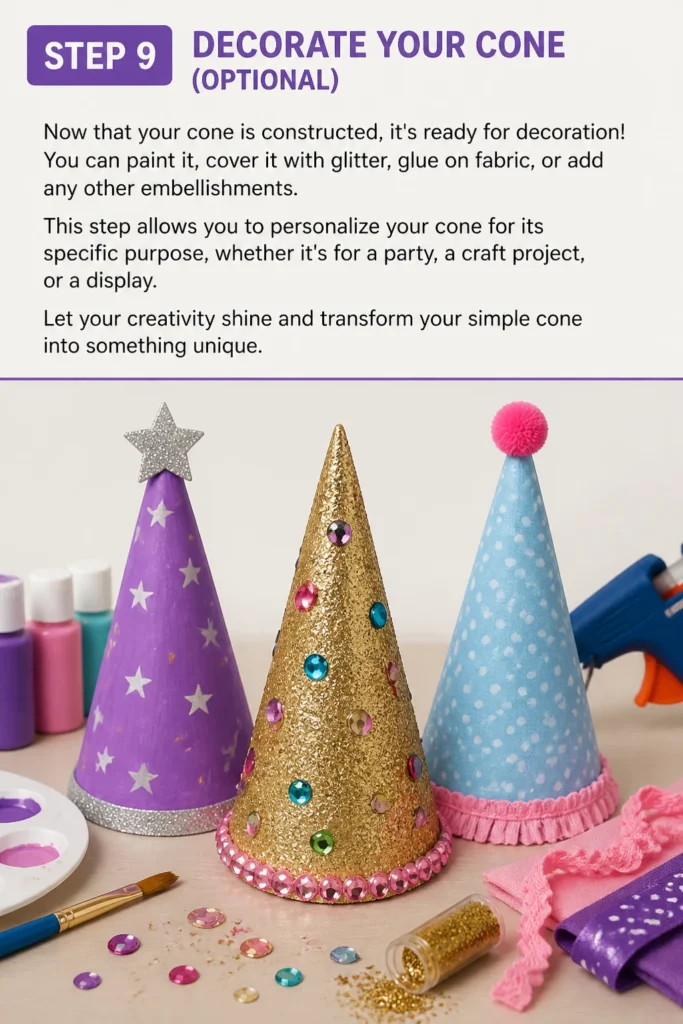
This step allows you to personalize your cone for its specific purpose, whether it’s for a party, a craft project, or a display.
Let your creativity shine and transform your simple cone into something unique.
Common Mistakes to Avoid
Incorrect Measurements
One of the most frequent errors is inaccurate measuring of the initial arc or the angle of the sector. This leads to cones that are lopsided, wobbly, or don’t meet your desired dimensions.
Always double-check your measurements with a ruler and compass, ensuring precision from the very start. A small error early on can compound into a significant problem later.
Imprecise Cutting
Using dull scissors or rushing the cutting process can result in jagged, uneven edges. These not only look messy but also make it harder to form a strong, seamless bond when gluing the cone together.
Always use sharp tools and take your time cutting. Smooth, clean cuts are fundamental for a professional finish and a sturdy structure.
Poor Adhesive Application
Applying too little glue, too much glue, or not letting it dry properly are common pitfalls. Too little glue won’t hold the seam, while too much can cause warping or a messy appearance.
Apply a thin, even layer of adhesive and hold the seam firmly until it sets. Patience during the drying phase is crucial for a strong, lasting bond.
Rushing the Process
Trying to complete the cone too quickly often leads to mistakes in measuring, cutting, and assembly. This can result in a less than perfect, or even unusable, cone.
Take your time with each step, focusing on accuracy and neatness. Crafting is a process that benefits from patience and attention to detail.
Troubleshooting
My cone isn’t perfectly round at the base.
This usually happens if the two straight edges of your sector weren’t perfectly aligned when you glued them, or if the initial arc wasn’t drawn from a fixed center point.
To fix it, place the cone on a flat surface and use a pencil to mark an even line around the base. Carefully trim along this line with sharp scissors to level it out.
The seam keeps coming undone.
If your seam isn’t holding, it’s likely due to insufficient adhesive, not enough pressure during drying, or the wrong type of glue for your material.
Reapply a fresh, thin line of strong craft glue or double-sided tape. Hold the seam firmly with clips or your fingers until the adhesive is completely dry and set.
The cone looks lopsided or leans to one side.
A lopsided cone often stems from an uneven initial arc drawing or an inconsistent angle when marking the two straight lines of the sector.
Check your measurements carefully in Step 3 and 4. If it’s a minor lean, you might be able to trim the base slightly to balance it, but for significant issues, starting over with precise measurements is best.
Key Takeaways
- Accurate measurements are the foundation for a well-formed cone.
- The radius of your initial arc determines the cone’s slant height.
- The angle of the sector you cut out dictates the width of the cone’s base.
- Sharp tools and precise cutting are essential for clean edges and a strong seam.
- Patience with adhesive application and drying ensures a durable and neat finish.
- Practice with different materials and dimensions will improve your cone-making skills.
Frequently Asked Questions
What’s the best material for making a cone?
The best material depends on the cone’s purpose. For decorative items or party hats, construction paper or lighter cardstock works well. For funnels or more robust structures, a heavier cardstock or even thin plastic sheets are more suitable.
How do I make a cone of a specific height and base diameter?
This involves a bit of geometry. You’ll need to calculate the slant height (the radius of your large arc) and the angle of your sector. The slant height (s) can be found using the Pythagorean theorem: s² = height² + radius_base². The angle of the sector (θ) is (base_circumference / large_arc_circumference) 360 degrees, which simplifies to (2 π radius_base / 2 π slant_height) 360, or (radius_base / slant_height) * 360 degrees. With these calculations, you can draw your sector precisely.
Can I make a cone without a compass?
Absolutely! If you don’t have a compass, you can easily use a piece of string and a pencil. Tie one end of the string to the pencil and hold the other end firmly at the center point where you want your arc to begin. Keeping the string taut, pivot the pencil to draw your arc.
What kind of adhesive works best?
For most paper or cardstock cones, a strong craft glue, a glue stick, or double-sided tape works well. Craft glue provides a very strong bond but requires drying time. Glue sticks are quick but might not be as strong for heavy cardstock. Double-sided tape offers instant adhesion and a clean finish.
Our Top Recommended Finds
- Precision Craft Knife Set: Ideal for making incredibly clean and precise cuts, especially on thicker materials or for intricate cone designs.
- Self-Healing Cutting Mat: Protects your work surface and provides a stable base for cutting with knives, extending the life of your blades.
- Strong Craft Glue: A reliable, fast-drying adhesive that forms a strong bond, perfect for ensuring your cone’s seam holds securely over time.
Ready to Shape Your Ideas?
You now have all the knowledge and steps needed to confidently create a perfect cone. This fundamental skill opens up a world of possibilities for various craft projects, practical applications, and decorative items.
Don’t stop at just one; try making cones of different sizes, proportions, and from various materials. Each attempt will refine your technique and boost your confidence.
Grab your materials today and start shaping your very own cones!