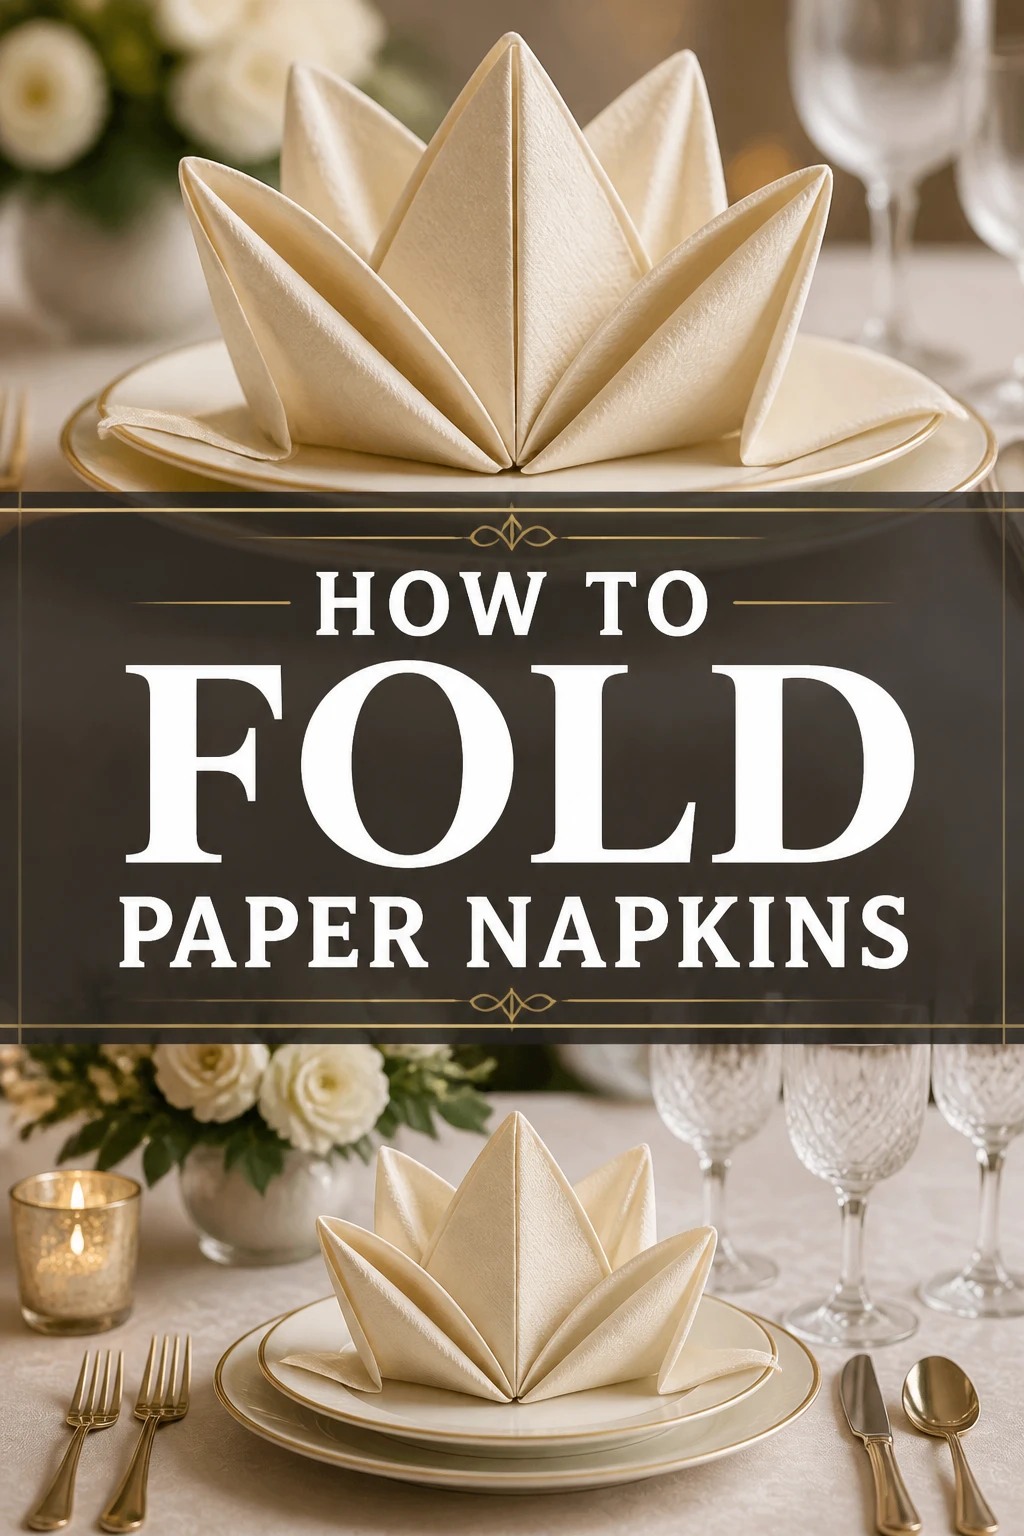
✨ How To Fold Paper Napkins
There’s a quiet satisfaction that comes with setting a beautiful table.
I’ve always found that a well-folded napkin instantly elevates any meal, turning a simple dinner into a special occasion.
Having prepared countless tables for family gatherings and intimate dinners, I’ve learned the simple secrets to making paper napkins look elegant and impressive.
Quick Overview
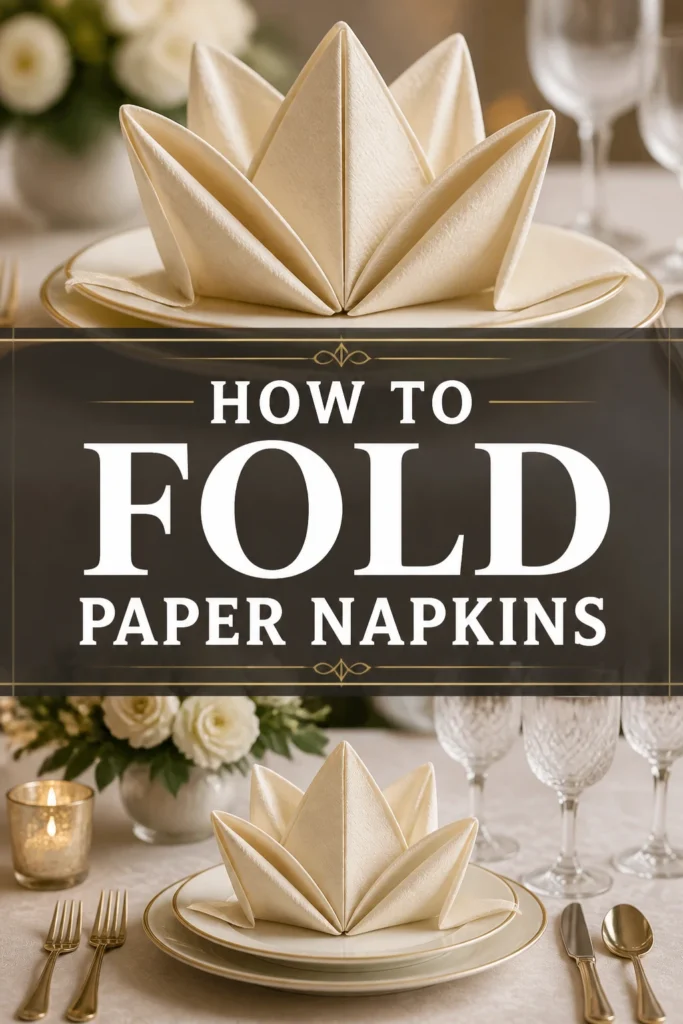
Transforming a simple paper napkin into a decorative element is easier than you think. This guide will walk you through creating an elegant “Pyramid Fold,” perfect for any table setting.
- Time needed: 2-5 minutes per napkin
- Difficulty: Beginner
- What you’ll need: Square paper napkins, a flat surface
Step-by-Step Instructions
We’ll guide you through the classic Pyramid Fold, a versatile design that stands proudly on your plate. This fold works wonderfully for both casual and formal settings.
Step 1: Prepare Your Workspace and Napkin
Before you begin folding, ensure your workspace is clean and flat. A kitchen counter or dining table provides an ideal surface.
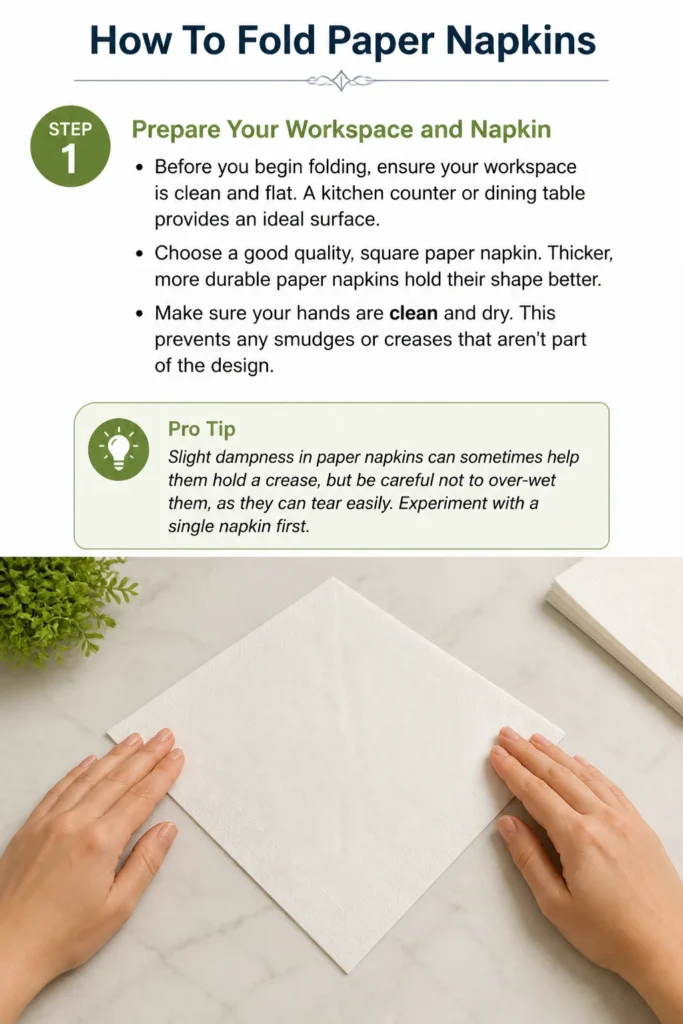
Choose a good quality, square paper napkin. Thicker, more durable paper napkins hold their shape better.
Make sure your hands are clean and dry. This prevents any smudges or creases that aren’t part of the design.
Pro Tip: Slight dampness in paper napkins can sometimes help them hold a crease, but be careful not to over-wet them, as they can tear easily. Experiment with a single napkin first.
Step 2: Unfold and Flatten the Napkin
Start by completely unfolding your paper napkin. Lay it out flat on your prepared surface.
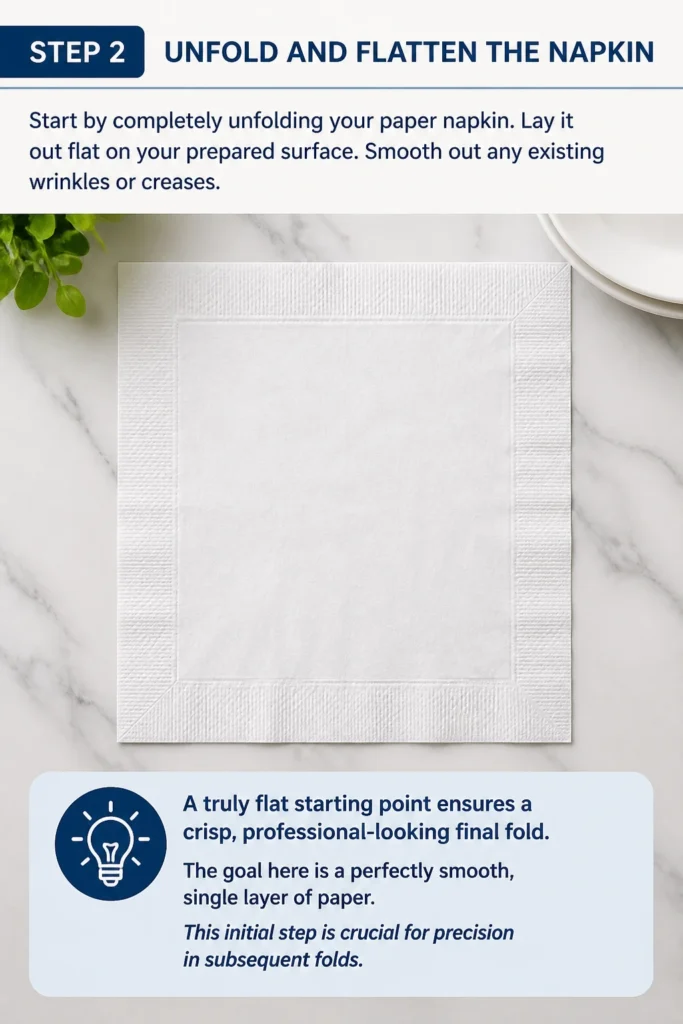
Smooth out any existing wrinkles or creases. A truly flat starting point ensures a crisp, professional-looking final fold.
The goal here is a perfectly smooth, single layer of paper. This initial step is crucial for precision in subsequent folds.
Step 3: Create the Base Quarter Square
Take the unfolded napkin and fold it in half. Bring one edge precisely to meet the opposite edge.
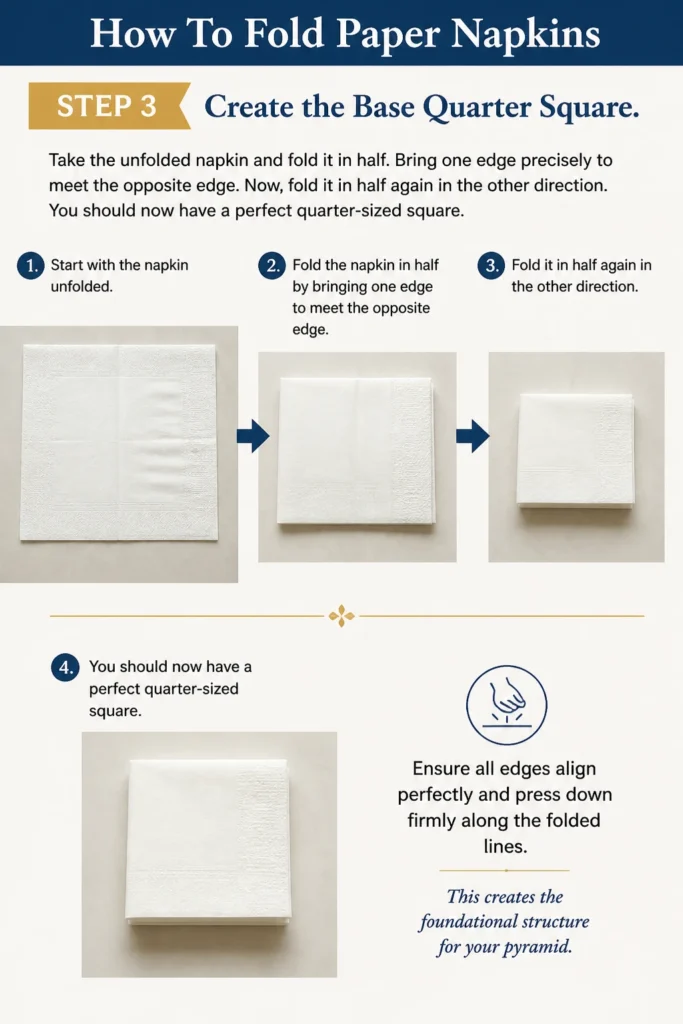
Now, fold it in half again in the other direction. You should now have a perfect quarter-sized square.
Ensure all edges align perfectly and press down firmly along the folded lines. This creates the foundational structure for your pyramid.
Step 4: Form the Initial Triangle
Orient your quarter-sized square so the open, loose corners are facing away from you, towards the top. The solid, folded corner should be closest to you.
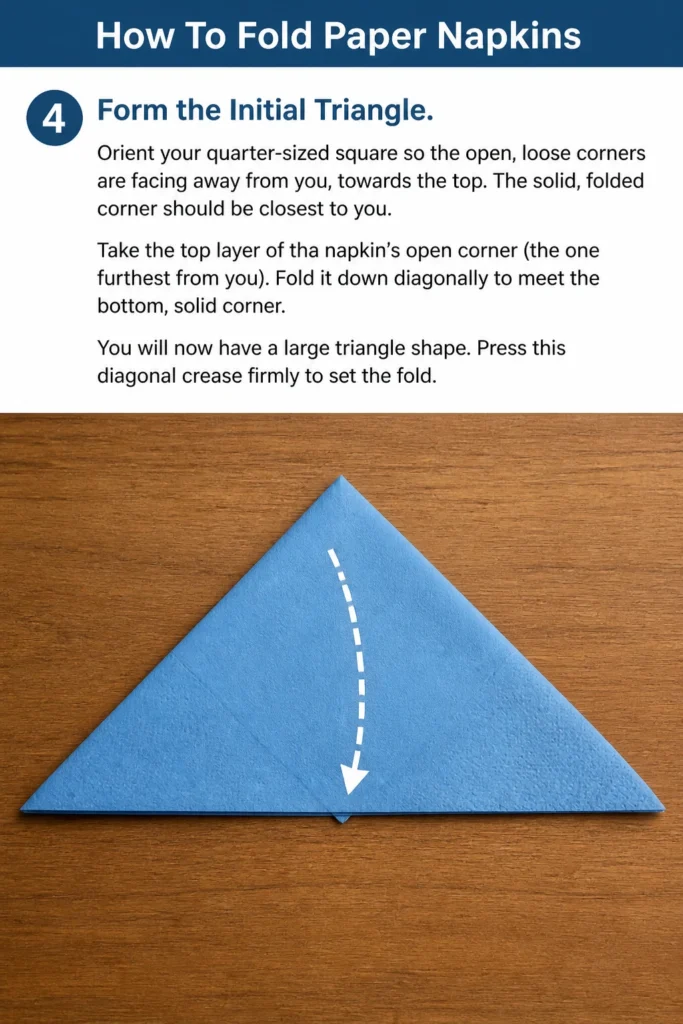
Take the top layer of the napkin’s open corner (the one furthest from you). Fold it down diagonally to meet the bottom, solid corner.
You will now have a large triangle shape. Press this diagonal crease firmly to set the fold.
Step 5: Lift and Align Corners to the Top
With the large triangle still in front of you (the long folded edge at the bottom), locate the two bottom corners. These are the points closest to you.
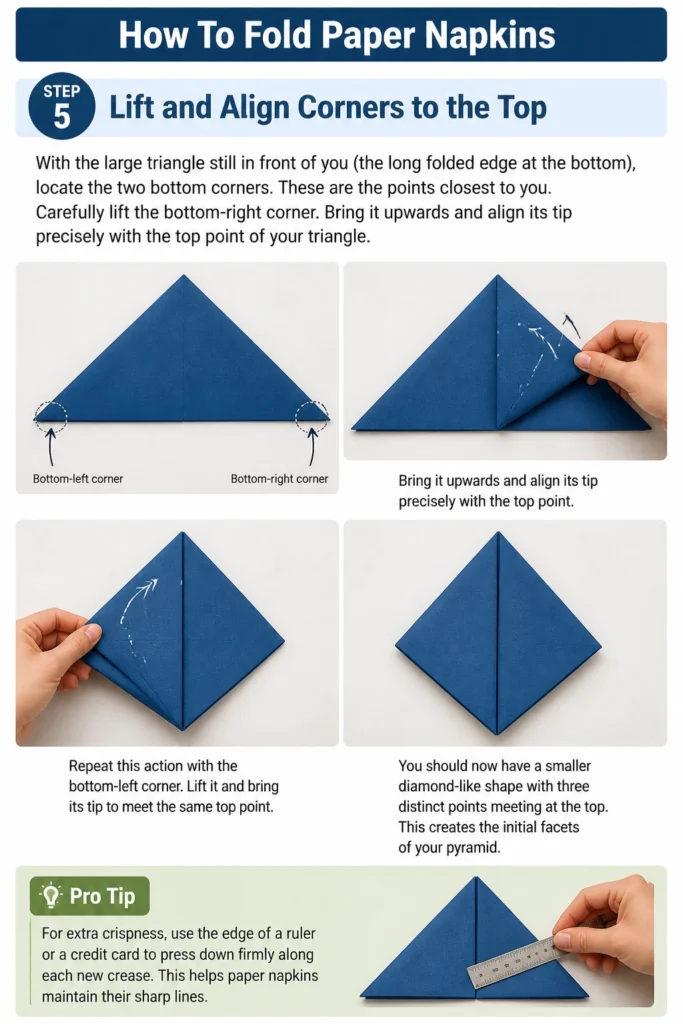
Carefully lift the bottom-right corner. Bring it upwards and align its tip precisely with the top point of your triangle.
Repeat this action with the bottom-left corner. Lift it and bring its tip to meet the same top point.
You should now have a smaller diamond-like shape with three distinct points meeting at the top. This creates the initial facets of your pyramid.
Pro Tip: For extra crispness, use the edge of a ruler or a credit card to press down firmly along each new crease. This helps paper napkins maintain their sharp lines.
Step 6: Flip and Fold the Base Up
Turn the napkin over completely. The flat, unfolded side should now be facing you.
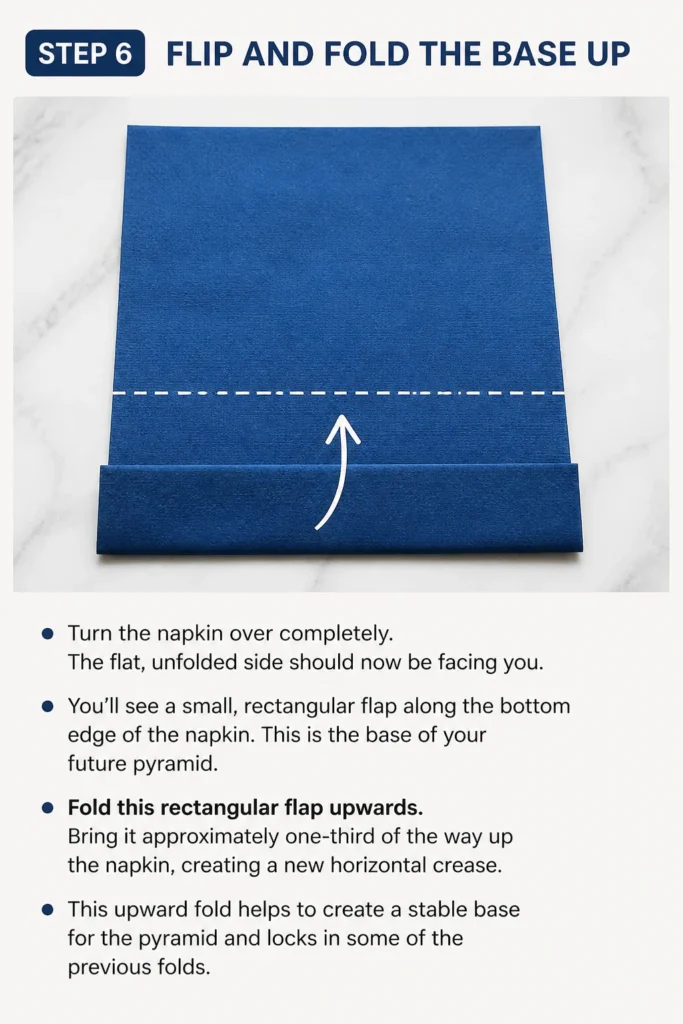
You’ll see a small, rectangular flap along the bottom edge of the napkin. This is the base of your future pyramid.
Fold this rectangular flap upwards. Bring it approximately one-third of the way up the napkin, creating a new horizontal crease.
This upward fold helps to create a stable base for the pyramid and locks in some of the previous folds.
Step 7: Fold Sides Inward and Secure
With the napkin still flipped over and the bottom flap folded up, you’ll see two side edges.
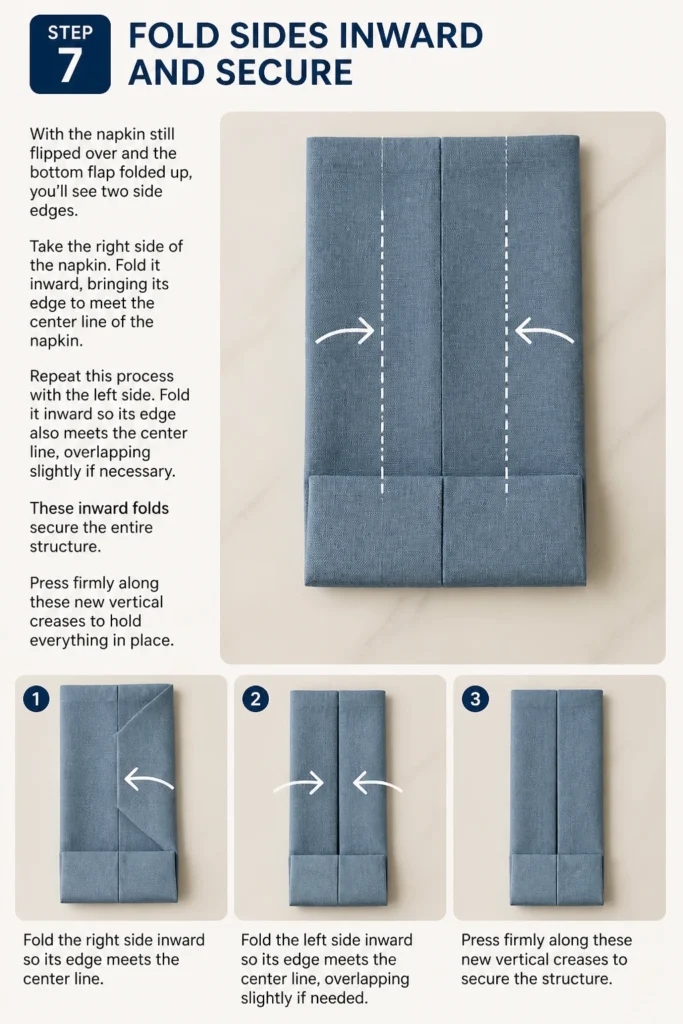
Take the right side of the napkin. Fold it inward, bringing its edge to meet the center line of the napkin.
Repeat this process with the left side. Fold it inward so its edge also meets the center line, overlapping slightly if necessary.
These inward folds secure the entire structure. Press firmly along these new vertical creases to hold everything in place.
Step 8: Flip Again, Gently Open, and Stand
Carefully turn the napkin back over to the front side. You should see a neat, pointed shape.
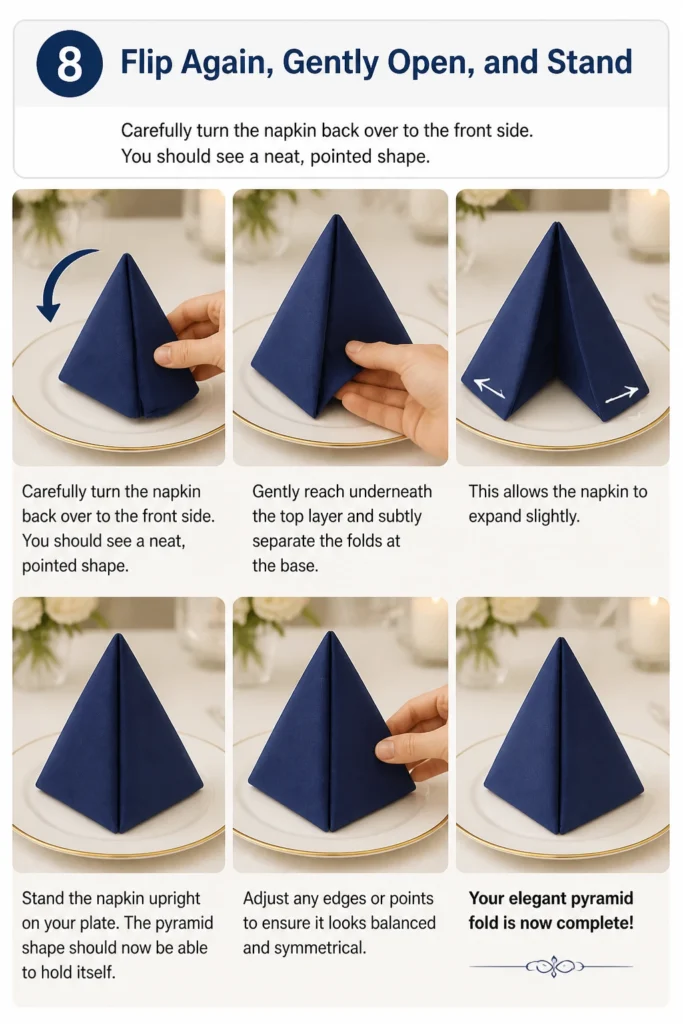
Gently reach underneath the top layer and subtly separate the folds at the base. This allows the napkin to expand slightly.
Stand the napkin upright on your plate. The pyramid shape should now be able to hold itself.
Adjust any edges or points to ensure it looks balanced and symmetrical. Your elegant pyramid fold is now complete!
Common Mistakes to Avoid
Not Flattening the Napkin Properly
Many people rush the initial step of laying the napkin flat. If you start with wrinkles, every subsequent fold will amplify those imperfections, leading to a messy and uneven result. Always take a moment to smooth out the napkin completely before making any folds.
Ignoring Precise Alignments
Folding napkins requires precision. If your corners don’t meet exactly or your edges aren’t perfectly aligned, the final shape will be crooked and lose its crispness. Take your time with each fold, ensuring everything lines up before pressing down. A little extra attention here makes a big difference.
Not Pressing Creases Firmly
Paper napkins need firm creases to hold their shape, especially for standing folds like the pyramid. Lightly running your finger over a fold isn’t enough. Use your thumb and forefinger, or even the side of your hand, to press down hard along each crease. This creates the sharp lines essential for an elegant finish.
Using the Wrong Type of Napkin
While many paper napkins exist, some are too thin, flimsy, or overly slick to hold complex folds. Trying to fold a single-ply, highly absorbent napkin into a pyramid will often lead to frustration. Opt for thicker, multi-ply paper napkins that have some body and texture. These will hold a crease much better and stand up without collapsing.
Troubleshooting
My Napkin Keeps Collapsing
If your pyramid fold won’t stand up, it’s usually due to insufficient creasing or using a very thin napkin. Go back through the steps and ensure you’re pressing down very firmly on every single fold. Consider trying a thicker, multi-ply paper napkin for better structural integrity. Sometimes, a slight mist of water (very slight!) can help thinner napkins hold a crease temporarily, but be cautious not to tear them.
The Edges Look Uneven
Uneven edges typically stem from imprecise initial folds. When you create the quarter square or the first triangle, ensure the edges and corners meet exactly before pressing. If one side is off, it will compound through subsequent steps. Unfold and restart, paying extra attention to perfect alignment at each stage.
It Doesn’t Look Like a Pyramid
If your final fold resembles something other than a pyramid, you might have missed a flip or an inward fold. Double-check Step 6 (Flip and Fold the Base Up) and Step 7 (Fold Sides Inward and Secure). These steps are crucial for creating the internal structure that allows the pyramid to stand and take its distinct shape. Review the sequence carefully.
Key Takeaways
- Always start with a clean, flat napkin and a smooth surface.
- Precision in aligning edges and corners is vital for a crisp finish.
- Press down firmly on every single crease to ensure the fold holds its shape.
- Thicker, multi-ply paper napkins work best for standing folds like the pyramid.
- Practice makes perfect; don’t be discouraged if your first attempt isn’t flawless.
- A well-folded napkin adds a touch of elegance to any dining experience.
Frequently Asked Questions
Can I use any size paper napkin for this fold?
While you can technically attempt this fold with various sizes, a standard dinner-sized square paper napkin (usually around 16-20 inches unfolded) works best. Smaller napkins will result in a tiny pyramid, which might not stand as well or make the intricate folds difficult to execute.
How do I make the fold stay crisp for a long time?
The best way to maintain crispness is by pressing each fold firmly as you go. For paper napkins, once they are folded, store them carefully to avoid crushing. Avoid stacking heavy items on top of them. If you’re setting the table in advance, place them gently on plates rather than cramming them into a drawer.
Are there easier folds for beginners?
Absolutely! The “Basic Rectangle” or “Simple Triangle” are much easier starting points. For a rectangle, simply fold the napkin in half, then in half again. For a triangle, fold it diagonally. These simple folds still add a touch of order to your table without the complexity of a standing fold.
Can I pre-fold napkins for an event?
Yes, you can definitely pre-fold paper napkins. It’s a great time-saver. Just be sure to store them in a way that protects their shape. Lay them flat in a box or on a tray rather than in a pile, which can flatten the folds. This ensures they look fresh and neat when it’s time to set the table.
Our Top Recommended Finds
- Premium Multi-Ply Paper Napkins: Look for brands offering thicker, more absorbent paper napkins. These hold folds beautifully and feel more substantial.
- Napkin Rings (Optional): While not strictly needed for the pyramid, elegant napkin rings can add another layer of sophistication to simpler folds.
- Flat, Non-Slip Mat: A silicone baking mat or a clean, non-slip surface protector can prevent your napkin from sliding while you’re making precise folds.
Elevate Your Next Meal
Now that you have the steps for the elegant Pyramid Fold, you’re ready to transform your dining table. Imagine the subtle sophistication a crisp, well-folded napkin brings to even the simplest meal.
This small detail shows care and attention, making every guest feel truly welcomed. Don’t wait for a special occasion; practice this fold tonight. You’ll be surprised how quickly you master it, turning everyday dining into something a little more extraordinary.