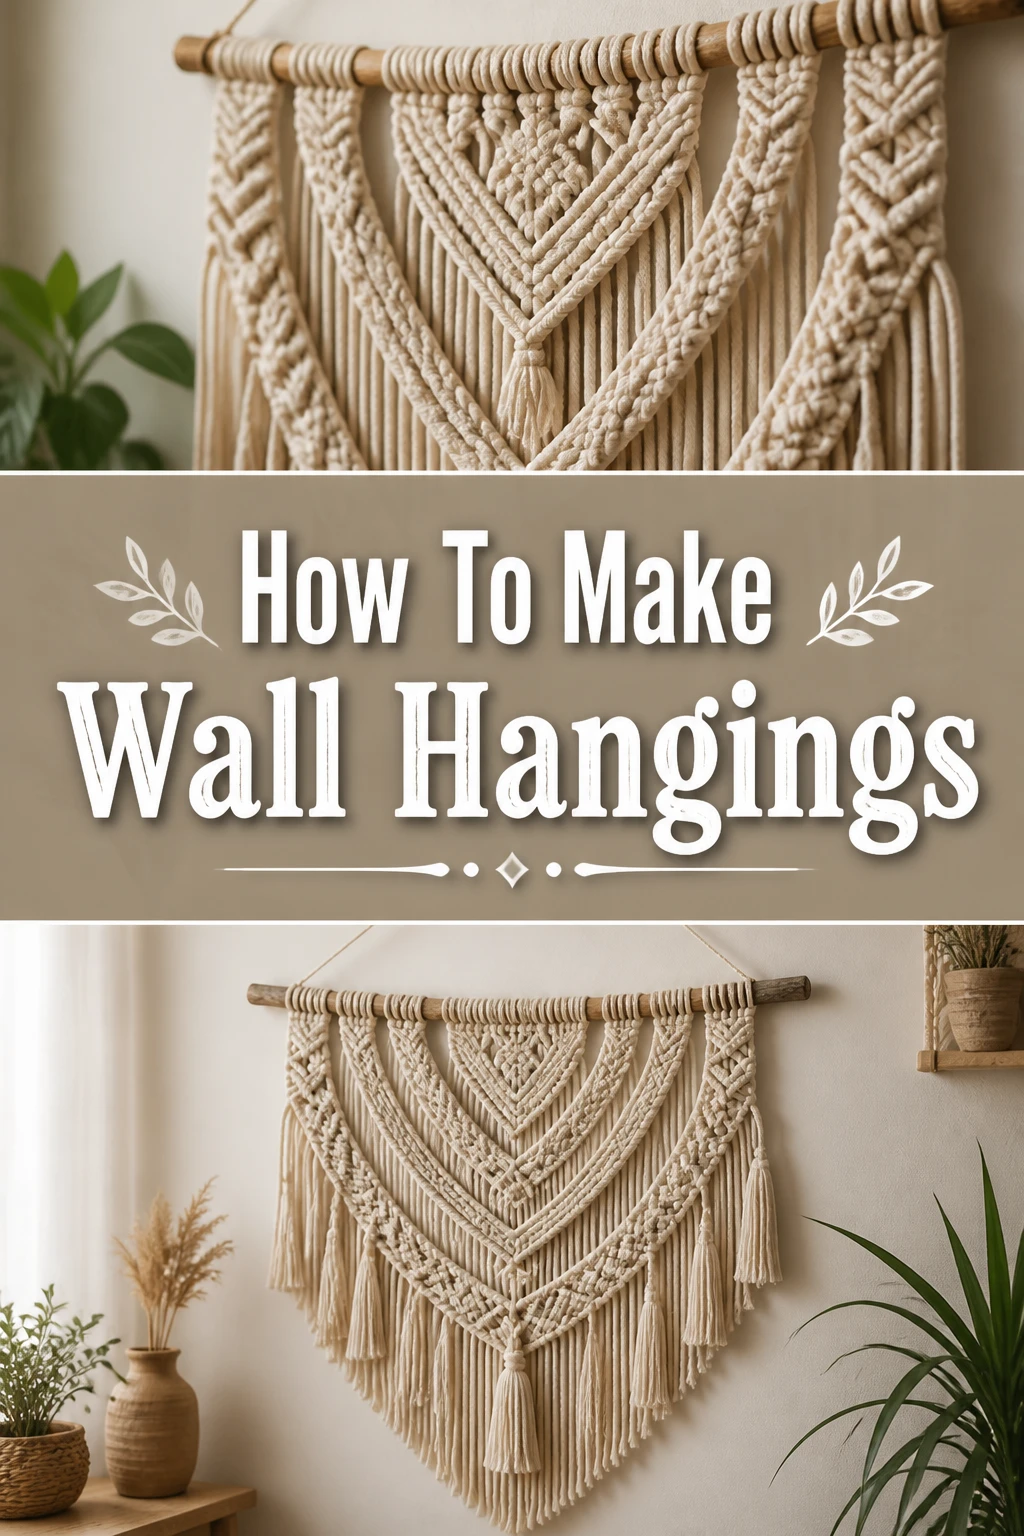
✨ How To Make Wall Hangings
There’s a special joy in transforming simple materials into something beautiful for your home.
Creating your own wall hangings allows you to infuse your space with personal style and warmth.
I’ve spent countless hours experimenting with fibers and knots, and I’m excited to share practical methods that truly work.
Quick Overview
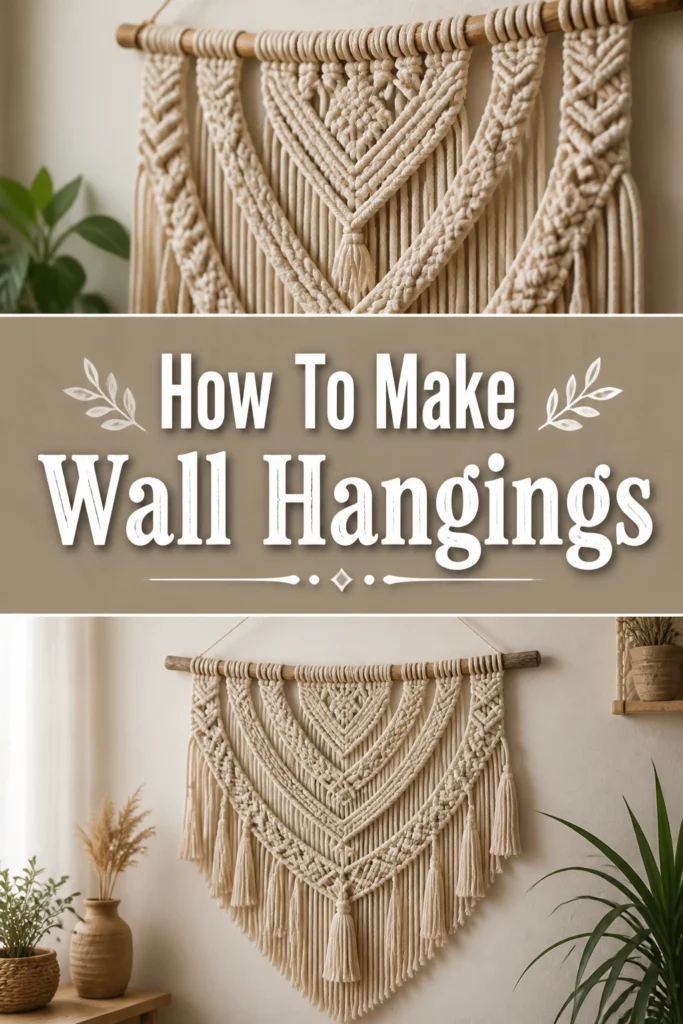
This guide will walk you through the process of crafting a stunning fiber wall hanging, perfect for adding texture and visual interest to any room.
You’ll learn essential techniques from selecting materials to adding the final touches, resulting in a unique piece of art.
- Time needed: 2-4 hours (depending on complexity and size)
- Difficulty: Beginner
- What you’ll need: Yarn or cord, a wooden dowel or branch, sharp scissors, a measuring tape.
Step-by-Step Instructions
Step 1: Gather Your Materials
Before you begin, collect all the necessary items. Having everything ready saves time and keeps your creative flow uninterrupted.
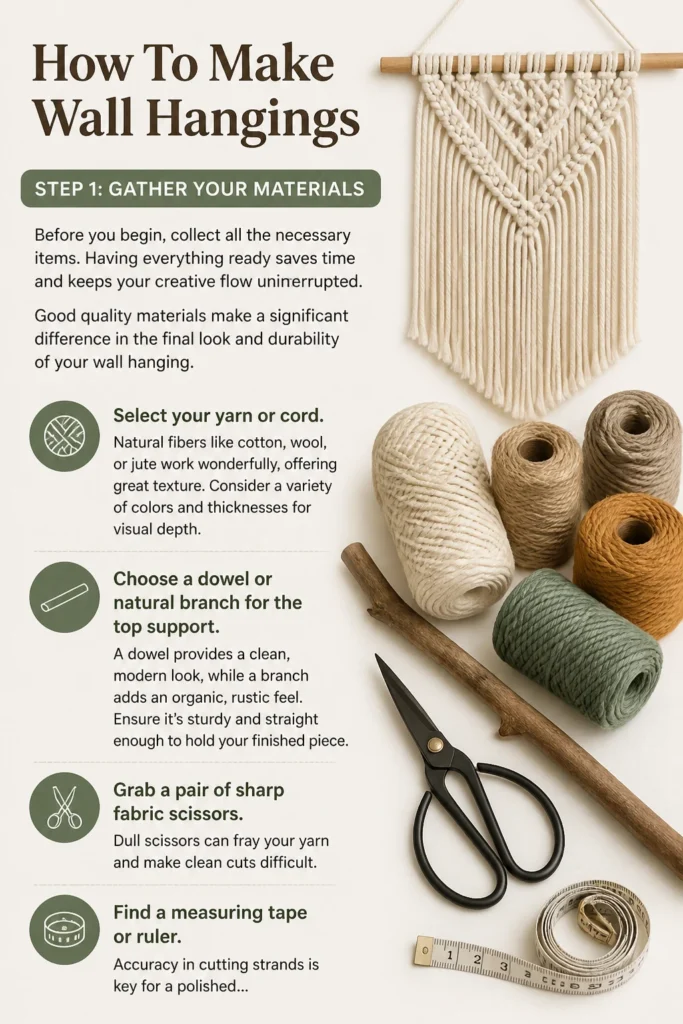
Good quality materials make a significant difference in the final look and durability of your wall hanging.
- Select your yarn or cord. Natural fibers like cotton, wool, or jute work wonderfully, offering great texture. Consider a variety of colors and thicknesses for visual depth.
- Choose a dowel or natural branch for the top support. A dowel provides a clean, modern look, while a branch adds an organic, rustic feel. Ensure it’s sturdy and straight enough to hold your finished piece.
- Grab a pair of sharp fabric scissors. Dull scissors can fray your yarn and make clean cuts difficult.
- Find a measuring tape or ruler. Accuracy in cutting strands is key for a polished finish.
Pro Tip: For beginners, start with a medium-weight cotton macrame cord. It’s easy to handle, holds knots well, and comes in many appealing colors.
Step 2: Prepare Your Dowel
The dowel or branch forms the foundation of your wall hanging, so proper preparation is important.
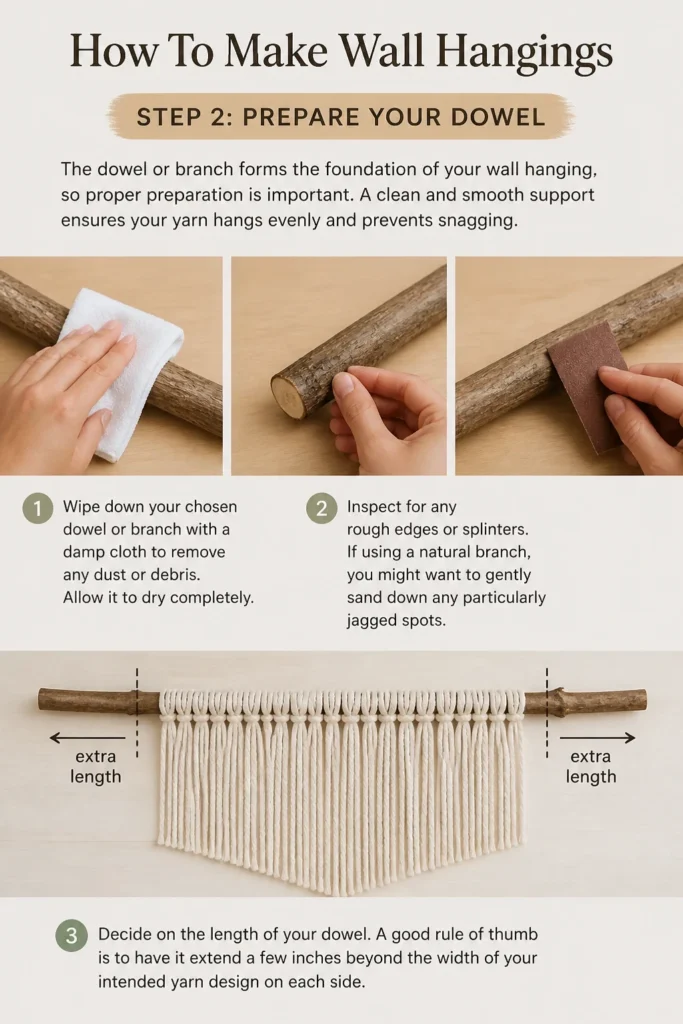
A clean and smooth support ensures your yarn hangs evenly and prevents snagging.
- Wipe down your chosen dowel or branch with a damp cloth to remove any dust or debris. Allow it to dry completely.
- Inspect for any rough edges or splinters. If using a natural branch, you might want to gently sand down any particularly jagged spots.
- Decide on the length of your dowel. A good rule of thumb is to have it extend a few inches beyond the width of your intended yarn design on each side.
Step 3: Cut Your Yarn Strands
This step is crucial for achieving a balanced and symmetrical wall hanging. Taking your time here will prevent frustration later.
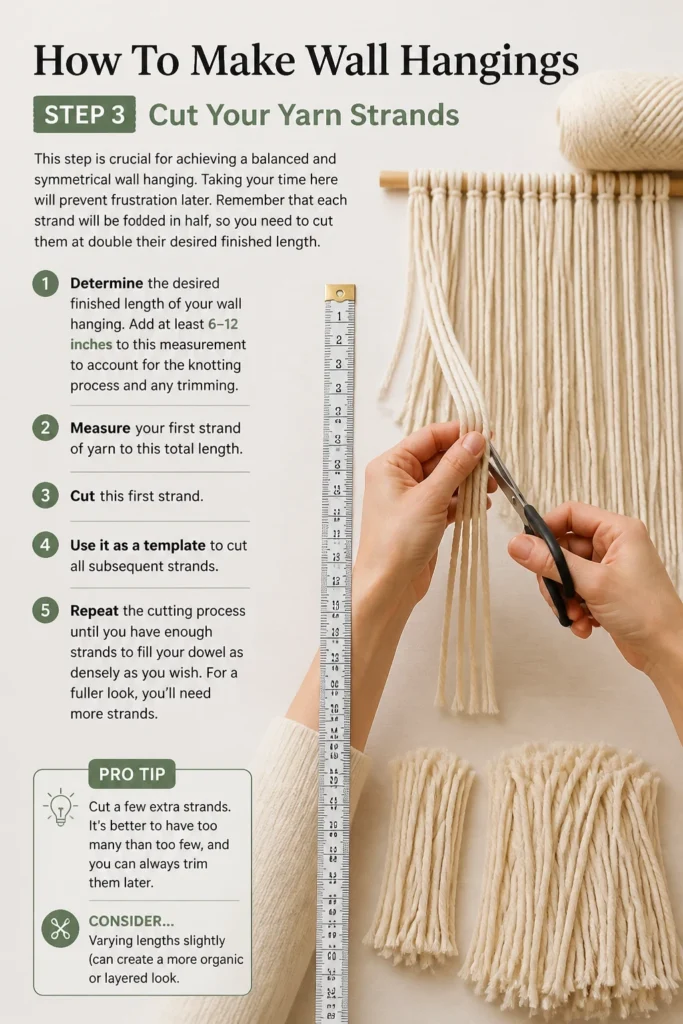
Remember that each strand will be folded in half, so you need to cut them at double their desired finished length.
- Determine the desired finished length of your wall hanging. Add at least 6-12 inches to this measurement to account for the knotting process and any trimming.
- Measure your first strand of yarn to this total length.
- Cut this first strand. Use it as a template to cut all subsequent strands.
- Repeat the cutting process until you have enough strands to fill your dowel as densely as you wish. For a fuller look, you’ll need more strands.
Pro Tip: Cut a few extra strands. It’s better to have too many than too few, and you can always trim them later. Consider cutting different lengths for a layered effect.
Step 4: Attach Yarn to Dowel (Lark’s Head Knot)
The Lark’s Head knot is the most common and secure way to attach your yarn strands to the dowel.
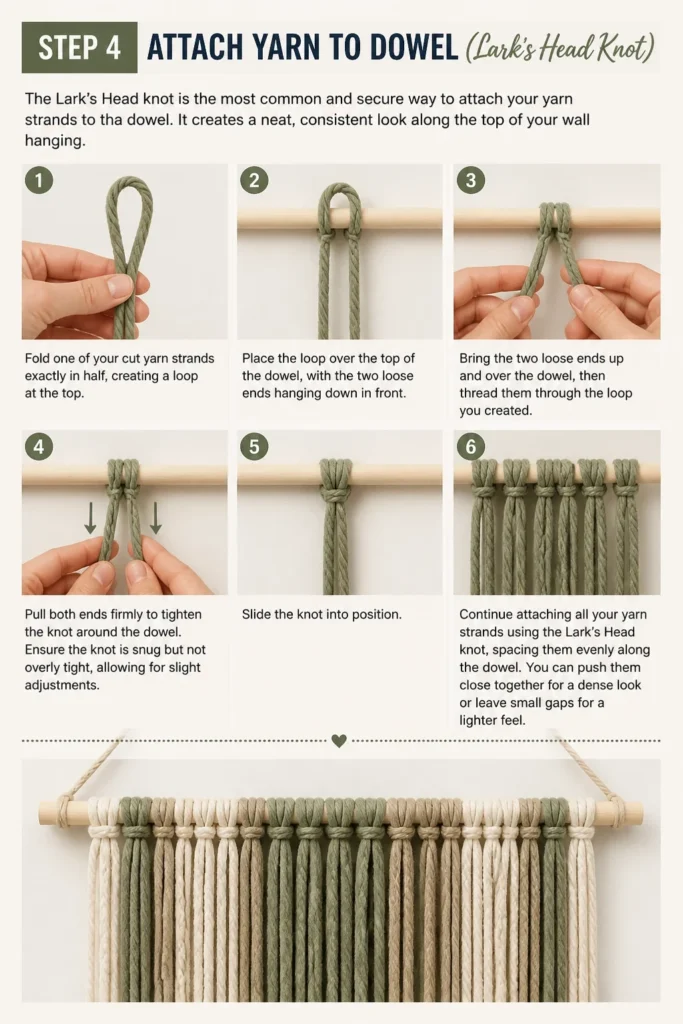
It creates a neat, consistent look along the top of your wall hanging.
- Fold one of your cut yarn strands exactly in half, creating a loop at the top.
- Place the loop over the top of the dowel, with the two loose ends hanging down in front.
- Bring the two loose ends up and over the dowel, then thread them through the loop you created.
- Pull both ends firmly to tighten the knot around the dowel. Ensure the knot is snug but not overly tight, allowing for slight adjustments.
- Slide the knot into position.
- Continue attaching all your yarn strands using the Lark’s Head knot, spacing them evenly along the dowel. You can push them close together for a dense look or leave small gaps for a lighter feel.
Step 5: Create Your Design/Pattern
Now comes the fun part: shaping your wall hanging and bringing your vision to life.
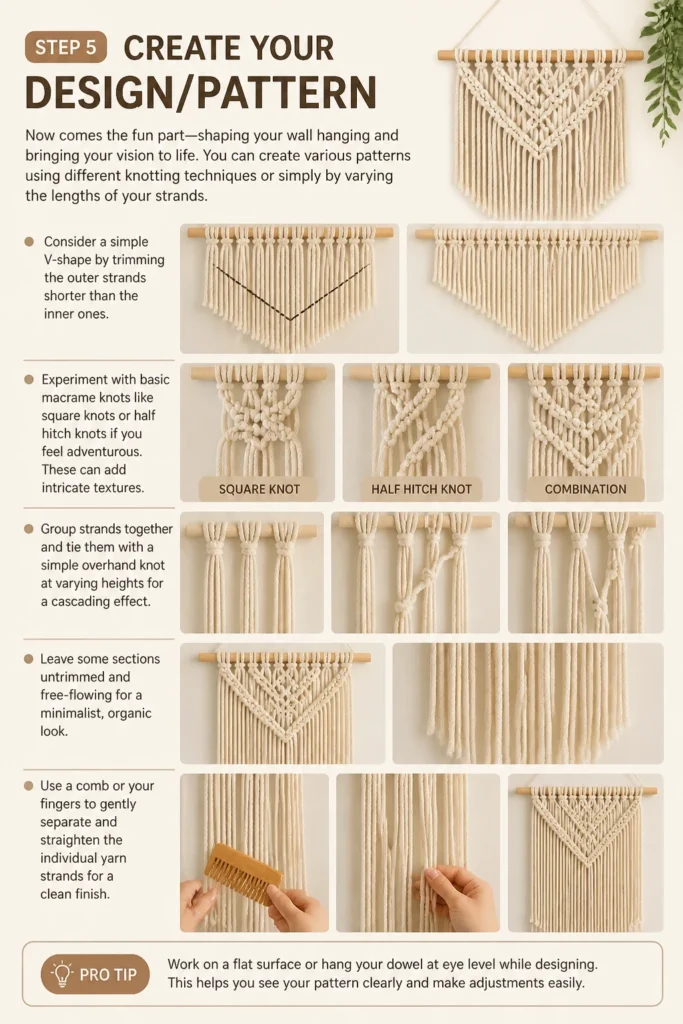
You can create various patterns using different knotting techniques or simply by varying the lengths of your strands.
- Consider a simple V-shape by trimming the outer strands shorter than the inner ones.
- Experiment with basic macrame knots like square knots or half hitch knots if you feel adventurous. These can add intricate textures.
- Group strands together and tie them with a simple overhand knot at varying heights for a cascading effect.
- Leave some sections untrimmed and free-flowing for a minimalist, organic look.
- Use a comb or your fingers to gently separate and straighten the individual yarn strands for a clean finish.
Pro Tip: Work on a flat surface or hang your dowel at eye level while designing. This helps you see the overall shape and make adjustments easily. Step back frequently to assess your progress.
Step 6: Trim and Shape Your Hanging
Trimming is where your wall hanging truly takes its final form. Precision here will elevate your piece.
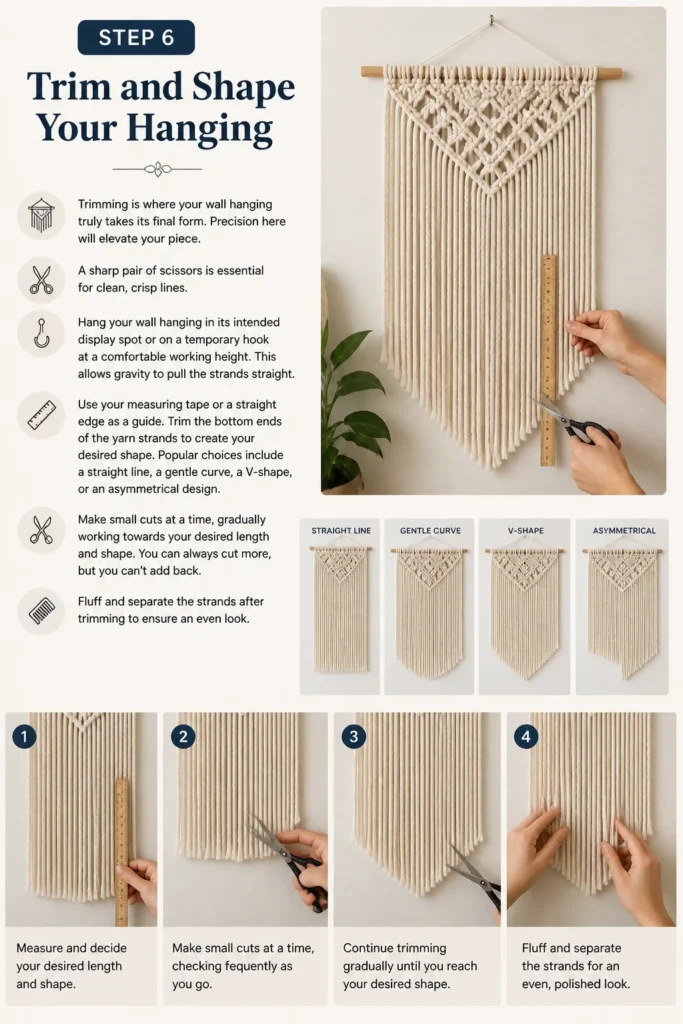
A sharp pair of scissors is essential for clean, crisp lines.
- Hang your wall hanging in its intended display spot or on a temporary hook at a comfortable working height. This allows gravity to pull the strands straight.
- Use your measuring tape or a straight edge as a guide.
- Trim the bottom ends of the yarn strands to create your desired shape. Popular choices include a straight line, a gentle curve, a V-shape, or an asymmetrical design.
- Make small cuts at a time, gradually working towards your desired length and shape. You can always cut more, but you can’t add back.
- Fluff and separate the strands after trimming to ensure an even look.
Step 7: Add a Hanging Loop
Your wall hanging needs a way to be displayed securely and aesthetically.
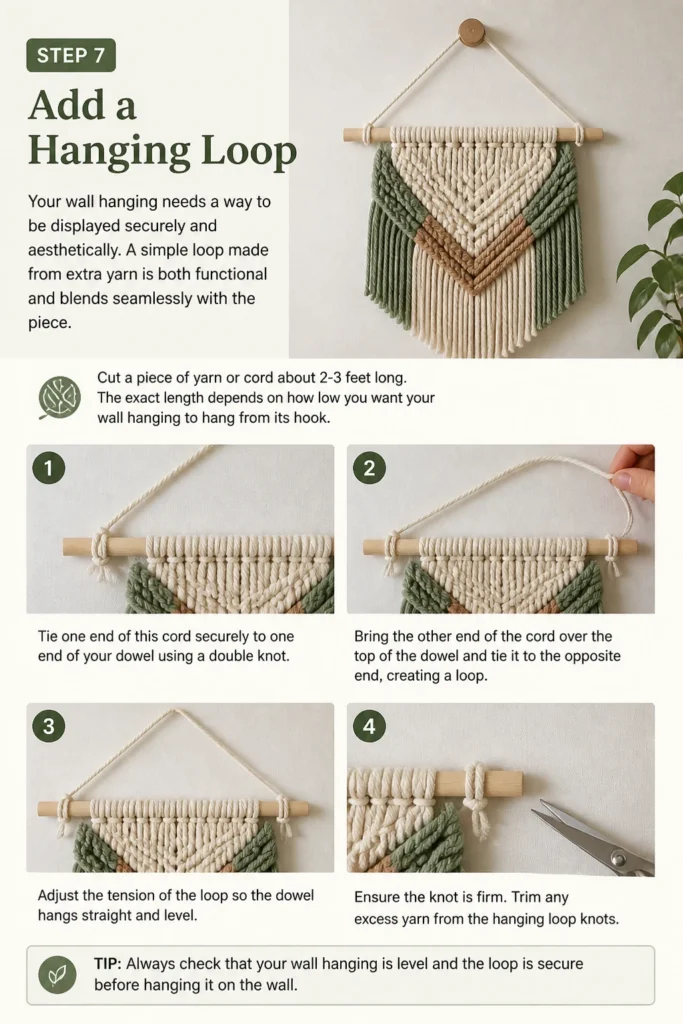
A simple loop made from extra yarn is both functional and blends seamlessly with the piece.
- Cut a piece of yarn or cord about 2-3 feet long. The exact length depends on how low you want your wall hanging to hang from its hook.
- Tie one end of this cord securely to one end of your dowel using a double knot.
- Bring the other end of the cord over the top of the dowel and tie it to the opposite end, creating a loop.
- Adjust the tension of the loop so the dowel hangs straight and level. Ensure the knot is firm.
- Trim any excess yarn from the hanging loop knots.
Step 8: Display Your Creation
The final and most rewarding step is finding the perfect place for your handmade wall hanging.
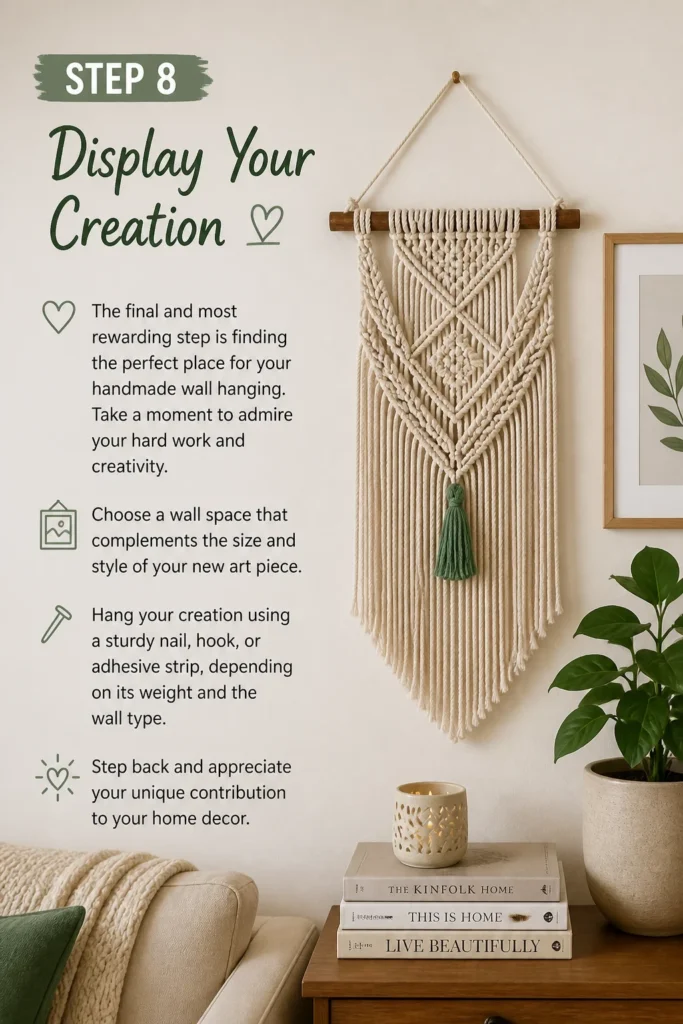
Take a moment to admire your hard work and creativity.
- Choose a wall space that complements the size and style of your new art piece.
- Hang your creation using a sturdy nail, hook, or adhesive strip, depending on its weight and the wall type.
- Step back and appreciate your unique contribution to your home decor.
Common Mistakes to Avoid
Uneven Yarn Lengths
A common pitfall for beginners is cutting yarn strands without precise measurements. This leads to a lopsided or uneven bottom edge, which can detract from the overall aesthetic.
Always use a measuring tape and cut your first strand accurately. Then, use that first strand as a consistent template for all subsequent cuts to ensure uniformity.
Loose Knots
If your Lark’s Head knots aren’t pulled tight enough, your yarn strands can slip or shift along the dowel. This results in gaps or an untidy appearance over time.
Make sure to pull both ends of the yarn firmly after creating each knot. The knot should feel snug against the dowel without deforming the yarn itself.
Overwhelming the Design
It’s easy to get carried away with too many colors, textures, or complex knots, especially when starting out. This can make the wall hanging look busy or cluttered rather than cohesive.
Start with a simpler design, perhaps using one or two complementary colors and focusing on clean lines or a single type of knot. You can always add more complexity to future projects as your skills grow.
Poor Hanging Method
Sometimes, after all the effort of creation, people overlook how the piece will actually hang. An improperly secured hanging loop or an unlevel display can ruin the presentation.
Ensure your hanging loop is tied securely and evenly to both ends of the dowel. Before finalizing its position on the wall, use a small level to confirm it hangs perfectly straight.
Troubleshooting
Wall hanging looks sparse
If your finished piece appears thinner or less full than you envisioned, it’s likely due to too few yarn strands or strands that are spaced too far apart.
The best solution is to add more yarn strands. You can carefully slide existing knots apart slightly to create space, then attach new strands using the Lark’s Head knot. Push all the knots back together for a denser look.
Yarn strands are unraveling at the bottom
Certain types of yarn, especially natural fibers like cotton or jute, can fray or unravel at the cut ends, making the bottom edge look messy.
To prevent this, you can apply a small amount of fabric glue or clear nail polish to the very tips of the cut strands. For a more natural look, you can also gently comb out the ends to create a soft, feathery fringe.
Wall hanging doesn’t hang straight
If your dowel or branch is tilting or your entire piece hangs crooked, the issue usually lies with the hanging loop or an uneven weight distribution.
First, check that your hanging loop is tied at equal distances from the ends of the dowel and that its tension is even. If the piece is heavy on one side, you might need to adjust the yarn distribution or add a hidden counterweight to balance it.
Key Takeaways
- Preparation is paramount: Gather all materials and cut yarn accurately before knotting.
- Master the Lark’s Head knot: This fundamental knot ensures secure attachment and a neat top edge.
- Design with intention: Plan your shape and pattern, starting simple for your first project.
- Trim with care: Hang your piece for trimming to achieve precise, even lines and shapes.
- Secure your display: A sturdy and level hanging loop is essential for showcasing your art.
- Embrace imperfections: Handmade items have character; enjoy the unique qualities of your creation.
Frequently Asked Questions
What is the best type of yarn for a beginner?
For beginners, a medium-weight cotton macrame cord (typically 3mm-5mm) is highly recommended. It’s easy to grip, holds knots well, and doesn’t fray excessively. It’s also widely available in various colors.
How do I clean my wall hanging?
For most fiber wall hangings, spot cleaning is best. Use a damp cloth with a mild soap to gently dab any soiled areas. Avoid submerging the entire piece in water, as it can cause shrinkage or damage to delicate fibers. Regular dusting with a soft brush or lint roller can keep it fresh.
Can I use a natural branch instead of a wooden dowel?
Absolutely! A natural branch can add a beautiful, rustic, or bohemian touch to your wall hanging. Just ensure the branch is clean, dry, and sturdy enough to support the weight of your yarn without bending or breaking.
How can I make a larger wall hanging?
To create a larger wall hanging, you’ll need a longer and potentially thicker dowel or branch, and significantly more yarn. The process remains the same, but planning your design and managing a larger volume of material will require more time and space. Consider working in sections if it becomes too cumbersome.
Our Top Recommended Finds
- Natural Cotton Macrame Cord: Perfect for beginners, offering excellent knot definition and a soft feel.
- Smooth Wooden Dowel Rods: Provide a clean, modern aesthetic and a sturdy base for any design.
- Sharp Fabric Shears: Essential for precise, clean cuts that prevent fraying and ensure a professional finish.
Unleash Your Inner Creator
Creating your own wall hanging is more than just a craft; it’s an opportunity to express yourself and personalize your living space.
Each knot and trim adds to a unique piece of art that reflects your personal touch.
Don’t hesitate to start your own fiber art journey today. Pick up some yarn, find a dowel, and let your creativity flow.