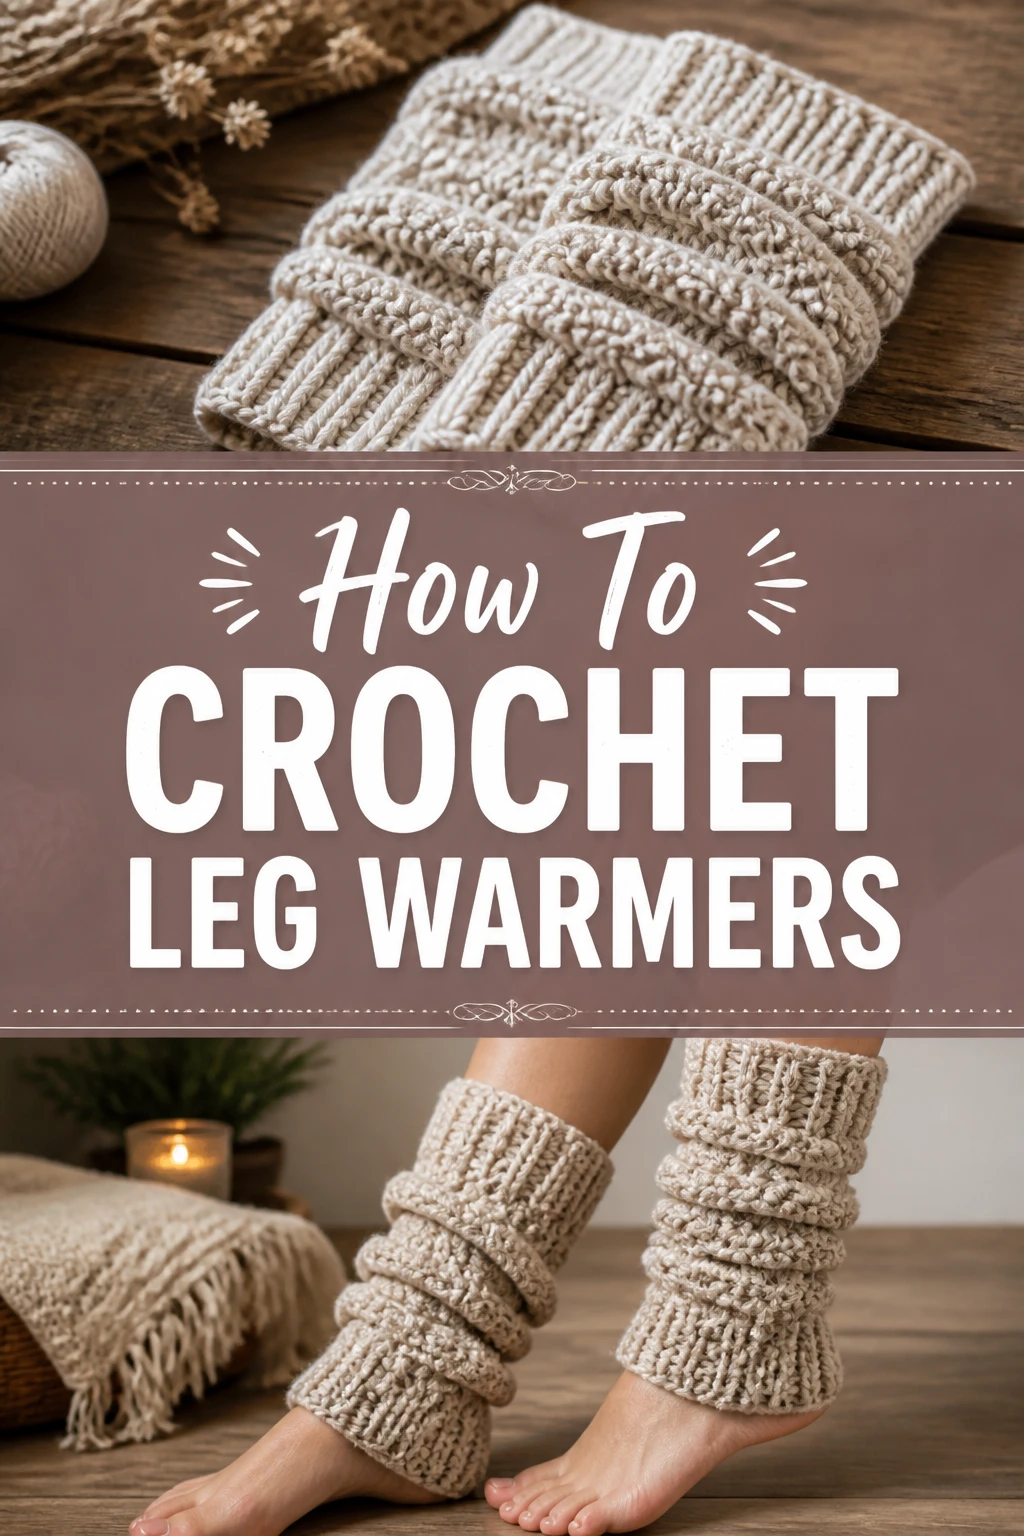
🧶 How To Crochet Leg Warmers
Imagine cozying up with warm, handmade leg warmers, perfect for chilly days or adding a stylish touch to any outfit.
Crocheting your own pair is a wonderfully rewarding project, much simpler than you might think.
I’ve personally crafted countless pairs, experimenting with different yarns and stitches, and I’m excited to share my easy-to-follow method with you.
Quick Overview
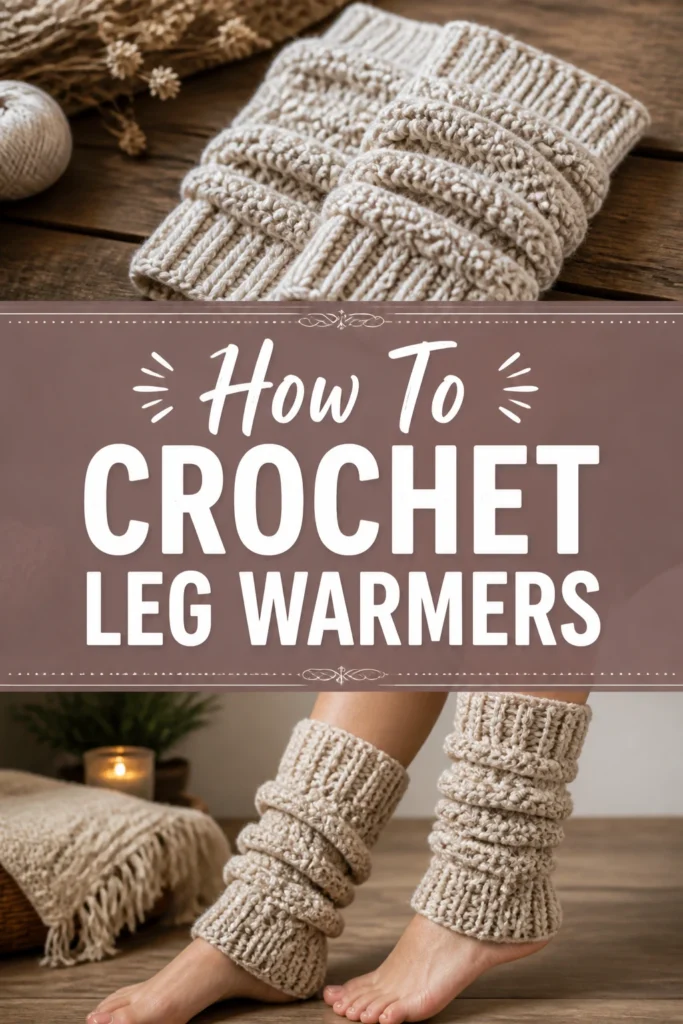
In this guide, you will learn to crochet comfortable and stylish leg warmers from start to finish.
We’ll cover everything from selecting your materials to finishing touches, ensuring a beautiful result.
- Time needed: 4-8 hours (depending on speed and complexity)
- Difficulty: Beginner-Intermediate
- What you’ll need: Yarn, crochet hook, scissors, yarn needle, measuring tape
Step-by-Step Instructions
Step 1: Gather Your Materials
Before you begin your crocheting adventure, it’s essential to have all your supplies ready.
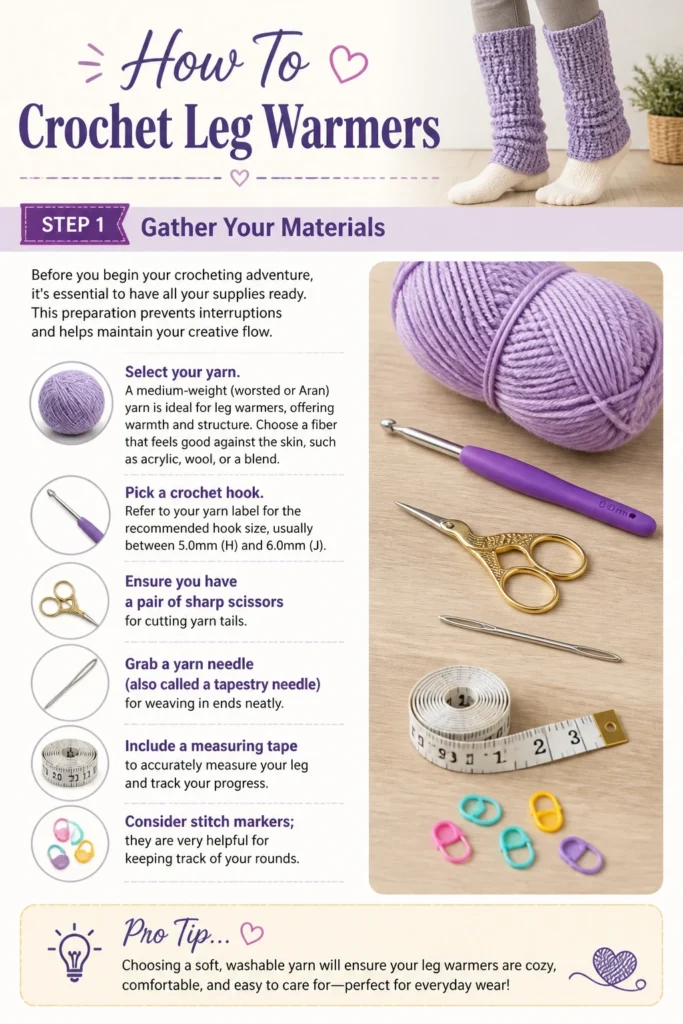
This preparation prevents interruptions and helps maintain your creative flow.
- Select your yarn. A medium-weight (worsted or Aran) yarn is ideal for leg warmers, offering warmth and structure.
- Choose a fiber that feels good against the skin, such as acrylic, wool, or a blend.
- Pick a crochet hook. Refer to your yarn label for the recommended hook size, usually between 5.0mm (H) and 6.0mm (J).
- Ensure you have a pair of sharp scissors for cutting yarn tails.
- Grab a yarn needle (also called a tapestry needle) for weaving in ends neatly.
- Include a measuring tape to accurately measure your leg and track your progress.
- Consider stitch markers; they are very helpful for keeping track of your rounds.
Pro Tip: Always make a small gauge swatch before starting your main project. This 4×4 inch sample helps you match the pattern’s tension, ensuring your finished leg warmers are the correct size and fit. Adjust your hook size if your swatch is too big or too small.
Step 2: Measure for a Perfect Fit
Accurate measurements are crucial for leg warmers that fit comfortably and stay in place.
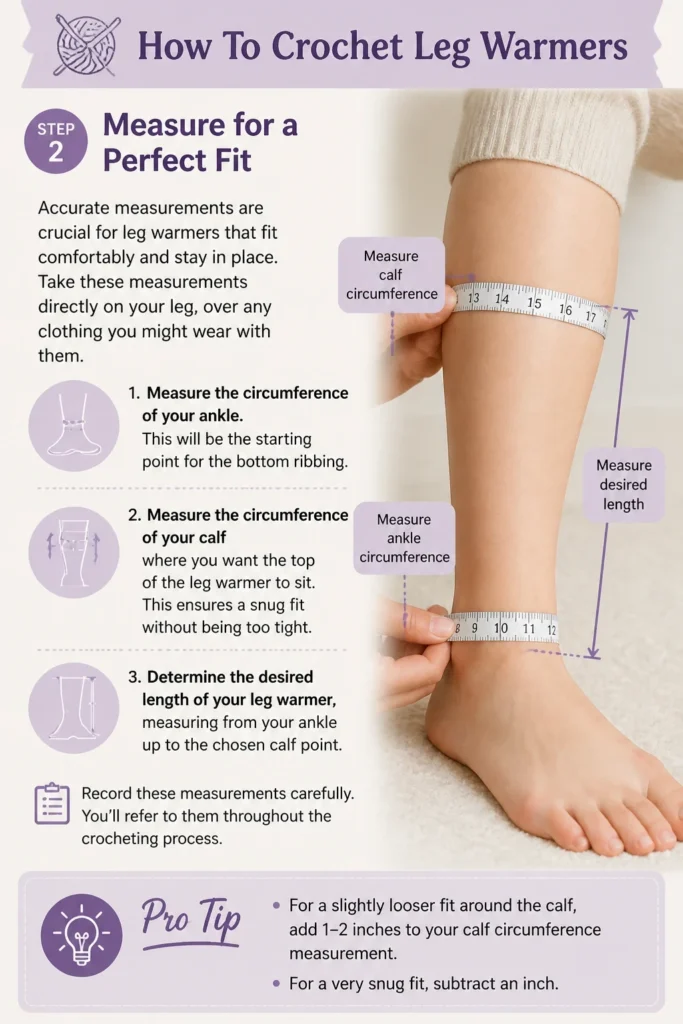
Take these measurements directly on your leg, over any clothing you might wear with them.
- Measure the circumference of your ankle. This will be the starting point for the bottom ribbing.
- Measure the circumference of your calf where you want the top of the leg warmer to sit. This ensures a snug fit without being too tight.
- Determine the desired length of your leg warmer, measuring from your ankle up to the chosen calf point.
- Record these measurements carefully. You’ll refer to them throughout the crocheting process.
Pro Tip: For a slightly looser fit around the calf, add 1-2 inches to your calf circumference measurement. For a very snug fit, subtract an inch.
Step 3: Create the Bottom Ribbing (Ankle Cuff)
We’ll begin with a stretchy ribbing that will hug your ankle comfortably.
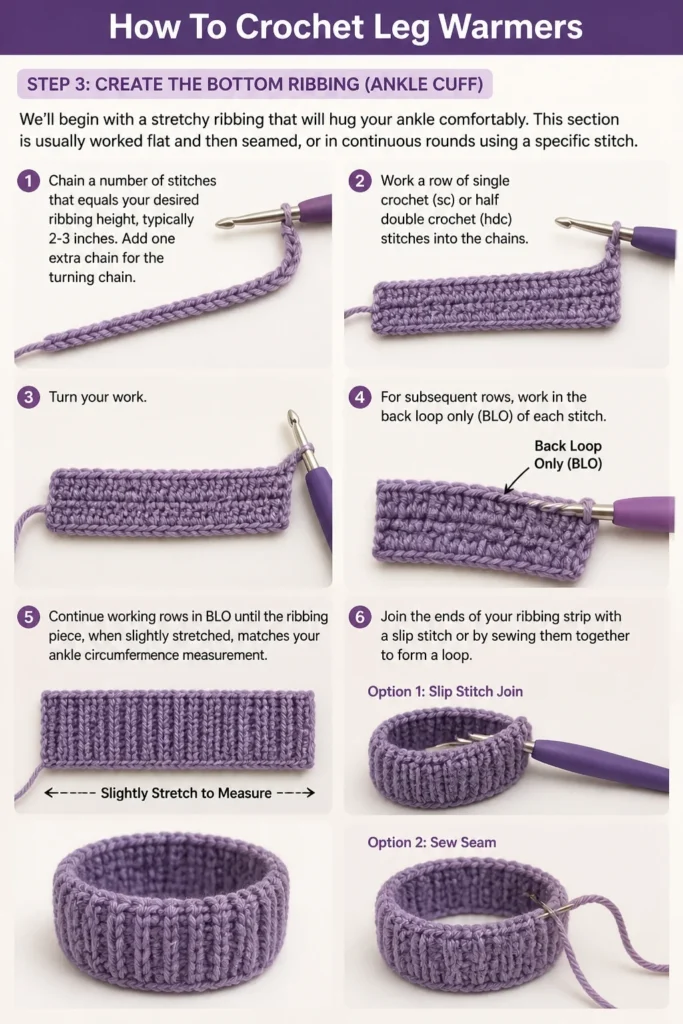
This section is usually worked flat and then seamed, or in continuous rounds using a specific stitch.
- Chain a number of stitches that equals your desired ribbing height, typically 2-3 inches. Add one extra chain for the turning chain.
- Work a row of single crochet (sc) or half double crochet (hdc) stitches into the chains.
- Turn your work. For subsequent rows, work in the back loop only (BLO) of each stitch.
- Continue working rows in BLO until the ribbing piece, when slightly stretched, matches your ankle circumference measurement.
- Join the ends of your ribbing strip with a slip stitch or by sewing them together to form a loop.
Step 4: Start the Main Body of the Leg Warmer
Now that your ankle cuff is complete, you’ll work the main body of the leg warmer upwards.
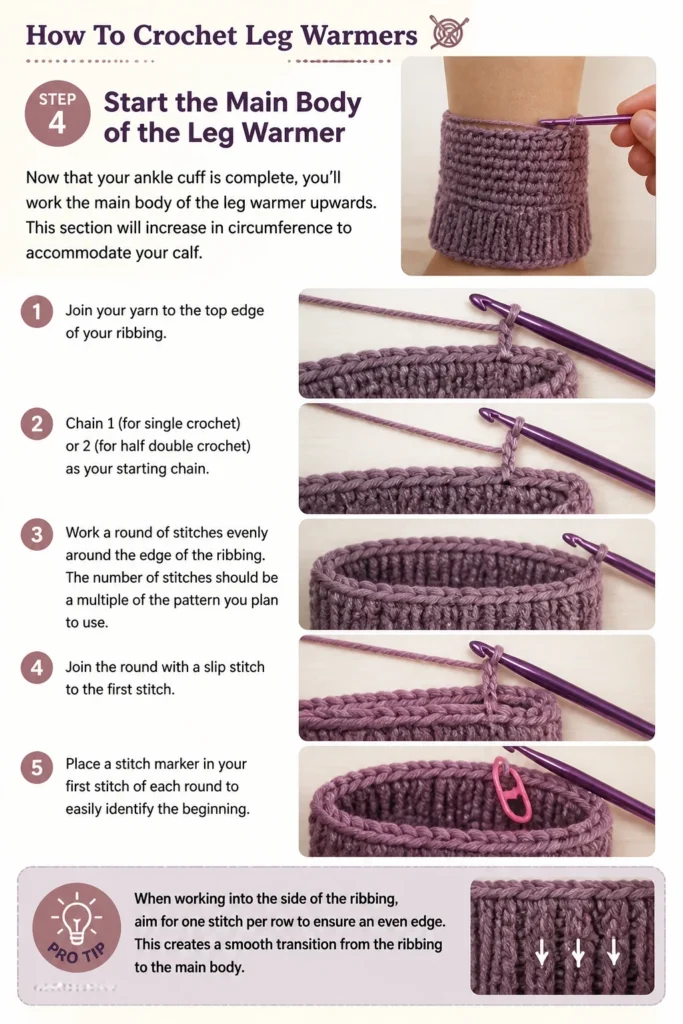
This section will increase in circumference to accommodate your calf.
- Join your yarn to the top edge of your ribbing.
- Chain 1 (for single crochet) or 2 (for half double crochet) as your starting chain.
- Work a round of stitches evenly around the edge of the ribbing. The number of stitches should be a multiple of the pattern you plan to use.
- Join the round with a slip stitch to the first stitch.
- Place a stitch marker in your first stitch of each round to easily identify the beginning.
Pro Tip: When working into the side of the ribbing, aim for one stitch per row to ensure an even edge. This creates a smooth transition from the ribbing to the main body.
Step 5: Increase for Calf Shaping
To ensure the leg warmer widens nicely towards your calf, you’ll need to incorporate increases.
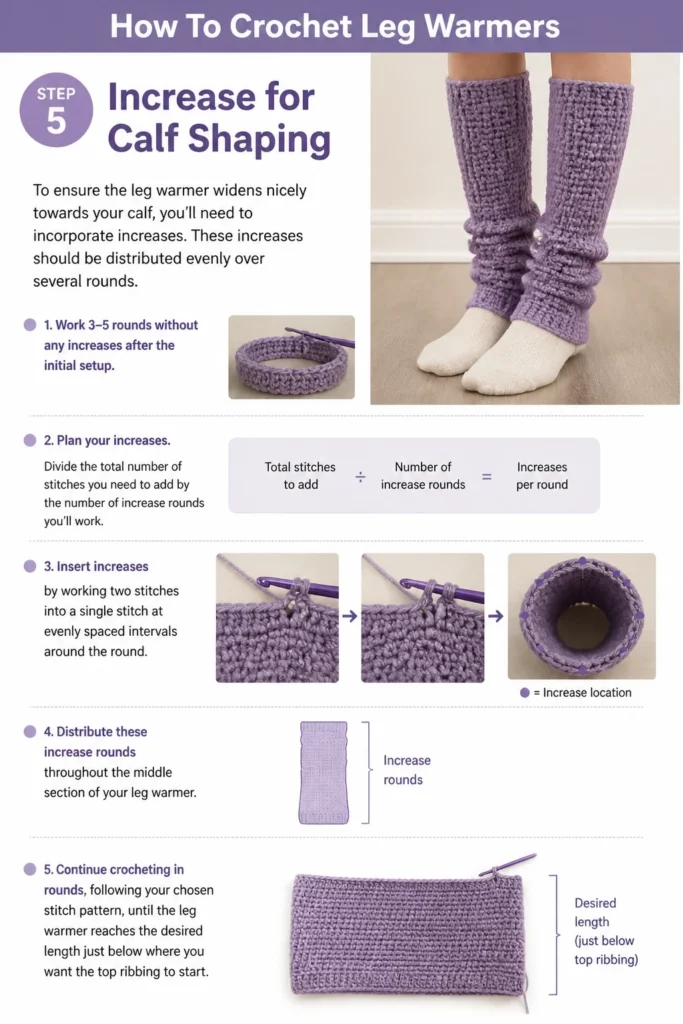
These increases should be distributed evenly over several rounds.
- Work 3-5 rounds without any increases after the initial setup.
- Plan your increases. Divide the total number of stitches you need to add by the number of increase rounds you’ll work.
- Insert increases by working two stitches into a single stitch at evenly spaced intervals around the round.
- Distribute these increase rounds throughout the middle section of your leg warmer.
- Continue crocheting in rounds, following your chosen stitch pattern, until the leg warmer reaches the desired length just below where you want the top ribbing to start.
Step 6: Work the Main Body Stitch Pattern
The main body is where you can truly personalize your leg warmers with different stitch patterns.
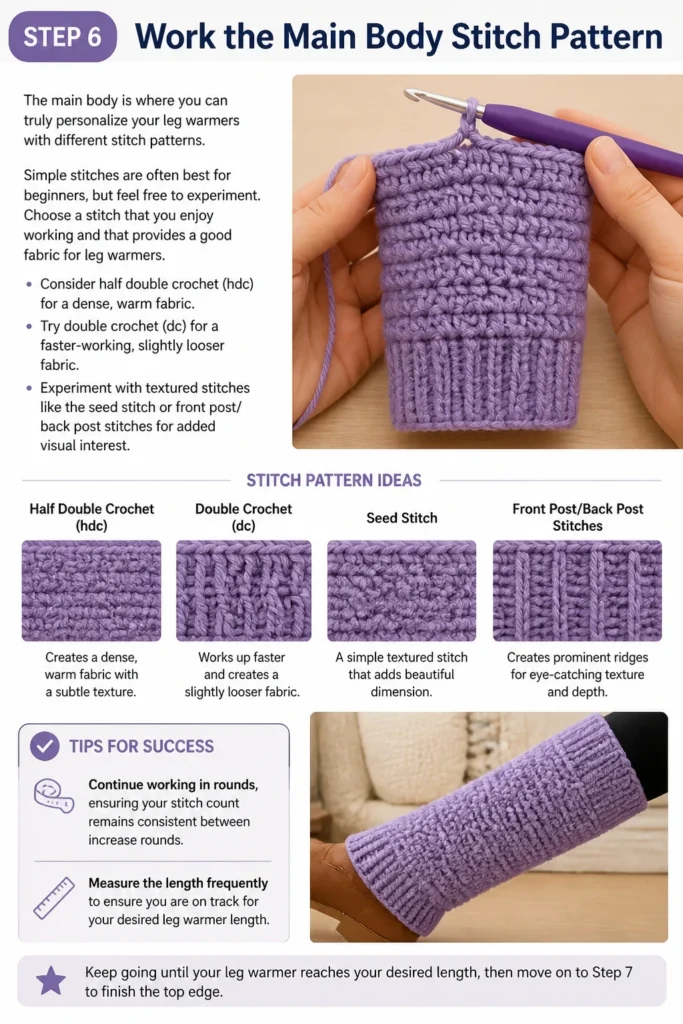
Simple stitches are often best for beginners, but feel free to experiment.
- Choose a stitch that you enjoy working and that provides a good fabric for leg warmers.
- Consider half double crochet (hdc) for a dense, warm fabric.
- Try double crochet (dc) for a faster-working, slightly looser fabric.
- Experiment with textured stitches like the seed stitch or front post/back post stitches for added visual interest.
- Continue working in rounds, ensuring your stitch count remains consistent between increase rounds.
- Measure the length frequently to ensure you are on track for your desired leg warmer length.
Step 7: Create the Top Ribbing (Calf Cuff)
Once the main body reaches the appropriate length, it’s time to add the top ribbing.
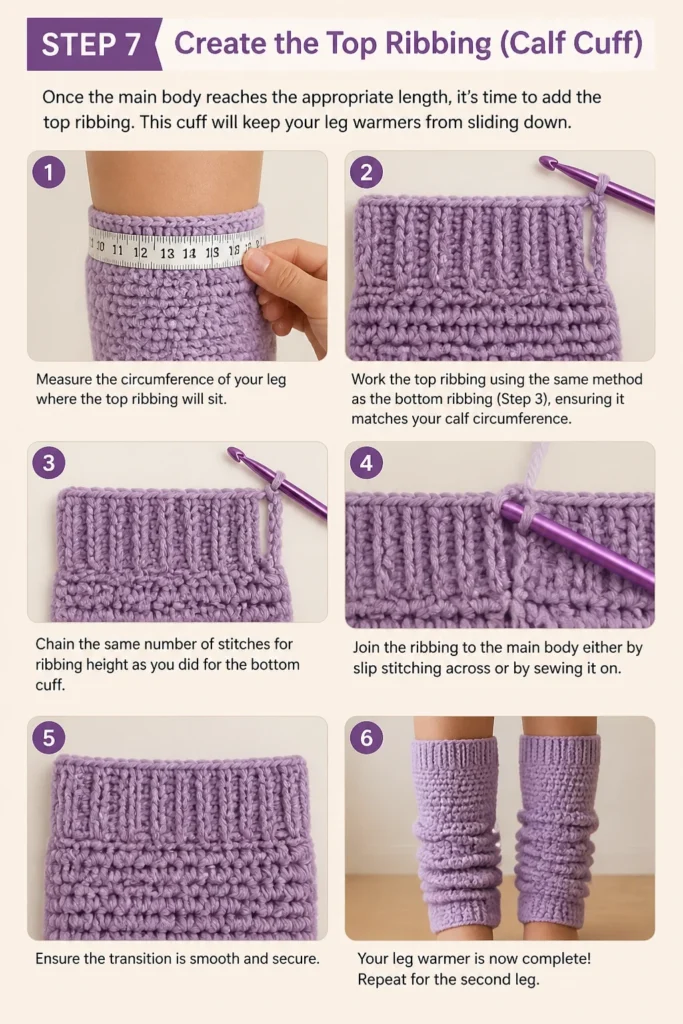
This cuff will keep your leg warmers from sliding down.
- Measure the circumference of your leg where the top ribbing will sit.
- Work the top ribbing using the same method as the bottom ribbing (Step 3), ensuring it matches your calf circumference.
- Chain the same number of stitches for ribbing height as you did for the bottom cuff.
- Join the ribbing to the main body either by slip stitching across or by sewing it on.
- Ensure the transition is smooth and secure.
Step 8: Finishing Touches
The final steps involve securing your work and making it look professional.
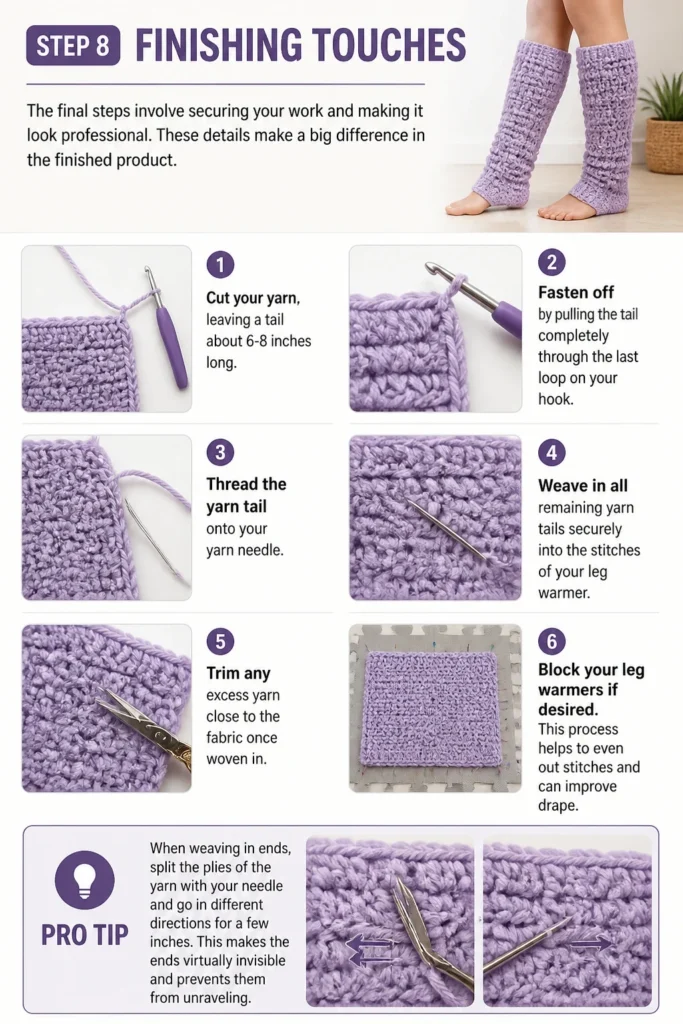
These details make a big difference in the finished product.
- Cut your yarn, leaving a tail about 6-8 inches long.
- Fasten off by pulling the tail completely through the last loop on your hook.
- Thread the yarn tail onto your yarn needle.
- Weave in all remaining yarn tails securely into the stitches of your leg warmer.
- Trim any excess yarn close to the fabric once woven in.
- Block your leg warmers if desired. This process helps to even out stitches and can improve drape.
Pro Tip: When weaving in ends, split the plies of the yarn with your needle and go in different directions for a few inches. This makes the ends virtually invisible and prevents them from unraveling.
Common Mistakes to Avoid
Inconsistent Tension
Crocheting with uneven tension can lead to a fabric that is too tight in some areas and too loose in others. This results in a lumpy, ill-fitting leg warmer.
Practice maintaining a consistent grip on your yarn and hook. If your hands get tired, take a break. A gauge swatch helps you identify tension issues early.
Incorrect Sizing Without a Gauge Swatch
Skipping the gauge swatch is a common oversight that often leads to leg warmers that are too big or too small. Your finished project won’t match the intended dimensions.
Always take the time to create a swatch. If your swatch is off, adjust your hook size up or down until you match the recommended gauge. This small step saves significant frustration later.
Forgetting Increases for Calf Shaping
If you crochet straight up without increasing the stitch count, your leg warmers will be the same width from ankle to calf. This can make them too tight at the calf or baggy at the ankle.
Plan your increases carefully based on your calf measurement. Distribute them evenly over several rounds to create a gradual, comfortable taper that fits your leg shape.
Leaving Loose Ends
Loose yarn tails can unravel your hard work, making your beautiful leg warmers fall apart over time. They also make the project look unfinished and messy.
Always weave in all your ends securely using a yarn needle. Take your time to hide them properly within the stitches, changing direction a few times to lock them in place.
Troubleshooting
Leg Warmers Are Too Tight/Loose
If your leg warmers feel too snug or too baggy once complete, it’s usually a gauge issue or a measurement error.
Check your gauge swatch against the pattern’s recommendation. If you’re consistently off, try a different hook size. For future projects, double-check your initial leg measurements and consider adding or subtracting an inch for preferred fit.
Seam is Visible or Bulky
A noticeable or thick seam where you joined your ribbing can detract from the overall appearance of your leg warmers.
When joining ribbing, use a slip stitch join or a mattress stitch if sewing. For a cleaner look, use a “seamless” joining method where you work into the back loop of the last row and the front loop of the first row simultaneously.
Top Edge Keeps Rolling Down
If the top cuff of your leg warmers isn’t staying put, it might not be tight enough or the ribbing isn’t sturdy.
Ensure your top ribbing is slightly smaller than your actual calf circumference to provide gentle tension. Working front post/back post double crochet for ribbing creates a firmer, more elastic edge that resists rolling.
Key Takeaways
- Always begin with accurate measurements for a custom fit.
- A gauge swatch is non-negotiable for achieving the correct size.
- Gradually increase stitches to accommodate calf shaping.
- Choose a yarn and hook that complement each other and your desired fabric.
- Weave in all ends securely for a durable and professional finish.
- Don’t be afraid to experiment with different stitch patterns for unique designs.
Frequently Asked Questions
Can I make leg warmers without a seam?
Yes, you can absolutely make leg warmers seamlessly by working entirely in continuous rounds. You would start with a foundation chain that fits your ankle circumference and join it immediately, then work upwards in the round.
What’s the best yarn for leg warmers?
Medium-weight (worsted) yarn is generally best for leg warmers, offering a good balance of warmth and drape. Acrylic is durable and easy to care for, while wool provides excellent warmth. Blends offer the best of both worlds.
How do I make my leg warmers stay up?
To ensure your leg warmers stay up, make sure your top ribbing is slightly smaller than your actual calf circumference. Using a stitch with good elasticity for the ribbing, like front post/back post stitches, also helps create a snug fit.
Can I use a different stitch for the main body?
Absolutely! The main body is where you can be most creative. You can use almost any crochet stitch you like, such as single crochet, half double crochet, double crochet, or even more complex textured stitches. Just ensure your stitch count remains consistent.
Our Top Recommended Finds
- Ergonomic Crochet Hook Set: Comfortable handles reduce hand fatigue, making long crocheting sessions more enjoyable.
- Yarn Winder and Swift: These tools transform skeins into neat cakes, preventing tangles and making yarn management much easier.
- Blocking Mats with Pins: Essential for shaping and setting your finished leg warmers, giving them a professional, polished look.
Embrace Your Handmade Style
You’ve just learned the foundational steps to create your very own pair of cozy crochet leg warmers.
This project is a fantastic way to practice your crochet skills while making something truly useful and personal.
Why not pick out your favorite yarn today and start crafting a pair that perfectly expresses your unique style?