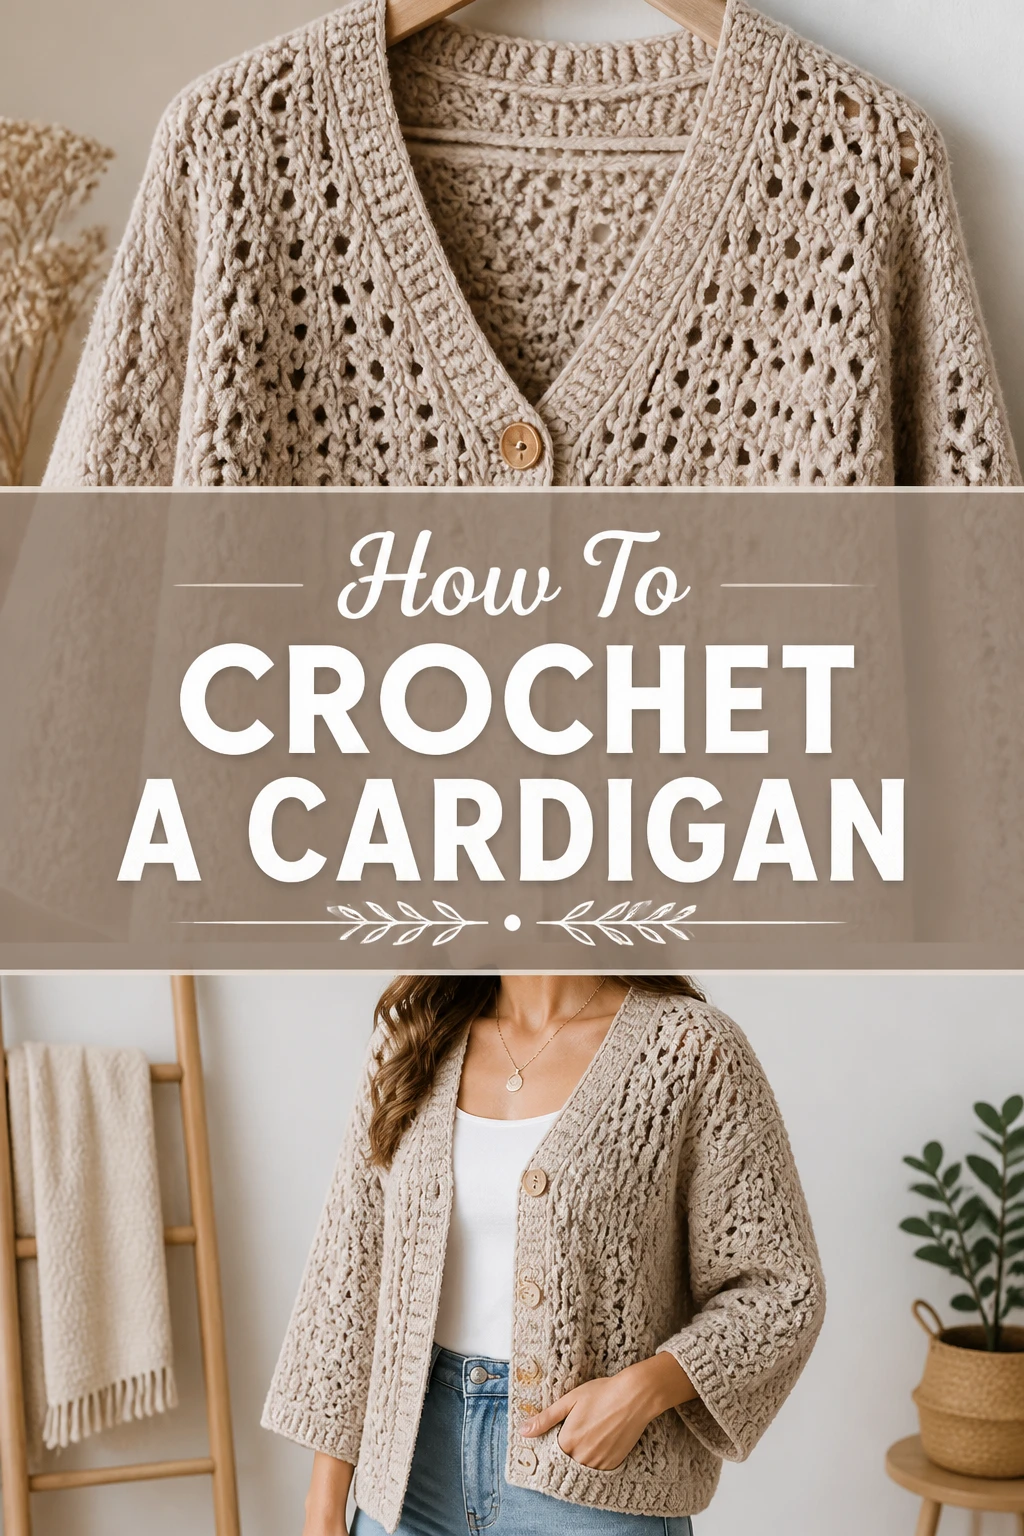
🔥 How To Crochet A Cardigan
There’s a special kind of joy in wearing something you’ve made with your own hands.
My first crocheted cardigan felt like a warm hug, a tangible result of hours of creative effort.
This guide will walk you through creating your very own wearable masterpiece, giving you that same sense of accomplishment.
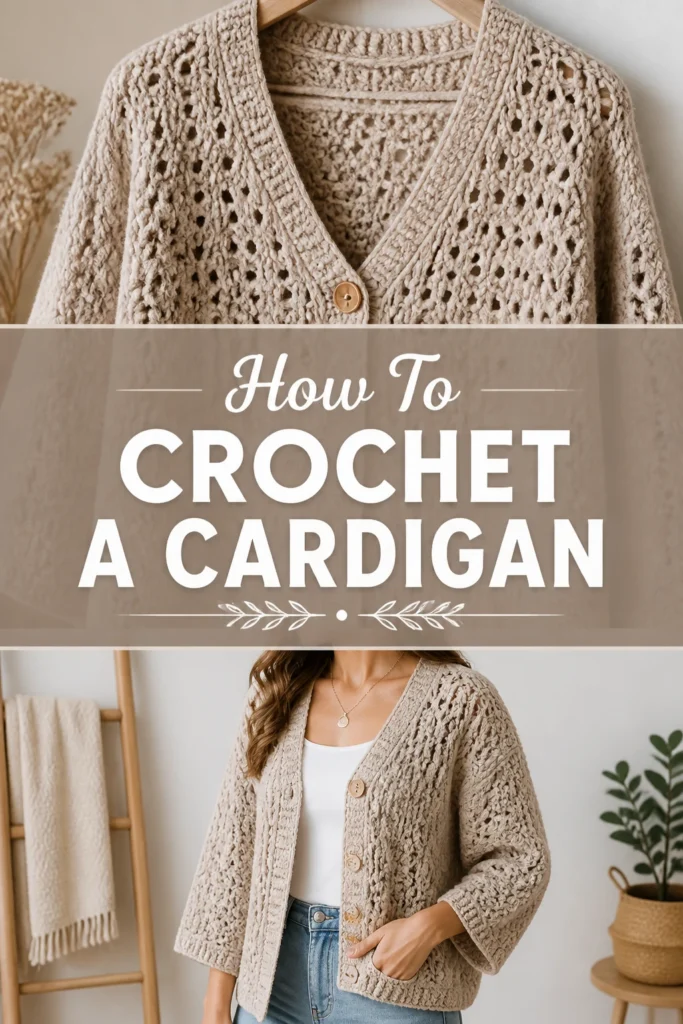
Quick Overview
By following these steps, you’ll learn to crochet a beautiful, custom-fit cardigan, perfect for any season.
You’ll understand the process from selecting a pattern to the final finishing touches.
- Time needed: 20-40 hours (spread over several weeks)
- Difficulty: Intermediate
- What you’ll need: Yarn, crochet hook, scissors, tapestry needle, stitch markers, measuring tape, chosen pattern.
Step-by-Step Instructions
Step 1: Gather Your Supplies & Choose a Pattern
The foundation of any successful project begins with careful preparation.
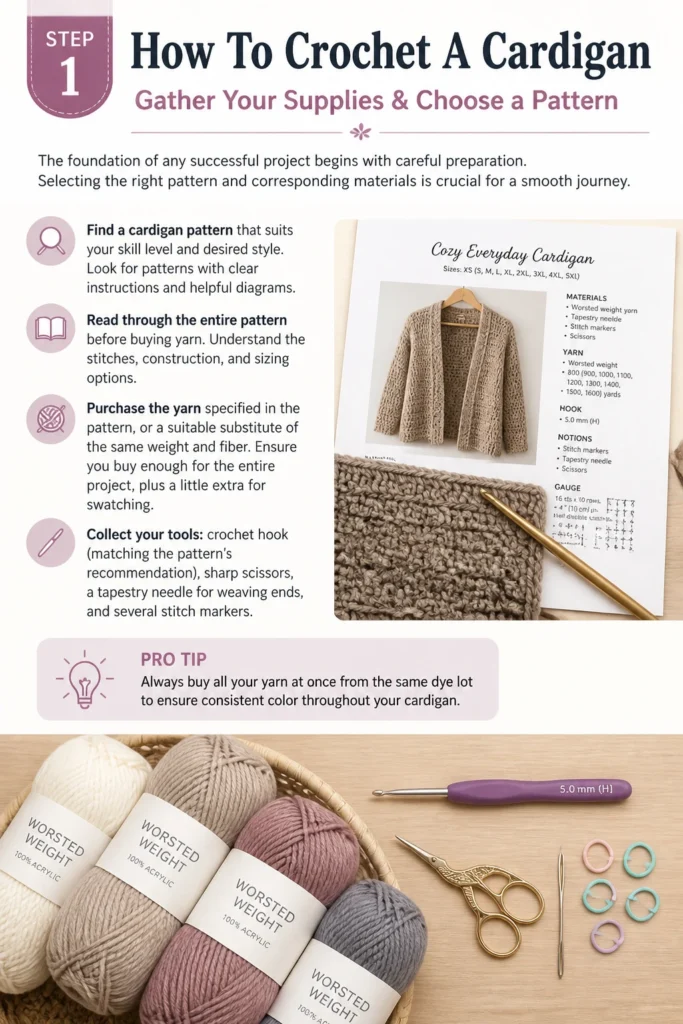
Selecting the right pattern and corresponding materials is crucial for a smooth journey.
- Find a cardigan pattern that suits your skill level and desired style. Look for patterns with clear instructions and helpful diagrams.
- Read through the entire pattern before buying yarn. Understand the stitches, construction, and sizing options.
- Purchase the yarn specified in the pattern, or a suitable substitute of the same weight and fiber. Ensure you buy enough for the entire project, plus a little extra for swatching.
- Collect your crochet hook (matching the pattern’s recommendation), sharp scissors, a tapestry needle for weaving ends, and several stitch markers.
Pro Tip: Always buy all your yarn at once from the same dye lot if possible. Different dye lots can have subtle color variations that become noticeable in your finished garment.
Step 2: Master the Gauge Swatch
This step is non-negotiable for a well-fitting garment.
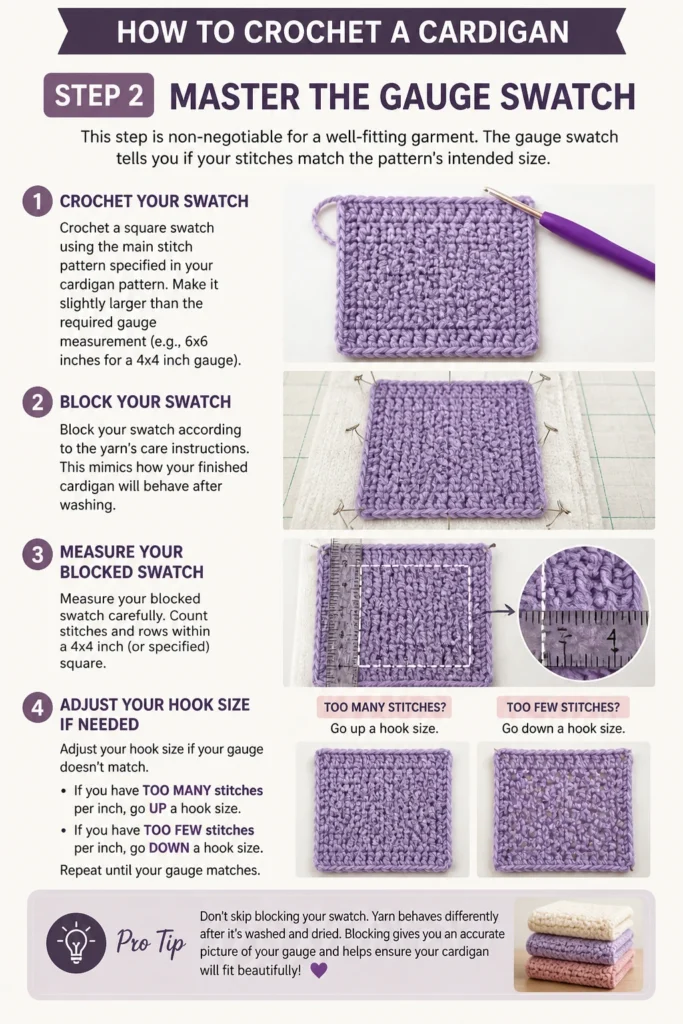
The gauge swatch tells you if your stitches match the pattern’s intended size.
- Crochet a square swatch using the main stitch pattern specified in your cardigan pattern. Make it slightly larger than the required gauge measurement (e.g., 6×6 inches for a 4×4 inch gauge).
- Block your swatch according to the yarn’s care instructions. This mimics how your finished cardigan will behave after washing.
- Measure your blocked swatch carefully. Count stitches and rows within a 4×4 inch (or specified) square.
- Adjust your hook size if your gauge doesn’t match. If you have too many stitches per inch, go up a hook size. If you have too few, go down a hook size. Repeat until your gauge matches.
Pro Tip: Don’t skip blocking your swatch. Yarn behaves differently when wet and dry, and blocking ensures the most accurate gauge measurement for your finished cardigan.
Step 3: Crochet the Back Panel
The back panel is often the largest and most straightforward piece.
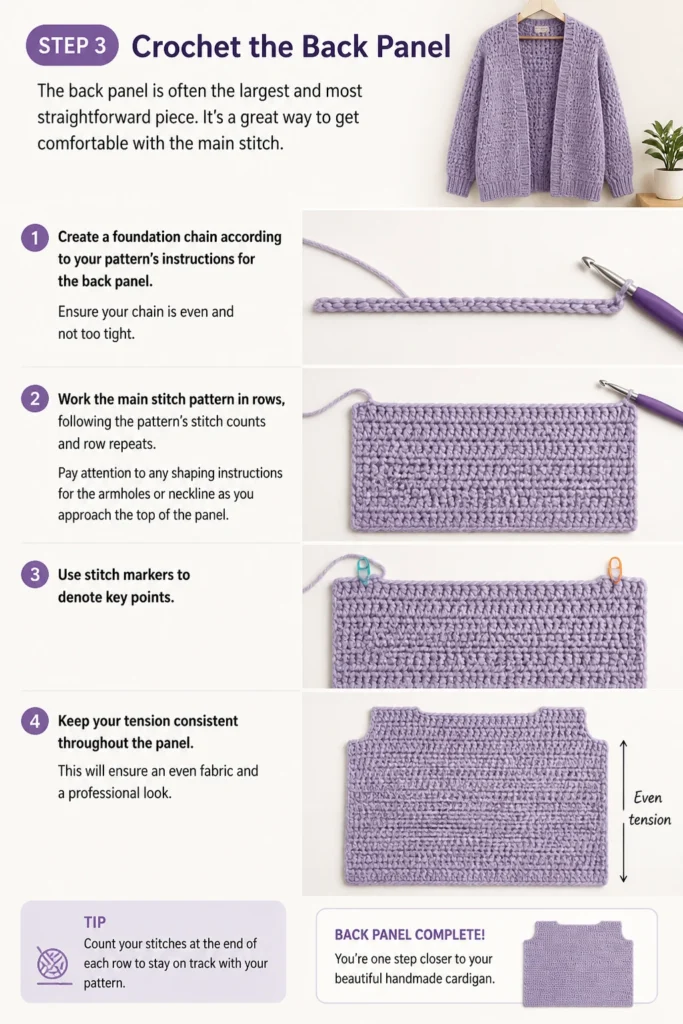
It’s a great way to get comfortable with the main stitch.
- Create a foundation chain according to your pattern’s instructions for the back panel. Ensure your chain is even and not too tight.
- Work the main stitch pattern in rows, following the pattern’s stitch counts and row repeats.
- Pay attention to any shaping instructions for the armholes or neckline as you approach the top of the panel. Use stitch markers to denote key points.
- Keep your tension consistent throughout the panel. This will ensure an even fabric and a professional look.
Step 4: Create the Front Panels
Cardigans typically have two front panels, often mirroring each other.
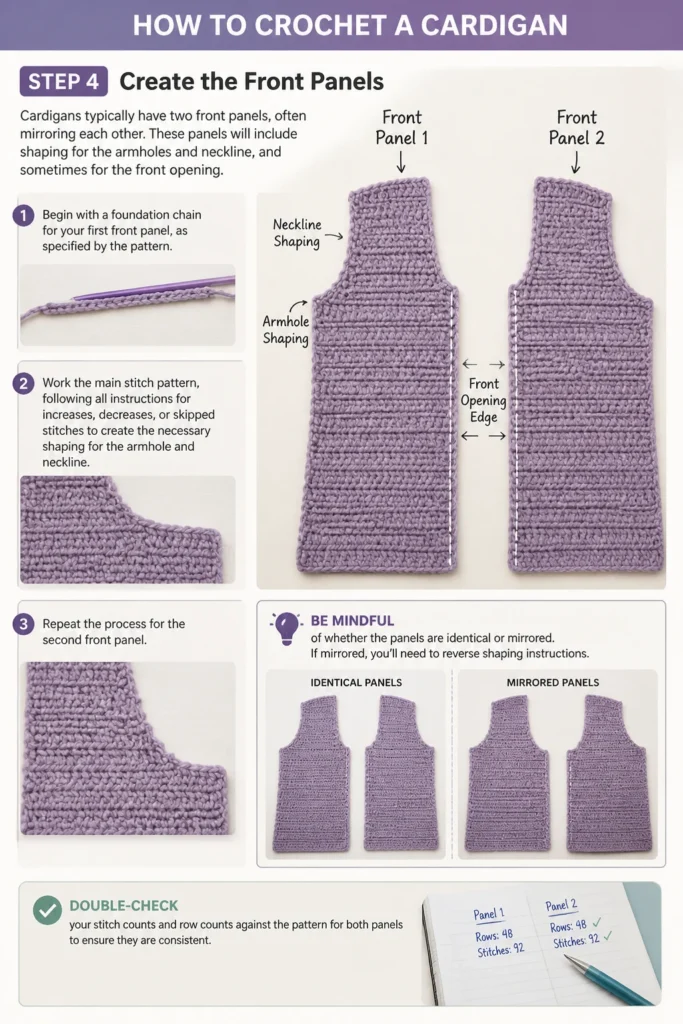
These panels will include shaping for the armholes and neckline, and sometimes for the front opening.
- Begin with a foundation chain for your first front panel, as specified by the pattern.
- Work the main stitch pattern, following all instructions for increases, decreases, or skipped stitches to create the necessary shaping for the armhole and neckline.
- Repeat the process for the second front panel. Be mindful of whether the panels are identical or mirrored. If mirrored, you’ll need to reverse shaping instructions.
- Double-check your stitch counts and row counts against the pattern for both panels to ensure they are consistent.
Step 5: Work the Sleeves
Sleeves can be worked flat and seamed, or in the round for a seamless finish.
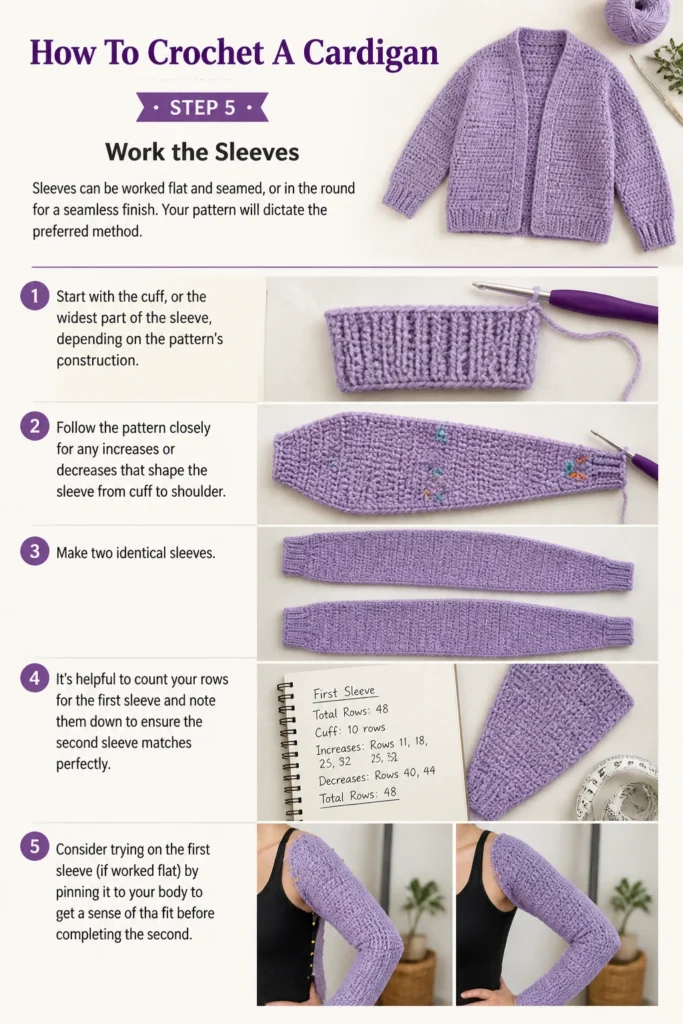
Your pattern will dictate the preferred method.
- Start with the cuff, or the widest part of the sleeve, depending on the pattern’s construction.
- Follow the pattern closely for any increases or decreases that shape the sleeve from cuff to shoulder.
- Make two identical sleeves. It’s helpful to count your rows for the first sleeve and note them down to ensure the second sleeve matches perfectly.
- Consider trying on the first sleeve (if worked flat) by pinning it to your body to get a sense of the fit before completing the second.
Step 6: Assemble the Pieces
Now, your individual panels come together to form the cardigan structure.
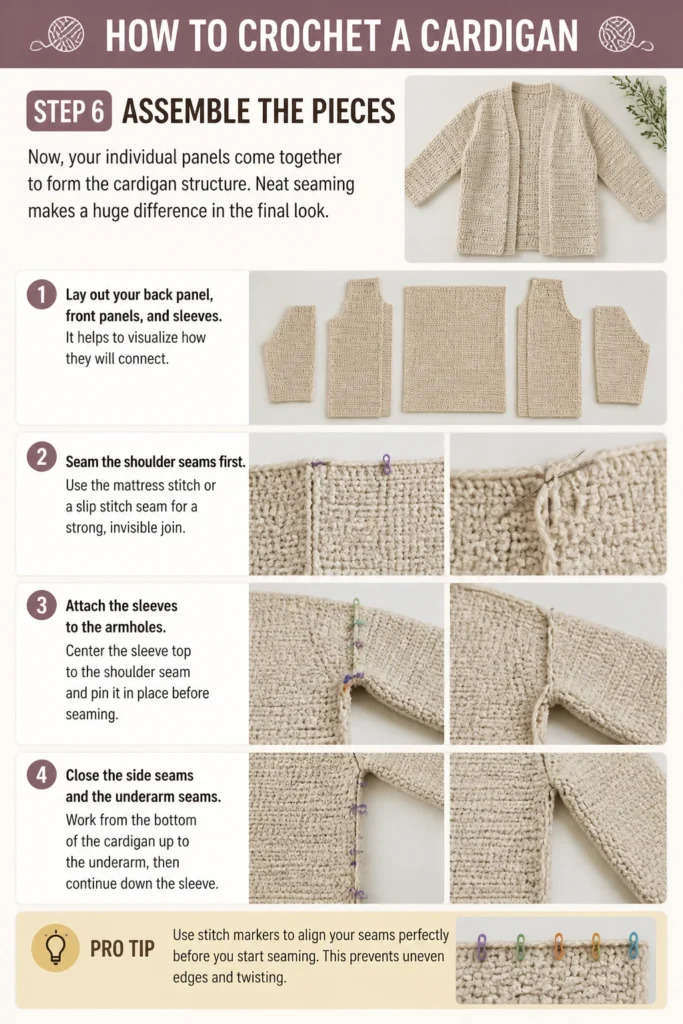
Neat seaming makes a huge difference in the final look.
- Lay out your back panel, front panels, and sleeves. It helps to visualize how they will connect.
- Seam the shoulder seams first. Use the mattress stitch or a slip stitch seam for a strong, invisible join.
- Attach the sleeves to the armholes. Center the sleeve top to the shoulder seam and pin it in place before seaming.
- Close the side seams and the underarm seams. Work from the bottom of the cardigan up to the underarm, then continue down the sleeve.
Pro Tip: Use stitch markers to align your seams perfectly before you start seaming. This prevents uneven edges and twisting.
Step 7: Add Finishing Touches (Borders & Edging)
Borders and edgings give your cardigan a polished, professional finish.
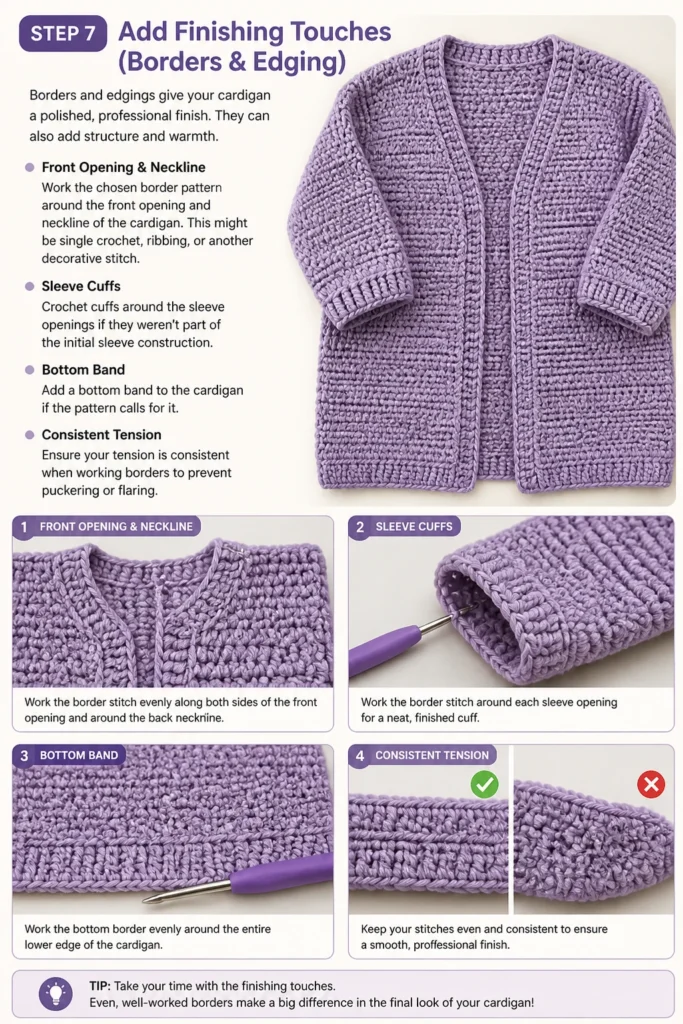
They can also add structure and warmth.
- Work the chosen border pattern around the front opening and neckline of the cardigan. This might be single crochet, ribbing, or another decorative stitch.
- Crochet cuffs around the sleeve openings if they weren’t part of the initial sleeve construction.
- Add a bottom band to the cardigan if the pattern calls for it.
- Ensure your tension is consistent when working borders to prevent puckering or flaring.
Step 8: Block Your Cardigan
Blocking is the magic that transforms your crocheted fabric.
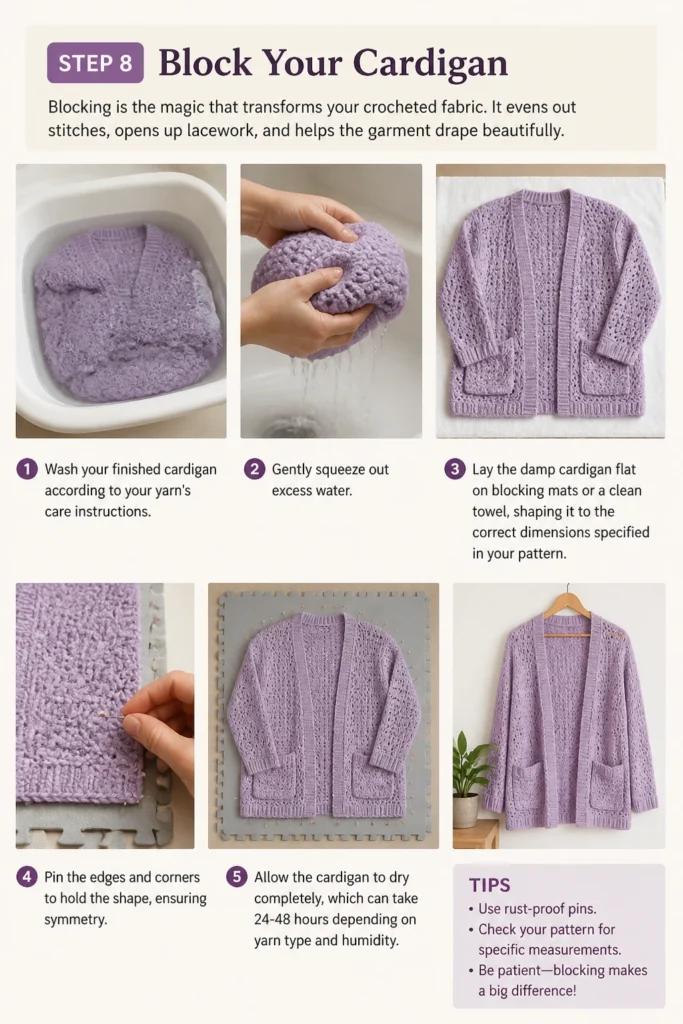
It evens out stitches, opens up lacework, and helps the garment drape beautifully.
- Wash your finished cardigan according to your yarn’s care instructions. Gently squeeze out excess water.
- Lay the damp cardigan flat on blocking mats or a clean towel, shaping it to the correct dimensions specified in your pattern.
- Pin the edges and corners to hold the shape, ensuring symmetry.
- Allow the cardigan to dry completely, which can take 24-48 hours depending on yarn type and humidity.
Step 9: Weave in Ends & Enjoy
The final, satisfying step before you can wear your creation.
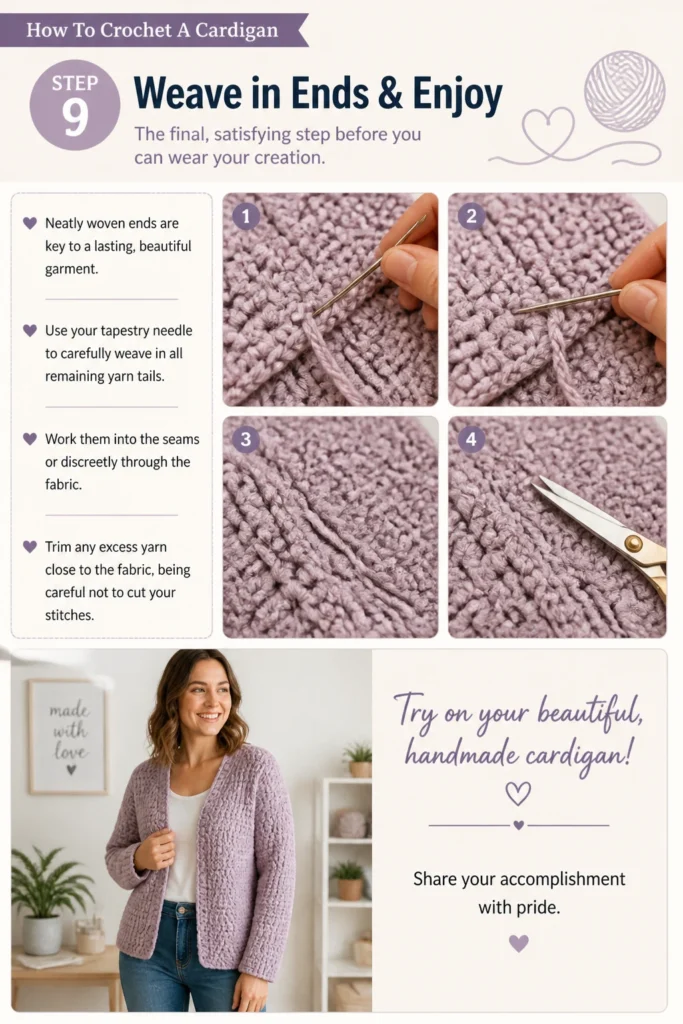
Neatly woven ends are key to a lasting, beautiful garment.
- Use your tapestry needle to carefully weave in all remaining yarn tails. Work them into the seams or discreetly through the fabric.
- Trim any excess yarn close to the fabric, being careful not to cut your stitches.
- Try on your beautiful, handmade cardigan!
- Share your accomplishment with pride.
Common Mistakes to Avoid
Ignoring the Gauge Swatch
Skipping the gauge swatch is a common shortcut that often leads to disappointment. Without it, your cardigan could end up significantly larger or smaller than intended, making it unwearable or requiring extensive adjustments.
Always take the time to create, block, and measure your swatch. Adjust your hook size until your gauge matches the pattern’s recommendation for a perfectly fitting garment.
Not Reading the Pattern Fully
Jumping straight into crocheting without a thorough read-through can lead to confusion, mistakes, and frogging (ripping out stitches). You might miss crucial shaping instructions, stitch changes, or special techniques.
Before you even pick up your hook, read the entire pattern from start to finish. Highlight key instructions, stitch counts, and any parts you might need to reference frequently. This pre-planning saves time and frustration.
Skipping Blocking
Some crocheters view blocking as an optional step, but for garments, it’s essential. Unblocked crochet can look uneven, stiff, or misshapen, even with perfect stitches.
Blocking relaxes the fibers, evens out your stitches, and allows the garment to drape as intended. It can also correct minor size discrepancies and give your cardigan a professional, finished appearance. Always block your finished piece.
Using the Wrong Yarn Weight
Substituting yarn without considering its weight can drastically alter your project. A pattern designed for a worsted weight yarn will not turn out correctly if you use a sport weight yarn, even if you match the fiber type.
Always check the yarn weight recommended by the pattern. If substituting, ensure your chosen yarn has a similar weight and fiber content to achieve the intended drape and gauge. Remember, gauge is king!
Troubleshooting
Cardigan is Too Big/Small
If your finished cardigan doesn’t match the pattern’s size, the most likely culprit is your gauge. Even a small difference in stitches per inch can add up across an entire garment.
To fix this for future projects, always create and block a gauge swatch before starting. If your current cardigan is slightly off, careful blocking can sometimes stretch or shrink it a little. For significant size issues, consider frogging and re-crocheting with the correct hook size.
Edges are Wavy or Too Tight
Wavy or flared edges often indicate your tension is too loose or you’re adding too many stitches on the turns. Conversely, tight, puckered edges suggest tension is too tight or you’re missing stitches.
Practice consistent tension. Ensure your turning chains are the correct height for your stitch and that you’re not accidentally increasing or decreasing stitches at the beginning or end of rows. Counting stitches regularly can help prevent this.
Seams Look Messy or Bulky
Messy seams can detract from an otherwise beautiful cardigan. This often happens if stitches aren’t aligned correctly or if the seaming technique isn’t suitable for the fabric.
Use stitch markers to align your panels before seaming. Opt for a mattress stitch for invisible seams on flat pieces. For ribbed or textured edges, a slip stitch seam can be effective. Practice your seaming technique on scrap pieces if unsure.
Key Takeaways
- Always crochet and block a gauge swatch to ensure your cardigan fits as intended.
- Read your entire pattern thoroughly before beginning to understand all instructions and shaping.
- Consistent tension throughout your project is vital for an even, professional-looking fabric.
- Take your time with seaming and finishing touches; they significantly impact the final appearance.
- Blocking your finished cardigan is a crucial step that enhances drape, evens stitches, and sets the final shape.
- Don’t be afraid to frog (undo) stitches if you spot a mistake; it’s better to fix it early than regret it later.
Frequently Asked Questions
What’s the best stitch for a cardigan?
The “best” stitch depends on the desired look and warmth. Simple stitches like half double crochet (hdc) or double crochet (dc) create a dense, warm fabric. More open stitches like the V-stitch or shell stitch can create a lighter, lacy cardigan. Ribbing stitches are excellent for cuffs and bands.
Can I use a different yarn than the pattern suggests?
Yes, but with caution. You must match the yarn’s weight (e.g., worsted, DK, bulky) and fiber content as closely as possible to the pattern’s recommendation. Always make a new gauge swatch with your substitute yarn and adjust your hook size to match the pattern’s gauge. Different fibers also have different drape and stretch properties.
How do I make my cardigan longer/shorter?
To adjust length, simply add or subtract rows from the body panels (back and front) before you start any armhole or neckline shaping. Make sure to adjust all corresponding panels by the same number of rows to maintain symmetry. For sleeves, add or subtract rows from the main sleeve body before the cuff.
Is a cardigan a good first crochet project?
While ambitious, a simple cardigan pattern can be a good first garment project for an advanced beginner or intermediate crocheter. It’s generally not recommended as a very first project, as it involves multiple pieces, shaping, and seaming. Start with smaller, simpler projects to build foundational skills before tackling a garment.
Our Top Recommended Finds
- Ergonomic Crochet Hook Set: Comfortable handles reduce hand fatigue, making long crochet sessions much more enjoyable.
- Blocking Mats with T-Pins: Essential for shaping and finishing garments, ensuring professional results and accurate sizing.
- Good Quality Yarn Scissors: Sharp, precise scissors make neat yarn cuts, crucial for clean joins and weaving in ends.
Embrace Your Crochet Journey
You’ve now got the map to create a beautiful, custom-made cardigan.
Each stitch you make is a step closer to a unique piece of wearable art.
Don’t hesitate to start today, and soon you’ll be enjoying the cozy comfort of your own handmade creation.