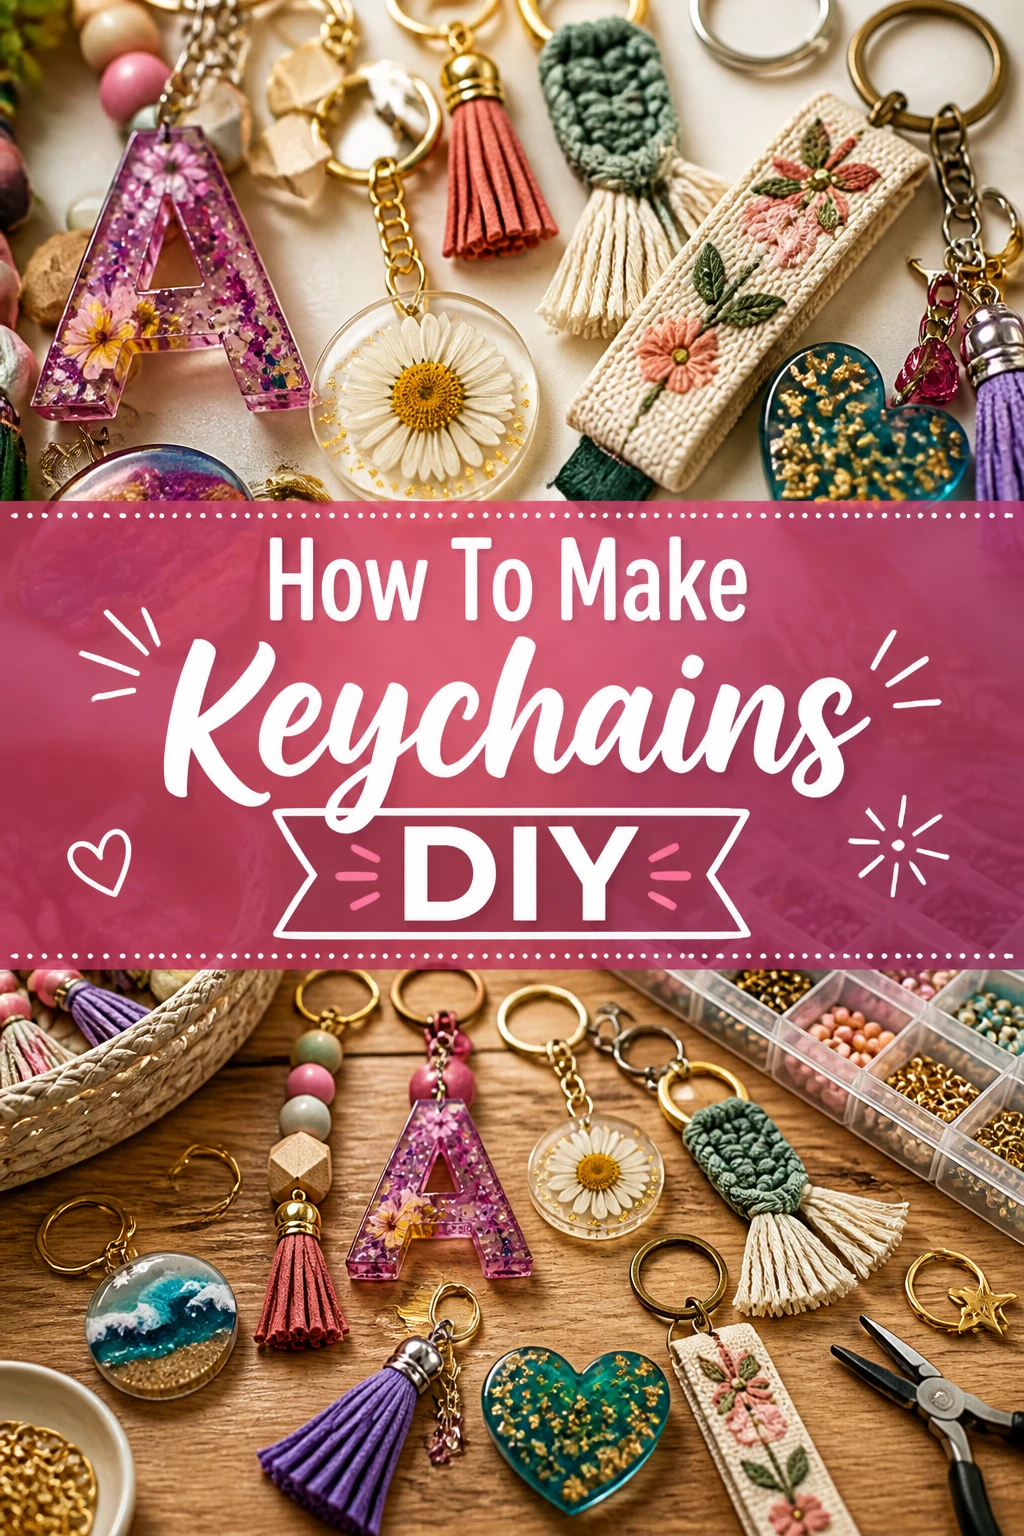
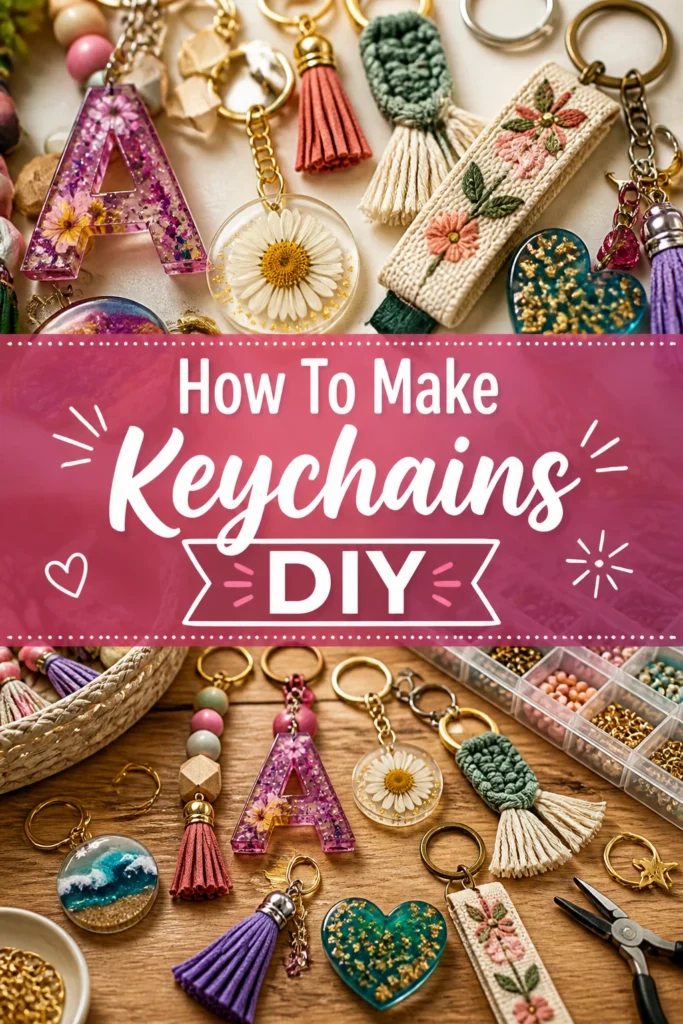
🔑 How To Make Keychains DIY
Making your own keychains is a delightful way to express creativity. I remember the first time I made a custom resin keychain for a friend; the joy it brought them was truly special. This guide will walk you through everything you need to know, drawing from my own crafting experiences.
You’ll soon be creating unique, personalized accessories.
Quick Overview
This guide will empower you to craft beautiful, custom keychains from scratch. You will learn the essential techniques, from mixing materials to adding the final touches. Get ready to transform simple supplies into functional art.
- Time needed: 1-2 hours (active crafting), 12-24 hours (curing/drying)
- Difficulty: Beginner
- What you’ll need: Epoxy resin kit, silicone molds, key rings, jump rings, small pliers, glitter/add-ins, mixing cups, stir sticks, safety gear.
Step-by-Step Instructions
Step 1: Gather Your Materials and Prepare Your Workspace
Before you begin, lay out all your necessary supplies. A well-organized space makes the crafting process smoother and more enjoyable. Choose a flat, well-ventilated area that can remain undisturbed for several hours.
Protect your surfaces with a silicone mat, wax paper, or an old newspaper. This prevents spills from damaging your table.
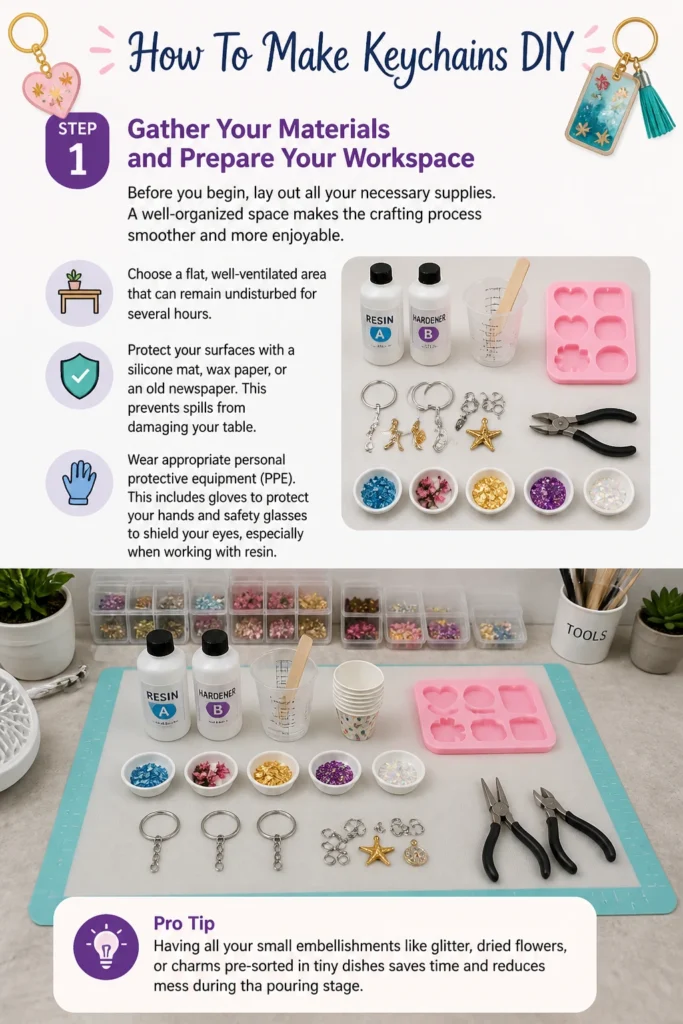
Wear appropriate personal protective equipment (PPE). This includes gloves to protect your hands and safety glasses to shield your eyes, especially when working with resin.
Pro Tip: Having all your small embellishments like glitter, dried flowers, or charms pre-sorted in tiny dishes saves time and reduces mess during the pouring stage.
Step 2: Mix Your Resin Components
Accurate resin mixing is the most crucial step for a successful cure. Epoxy resin typically comes in two parts: Part A (resin) and Part B (hardener). Always refer to your specific resin kit’s instructions for exact ratios.
Measure Part A into a clean mixing cup according to the manufacturer’s directions. Use a separate, clean stir stick or syringe for precise measurement.
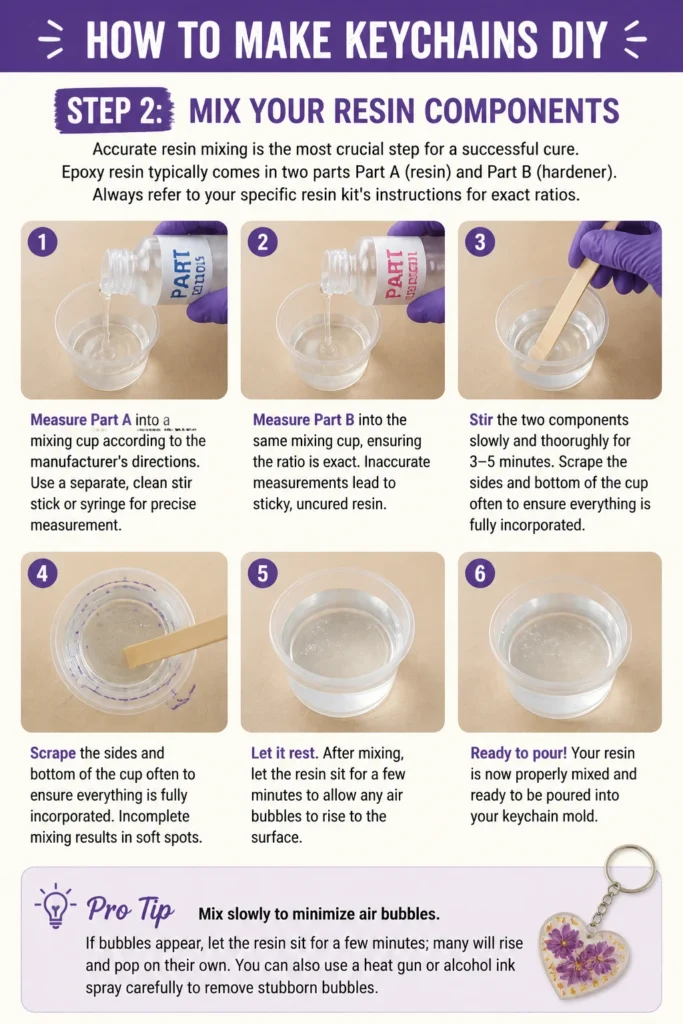
Measure Part B into the same mixing cup, ensuring the ratio is exact. Inaccurate measurements lead to sticky, uncured resin.
Stir the two components slowly and thoroughly for 3-5 minutes. Scrape the sides and bottom of the cup often to ensure everything is fully incorporated. Incomplete mixing results in soft spots.
Pro Tip: Mix slowly to minimize air bubbles. If bubbles appear, let the resin sit for a few minutes; many will rise and pop on their own. A heat gun or lighter passed quickly over the surface can also remove stubborn bubbles after pouring.
Step 3: Add Embellishments and Color
Now comes the fun part: customizing your resin mixture. This is where your keychains truly become unique. You can add color, sparkle, or tiny treasures.
Divide your mixed resin into smaller cups if you plan to use multiple colors or add different embellishments. This gives you more creative freedom.
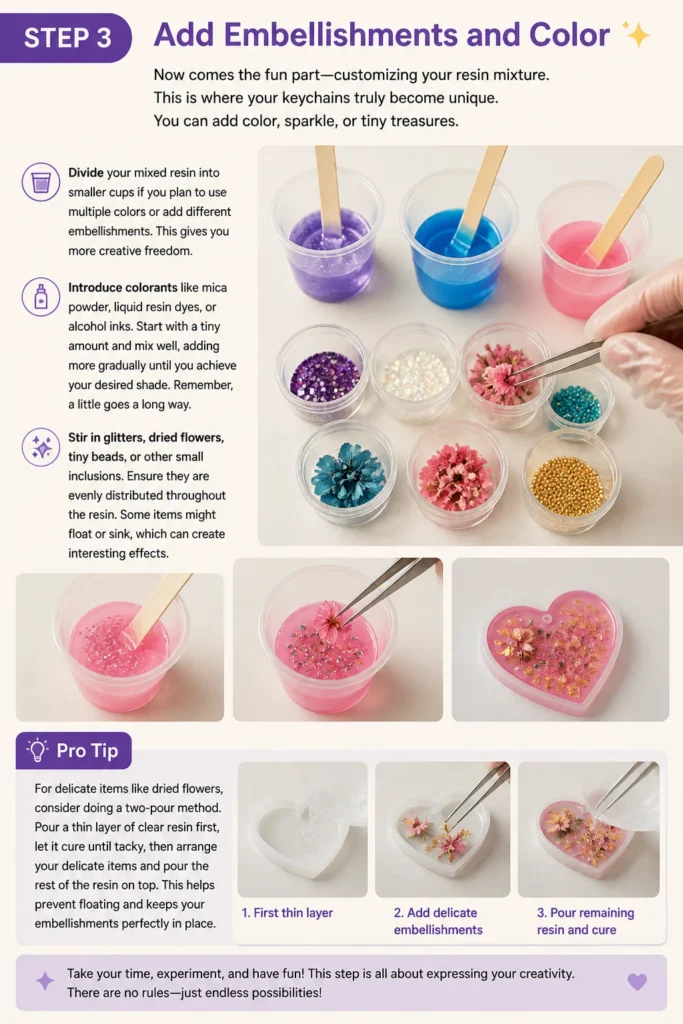
Introduce colorants like mica powder, liquid resin dyes, or alcohol inks. Start with a tiny amount and mix well, adding more gradually until you achieve your desired shade. Remember, a little goes a long way.
Stir in glitters, dried flowers, tiny beads, or other small inclusions. Ensure they are evenly distributed throughout the resin. Some items might float or sink, which can create interesting effects.
Pro Tip: For delicate items like dried flowers, consider doing a “two-pour” method. Pour a thin layer of clear resin first, place your items, let it partially cure, then pour a second layer to encapsulate them fully. This prevents them from floating or shifting.
Step 4: Pour Resin into Molds
Carefully pour your prepared resin into your silicone keychain molds. Precision here helps prevent overflow and ensures a clean finish. Take your time with this step.
Position your molds on a level surface. Any tilt will cause uneven curing and a lopsided keychain.
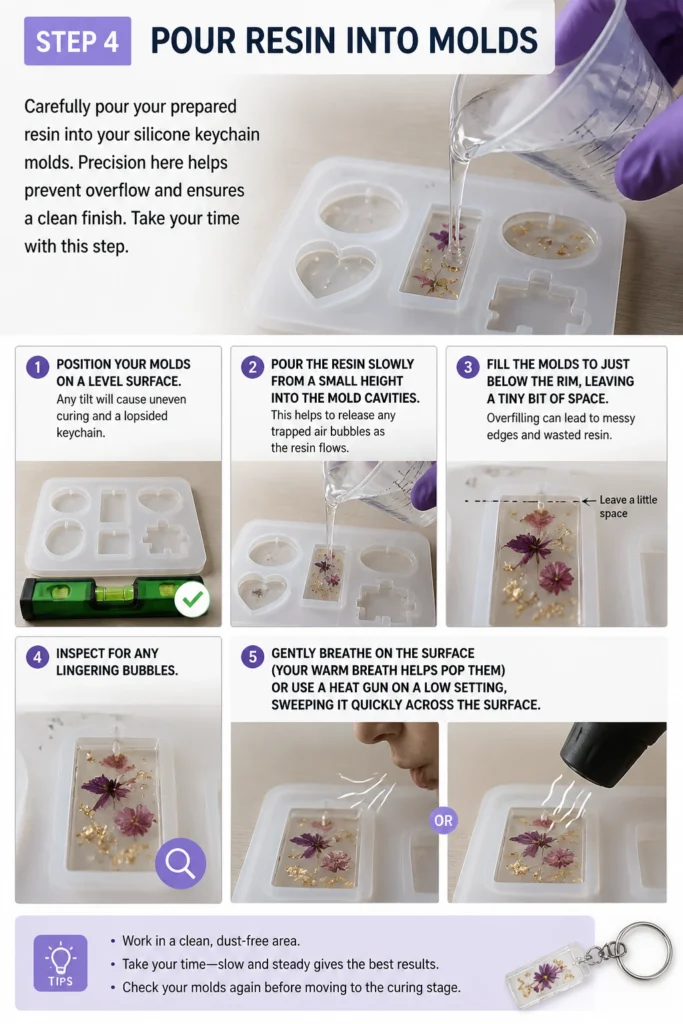
Pour the resin slowly from a small height into the mold cavities. This helps to release any trapped air bubbles as the resin flows.
Fill the molds to just below the rim, leaving a tiny bit of space. Overfilling can lead to messy edges and wasted resin.
Inspect for any lingering bubbles. Gently breathe on the surface (your warm breath helps pop them) or use a heat gun on a low setting, sweeping it quickly across the surface.
Step 5: Cure the Resin
Patience is key during the curing process. This is when the liquid resin transforms into a solid, durable piece. Do not rush this stage.
Cover your molds with a box or dome to protect them from dust and pet hair while curing. Even tiny particles can ruin the smooth surface.
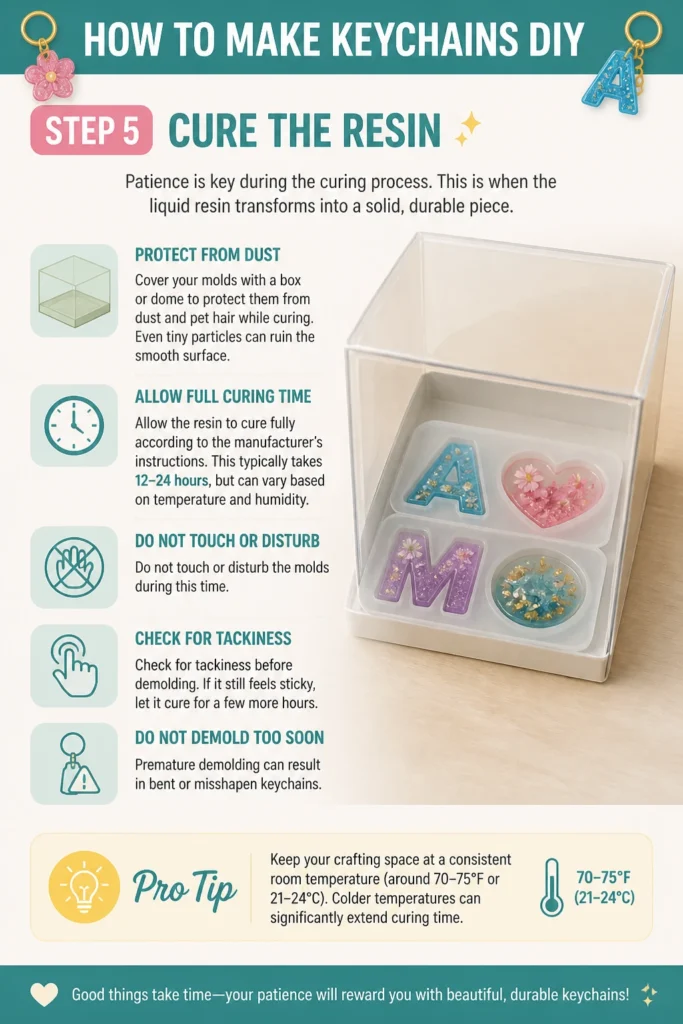
Allow the resin to cure fully according to the manufacturer’s instructions. This typically takes 12-24 hours, but can vary based on temperature and humidity. Do not touch or disturb the molds during this time.
Check for tackiness before demolding. If it still feels sticky, let it cure for a few more hours. Premature demolding can result in bent or misshapen keychains.
Pro Tip: Keep your crafting space at a consistent room temperature (around 70-75°F or 21-24°C). Colder temperatures can significantly extend curing times or even prevent proper curing.
Step 6: Demold and Finish Edges
Once fully cured, your keychains are ready to be released from their molds. This is an exciting moment to see your creations come to life. Handle them gently.
Flex the silicone mold gently to release the cured resin piece. Silicone is flexible, making demolding easy. Avoid pulling or twisting too hard, which could damage the keychain or the mold.
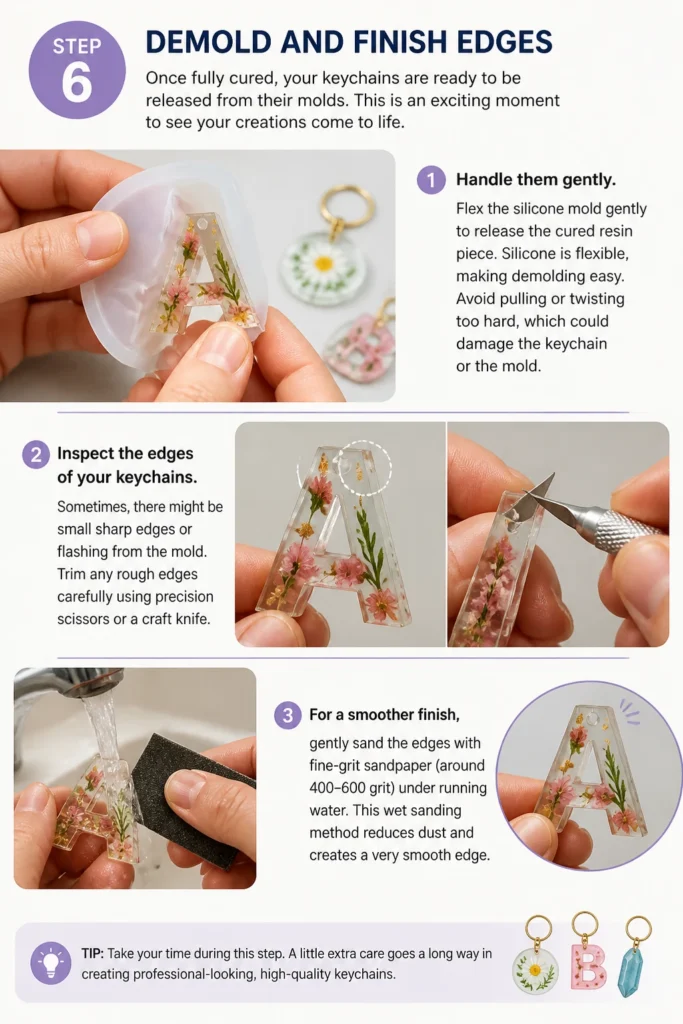
Inspect the edges of your keychains. Sometimes, there might be small sharp edges or “flashing” from the mold.
Trim any rough edges carefully using precision scissors or a craft knife. For a smoother finish, gently sand the edges with fine-grit sandpaper (around 400-600 grit) under running water. This “wet sanding” method reduces dust and creates a very smooth edge.
Step 7: Attach Keychain Hardware
Your resin pieces are complete; now they need to become functional keychains. This involves attaching the metal components.
Gather your key rings and jump rings. You’ll also need two pairs of jewelry pliers: one round-nose and one flat-nose, or two flat-nose pliers.
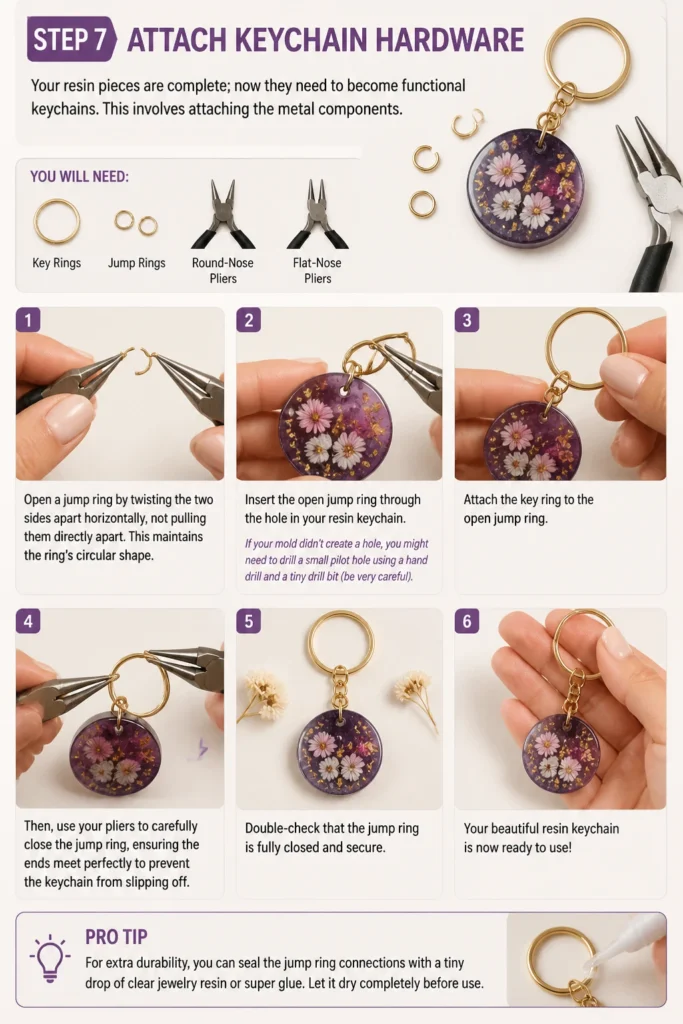
Open a jump ring by twisting the two sides apart horizontally, not pulling them directly apart. This maintains the ring’s circular shape.
Insert the open jump ring through the hole in your resin keychain. If your mold didn’t create a hole, you might need to drill a small pilot hole using a hand drill and a tiny drill bit (be very careful).
Attach the key ring to the open jump ring. Then, use your pliers to carefully close the jump ring, ensuring the ends meet perfectly to prevent the keychain from slipping off.
Pro Tip: For extra security, consider using two jump rings between the resin piece and the key ring. This adds a bit more length and makes the keychain less prone to detachment from frequent use.
Step 8: Personalize and Protect
The final touches can elevate your keychain from good to great. Consider adding an extra layer of protection or further personalization.
Apply a thin layer of clear topcoat or UV resin to the surface for an extra glossy finish and added protection. Cure UV resin under a UV lamp for a few minutes.
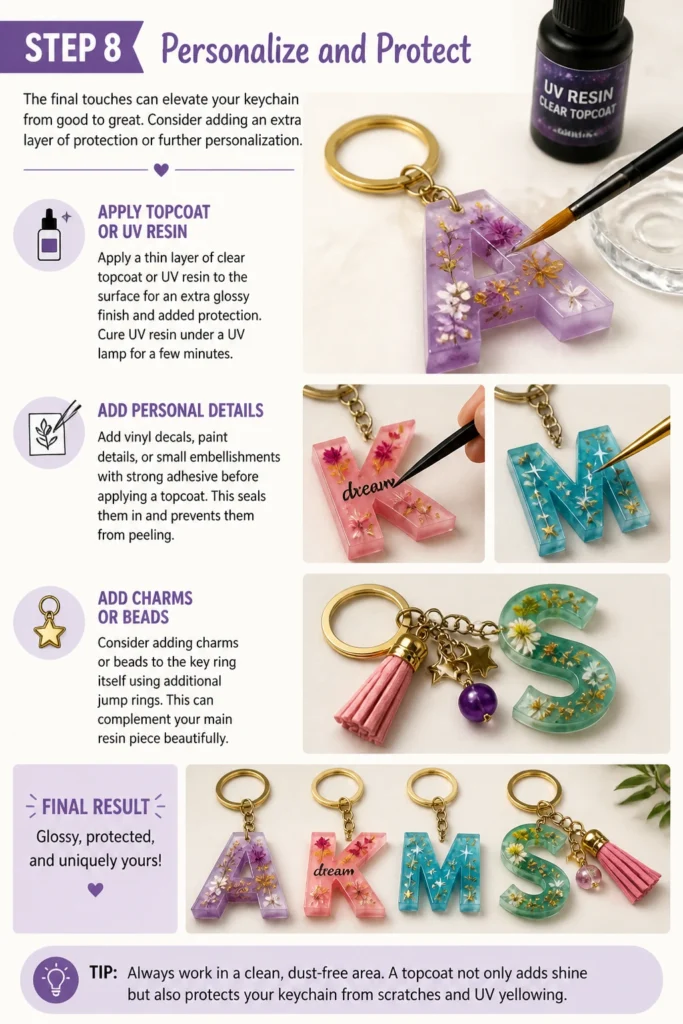
Add vinyl decals, paint details, or small embellishments with strong adhesive before applying a topcoat. This seals them in and prevents them from peeling.
Consider adding charms or beads to the key ring itself using additional jump rings. This can complement your main resin piece beautifully.
Common Mistakes to Avoid
Improper Resin Mixing
Many beginners rush the mixing process or don’t measure accurately. This often leads to parts of the keychain remaining sticky, soft, or never fully hardening. Always follow the resin manufacturer’s precise ratio and stir slowly and thoroughly for the recommended time, scraping the sides and bottom of your mixing cup.
Ignoring Safety Precautions
Working with resin without gloves or eye protection can lead to skin irritation or, in rare cases, allergic reactions. Always wear gloves and safety glasses. Ensure you work in a well-ventilated area to avoid inhaling fumes, even if the resin claims to be low-odor.
Overfilling Molds
Pouring too much resin into your molds creates overflow, leading to messy, uneven edges that require extra sanding. It also wastes resin. Fill molds just below the rim to leave a slight meniscus, which helps create a smooth, domed surface without spillage.
Rushing the Curing Process
Impatience can ruin an otherwise perfect keychain. Demolding resin before it’s fully cured can cause it to bend, warp, or leave fingerprints. Always allow the full recommended curing time, which can range from 12 to 24 hours, and check for complete hardness before attempting to remove it from the mold.
Troubleshooting
Sticky or Tacky Resin
If your resin keychain feels sticky even after the recommended curing time, it’s usually due to improper mixing ratios or insufficient stirring. Ensure you measure parts A and B precisely and mix for at least 3-5 minutes, scraping the sides and bottom of the cup. Sometimes, a thin layer of uncured resin can be wiped off with rubbing alcohol, or a thin layer of freshly mixed resin or UV resin can be poured over the top and cured.
Excessive Bubbles in Resin
Bubbles are a common issue. They often result from mixing too quickly or pouring from too high a distance. To minimize them, stir slowly. After pouring, let the resin sit for a few minutes to allow bubbles to rise. A quick pass with a heat gun or lighter (held far enough away not to burn the resin) can pop surface bubbles. Using a pressure pot can eliminate all bubbles, but this is a more advanced technique.
Dull Finish on Keychain
A dull finish can occur if the mold is old, dirty, or if the resin wasn’t fully cured. Ensure your molds are clean and polished. If the keychain is already cured, you can restore its shine by applying a thin layer of clear topcoat resin or a clear gloss varnish specifically designed for resin. UV resin also works wonderfully for a quick, super-glossy finish.
Key Takeaways
- Safety First: Always wear gloves and safety glasses when working with resin.
- Measure Precisely: Accurate resin ratios are crucial for proper curing.
- Mix Thoroughly: Stir resin slowly and completely to avoid sticky spots and minimize bubbles.
- Patience is a Virtue: Allow full curing time before demolding to prevent damage.
- Embrace Creativity: Experiment with colors, glitters, and inclusions to make unique designs.
- Finish Strong: Proper hardware attachment and edge finishing enhance durability and appearance.
Frequently Asked Questions
What type of resin is best for keychains?
Epoxy resin is generally recommended for keychains due to its durability, clarity, and ease of use for beginners. It cures to a hard, glossy finish perfect for everyday wear and tear. UV resin is also an option for smaller, quicker projects, as it cures in minutes under a UV light.
How do I prevent my inclusions from floating or sinking?
The density of your inclusions relative to the resin determines if they float or sink. For items that tend to float, try pouring a thin “base” layer of resin, letting it partially cure to a gel-like state, then placing your inclusions, and finally pouring the rest of your resin. For items that sink, you can pour a thin layer, let it partially cure, then add your inclusions, and they will stay suspended in that layer.
Can I add photos to my resin keychains?
Yes, you can! Print your photos on waterproof or photo paper. For extra protection, seal the photo completely with a thin layer of Mod Podge, clear acrylic spray, or even a thin layer of UV resin before embedding it in your epoxy resin. This prevents the resin from soaking into the paper and making it translucent.
How do I clean my silicone molds after use?
After demolding your keychains, clean your silicone molds with warm water and a mild soap. Gently rub away any residue. Ensure they are completely dry before storing them. Avoid using harsh chemicals or abrasive brushes, as these can damage the mold’s surface and affect future casts.
Our Top Recommended Finds
- Epoxy Resin Starter Kit: An all-in-one kit usually includes resin, hardener, mixing cups, stir sticks, and sometimes even basic molds or glitter, perfect for beginners.
- Jewelry Pliers Set: A small set including round-nose and flat-nose pliers is indispensable for opening and closing jump rings and attaching hardware securely.
- Silicone Keychain Molds: Look for a variety pack with different shapes and sizes, including those with pre-made holes for easy hardware attachment.
Your Keychain Crafting Adventure Awaits
You now have a comprehensive guide to start your keychain making journey. From the precision of resin mixing to the creative freedom of embellishments, each step brings you closer to a unique, handcrafted accessory. This skill opens doors to personalized gifts, delightful home decor, or even a small side hustle.
Why wait? Gather your materials and begin crafting your very first custom keychain today. Explore different colors, experiment with new inclusions, and let your imagination lead the way. The joy of creating something beautiful with your own hands is truly rewarding.