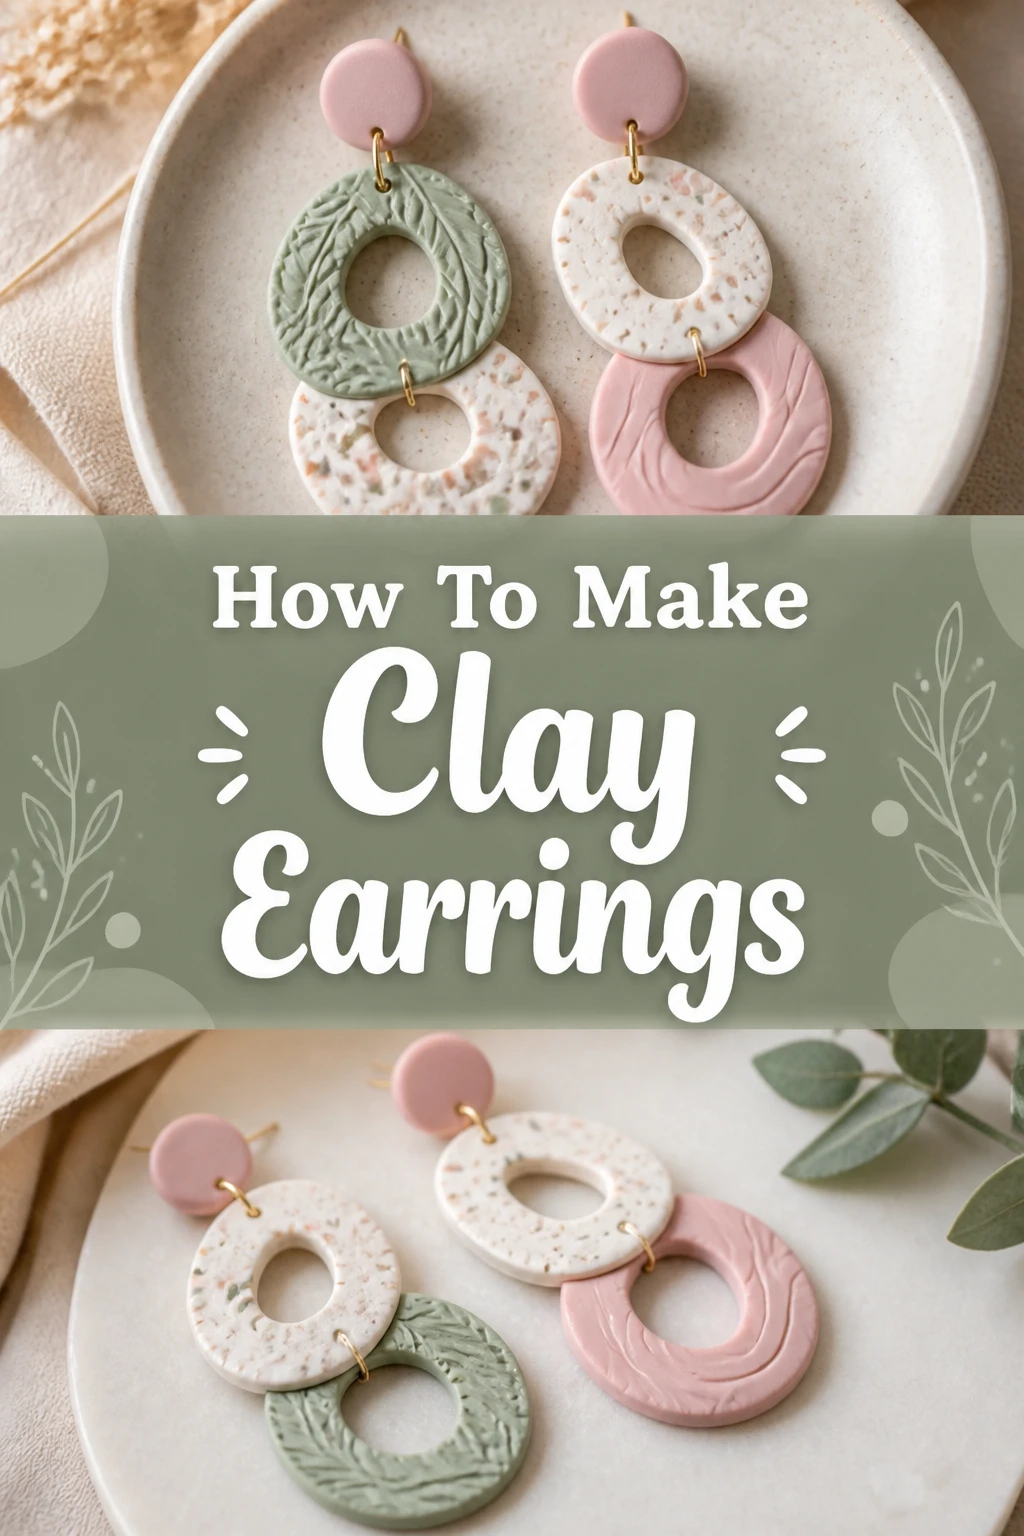
👂 How To Make Clay Earrings
There’s a unique satisfaction in wearing something you’ve crafted with your own hands.
I remember the first pair of clay earrings I made; they weren’t perfect, but they sparked a passion.
This guide will walk you through creating your very own beautiful, personalized clay earrings, drawing from my own trial-and-error experience.
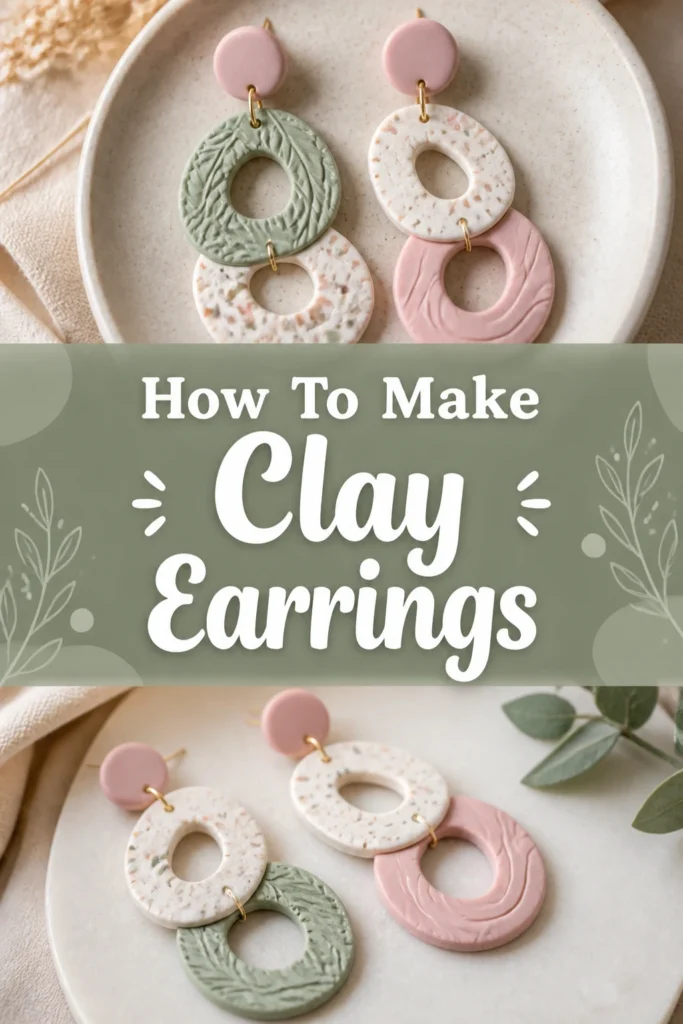
Quick Overview
In this guide, you will learn the complete process of transforming simple polymer clay into stunning, wearable art.
You’ll finish with at least one pair of custom-made earrings, ready to show off your creativity.
- Time needed: 3-6 hours (including baking and cooling)
- Difficulty: Beginner
- What you’ll need: Polymer clay, cutters, rolling pin, oven, jewelry pliers, earring findings.
Step-by-Step Instructions
Step 1: Gather Your Tools and Materials
Before you begin, ensure you have everything laid out and ready to go.
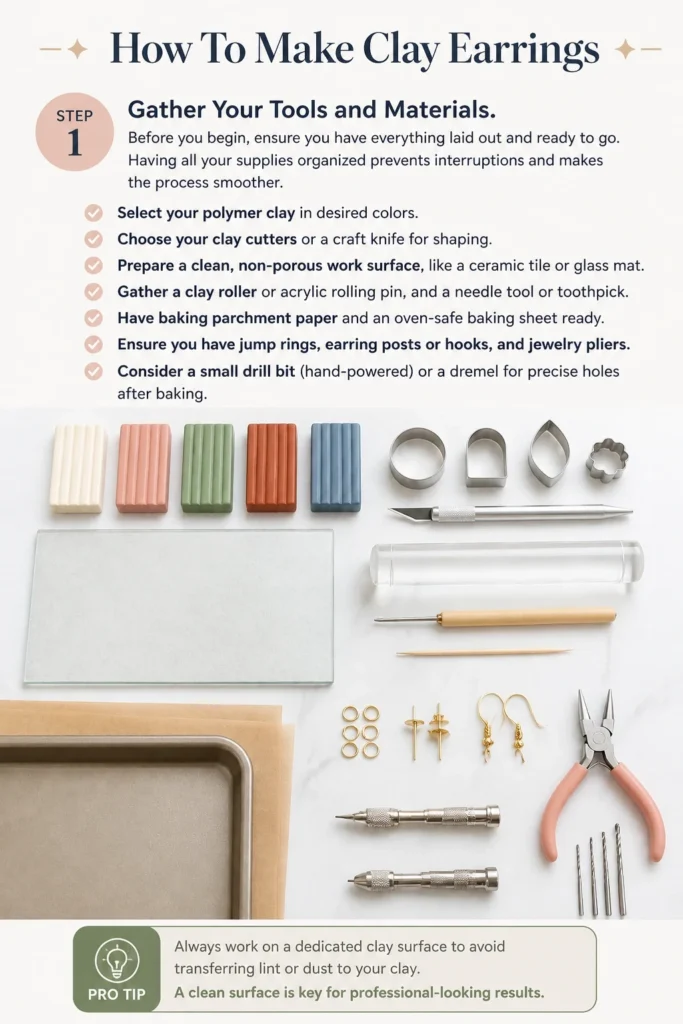
Having all your supplies organized prevents interruptions and makes the process smoother.
- Select your polymer clay in desired colors.
- Choose your clay cutters or a craft knife for shaping.
- Prepare a clean, non-porous work surface, like a ceramic tile or glass mat.
- Gather a clay roller or acrylic rolling pin, and a needle tool or toothpick.
- Have baking parchment paper and an oven-safe baking sheet ready.
- Ensure you have jump rings, earring posts or hooks, and jewelry pliers.
- Consider a small drill bit (hand-powered) or a dremel for precise holes after baking.
Pro Tip: Always work on a dedicated clay surface to avoid transferring lint or dust to your clay. A clean surface is key for professional-looking results.
Step 2: Condition the Clay
Conditioning is vital for making the clay pliable and strong.
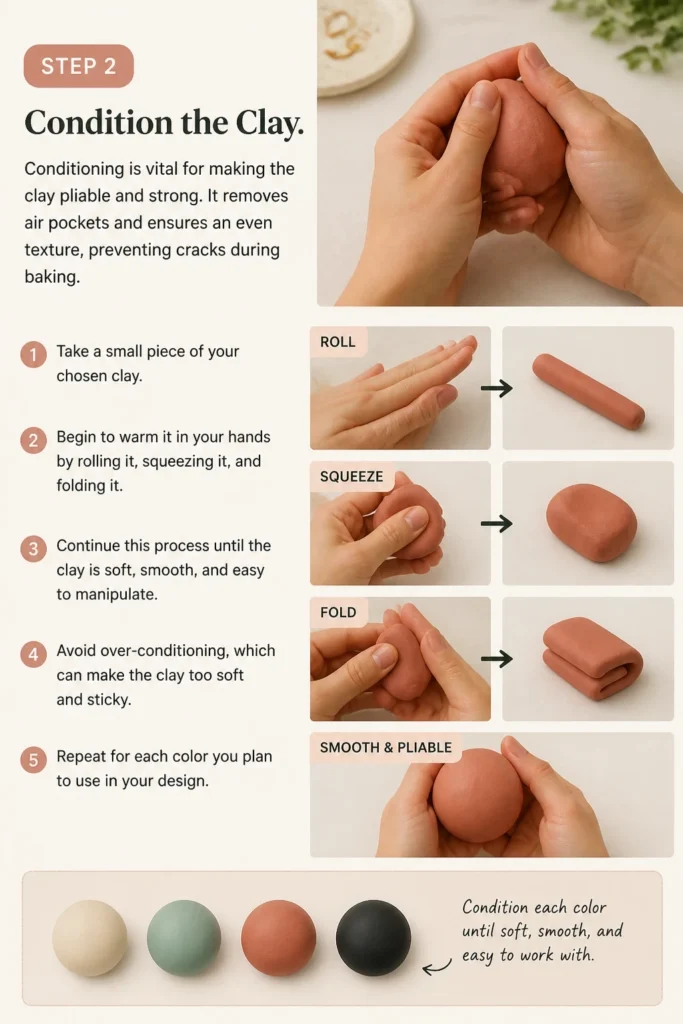
It removes air pockets and ensures an even texture, preventing cracks during baking.
- Take a small piece of your chosen clay.
- Begin to warm it in your hands by rolling it, squeezing it, and folding it.
- Continue this process until the clay is soft, smooth, and easy to manipulate.
- Avoid over-conditioning, which can make the clay too soft and sticky.
- Repeat for each color you plan to use in your design.
Step 3: Roll and Cut Your Shapes
This is where your design starts to take physical form.
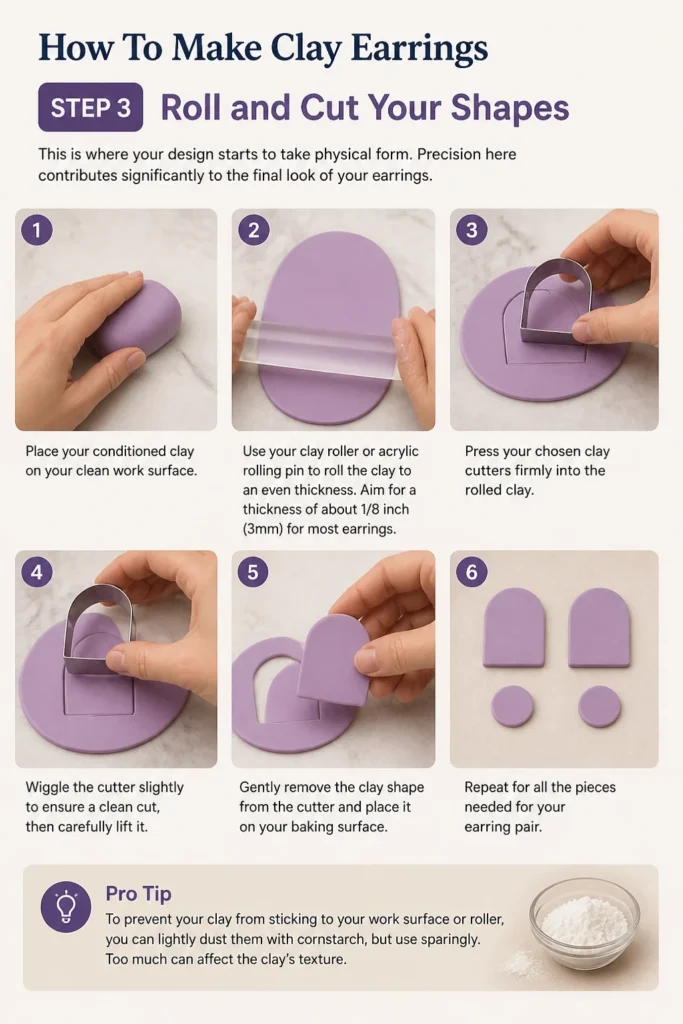
Precision here contributes significantly to the final look of your earrings.
- Place your conditioned clay on your clean work surface.
- Use your clay roller or acrylic rolling pin to roll the clay to an even thickness.
- Aim for a thickness of about 1/8 inch (3mm) for most earrings.
- Press your chosen clay cutters firmly into the rolled clay.
- Wiggle the cutter slightly to ensure a clean cut, then carefully lift it.
- Gently remove the clay shape from the cutter and place it on your baking surface.
- Repeat for all the pieces needed for your earring pair.
Pro Tip: To prevent your clay from sticking to your work surface or roller, you can lightly dust them with cornstarch, but use sparingly. Too much can affect the clay’s texture.
Step 4: Create Texture and Details
Adding texture and unique details elevates your earrings from simple shapes to intricate designs.
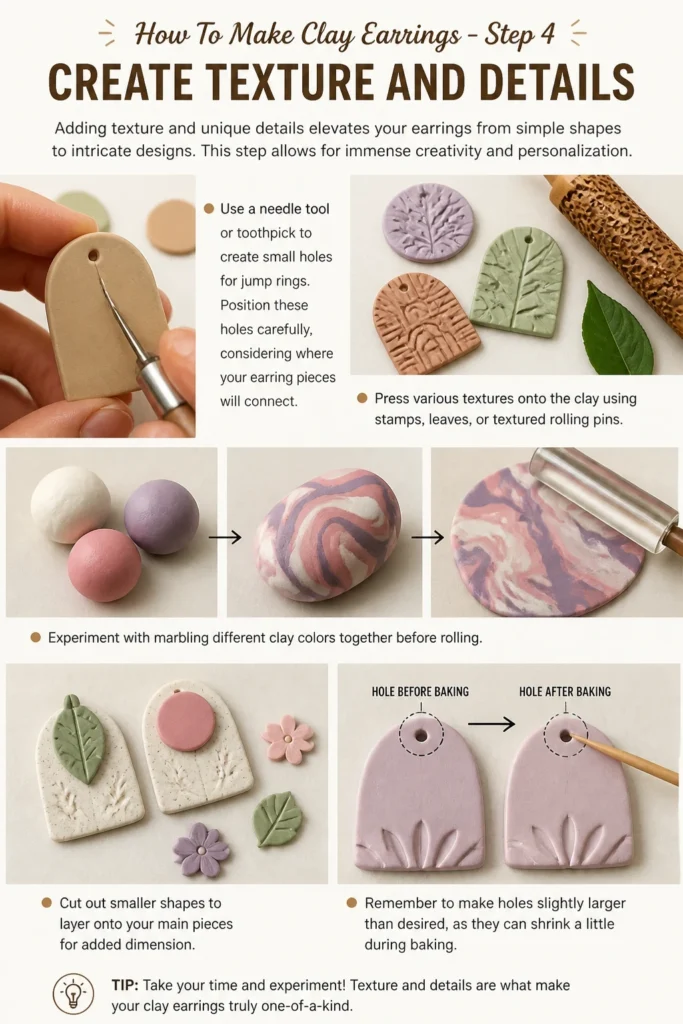
This step allows for immense creativity and personalization.
- Use a needle tool or toothpick to create small holes for jump rings.
- Position these holes carefully, considering where your earring pieces will connect.
- Press various textures onto the clay using stamps, leaves, or textured rolling pins.
- Experiment with marbling different clay colors together before rolling.
- Cut out smaller shapes to layer onto your main pieces for added dimension.
- Remember to make holes slightly larger than desired, as they can shrink a little during baking.
Step 5: Bake Your Clay Pieces
Proper baking is crucial for curing the clay and ensuring durability.
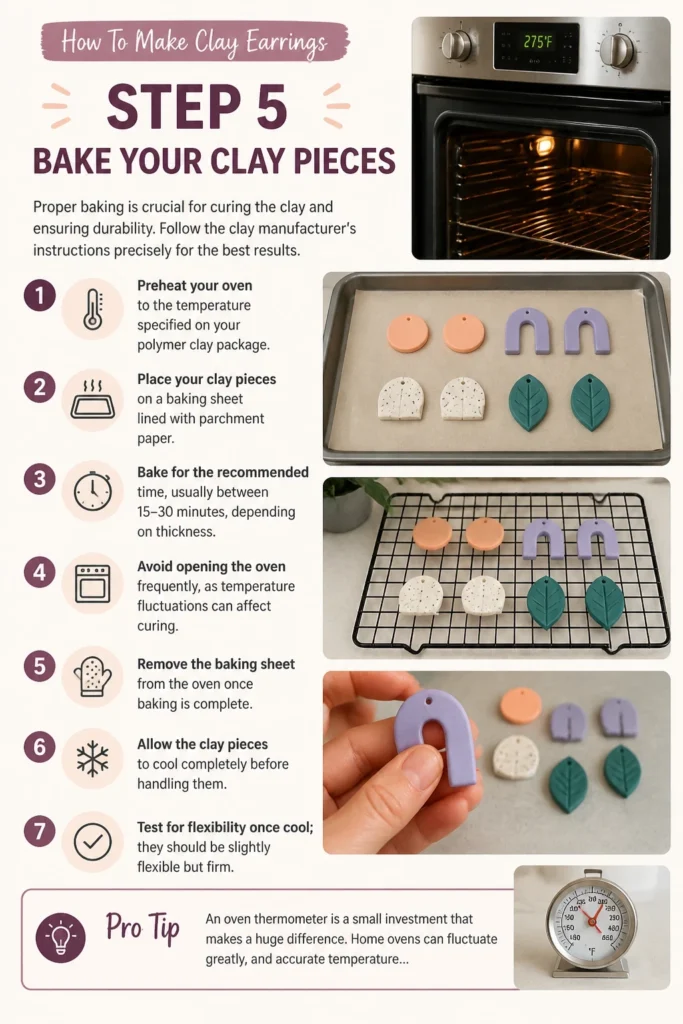
Follow the clay manufacturer’s instructions precisely for the best results.
- Preheat your oven to the temperature specified on your polymer clay package.
- Place your clay pieces on a baking sheet lined with parchment paper.
- Bake for the recommended time, usually between 15-30 minutes, depending on thickness.
- Avoid opening the oven frequently, as temperature fluctuations can affect curing.
- Remove the baking sheet from the oven once baking is complete.
- Allow the clay pieces to cool completely before handling them.
- Test for flexibility once cool; they should be slightly flexible but firm.
Pro Tip: An oven thermometer is a small investment that makes a huge difference. Home ovens can fluctuate greatly, and accurate temperature is key for perfectly cured clay.
Step 6: Assemble Your Earrings
Now it’s time to bring all your cured pieces together into a cohesive design.
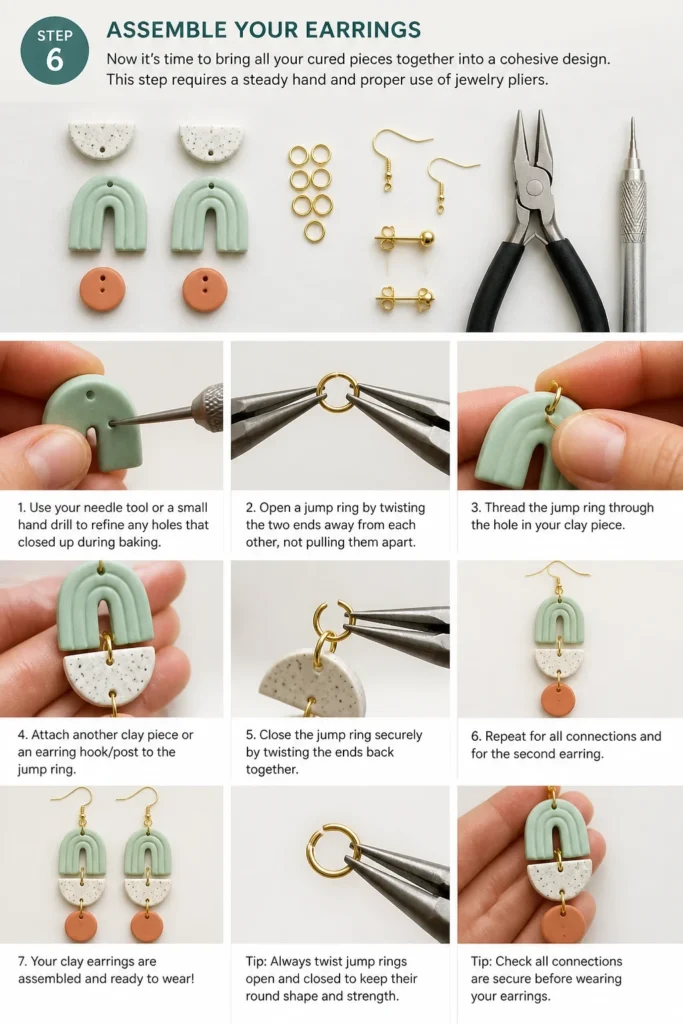
This step requires a steady hand and proper use of jewelry pliers.
- Gather your cooled clay pieces, jump rings, and earring hooks/posts.
- Use your needle tool or a small hand drill to refine any holes that closed up during baking.
- Open a jump ring by twisting the two ends away from each other, not pulling them apart.
- Thread the jump ring through the hole in your clay piece.
- Attach another clay piece or an earring hook/post to the jump ring.
- Close the jump ring securely by twisting the ends back together.
- Repeat for all connections and for the second earring.
Step 7: Add the Finishing Touches
Finishing touches can enhance durability, shine, and overall aesthetic appeal.
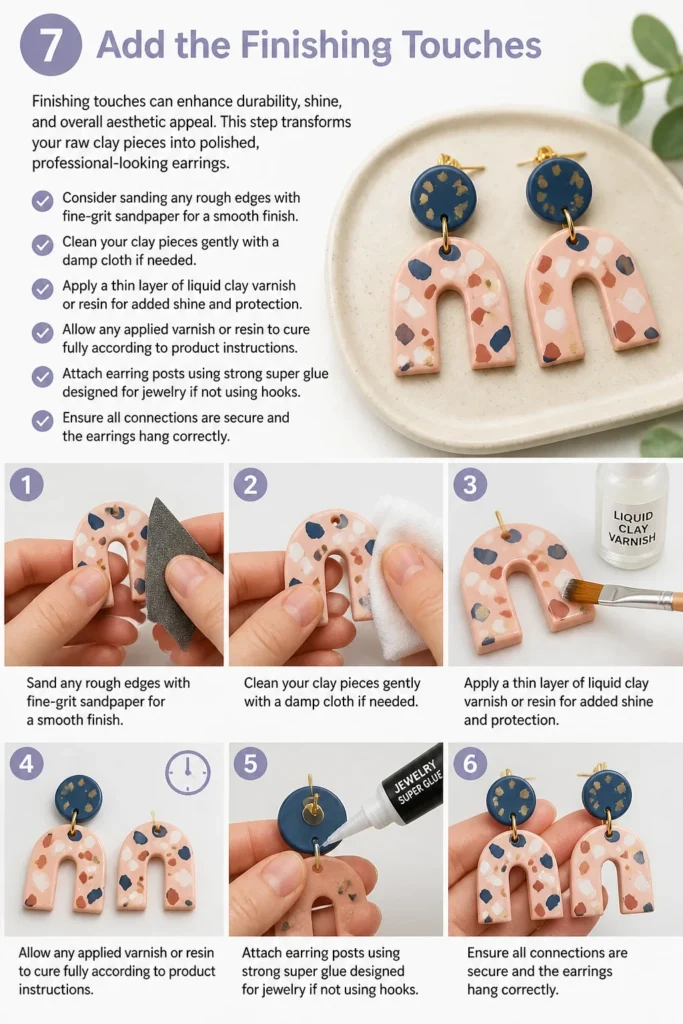
This step transforms your raw clay pieces into polished, professional-looking earrings.
- Consider sanding any rough edges with fine-grit sandpaper for a smooth finish.
- Clean your clay pieces gently with a damp cloth if needed.
- Apply a thin layer of liquid clay varnish or resin for added shine and protection.
- Allow any applied varnish or resin to cure fully according to product instructions.
- Attach earring posts using strong super glue designed for jewelry if not using hooks.
- Ensure all connections are secure and the earrings hang correctly.
Common Mistakes to Avoid
Under-Conditioning the Clay
If your clay isn’t properly conditioned, it will be crumbly and difficult to work with.
This can lead to air bubbles, cracks during shaping, and brittle pieces after baking.
Always take the time to warm and knead your clay until it’s smooth and pliable.
Over-Baking or Under-Baking
Incorrect baking temperatures or times are common pitfalls.
Under-baked clay remains brittle and prone to breaking, while over-baked clay can scorch, become discolored, or lose its flexibility.
Always use an oven thermometer and adhere strictly to the clay manufacturer’s guidelines for temperature and duration.
Skipping Surface Prep
Working on a dusty or unclean surface can embed lint, hair, or debris into your clay.
These imperfections become permanent after baking, detracting from the finished look.
Always clean your work area, tools, and hands thoroughly before starting your project.
Improper Hole Placement
Placing holes too close to the edge of your clay pieces can weaken them, causing breakage.
Holes that are too small or not aligned correctly can make assembly difficult or result in crooked earrings.
Plan your hole placements carefully, ensuring they are adequately spaced and sized for your jump rings and findings.
Troubleshooting
Clay Cracks After Baking
Cracks often occur due to under-conditioning, causing air pockets, or under-baking, leaving the clay brittle.
Ensure your clay is thoroughly conditioned and that your oven temperature is accurate using an oven thermometer, baking for the full recommended time.
Earring Posts Don’t Stick
If your earring posts detach, it’s usually an issue with the glue or surface preparation.
Use a strong, jewelry-specific super glue or epoxy, and ensure the back of your clay piece is clean and slightly textured (lightly sanded) for better adhesion.
Uneven or Bumpy Surface
An uneven surface can result from inconsistent rolling thickness or debris on your work surface.
Roll your clay slowly and evenly, using guides if necessary, and always ensure your work area and tools are impeccably clean before beginning.
Key Takeaways
- Patience and proper conditioning are fundamental for strong, workable clay.
- Accurate oven temperature and baking time are crucial for durability and preventing cracks.
- Cleanliness of your workspace and tools directly impacts the final appearance of your earrings.
- Don’t be afraid to experiment with colors, textures, and shapes to develop your unique style.
- Always use appropriate jewelry pliers and secure jump rings for lasting assemblies.
- Adding a final sealant or varnish protects your creations and enhances their professional look.
Frequently Asked Questions
What kind of clay should I use?
Polymer clay is the best choice for making earrings due to its versatility, durability, and ability to hold fine details.
Brands like Sculpey, Fimo, and Premo are popular and widely available, offering a broad range of colors and finishes.
How do I clean my clay earrings?
To clean your clay earrings, gently wipe them with a soft, damp cloth.
Avoid harsh chemicals or abrasive cleaners, which can damage the clay or any applied finishes.
Can I paint my clay earrings?
Yes, you can paint your clay earrings after baking and cooling.
Acrylic paints are generally recommended, and you can then seal them with a clear varnish for protection and a finished look.
How do I prevent air bubbles?
Air bubbles often occur due to improper conditioning or trapping air during rolling.
Thoroughly condition your clay, roll it slowly and evenly, and gently press out any visible bubbles with a needle tool before baking.
Our Top Recommended Finds
- Polymer Clay Starter Kit: Great for beginners, often includes a variety of colors and basic tools.
- Acrylic Clay Roller with Thickness Guides: Ensures perfectly even clay sheets, essential for consistent earring pairs.
- Jewelry Pliers and Findings Kit: Contains all the necessary pliers, jump rings, and earring hooks to assemble your creations.
Embrace Your Inner Artisan
You’ve now got the knowledge and steps to dive into the wonderful world of clay earring making.
Each pair you create will be a testament to your growing skill and unique artistic vision.
Don’t stop here; explore different clay techniques, try new color combinations, or even venture into mixed media.
Grab your clay and tools today, and let your creativity take shape!