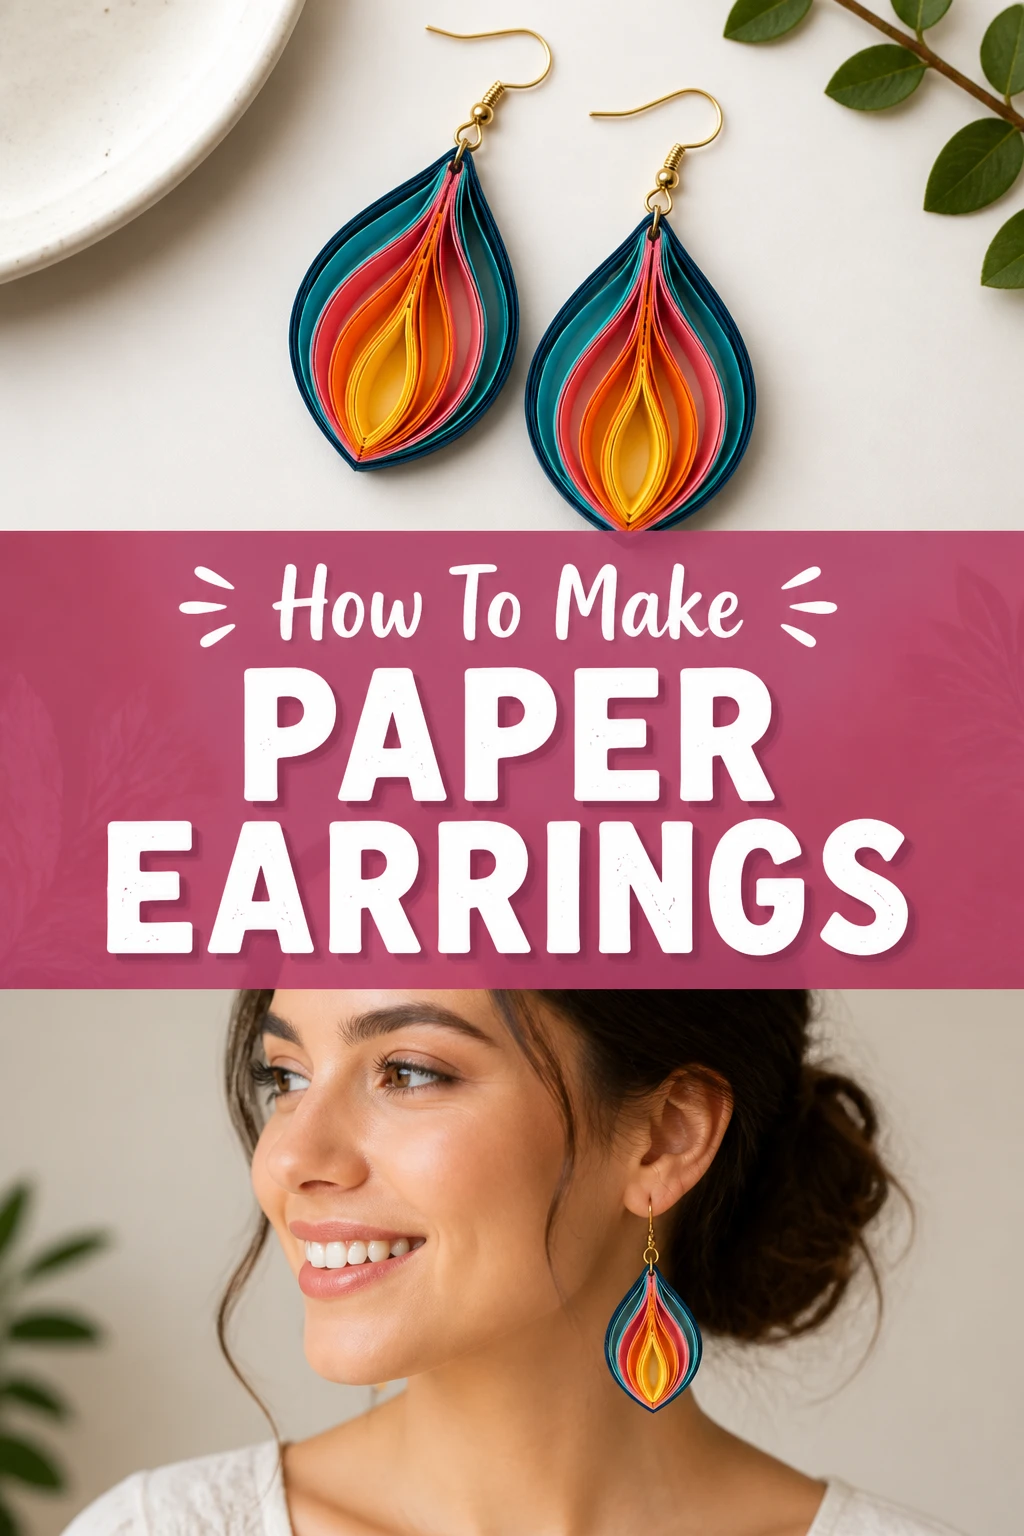
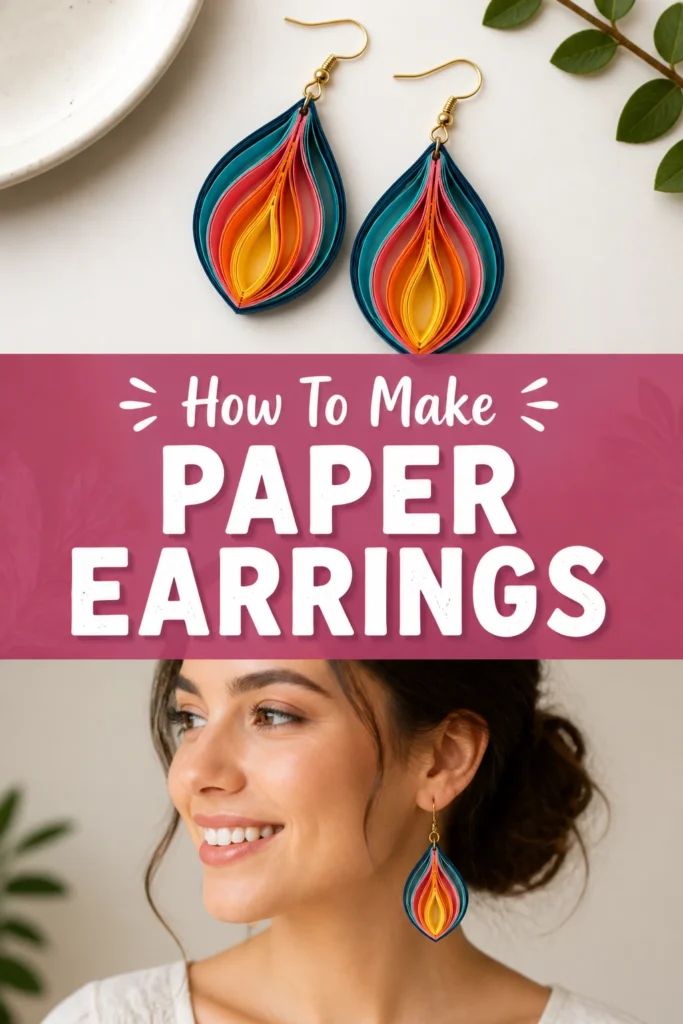
🎨 How To Make Paper Earrings
Making paper earrings is a wonderfully creative and accessible craft. It’s a fantastic way to transform simple materials into beautiful, wearable art. I remember my first attempts, turning old maps into unique dangle earrings.
This guide will walk you through every step, sharing all the practical tips I’ve learned along the way. You’ll soon be creating stunning, lightweight pieces that express your personal style.
Quick Overview
This guide will empower you to design and craft your own unique paper earrings from start to finish. You’ll learn how to select materials, assemble your designs, and ensure they are durable.
- Time needed: 1-3 hours (depending on complexity and drying time)
- Difficulty: Beginner to Intermediate
- What you’ll need: Paper, glue, sealant, earring hooks, jump rings, cutting tools, pliers.
Step-by-Step Instructions
Step 1: Gather Your Materials
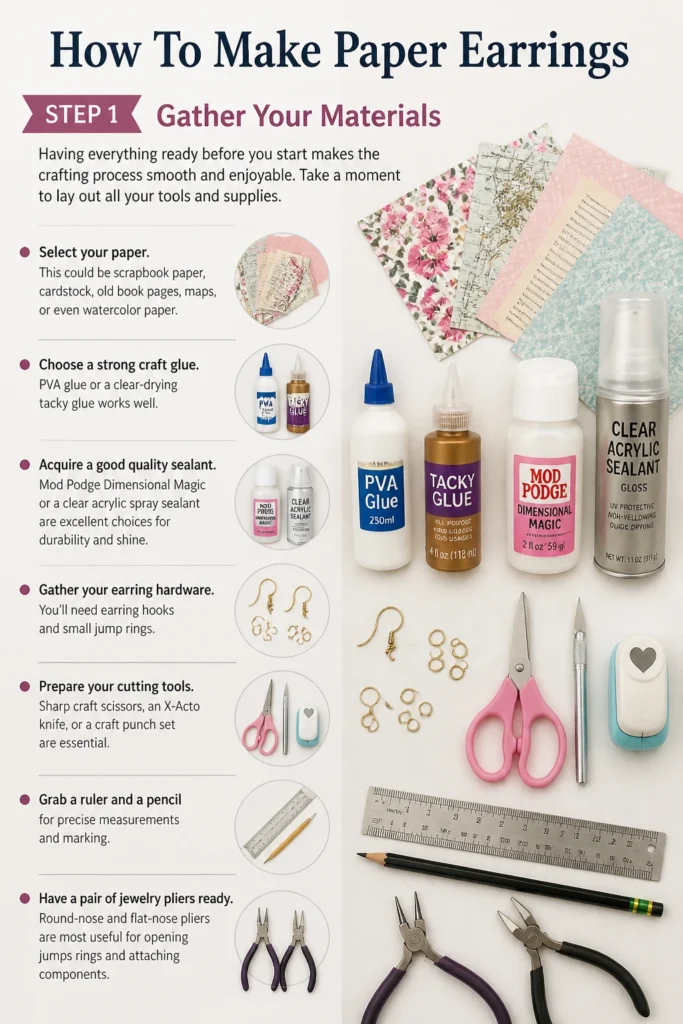
Having everything ready before you start makes the crafting process smooth and enjoyable. Take a moment to lay out all your tools and supplies.
- Select your paper. This could be scrapbook paper, cardstock, old book pages, maps, or even watercolor paper.
- Choose a strong craft glue. PVA glue or a clear-drying tacky glue works well.
- Acquire a good quality sealant. Mod Podge Dimensional Magic or a clear acrylic spray sealant are excellent choices for durability and shine.
- Gather your earring hardware. You’ll need earring hooks and small jump rings.
- Prepare your cutting tools. Sharp craft scissors, an X-Acto knife, or a craft punch set are essential.
- Grab a ruler and a pencil for precise measurements and marking.
- Have a pair of jewelry pliers ready. Round-nose and flat-nose pliers are most useful for handling jump rings and hooks.
- Set up a protected work surface. A cutting mat is ideal if you’re using an X-Acto knife.
Pro Tip: Invest in quality, sharp cutting tools. Dull scissors or knives can tear paper, making your edges look messy and unprofessional.
Step 2: Choose Your Paper and Design
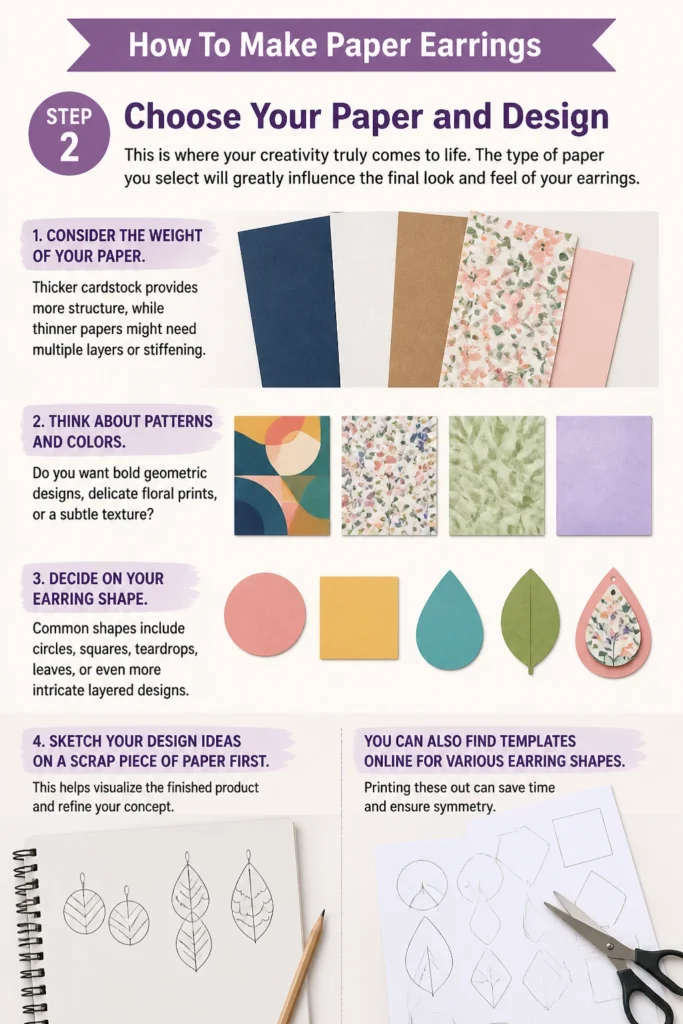
This is where your creativity truly comes to life. The type of paper you select will greatly influence the final look and feel of your earrings.
- Consider the weight of your paper. Thicker cardstock provides more structure, while thinner papers might need multiple layers or stiffening.
- Think about patterns and colors. Do you want bold geometric designs, delicate floral prints, or a subtle texture?
- Decide on your earring shape. Common shapes include circles, squares, teardrops, leaves, or even more intricate layered designs.
- Sketch your design ideas on a scrap piece of paper first. This helps visualize the finished product and refine your concept.
You can also find templates online for various earring shapes. Printing these out can save time and ensure symmetry.
Step 3: Cut Your Shapes
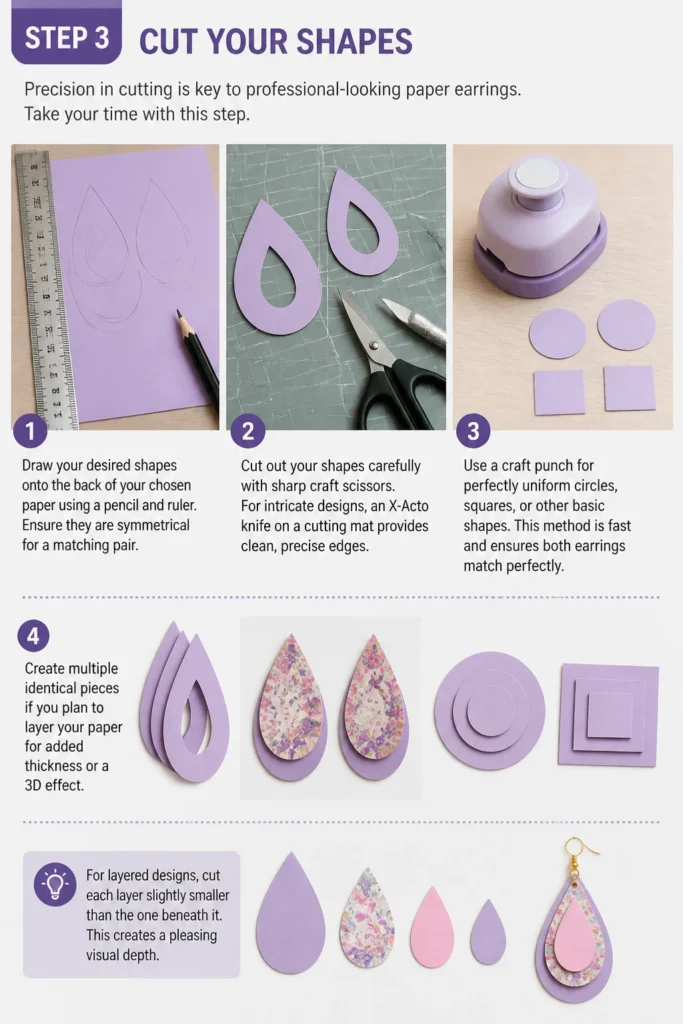
Precision in cutting is key to professional-looking paper earrings. Take your time with this step.
- Draw your desired shapes onto the back of your chosen paper using a pencil and ruler. Ensure they are symmetrical for a matching pair.
- Cut out your shapes carefully with sharp craft scissors. For intricate designs, an X-Acto knife on a cutting mat provides clean, precise edges.
- Use a craft punch for perfectly uniform circles, squares, or other basic shapes. This method is fast and ensures both earrings match perfectly.
- Create multiple identical pieces if you plan to layer your paper for added thickness or a 3D effect.
For layered designs, cut each layer slightly smaller than the one beneath it. This creates a pleasing visual depth.
Step 4: Assemble Your Layers (Optional)
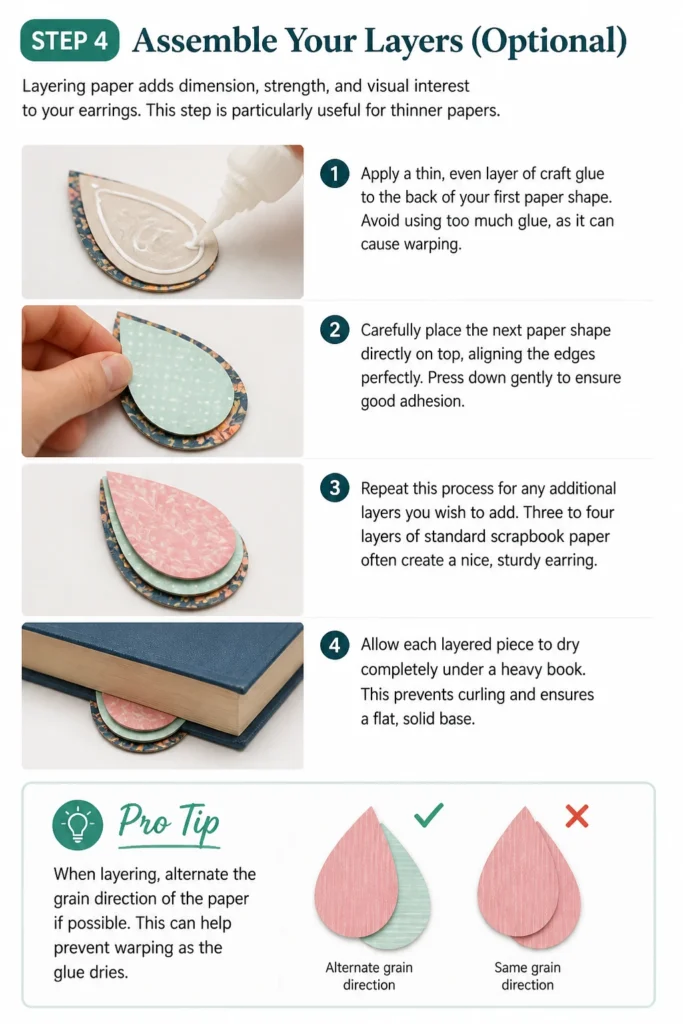
Layering paper adds dimension, strength, and visual interest to your earrings. This step is particularly useful for thinner papers.
- Apply a thin, even layer of craft glue to the back of your first paper shape. Avoid using too much glue, as it can cause warping.
- Carefully place the next paper shape directly on top, aligning the edges perfectly. Press down gently to ensure good adhesion.
- Repeat this process for any additional layers you wish to add. Three to four layers of standard scrapbook paper often create a nice, sturdy earring.
- Allow each layered piece to dry completely under a heavy book. This prevents curling and ensures a flat, solid base.
Pro Tip: When layering, alternate the grain direction of the paper if possible. This can help prevent warping as the glue dries.
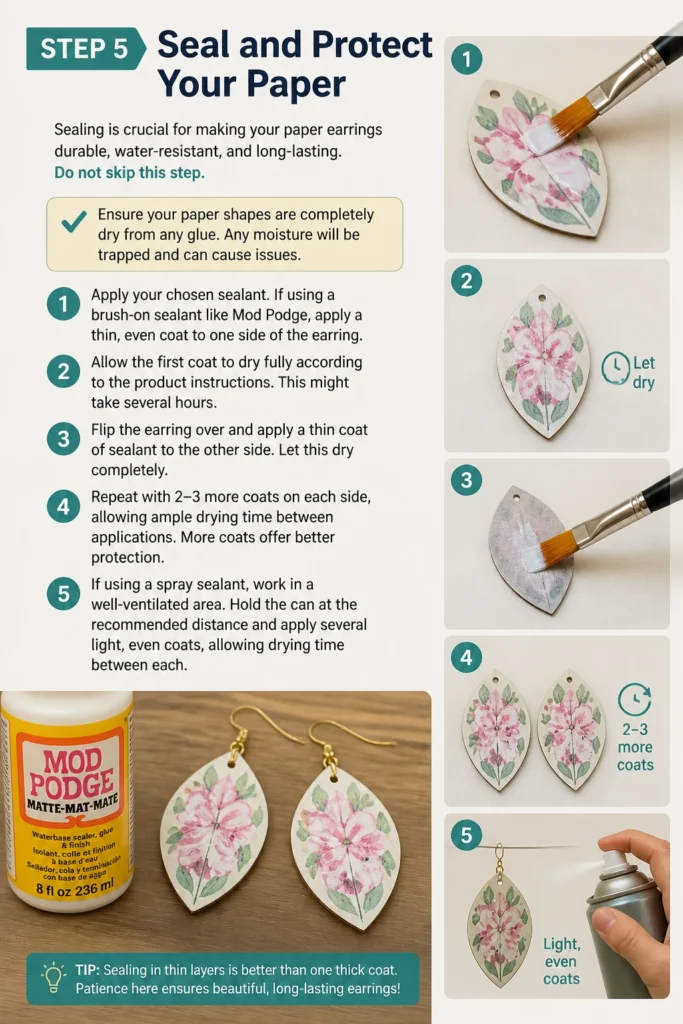
Step 5: Seal and Protect Your Paper
Sealing is crucial for making your paper earrings durable, water-resistant, and long-lasting. Do not skip this step.
- Ensure your paper shapes are completely dry from any glue. Any moisture will be trapped and can cause issues.
- Apply your chosen sealant. If using a brush-on sealant like Mod Podge, apply a thin, even coat to one side of the earring.
- Allow the first coat to dry fully according to the product instructions. This might take several hours.
- Flip the earring over and apply a thin coat of sealant to the other side. Let this dry completely.
- Repeat with 2-3 more coats on each side, allowing ample drying time between applications. More coats offer better protection.
- If using a spray sealant, work in a well-ventilated area. Hold the can at the recommended distance and apply several light, even coats to both sides, letting each dry.
This multi-coat process builds up a protective barrier. It also adds a nice sheen to your finished earrings.
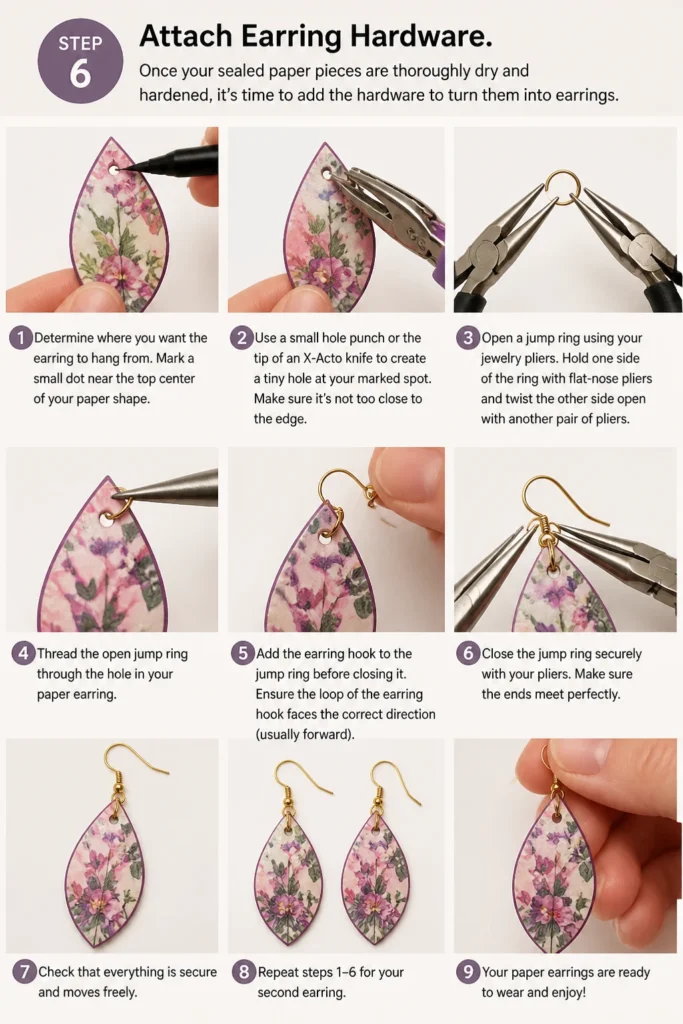
Step 6: Attach Earring Hardware
Once your sealed paper pieces are thoroughly dry and hardened, it’s time to add the hardware to turn them into earrings.
- Determine where you want the earring to hang from. Mark a small dot near the top center of your paper shape.
- Use a small hole punch or the tip of an X-Acto knife to create a tiny hole at your marked spot. Make sure it’s not too close to the edge.
- Open a jump ring using your jewelry pliers. Hold one side of the ring with flat-nose pliers and twist the other side open with another pair of pliers.
- Thread the open jump ring through the hole in your paper earring.
- Add the earring hook to the jump ring before closing it. Ensure the loop of the earring hook faces the correct direction (usually forward).
- Close the jump ring securely with your pliers. Make sure the ends meet perfectly to prevent the earring from slipping off.
Check that the earring hook is oriented correctly so the earring faces forward when worn. You can gently twist the hook loop with pliers if needed.
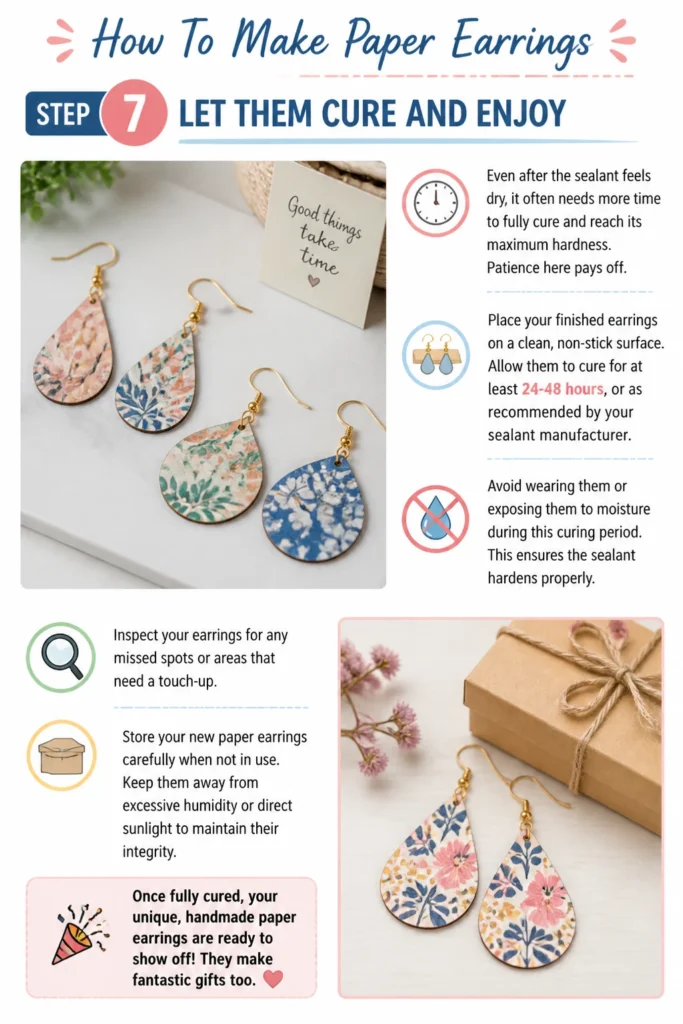
Step 7: Let Them Cure and Enjoy
Even after the sealant feels dry, it often needs more time to fully cure and reach its maximum hardness. Patience here pays off.
- Place your finished earrings on a clean, non-stick surface. Allow them to cure for at least 24-48 hours, or as recommended by your sealant manufacturer.
- Avoid wearing them or exposing them to moisture during this curing period. This ensures the sealant hardens properly.
- Inspect your earrings for any missed spots or areas that need a touch-up.
- Store your new paper earrings carefully when not in use. Keep them away from excessive humidity or direct sunlight to maintain their integrity.
Once fully cured, your unique, handmade paper earrings are ready to show off! They make fantastic gifts too.
Common Mistakes to Avoid
Using Flimsy Paper
Starting with paper that is too thin or not reinforcing it can lead to easily bent or torn earrings. Thin paper lacks the structural integrity needed to withstand daily wear. Always opt for cardstock, multiple layers of thinner paper, or stiffen it with glue before sealing.
Inadequate Sealing
Failing to apply enough coats of sealant, or not allowing sufficient drying time between coats, leaves your earrings vulnerable. They won’t be water-resistant and will quickly degrade if exposed to moisture or humidity. Be generous with your sealant coats and patient with drying.
Rushing Drying Times
Impatience is a common pitfall. Gluing layers together or applying sealant before previous layers are fully dry can lead to warping, bubbling, or a cloudy finish. Each step involving liquid needs its full drying time to achieve the best results.
Improper Hardware Attachment
Attaching jump rings or hooks too close to the edge of the paper, or not closing jump rings securely, can cause your earrings to fall apart. The hole needs to be strong enough to hold the hardware, and the jump ring must be fully closed to prevent slippage.
Troubleshooting
My Earrings Are Bending or Tearing
This usually indicates insufficient paper thickness or inadequate sealing. If your earrings feel too flexible, try adding another layer of paper with glue and pressing it flat while drying. Then, apply several more coats of a strong sealant, ensuring full coverage and cure time.
The Sealant Is Drying Cloudy or Sticky
A cloudy finish often happens when sealant is applied too thickly in one go, or if humidity is too high during drying. Apply thinner coats and allow ample drying time between each. Stickiness might mean the sealant hasn’t fully cured; give it more time in a dry environment.
Earring Hardware Keeps Falling Off
This problem typically stems from two issues: the hole in the paper is too large or too close to the edge, or the jump ring wasn’t closed tightly. Re-attach the hardware, ensuring the hole is small and secure, and use your pliers to firmly close the jump ring so there’s no gap.
Key Takeaways
- Use quality paper and reinforce thin paper with layers for durable earrings.
- Apply multiple, thin coats of sealant, allowing each to dry completely.
- Patience during drying and curing times is essential for a professional finish.
- Accurate cutting and secure hardware attachment prevent common issues.
- Experiment with different papers and shapes to unleash your creativity.
- Paper earrings are lightweight, versatile, and make unique handmade gifts.
Frequently Asked Questions
What is the best type of paper to use for earrings?
Cardstock, scrapbook paper, or even upcycled materials like old maps or magazines work wonderfully. The key is to choose paper that can hold its shape or be stiffened through layering and sealing. Thicker paper generally provides a better base.
Are paper earrings waterproof?
While sealant makes them highly water-resistant, they are not completely waterproof. Avoid prolonged exposure to heavy rain or submerging them in water. They can withstand light splashes or humidity, but treat them with care like any delicate jewelry.
How durable are paper earrings?
With proper sealing and construction, paper earrings can be surprisingly durable. They resist bending, tearing, and moisture much better than unsealed paper. They are generally lightweight and comfortable for everyday wear, lasting a long time with gentle handling.
Can I make paper earrings for sensitive ears?
Absolutely. The paper itself is hypoallergenic. You can easily purchase sterling silver, surgical steel, or niobium earring hooks. These materials are known to be safe for most people with metal sensitivities.
Our Top Recommended Finds
- Assorted Cardstock Paper Pack: Offers a wide variety of colors and patterns to kickstart your creative designs.
- Jewelry Pliers Set (Round-nose and Flat-nose): Essential for easily opening and closing jump rings and manipulating earring hooks.
- Mod Podge Dimensional Magic: A fantastic sealant that provides a clear, high-gloss, dome-like finish, adding protection and a professional look.
Time to Adorn Yourself!
You now have all the knowledge and practical steps needed to create your own beautiful paper earrings. This craft offers endless possibilities for personal expression.
Don’t be afraid to experiment with different papers, shapes, and embellishments. Your first pair might not be perfect, but each attempt builds skill and confidence. Why not gather your materials today and start designing your next favorite accessory?