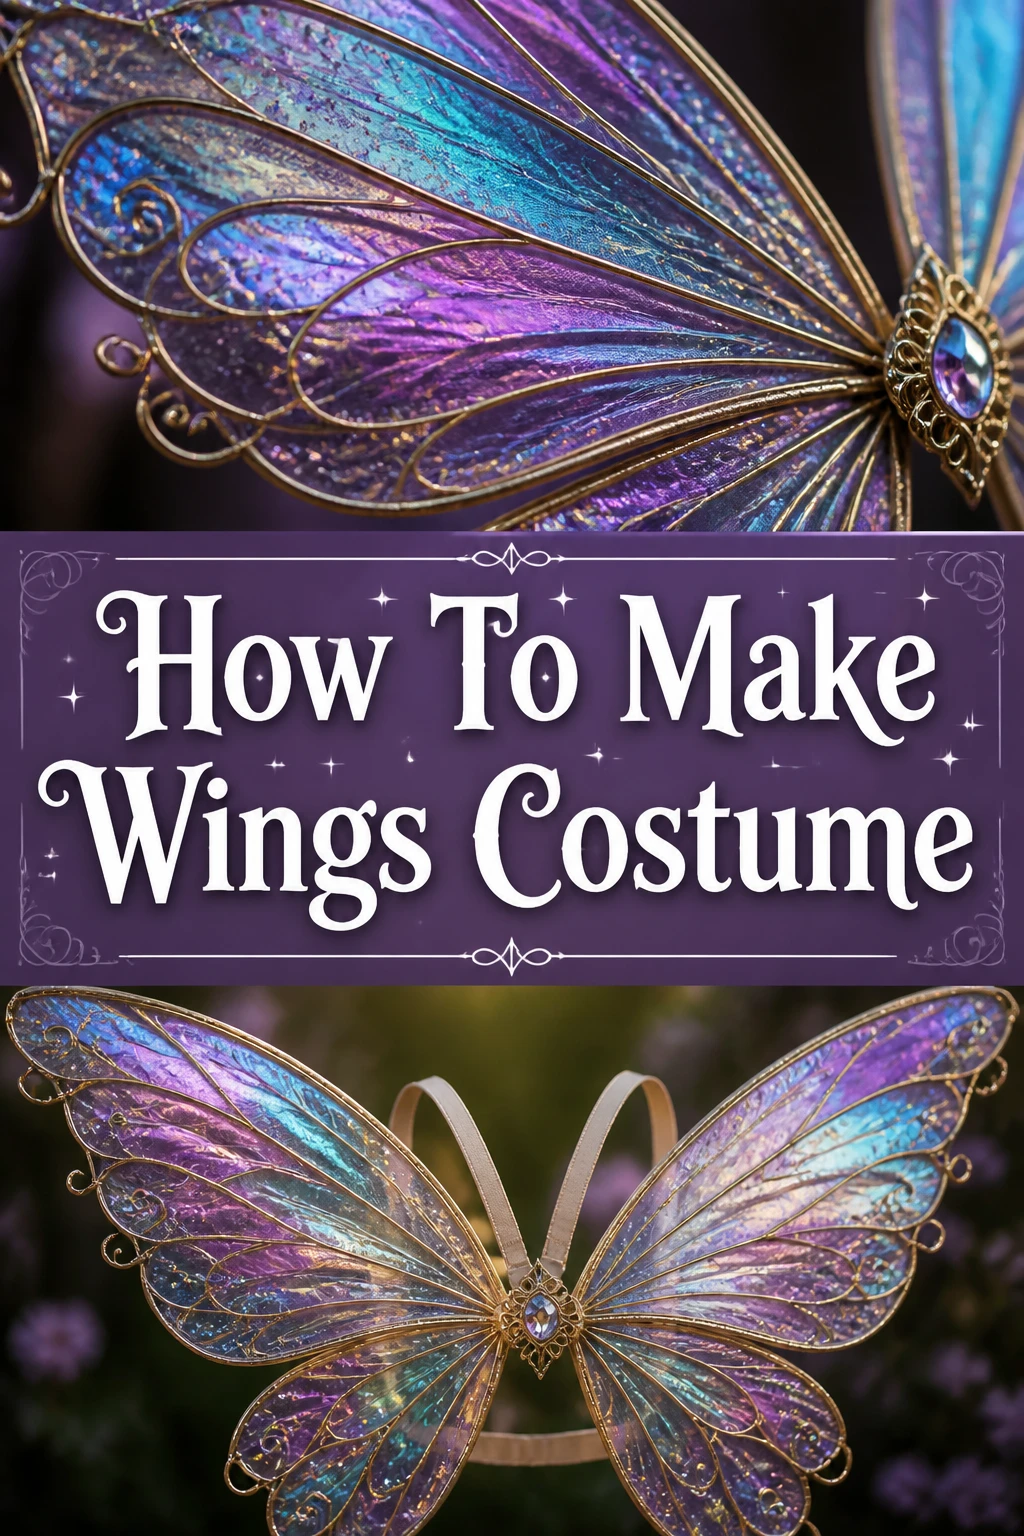
🦋 How To Make Wings Costume
I have spent years building elaborate costumes for local theater productions and comic conventions.
There is a specific magic that happens when you put on a pair of wings and feel your entire silhouette change.
This guide comes from my personal trial and error in the workshop to ensure your wings are sturdy, beautiful, and comfortable.
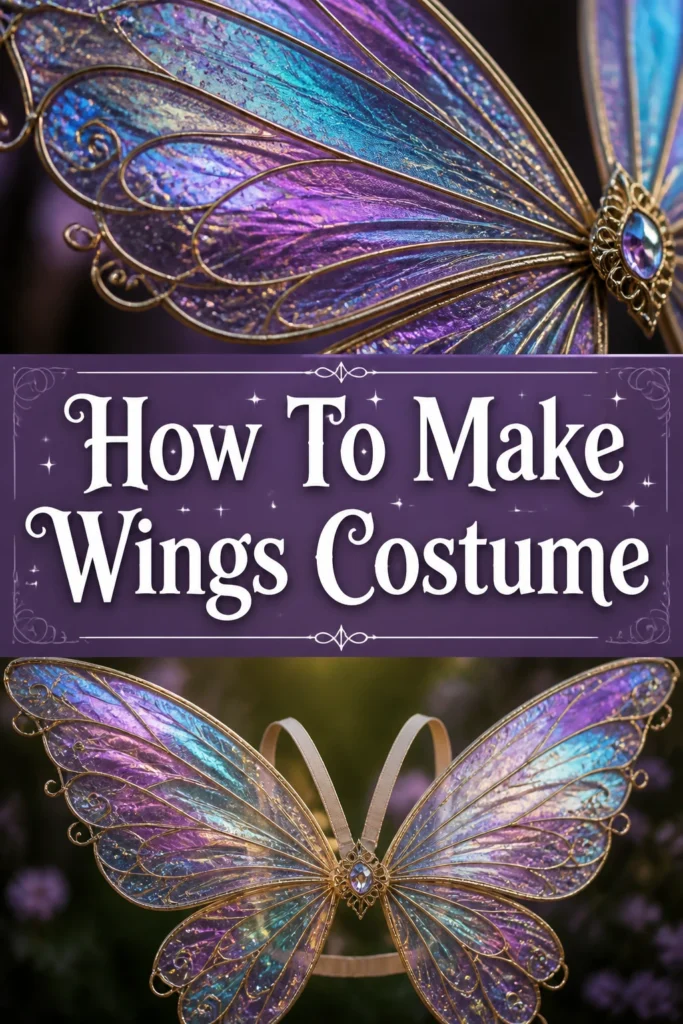
Quick Overview
Creating your own wings allows for a level of customization that store-bought versions simply cannot match.
You will learn how to build a structural wire frame and cover it with professional-looking membranes.
- Time needed: 4 to 6 hours (plus drying time)
- Difficulty: Intermediate
- What you’ll need: Heavy-gauge wire, pliers, sheer fabric or stockings, floral tape, elastic, and decorative elements.
Step 1: Design Your Silhouette
Sketch your desired wing shape on a large piece of poster board or butcher paper first.
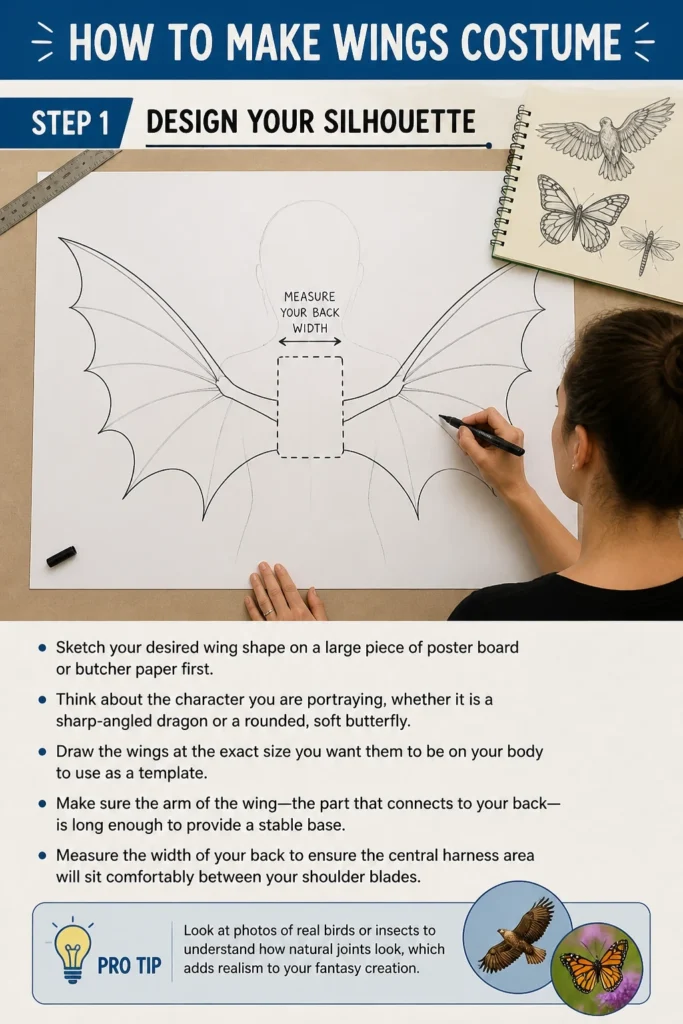
Think about the character you are portraying, whether it is a sharp-angled dragon or a rounded, soft butterfly.
Draw the wings at the exact size you want them to be on your body to use as a template.
Make sure the “arm” of the wing—the part that connects to your back—is long enough to provide a stable base.
Measure the width of your back to ensure the central harness area will sit comfortably between your shoulder blades.
Pro Tip: Look at photos of real birds or insects to understand how natural joints look, which adds realism to your fantasy creation.
Step 2: Choose the Right Wire
Select a galvanized steel wire between 12 and 16 gauge for the main structure.
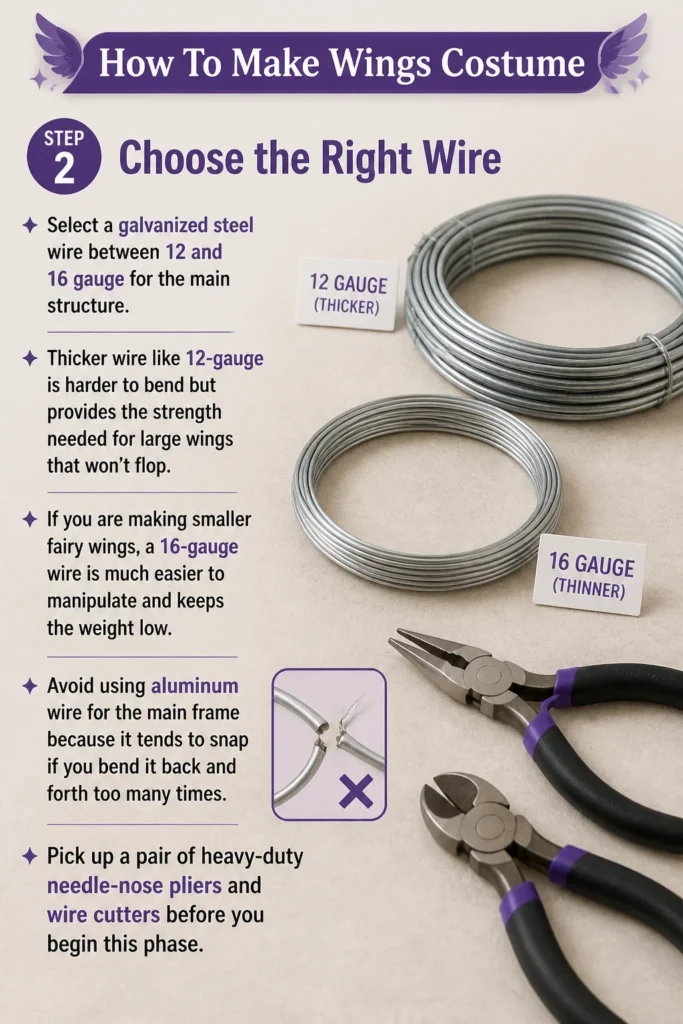
Thicker wire like 12-gauge is harder to bend but provides the strength needed for large wings that won’t flop.
If you are making smaller fairy wings, a 16-gauge wire is much easier to manipulate and keeps the weight low.
Avoid using aluminum wire for the main frame because it tends to snap if you bend it back and forth too many times.
Pick up a pair of heavy-duty needle-nose pliers and wire cutters before you begin this phase.
Step 3: Shape the Frame
Lay your wire directly over your paper template to guide your bends accurately.
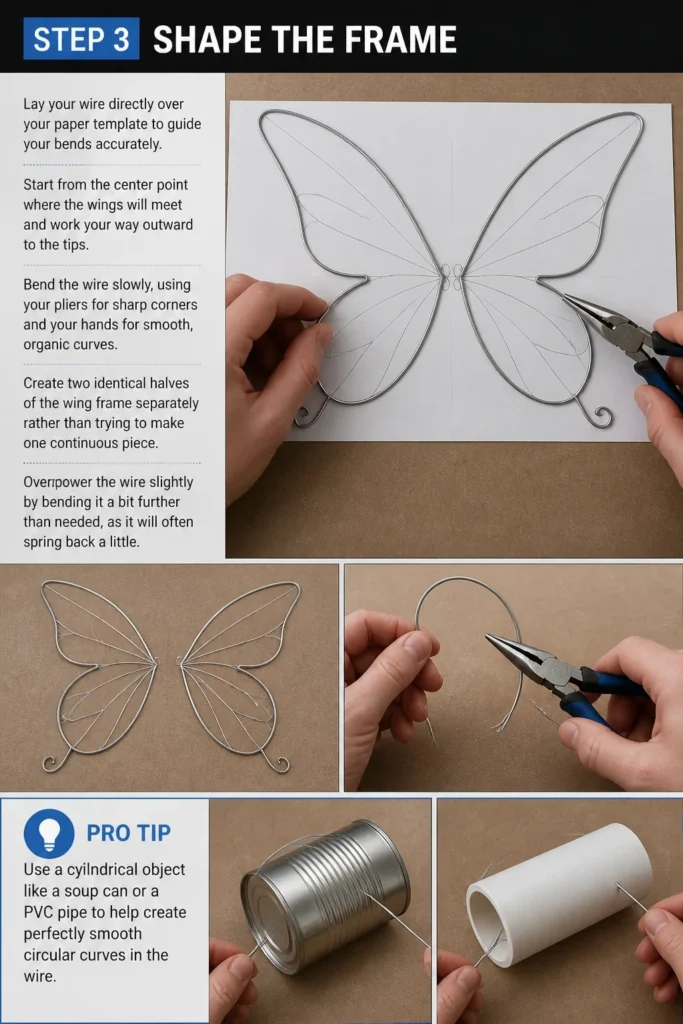
Start from the center point where the wings will meet and work your way outward to the tips.
Bend the wire slowly, using your pliers for sharp corners and your hands for smooth, organic curves.
Create two identical halves of the wing frame separately rather than trying to make one continuous piece.
Overpower the wire slightly by bending it a bit further than needed, as it will often spring back a little.
Pro Tip: Use a cylindrical object like a soup can or a PVC pipe to help create perfectly smooth circular curves in the wire.
Step 4: Secure the Central Joint
Bring the two wing halves together at the center where they will rest against your spine.
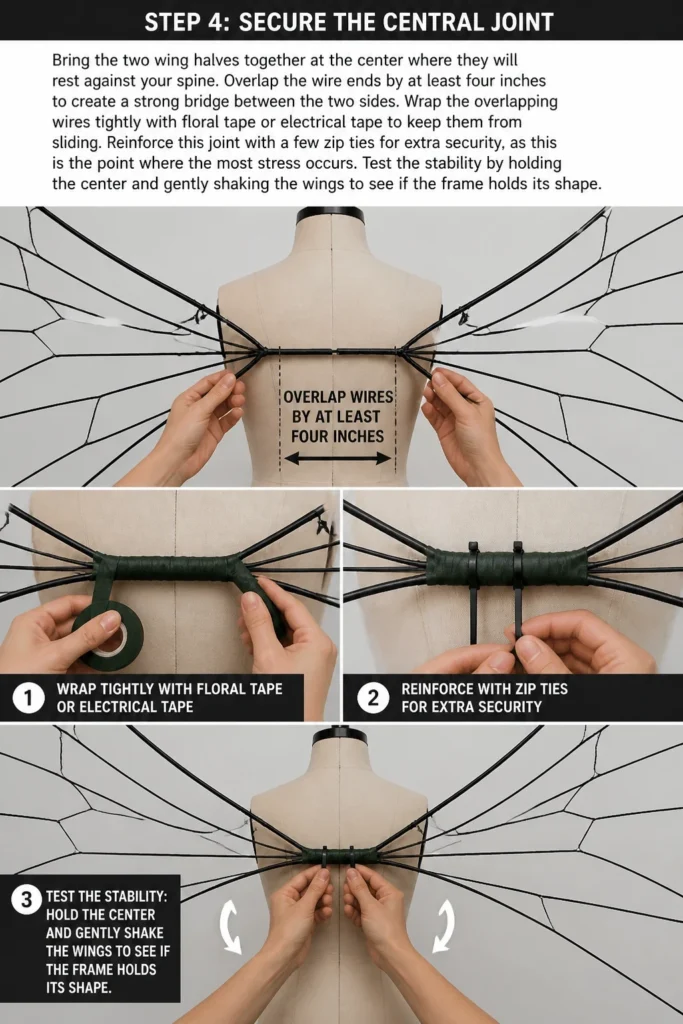
Overlap the wire ends by at least four inches to create a strong “bridge” between the two sides.
Wrap the overlapping wires tightly with floral tape or electrical tape to keep them from sliding.
Reinforce this joint with a few zip ties for extra security, as this is the point where the most stress occurs.
Test the stability by holding the center and gently shaking the wings to see if the frame holds its shape.
Step 5: Create the Harness Base
Construct a “U” or “H” shape out of extra wire or a piece of sturdy cardboard to sit against your back.
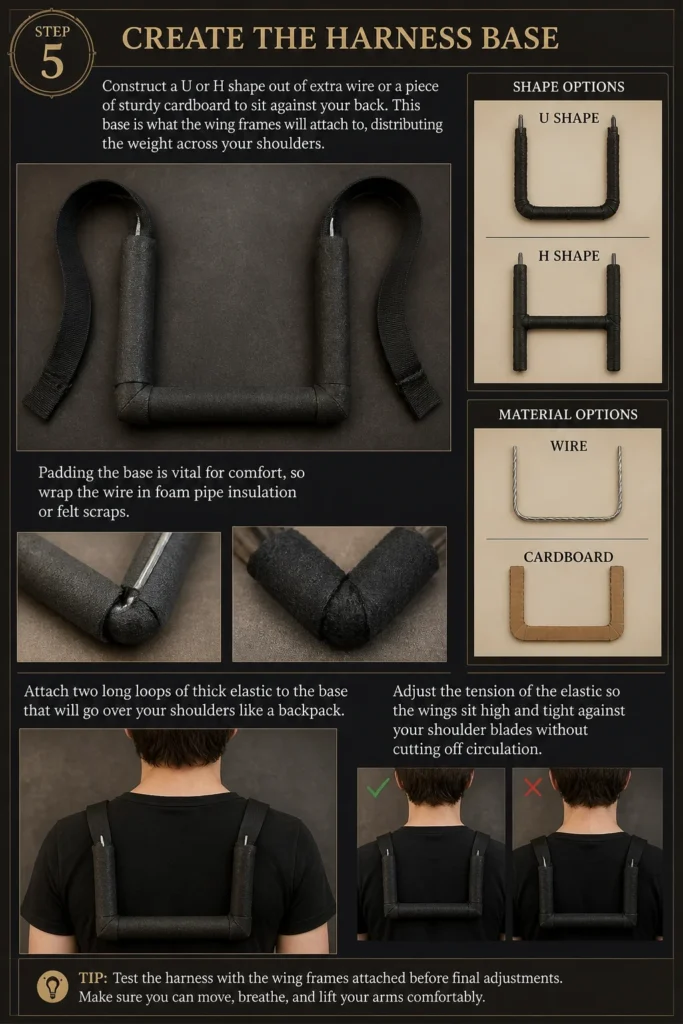
This base is what the wing frames will attach to, distributing the weight across your shoulders.
Padding the base is vital for comfort, so wrap the wire in foam pipe insulation or felt scraps.
Attach two long loops of thick elastic to the base that will go over your shoulders like a backpack.
Adjust the tension of the elastic so the wings sit high and tight against your shoulder blades without cutting off circulation.
Step 6: Apply the Fabric Membrane
Stretch sheer fabric, such as nylon stockings or iridescent organza, over the wire frames.
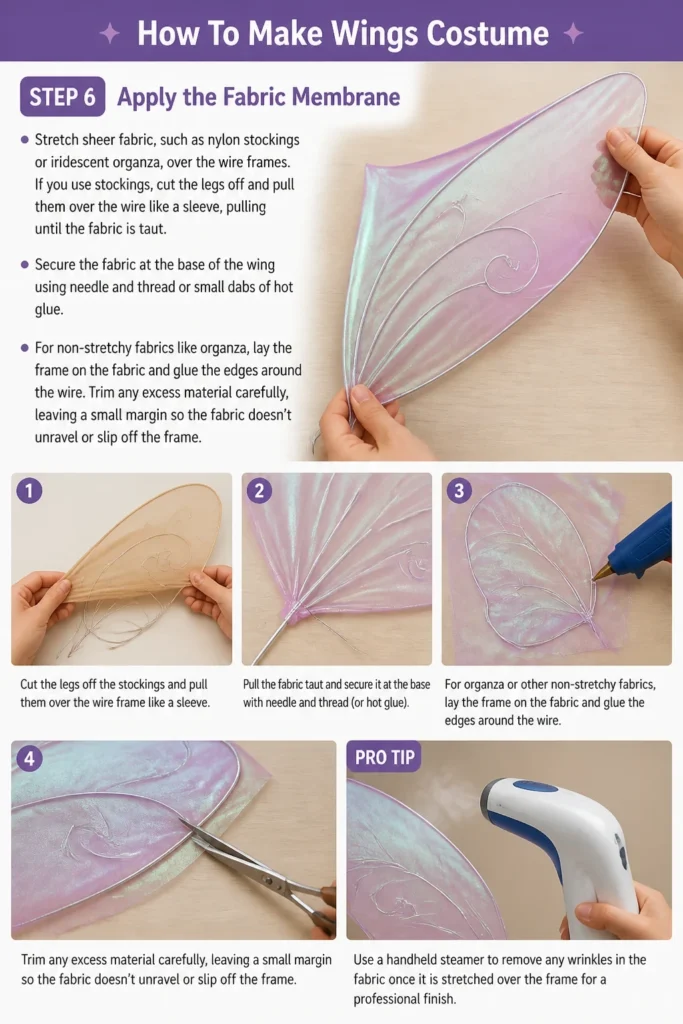
If you use stockings, cut the legs off and pull them over the wire like a sleeve, pulling until the fabric is taut.
Secure the fabric at the base of the wing using needle and thread or small dabs of hot glue.
For non-stretchy fabrics like organza, lay the frame on the fabric and glue the edges around the wire.
Trim any excess material carefully, leaving a small margin so the fabric doesn’t unravel or slip off the frame.
Pro Tip: Use a handheld steamer to remove any wrinkles in the fabric once it is stretched over the frame for a professional finish.
Step 7: Add Texture and Color
Paint the edges of the wings with acrylic paint or fabric markers to define the “veins” of the wing.
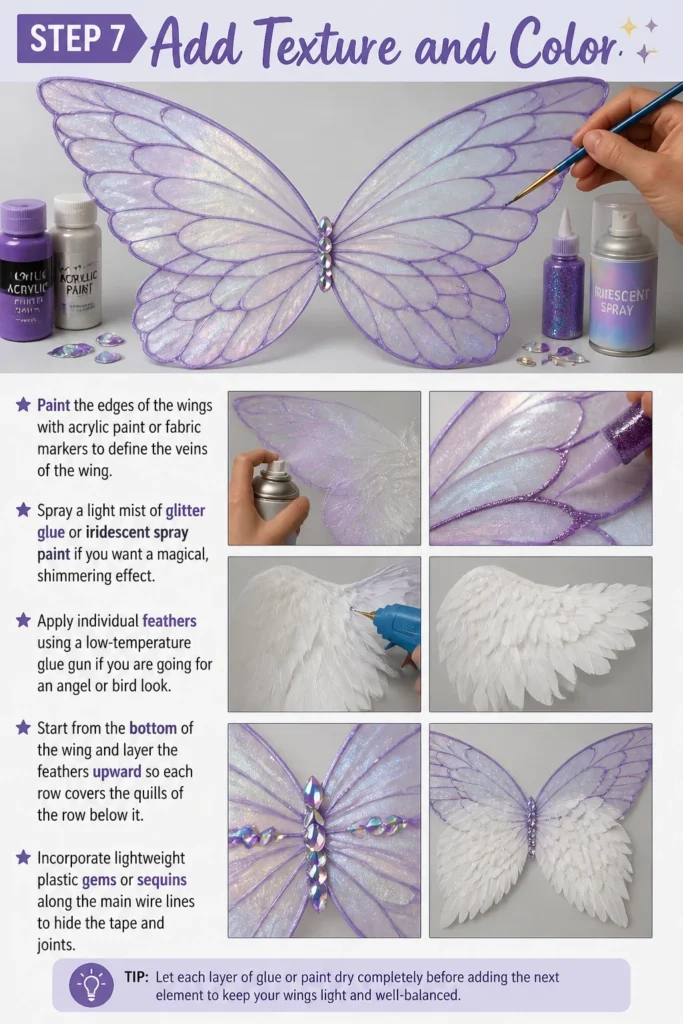
Spray a light mist of glitter glue or iridescent spray paint if you want a magical, shimmering effect.
Apply individual feathers using a low-temperature glue gun if you are going for an angel or bird look.
Start from the bottom of the wing and layer the feathers upward so each row covers the quills of the row below it.
Incorporate lightweight plastic gems or sequins along the main wire lines to hide the tape and joints.
Step 8: Final Adjustments and Weathering
Check the symmetry of your wings by standing in front of a full-length mirror with the costume on.
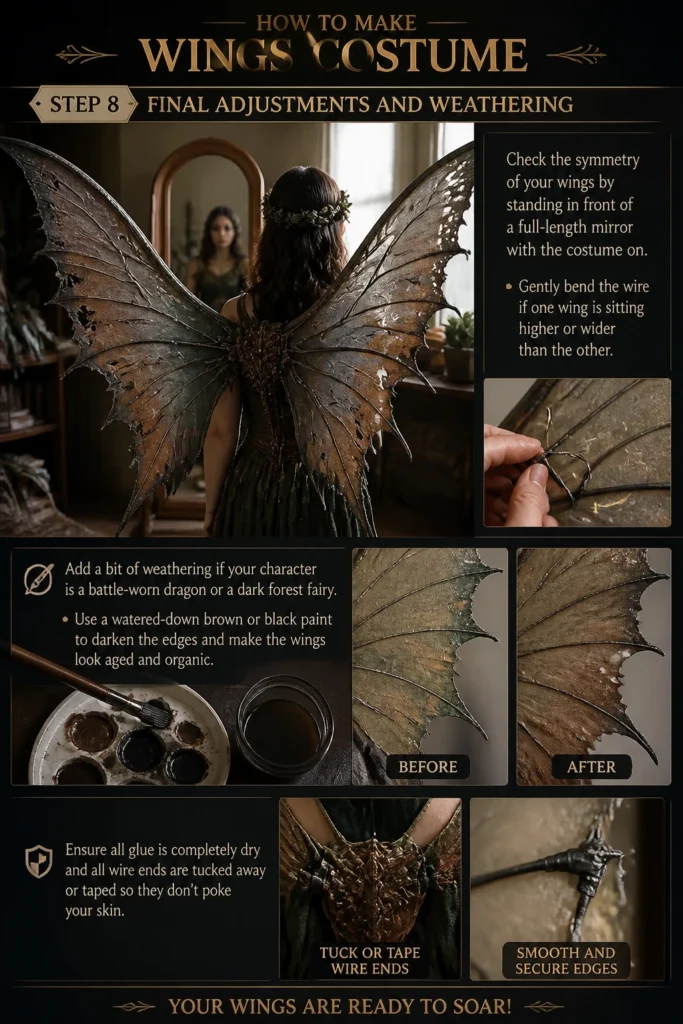
Gently bend the wire if one wing is sitting higher or wider than the other.
Add a bit of “weathering” if your character is a battle-worn dragon or a dark forest fairy.
Use a watered-down brown or black paint to darken the edges and make the wings look aged and organic.
Ensure all glue is completely dry and all wire ends are tucked away or taped so they don’t poke your skin.
Common Mistakes to Avoid
Using Weak Wire
Many beginners try to use coat hangers or thin craft wire because they are easy to find. These materials lack the structural integrity to hold up fabric once it is stretched tight. The wings will likely sag or collapse under their own weight within an hour of wearing them.
Ignoring Harness Comfort
People often focus so much on the look of the wings that they forget they have to wear them for hours. Thin elastic straps can dig into your shoulders and cause significant pain. Always use wide elastic and add padding to the backplate to ensure you can enjoy your event without discomfort.
Overloading with Decorations
It is tempting to add thousands of feathers or heavy glass beads to your wings. However, every gram adds up, and heavy wings will pull backward, making the harness rise up against your throat. Keep decorations lightweight by using foam, plastic, or natural feathers rather than heavy metals or glass.
Forgetting Doorway Clearance
Building massive wings is exciting until you realize you cannot fit through a standard door. If you plan to wear these at a crowded convention or a house party, consider making the wings foldable. You can create a hinge at the center joint to allow the wings to tuck behind you when navigating tight spaces.
Troubleshooting
The Fabric is Sagging
If your fabric isn’t tight, it will look messy and unprofessional. You can often fix this by applying a small amount of heat with a hair dryer if you used synthetic materials, which can cause them to shrink slightly. If that fails, use a needle and thread to “cinch” the fabric tighter around the wire frame at the back.
The Wings Keep Tilting Backward
This usually happens because the harness is too loose or the center of gravity is too high. Try crossing the elastic straps in an “X” shape across your chest to provide more stability. You can also add a waist strap to the harness to anchor the bottom of the backplate against your lower back.
The Wire is Poking Through the Fabric
Sharp wire ends can easily tear through delicate stockings or silk. Always sand down the ends of your wire with a metal file or cover them with a thick layer of hot glue or duct tape before applying the fabric. If a tear has already started, use a small dab of clear nail polish to stop the run in the fabric.
Key Takeaways
- Always start with a full-scale paper template to ensure symmetry and proper sizing.
- Use 12-16 gauge galvanized steel wire for a frame that is both flexible and strong.
- A sturdy, padded harness is the secret to wearing a costume comfortably for long periods.
- Stretch your fabric membrane as tight as possible to achieve a clean, professional appearance.
- Layer decorations from the bottom up to hide structural elements and create natural depth.
- Test your mobility and doorway clearance before the day of your event.
Frequently Asked Questions
What is the best fabric for fairy wings?
Nylon stockings or tights are the most popular choice because they stretch perfectly over wire frames without wrinkling. If you want a more ethereal look, iridescent organza or cellophane can be used, though they require more careful gluing. Cellophane can also be heat-shrunk with a heat gun to create a very realistic, crinkled insect wing texture.
How do I make the wings stay upright?
The key to upright wings is the “backplate” of the harness. This plate needs to be flat and rigid against your shoulder blades. If the backplate is too small or flexible, the weight of the wings will pull it away from your body, causing the wings to flop downward. Make the backplate at least five inches wide for the best support.
Can I make wings without a wire frame?
Yes, you can make wings out of stiffened felt, cardboard, or EVA foam. These materials are great for “static” wings that don’t need to be translucent. However, they tend to be heavier and less aerodynamic than wire-and-fabric wings, so they require a very robust harness system to stay in place.
How do I transport large wings to a convention?
If your wings don’t fold, the best way to transport them is to lay them flat in the trunk of a car on top of a soft blanket. Avoid putting anything on top of them, as the wire can bend out of shape easily. For air travel, you may need to design the wings so they can be unscrewed from the harness and packed into a large flat box or garment bag.
Our Top Recommended Finds
- Galvanized Steel Wire (14 Gauge): This is the perfect middle ground for strength and ease of use for most wing projects.
- Industrial Strength Elastic: Look for 1-inch or 2-inch wide elastic to create a harness that won’t roll or pinch your skin.
- Iridescent Cellophane Film: This material creates a stunning “oil slick” effect when layered over wire frames and heated slightly.
Spreading Your Creative Spirit
Building your own wing costume is a rewarding project that combines engineering with artistic flair.
Once you master the basic wire frame technique, you can experiment with different shapes and materials.
You might want to explore making “articulated” wings that can open and close using a pulley system next.
Another great follow-up project is learning how to work with EVA foam to create armored wing covers.
Take these steps and start bending your wire today to bring your fantasy character to life.