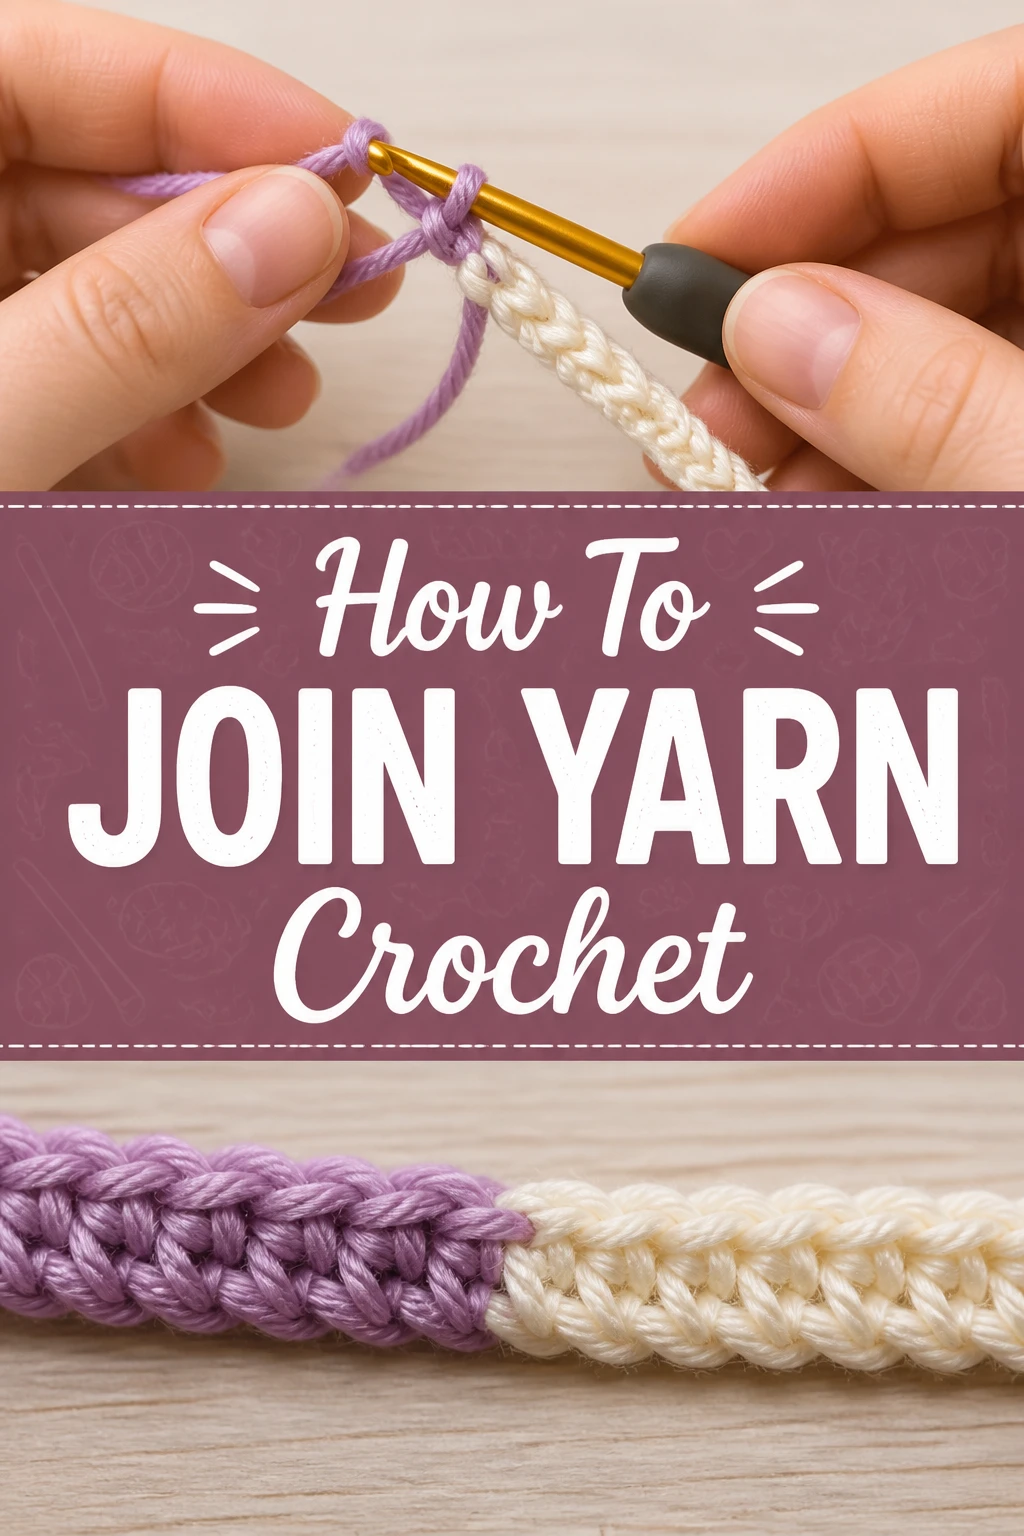
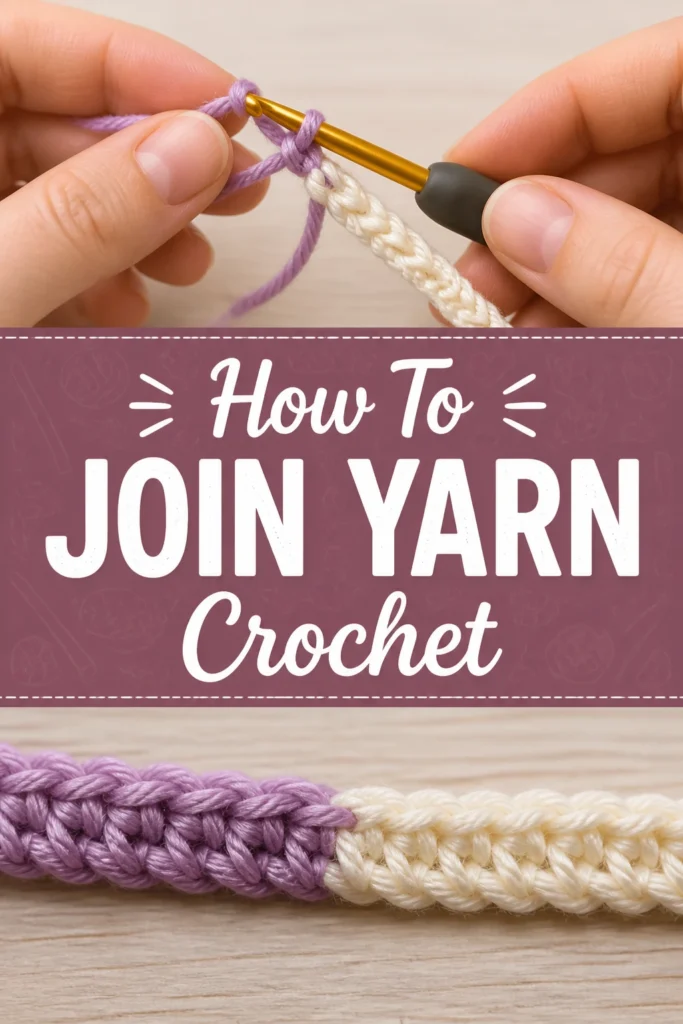
🧶 How To Join Yarn Crochet
There’s a moment in every crochet project when your yarn starts to dwindle, or you need to switch colors.
That feeling of seeing the end of a skein can be daunting, but joining new yarn doesn’t have to interrupt your flow.
Having tackled countless blankets, scarves, and amigurumi, I’ve learned the secrets to seamless, secure joins that make your finished piece look truly professional.
Quick Overview
This guide will walk you through several practical methods for joining yarn, ensuring your crochet projects are strong and beautiful.
You’ll learn how to seamlessly add new yarn, whether you’re running out of a color or introducing a new one.
- Time needed: 10-20 minutes (per method, initial practice)
- Difficulty: Beginner to Intermediate
- What you’ll need: Yarn, crochet hook, scissors, tapestry needle
Step-by-Step Instructions
Step 1: Understand Your Yarn and Project Needs
Before you even think about joining, take a moment to consider your yarn type and project.
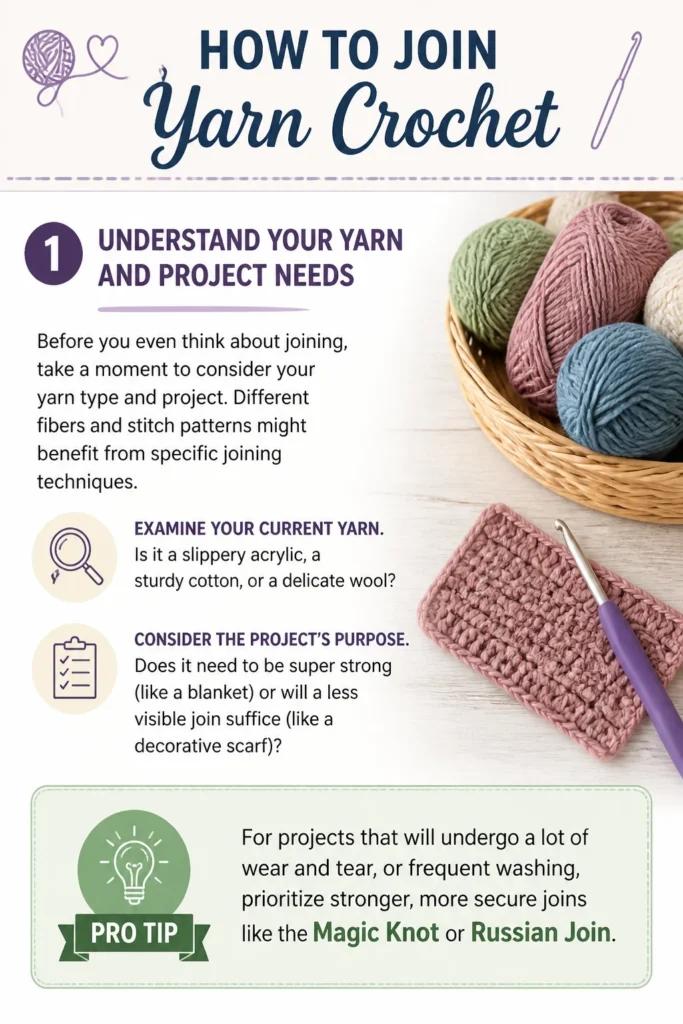
Different fibers and stitch patterns might benefit from specific joining techniques.
Examine your current yarn. Is it a slippery acrylic, a sturdy cotton, or a delicate wool?
Consider the project’s purpose. Does it need to be super strong (like a blanket) or will a less visible join suffice (like a decorative scarf)?
Pro Tip: For projects that will undergo a lot of wear and tear, or frequent washing, prioritize stronger, more secure joins like the Magic Knot or Russian Join.
Step 2: The Direct Slip Knot Join (Mid-Row)
This is one of the most common and straightforward ways to add new yarn, especially when you run out mid-row.
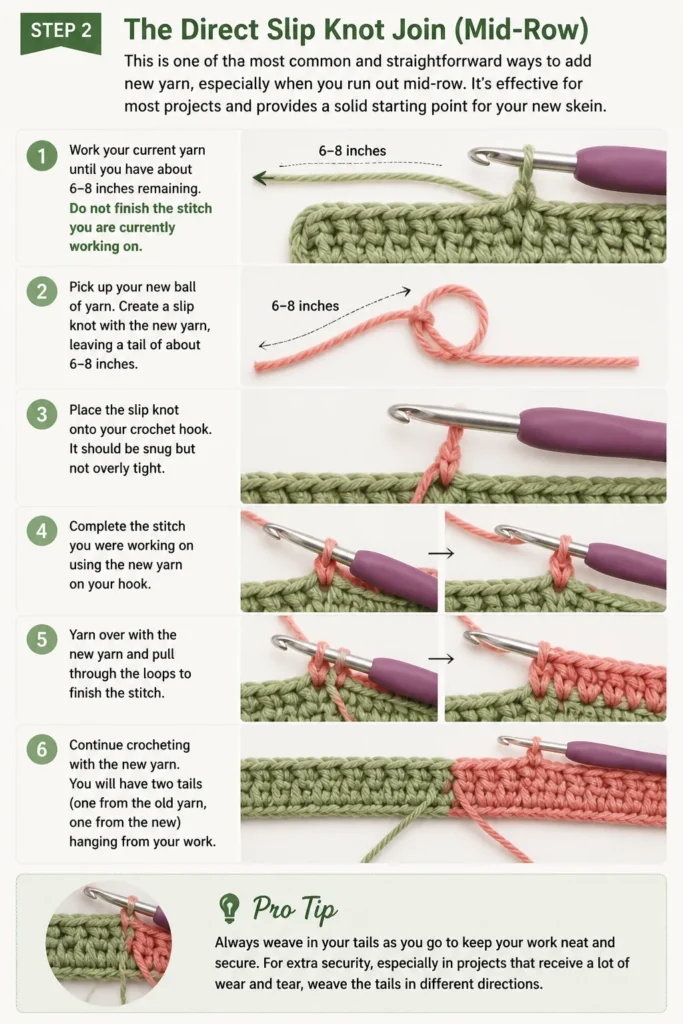
It’s effective for most projects and provides a solid starting point for your new skein.
Work your current yarn until you have about 6-8 inches remaining. Do not finish the stitch you are currently working on.
Pick up your new ball of yarn. Create a slip knot with the new yarn, leaving a tail of about 6-8 inches.
Place the slip knot onto your crochet hook. It should be snug but not overly tight.
Complete the stitch you were working on using the new yarn on your hook. Yarn over with the new yarn and pull through the loops to finish the stitch.
Continue crocheting with the new yarn. You will have two tails (one from the old yarn, one from the new) hanging from your work.
Pro Tip: Always leave generous tails (6-8 inches) for weaving in. Shorter tails are much harder to secure properly and are more prone to unraveling.
Step 3: Crocheting Over Ends (Concealed Join)
This method helps to hide the yarn tails as you go, reducing the amount of weaving you need to do at the end.
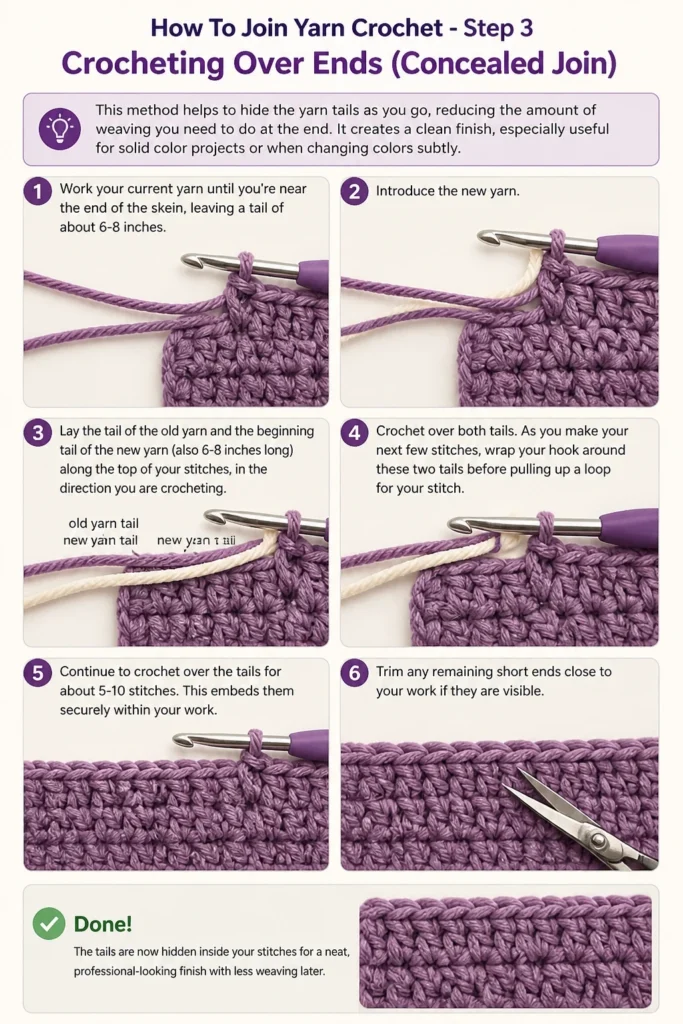
It creates a clean finish, especially useful for solid color projects or when changing colors subtly.
Work your current yarn until you’re near the end of the skein, leaving a tail of about 6-8 inches.
Introduce the new yarn. Lay the tail of the old yarn and the beginning tail of the new yarn (also 6-8 inches long) along the top of your stitches, in the direction you are crocheting.
Crochet over both tails. As you make your next few stitches, wrap your hook around these two tails before pulling up a loop for your stitch.
Continue to crochet over the tails for about 5-10 stitches. This embeds them securely within your work.
Trim any remaining short ends close to your work if they are fully secured. If not, weave them in with a tapestry needle.
Pro Tip: For best results, ensure your stitches are consistent when crocheting over tails. Too loose, and the tails might show; too tight, and your fabric might pucker.
Step 4: The Magic Knot (Strong and Nearly Invisible)
The Magic Knot is a fantastic technique for creating an incredibly strong and almost invisible join, especially with non-slippery yarns.
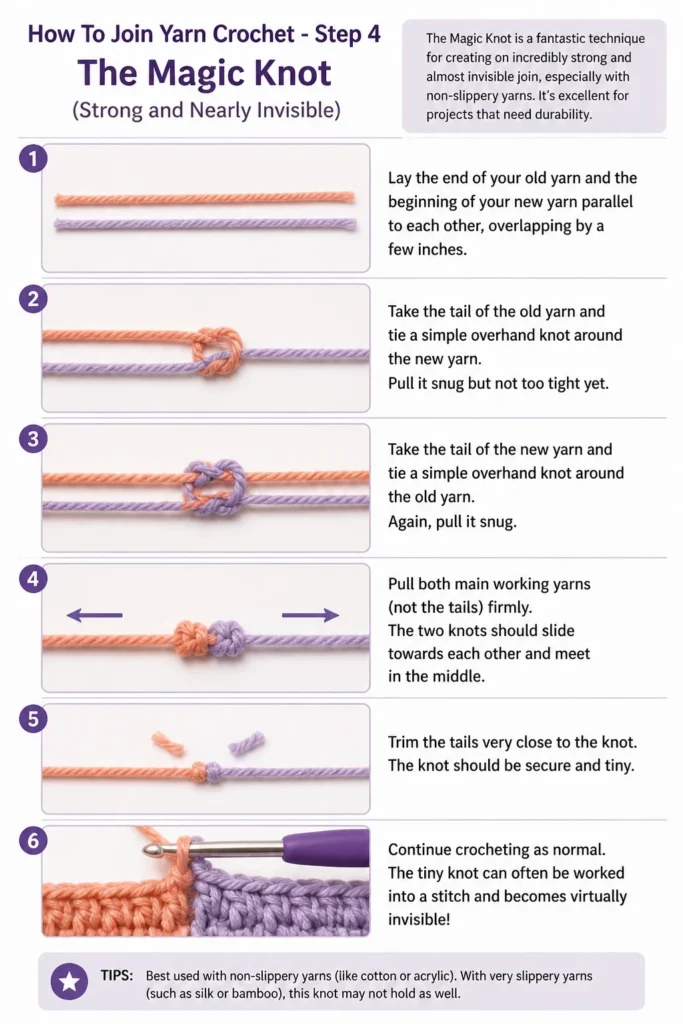
It’s excellent for projects that need durability.
Lay the end of your old yarn and the beginning of your new yarn parallel to each other, overlapping by a few inches.
Take the tail of the old yarn and tie a simple overhand knot around the new yarn. Pull it snug but not too tight yet.
Take the tail of the new yarn and tie a simple overhand knot around the old yarn. Again, pull it snug.
Pull both main working yarns (not the tails) firmly. The two knots should slide towards each other and meet in the middle.
Trim the tails very close to the knot. The knot should be secure and tiny.
Continue crocheting as normal. The tiny knot can often be worked into a stitch or tucked away.
Pro Tip: Practice the Magic Knot a few times with scrap yarn before using it on your project. Ensure both knots are tight against each other for maximum security and minimal bulk.
Step 5: Weaving in Loose Ends (The Essential Finish)
No matter which joining method you use, weaving in your loose ends is crucial for a tidy and durable finish.
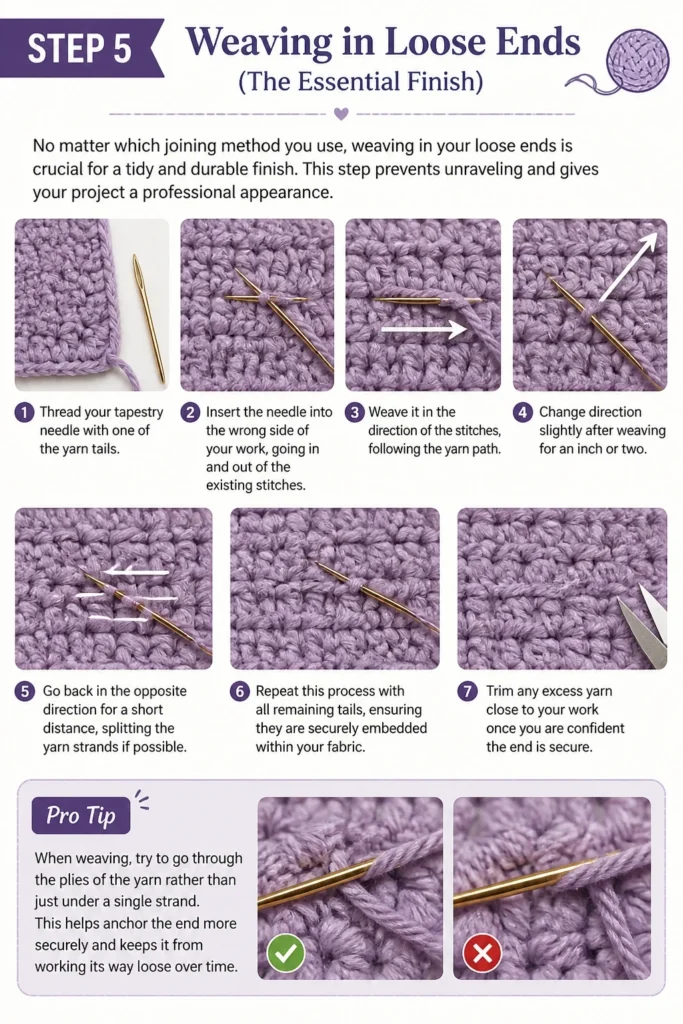
This step prevents unraveling and gives your project a professional appearance.
Thread your tapestry needle with one of the yarn tails.
Insert the needle into the wrong side of your work, going in and out of the existing stitches. Weave it in the direction of the stitches, following the yarn path.
Change direction slightly after weaving for an inch or two. Go back in the opposite direction for a short distance, splitting the yarn strands if possible.
Repeat this process with all remaining tails, ensuring they are securely embedded within your fabric.
Trim any excess yarn close to your work once you are confident the end is secure.
Pro Tip: When weaving, try to go through the plies of the existing yarn rather than just under loops. This “splits” the yarn, creating friction that holds the tail more securely in place.
Common Mistakes to Avoid
Leaving Insufficient Tails
Many beginners trim their yarn tails too short, thinking it will make them less visible. This is a common pitfall. Short tails are incredibly difficult to weave in securely, leading to unraveling and a messy finish over time. Always aim for at least 6-8 inches for each tail, giving you plenty of room to work with.
Ignoring Yarn Type
Not all yarns behave the same way. A Magic Knot might be perfect for wool, but could easily slip with a very smooth, slick acrylic or silk blend. Using a method like crocheting over ends or a Russian Join might be more suitable for slippery fibers. Always consider your yarn’s properties when choosing a joining technique.
Failing to Secure Ends Properly
Simply tucking a tail under a few stitches isn’t enough to prevent unraveling. The key to a secure join, especially when weaving in ends, is to change direction at least once and ideally split the yarn strands. This creates friction and locks the tail into the fabric, making it much harder to pull out.
Creating Bulky Joins
While security is important, excessive bulk at the join can be unsightly and uncomfortable in the finished piece. Avoid tying multiple large knots or overlapping too much yarn in one spot. Techniques like the Magic Knot or crocheting over ends are designed to minimize bulk while maintaining strength.
Troubleshooting
My Join is Visible and Bulky
If your join stands out too much, it might be due to a method that creates a larger knot, or perhaps not weaving in ends effectively. Try using the Magic Knot for a smaller profile, or practice crocheting over your ends more precisely. Ensure you’re not pulling too tight or leaving too much excess yarn at the knot itself.
The Yarn Keeps Coming Undone
This is often a sign of insufficient tail length or improper weaving. Make sure you’re leaving at least 6-8 inches for each tail. When weaving, thread your tapestry needle through the existing stitches, changing direction at least once, and if possible, splitting the plies of the yarn. This creates a stronger hold that resists unraveling.
My Fabric Looks Uneven at the Join
An uneven join can happen if you change tension when introducing new yarn or if the join itself is pulling the fabric. Ensure your tension remains consistent when starting with the new yarn. If using a knot, try to place it strategically where it can be incorporated into a stitch without pulling. Crocheting over ends often helps maintain an even fabric.
Key Takeaways
- Always leave generous yarn tails (6-8 inches) for secure weaving and easier handling.
- Choose your joining method based on your yarn type and the project’s intended use and durability needs.
- The Direct Slip Knot is quick for mid-row changes, while Crocheting Over Ends helps hide tails as you work.
- The Magic Knot offers an incredibly strong and nearly invisible join for non-slippery yarns.
- Properly weaving in all loose ends is crucial for a professional, durable, and unravel-proof finish.
- Practice different joining techniques with scrap yarn to find what works best for you and your materials.
Frequently Asked Questions
Can I join yarn at any point in my project?
Yes, you can join yarn at any point. However, it’s often cleanest and least noticeable to join at the end of a row or round. If you must join mid-row, techniques like the Direct Slip Knot or Crocheting Over Ends are very effective and can be made quite discreet.
Is the Magic Knot suitable for all types of yarn?
The Magic Knot works wonderfully with most natural fibers like wool, cotton, and blends. It can be less secure with very slippery yarns such as silk, rayon, or highly mercerized cotton, where the knots might loosen. For these, a Russian Join or crocheting over ends might be a better choice.
How much yarn should I leave before joining a new skein?
It’s best to leave at least 6-8 inches of your old yarn tail before introducing the new skein. This generous length provides ample yarn for weaving in securely and prevents the end from pulling out of your work.
What’s the best way to hide a color change?
For a clean color change, it’s often best to switch colors on the last pull-through of the stitch before the new color is desired. This means you complete most of the stitch with the old color, then use the new color to finish the final yarn over and pull through. Then, weave in both tails neatly.
Our Top Recommended Finds
- Ergonomic Crochet Hooks: Reduce hand fatigue, making long crafting sessions more enjoyable and precise.
- Blunt-Tipped Tapestry Needles: Essential for weaving in ends without splitting your yarn too much or snagging your work.
- Yarn Ball Winder: Helps organize your yarn, preventing tangles and making it easier to manage multiple skeins during joins.
Embrace the Art of Seamless Transitions
You now have the tools and knowledge to confidently join yarn in your crochet projects, transforming potential frustrations into opportunities for creativity.
Each method offers unique benefits, allowing you to choose the perfect technique for every situation.
Don’t let a dwindling skein or a desire for a new color stop your progress; practice these joins today and watch your crochet creations flourish beautifully.