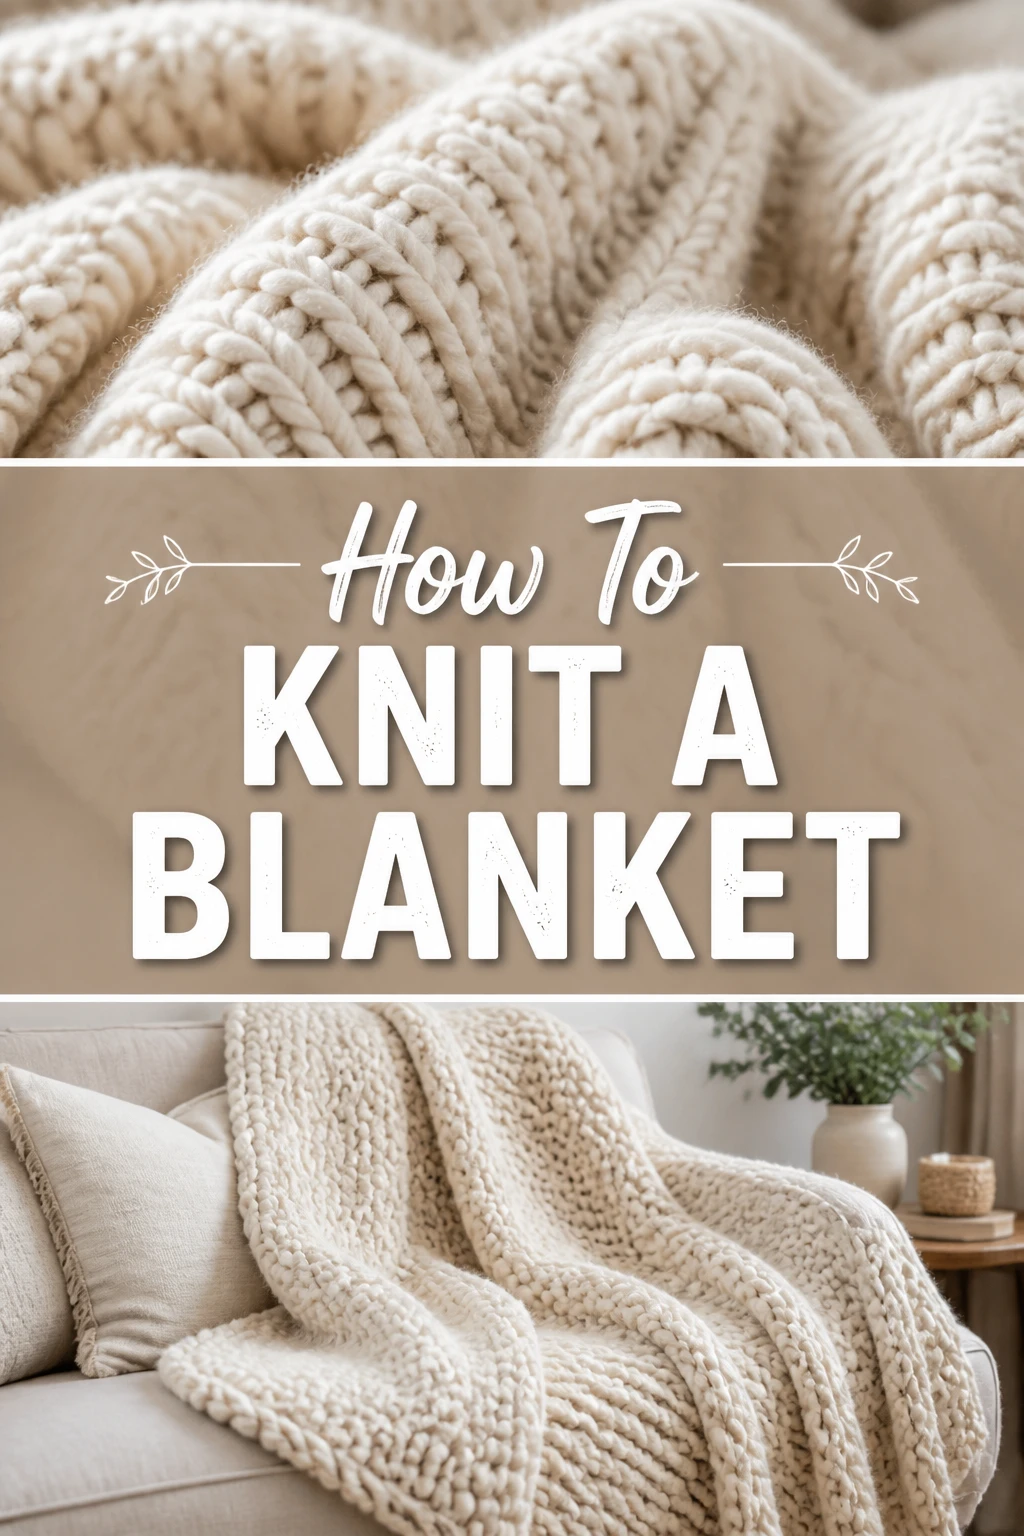
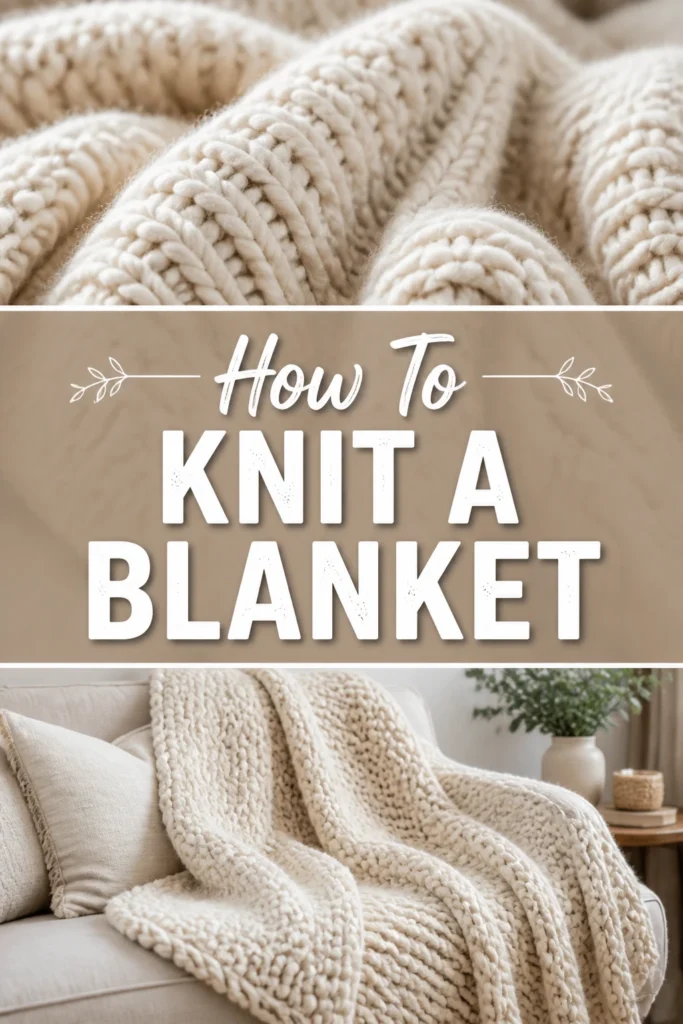
🧶 How To Knit A Blanket
There’s a unique joy in creating something warm and comforting with your own hands. Imagine snuggling under a blanket you personally knitted, stitch by careful stitch. I remember the immense satisfaction when I finished my very first blanket, a simple garter stitch creation that still brings warmth to my home. This guide will walk you through every practical step, helping you achieve that same rewarding feeling.
Quick Overview
Knitting a blanket is a wonderfully fulfilling project that yields a beautiful, custom piece for your home or as a heartfelt gift. You’ll learn the fundamental skills needed to create a substantial fabric.
- Time needed: Several weeks to a few months, depending on blanket size, your knitting speed, and dedication.
- Difficulty: Beginner (assuming basic knit stitch knowledge, which we’ll cover).
- What you’ll need: Yarn, appropriately sized knitting needles, scissors, and a tapestry needle.
Step-by-Step Instructions
Step 1: Gather Your Essential Supplies
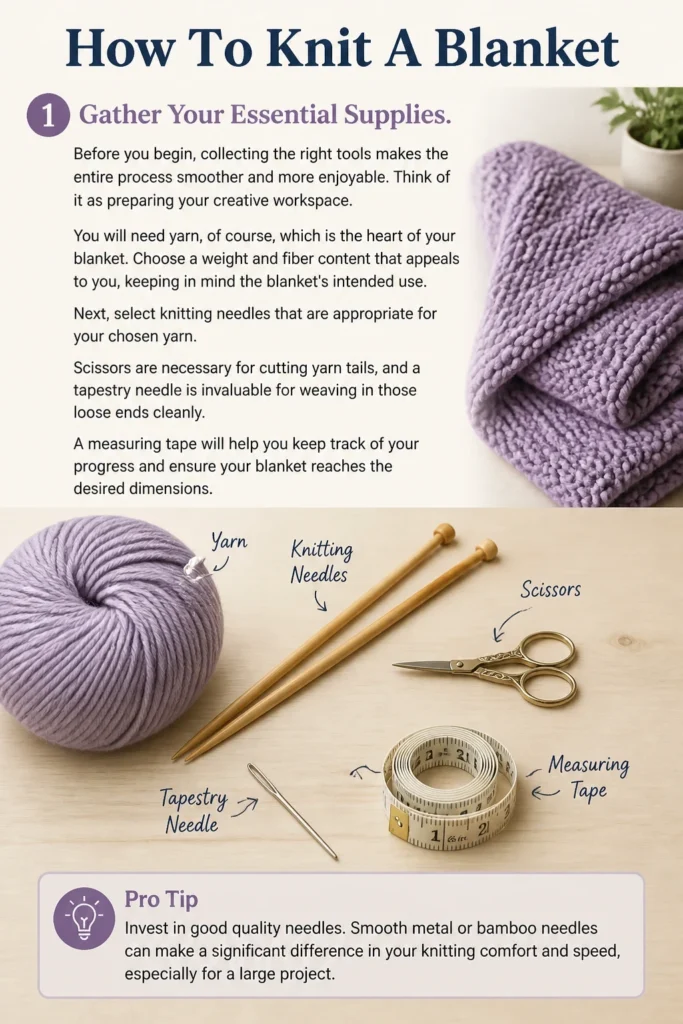
Before you begin, collecting the right tools makes the entire process smoother and more enjoyable. Think of it as preparing your creative workspace.
You will need yarn, of course, which is the heart of your blanket. Choose a weight and fiber content that appeals to you, keeping in mind the blanket’s intended use. Next, select knitting needles that are appropriate for your chosen yarn.
Scissors are necessary for cutting yarn tails, and a tapestry needle is invaluable for weaving in those loose ends cleanly. A measuring tape will help you keep track of your progress and ensure your blanket reaches the desired dimensions.
Pro Tip: Invest in good quality needles. Smooth metal or bamboo needles can make a significant difference in your knitting comfort and speed, especially for a large project.
Step 2: Choose Your Yarn and Needles Wisely
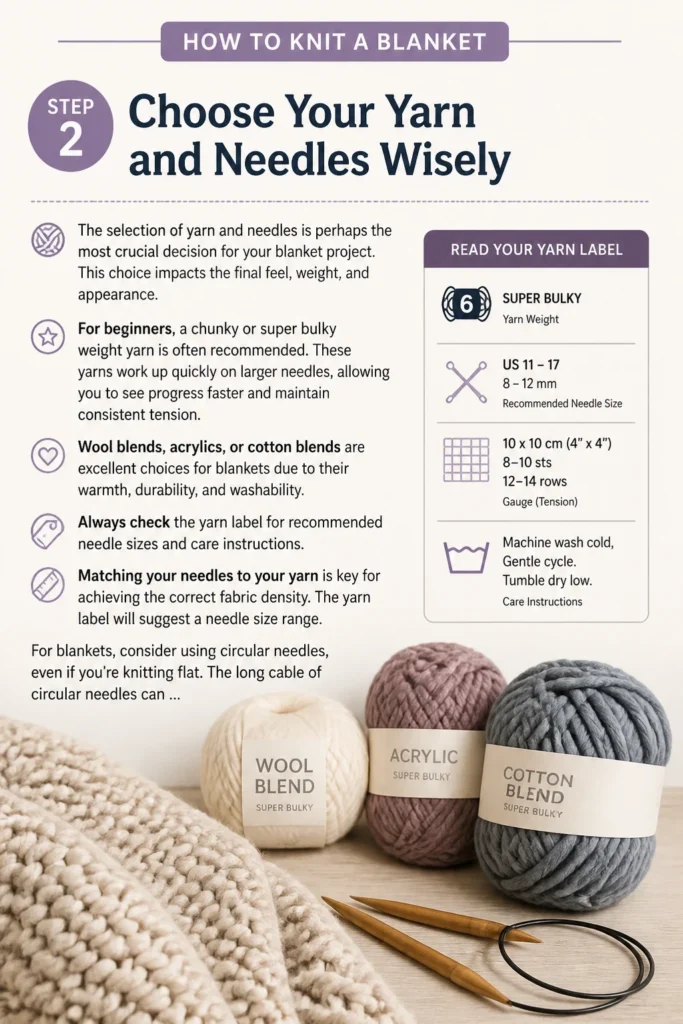
The selection of yarn and needles is perhaps the most crucial decision for your blanket project. This choice impacts the final feel, weight, and appearance.
For beginners, a chunky or super bulky weight yarn is often recommended. These yarns work up quickly on larger needles, allowing you to see progress faster and maintain consistent tension. Wool blends, acrylics, or cotton blends are excellent choices for blankets due to their warmth, durability, and washability. Always check the yarn label for recommended needle sizes and care instructions.
Matching your needles to your yarn is key for achieving the correct fabric density. The yarn label will suggest a needle size range. For blankets, consider using circular needles, even if you’re knitting flat. The long cable of circular needles can comfortably hold the vast number of stitches required for a blanket, preventing strain on your wrists and keeping stitches secure.
Step 3: Calculate Your Gauge Swatch
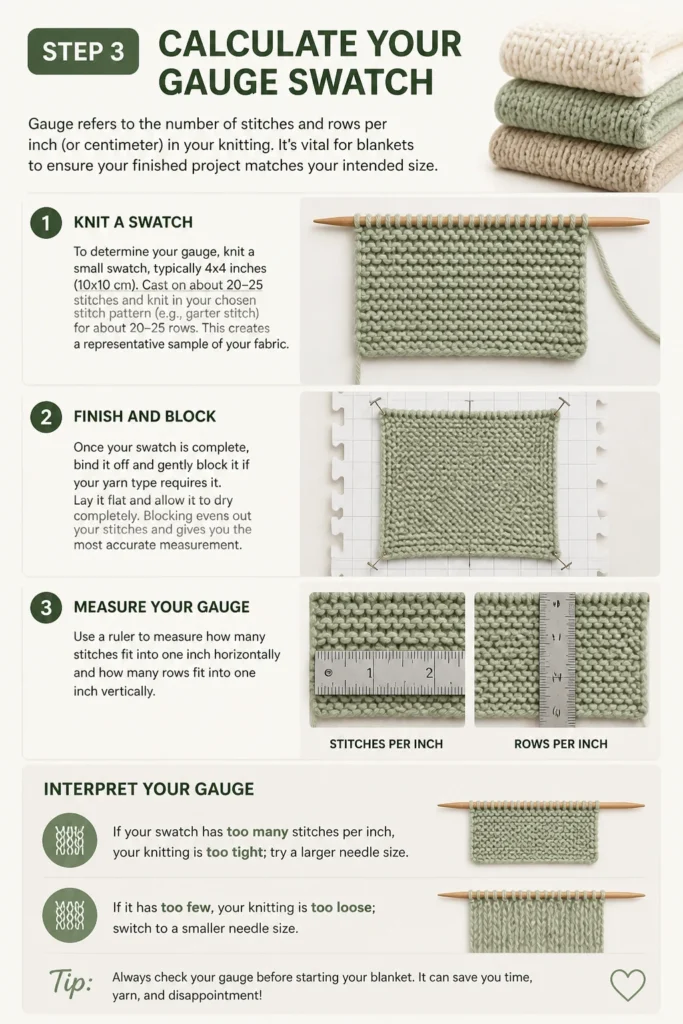
Gauge refers to the number of stitches and rows per inch (or centimeter) in your knitting. It’s vital for blankets to ensure your finished project matches your intended size.
To determine your gauge, knit a small swatch, typically 4×4 inches (10×10 cm). Cast on about 20-25 stitches and knit in your chosen stitch pattern (e.g., garter stitch) for about 20-25 rows. This creates a representative sample of your fabric.
Once your swatch is complete, bind it off and gently block it if your yarn type requires it. Lay it flat and use a ruler to measure how many stitches fit into one inch horizontally and how many rows fit into one inch vertically. If your swatch has too many stitches per inch, your knitting is too tight; try a larger needle size. If it has too few, your knitting is too loose; switch to smaller needles. Adjust your needle size until your gauge matches the yarn label’s recommendation or your desired fabric density.
Step 4: Cast On Your Stitches
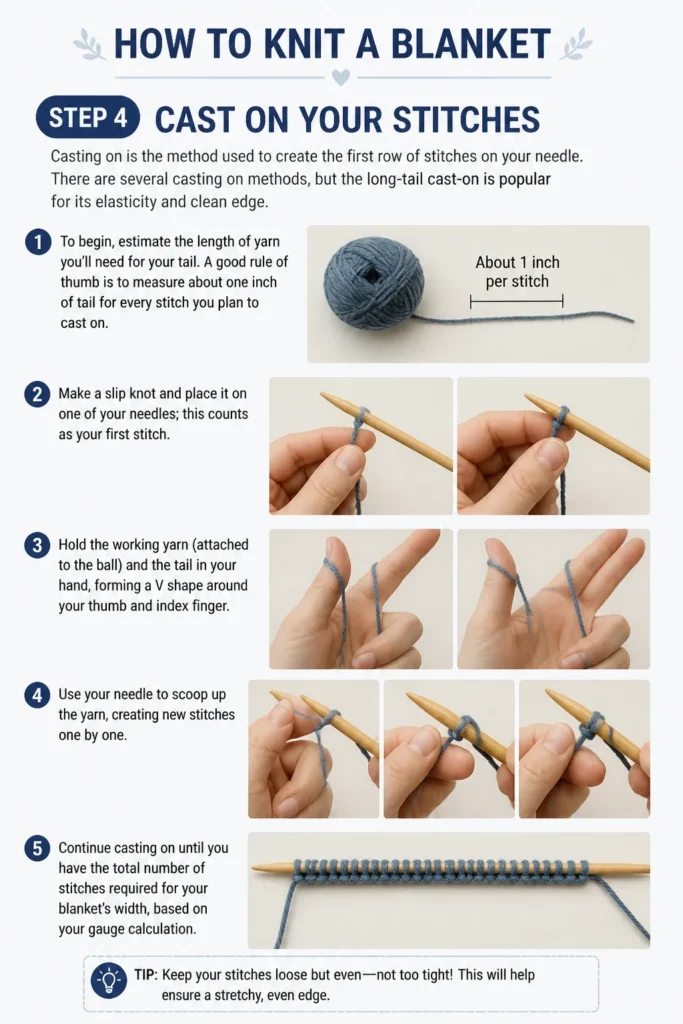
Casting on is the method used to create the first row of stitches on your needle. There are several casting on methods, but the long-tail cast-on is popular for its elasticity and clean edge.
To begin, estimate the length of yarn you’ll need for your tail. A good rule of thumb is to measure about one inch of tail for every stitch you plan to cast on. Make a slip knot and place it on one of your needles; this counts as your first stitch.
Hold the working yarn (attached to the ball) and the tail in your hand, forming a “V” shape around your thumb and index finger. Use your needle to scoop up the yarn, creating new stitches one by one. Continue casting on until you have the total number of stitches required for your blanket’s width, based on your gauge calculation.
Step 5: Knit the Garter Stitch Pattern
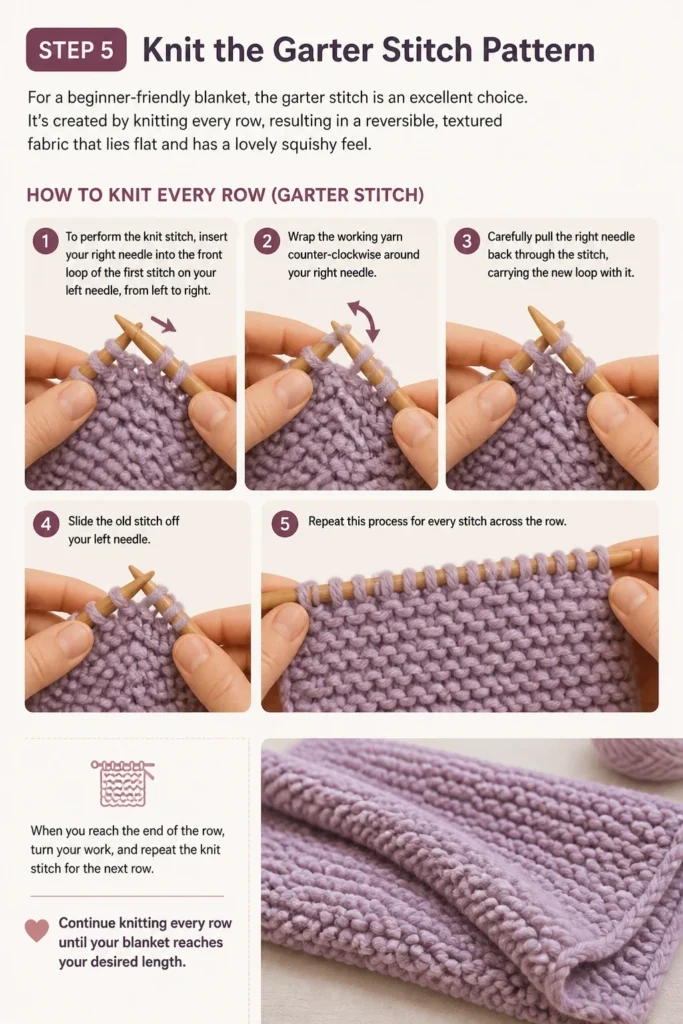
For a beginner-friendly blanket, the garter stitch is an excellent choice. It’s created by knitting every row, resulting in a reversible, textured fabric that lies flat and has a lovely squishy feel.
To perform the knit stitch, insert your right needle into the front loop of the first stitch on your left needle, from left to right. Wrap the working yarn counter-clockwise around your right needle. Carefully pull the right needle back through the stitch, carrying the new loop with it.
Slide the old stitch off your left needle. Repeat this process for every stitch across the row. When you reach the end of the row, turn your work, and repeat the knit stitch for the next row. Continue knitting every row until your blanket reaches your desired length.
Step 6: Join New Yarn Seamlessly
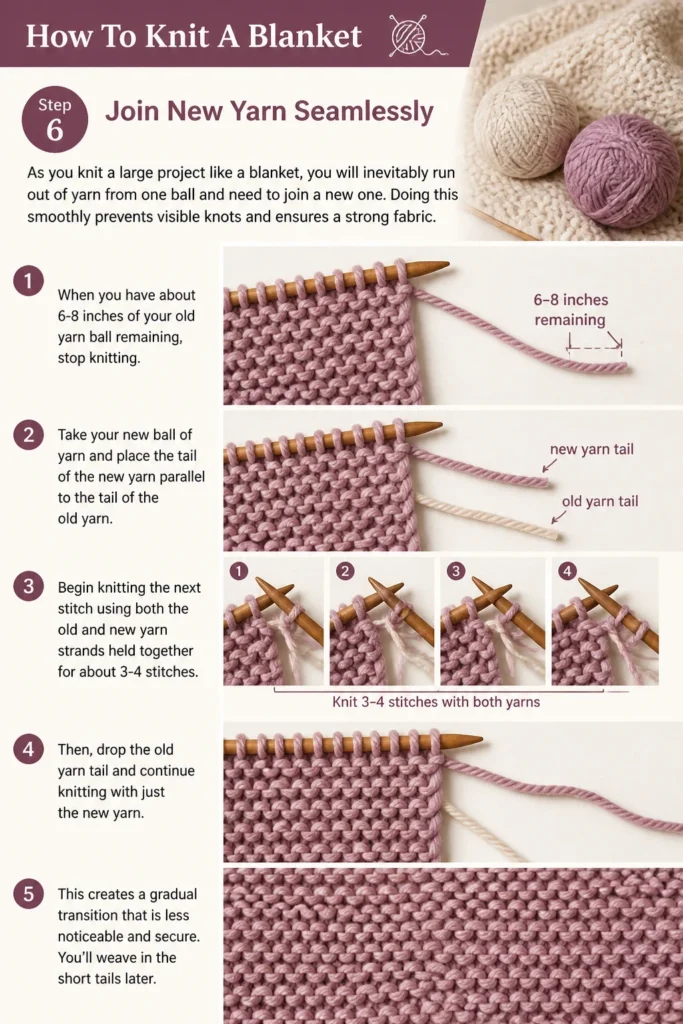
As you knit a large project like a blanket, you will inevitably run out of yarn from one ball and need to join a new one. Doing this smoothly prevents visible knots and ensures a strong fabric.
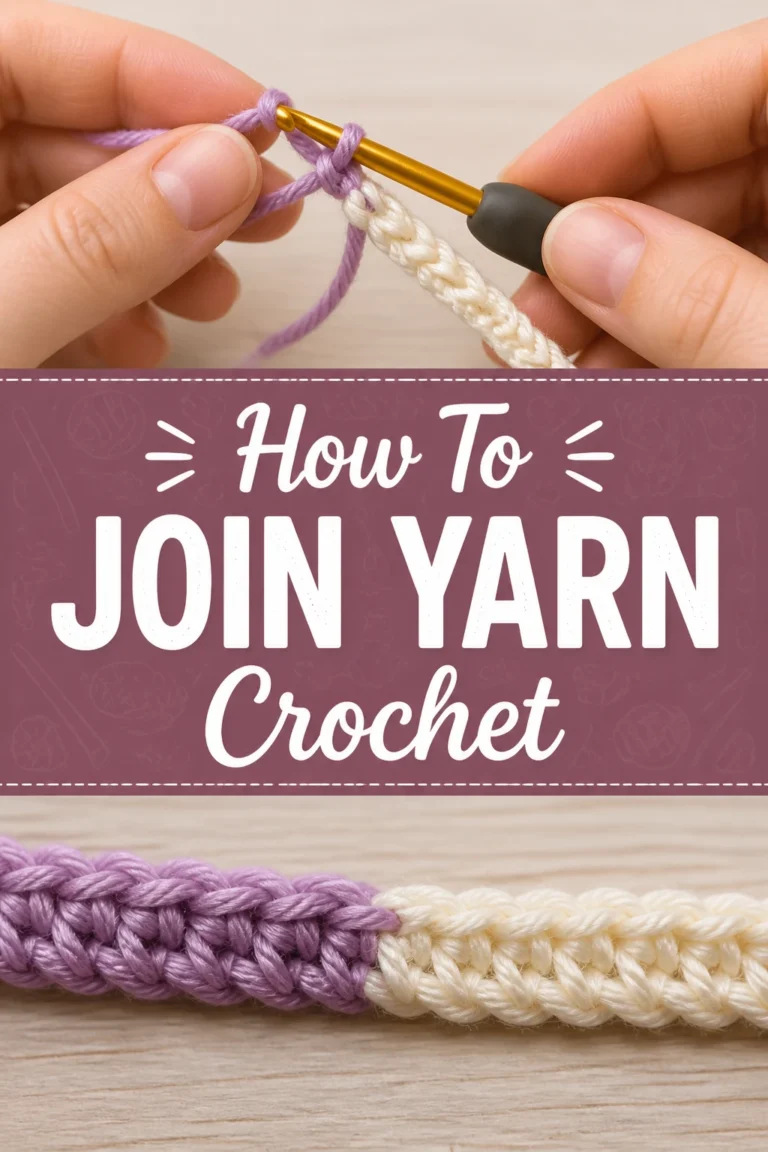
A common method is to join yarn at the beginning or end of a row. When you have about 6-8 inches of your old yarn ball remaining, stop knitting. Take your new ball of yarn and place the tail of the new yarn parallel to the tail of the old yarn.
Begin knitting the next stitch using both the old and new yarn strands held together for about 3-4 stitches. Then, drop the old yarn tail and continue knitting with just the new yarn. This creates a gradual transition that is less noticeable and secure. You’ll weave in the short tails later.
Step 7: Bind Off Your Stitches
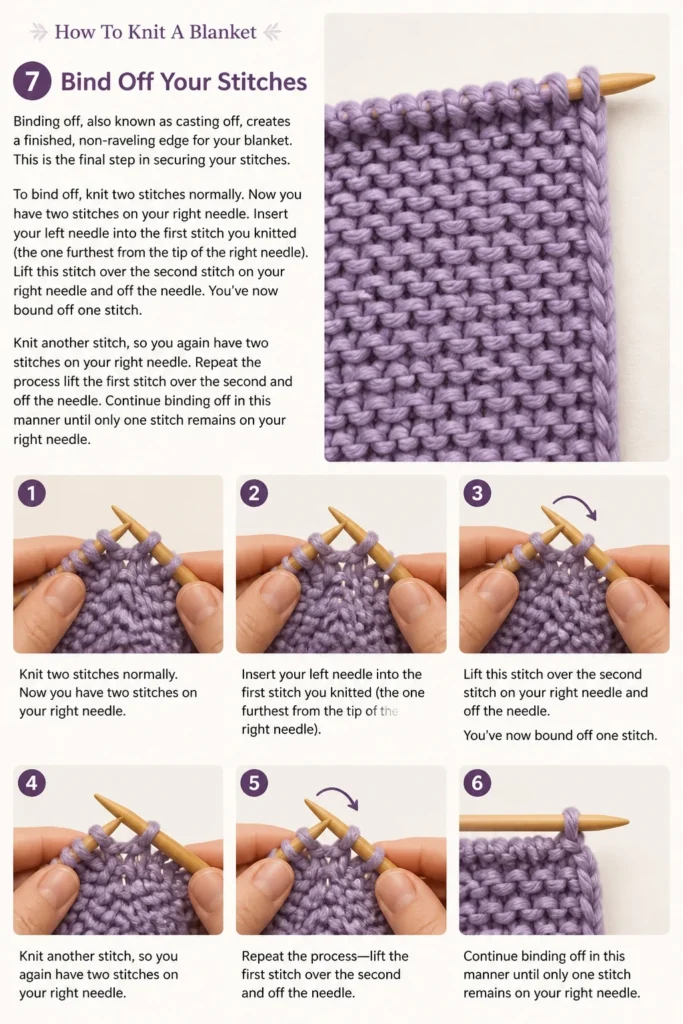
Binding off, also known as casting off, creates a finished, non-raveling edge for your blanket. This is the final step in securing your stitches.
To bind off, knit two stitches normally. Now you have two stitches on your right needle. Insert your left needle into the first stitch you knitted (the one furthest from the tip of the right needle). Lift this stitch over the second stitch on your right needle and off the needle. You’ve now bound off one stitch.
Knit another stitch, so you again have two stitches on your right needle. Repeat the process: lift the first stitch over the second and off the needle. Continue binding off in this manner until only one stitch remains on your right needle.
Step 8: Weave In Ends and Finish
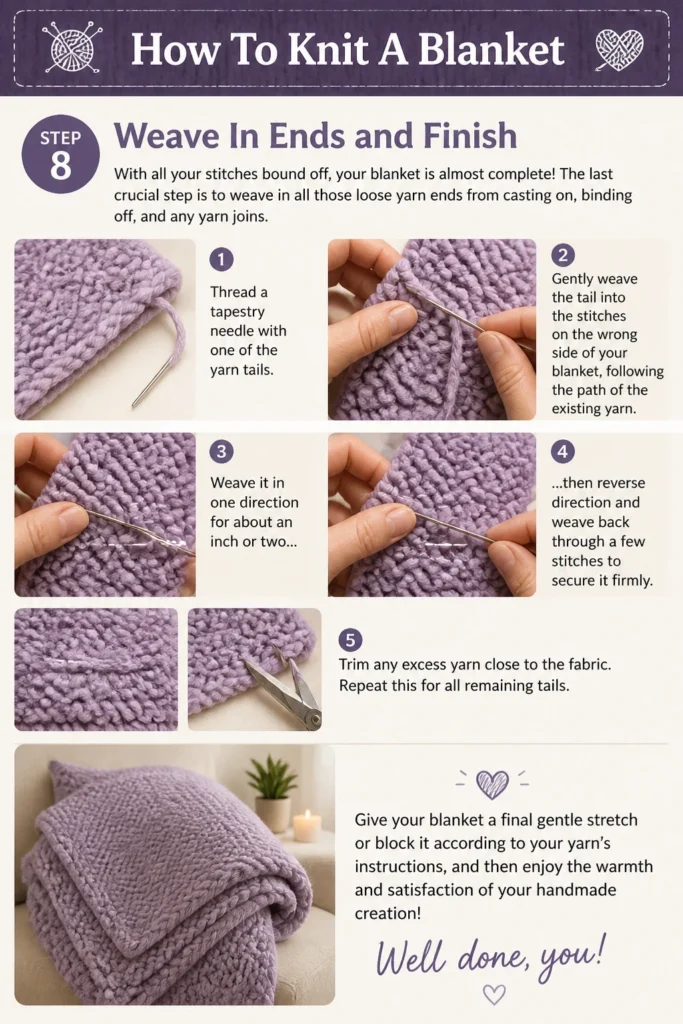
With all your stitches bound off, your blanket is almost complete! The last crucial step is to weave in all those loose yarn ends from casting on, binding off, and any yarn joins.
Thread a tapestry needle with one of the yarn tails. Gently weave the tail into the stitches on the wrong side of your blanket, following the path of the existing yarn. Weave it in one direction for about an inch or two, then reverse direction and weave back through a few stitches to secure it firmly.
Trim any excess yarn close to the fabric. Repeat this for all remaining tails. Give your blanket a final gentle stretch or block it according to your yarn’s instructions, and then enjoy the warmth and satisfaction of your handmade creation!
Common Mistakes to Avoid
Ignoring Gauge Swatches
Skipping the gauge swatch is a common shortcut many knitters regret, especially with blankets. Without checking your gauge, your blanket might end up significantly larger or smaller than intended. This can lead to frustration and a project that doesn’t fit your vision. Always take the time to knit and measure a swatch; it saves time and disappointment in the long run.
Uneven Tension
Inconsistent tension is a frequent issue for new knitters, resulting in a fabric that looks lumpy or has varying densities. Some stitches might be too tight, others too loose. Practice is key to developing even tension, but consciously trying to maintain a consistent grip on your yarn and needles helps immensely. Don’t grip too tightly, and try to relax your hands.
Dropping Stitches Unnoticed
A dropped stitch can unravel down several rows, creating an unsightly hole in your fabric. New knitters often don’t notice a dropped stitch until much later. Regularly check your work every few rows for the correct number of stitches and any ladders (vertical lines where a stitch has dropped). Catching a dropped stitch early makes it much easier to fix.
Not Weaving Ends Securely
After investing so much time in knitting, it’s tempting to rush through weaving in ends. However, if ends are not woven in securely, they can unravel, leaving your beautiful blanket with loose tails or even holes. Take your time to weave tails in both directions for a few inches, ensuring they are firmly hidden within the fabric.
Troubleshooting
Edges are Curling
If your blanket’s edges are curling, especially if you’re using a stitch like stockinette (knit one row, purl one row), this is a common characteristic of the stitch. Stockinette stitch naturally wants to curl.
To prevent curling, incorporate a border of a non-curling stitch pattern, such as garter stitch (knit every row) or seed stitch, around the entire blanket. These stitches create a flat, stable edge. Alternatively, blocking your finished blanket can help flatten out some of the curl.
Holes Appearing in My Fabric
Holes in your knitting usually indicate a dropped stitch that wasn’t picked up, or an accidental yarn over (bringing the yarn over the needle when you shouldn’t have). A dropped stitch will look like a ladder running down your work.
Carefully examine your knitting for these culprits. If it’s a dropped stitch, you can use a crochet hook to pick it back up, working your way up the ladder until it’s back on the needle. If it’s an accidental yarn over, it will create an extra stitch and a small hole; you can usually fix this by knitting two stitches together on the next row to decrease the extra stitch.
Fabric Feels Too Stiff or Too Floppy
The feel of your fabric (drape) is directly related to your gauge and yarn choice. If your blanket feels too stiff, your tension might be too tight, or your needles might be too small for the yarn.
If it feels too floppy or loose, your tension might be too loose, or your needles might be too large. Adjust your needle size accordingly after knitting a new gauge swatch. A larger needle will create a looser fabric, and a smaller needle will create a denser fabric.
Key Takeaways
- Plan Ahead: Choose your yarn and needles carefully, considering the desired feel and size of your blanket.
- Gauge is Gold: Always knit a gauge swatch to ensure your blanket turns out the correct size.
- Master the Basics: Focus on consistent knit stitches and smooth yarn joins for a professional finish.
- Embrace Circular Needles: Even for flat knitting, circular needles are ideal for holding many blanket stitches comfortably.
- Patience Pays Off: Knitting a blanket is a marathon, not a sprint. Enjoy the process and celebrate your progress.
- Finish Strong: Weave in all ends securely to prevent unraveling and give your blanket a polished look.
Frequently Asked Questions
What’s the best yarn for a beginner blanket?
For beginners, chunky or super bulky acrylic yarn is often recommended. Acrylic is affordable, widely available, easy to care for, and forgiving for learning. Its larger size also means your blanket will grow quickly, providing satisfying progress.
How do I make my blanket bigger?
To make your blanket wider, simply cast on more stitches. To make it longer, knit more rows. Always refer back to your gauge swatch to calculate how many stitches or rows per inch you need for your desired dimensions.
Can I use circular needles for a flat blanket?
Yes, absolutely! In fact, circular needles are highly recommended for large flat projects like blankets. The long cable allows you to hold a vast number of stitches comfortably, distributing the weight evenly and preventing strain on your wrists, unlike straight needles which can become unwieldy.
How do I wash my finished blanket?
Always refer to the care instructions on your yarn label. Most acrylic blankets can be machine washed on a gentle cycle with cold water and tumble dried on low. Wool blankets usually require hand washing or dry cleaning to prevent shrinking.
Our Top Recommended Finds
- Chunky Acrylic Yarn: Ideal for beginners, it works up quickly and is easy to care for, making your first blanket a breeze.
- Interchangeable Circular Needle Set: Offers various needle sizes and cable lengths, providing versatility for any project size and yarn weight.
- Bent-Tip Tapestry Needles: The slightly bent tip makes weaving in yarn ends much easier and more efficient, a small but mighty tool.
Your Cozy Creation Awaits
You now have a comprehensive guide to knitting your very own blanket. This project, while substantial, is incredibly rewarding and perfect for building foundational knitting skills. Each stitch you make brings you closer to a beautiful, handmade piece that will be cherished.
Don’t hesitate to start small if the idea of a full blanket feels daunting. A baby blanket or a lapghan uses the same techniques and builds confidence. Grab your yarn and needles today, and begin the journey of creating something truly special with your hands.