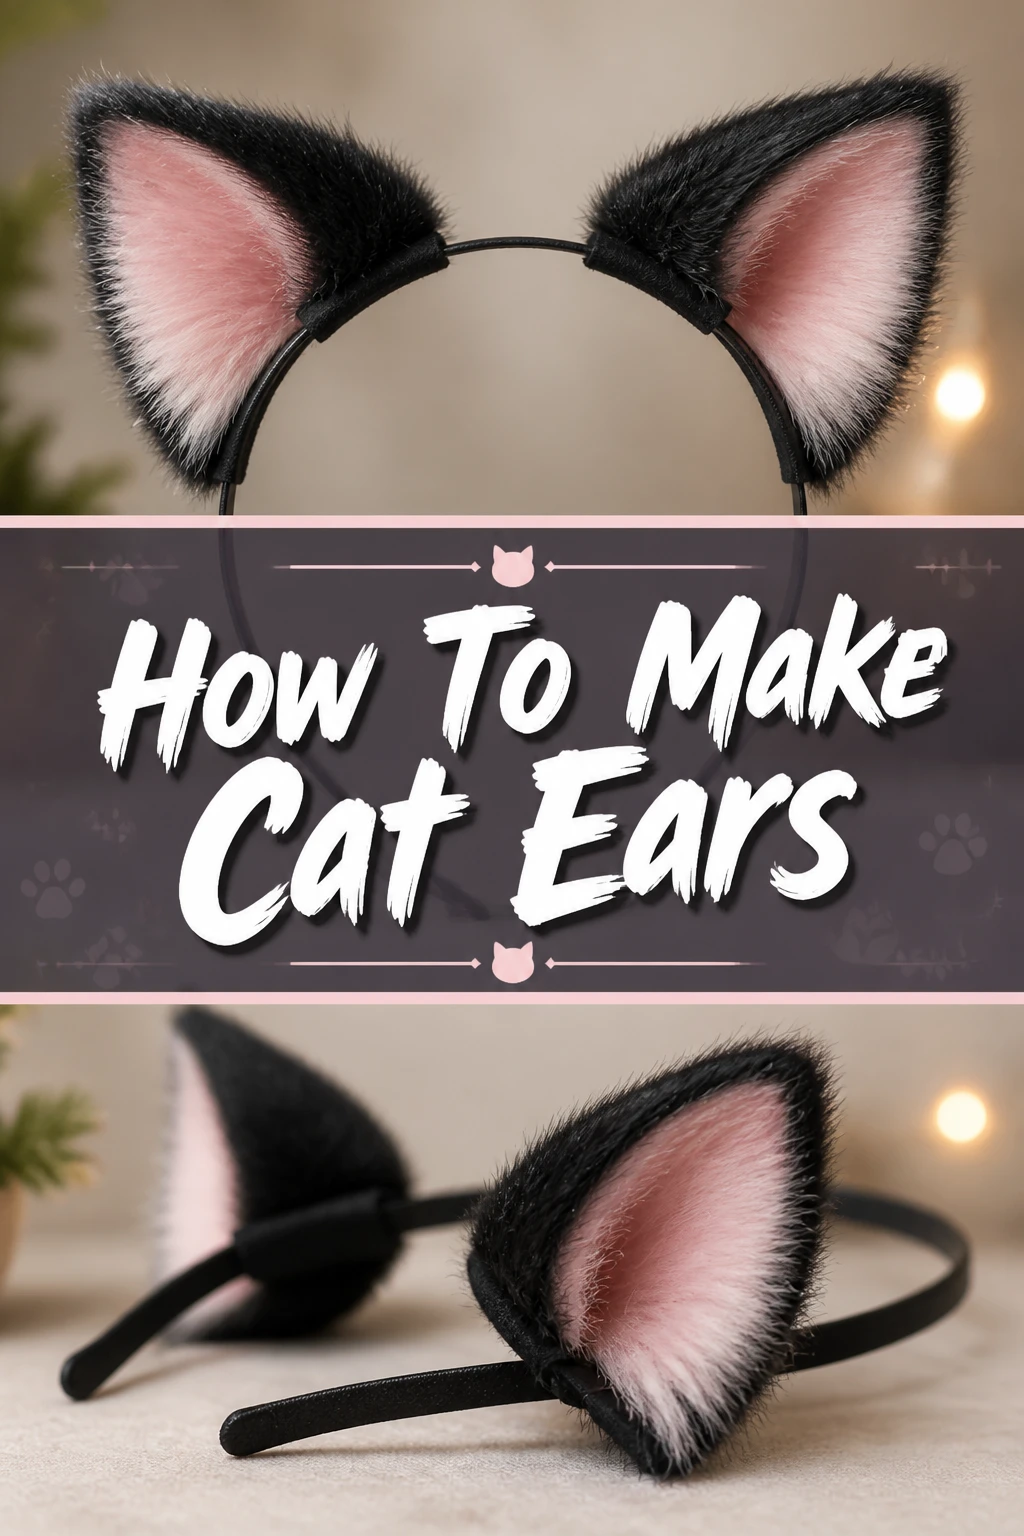
😺 How To Make Cat Ears
Thinking about adding a touch of feline charm to your next outfit or costume?
Making your own cat ears is a fun, rewarding project that lets your creativity shine.
Having crafted countless pairs for various events, I can guide you through each step with confidence.
Quick Overview
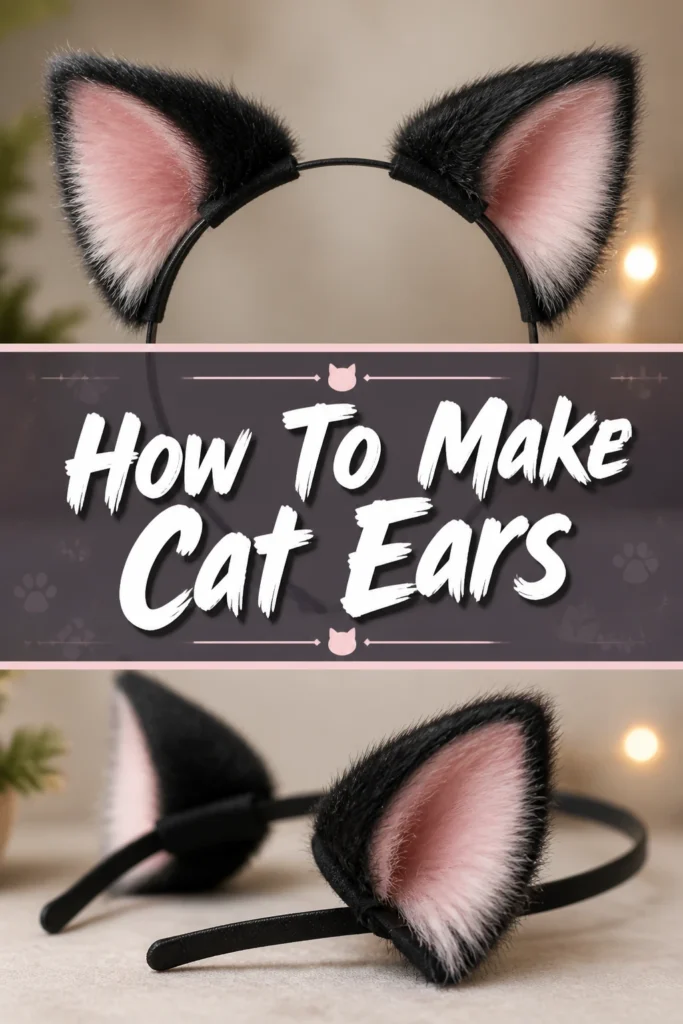
This guide will walk you through creating sturdy, stylish cat ears that will complete any look.
You’ll learn how to pick materials, shape your ears, and secure them for a purr-fect finish.
- Time needed: 1-2 hours (plus drying time)
- Difficulty: Beginner
- What you’ll need: Headband, felt or faux fur, scissors, hot glue, wire (optional).
Step-by-Step Instructions
Step 1: Gather Your Materials
Before you begin, lay out all your supplies in a clear workspace. This makes the process much smoother.
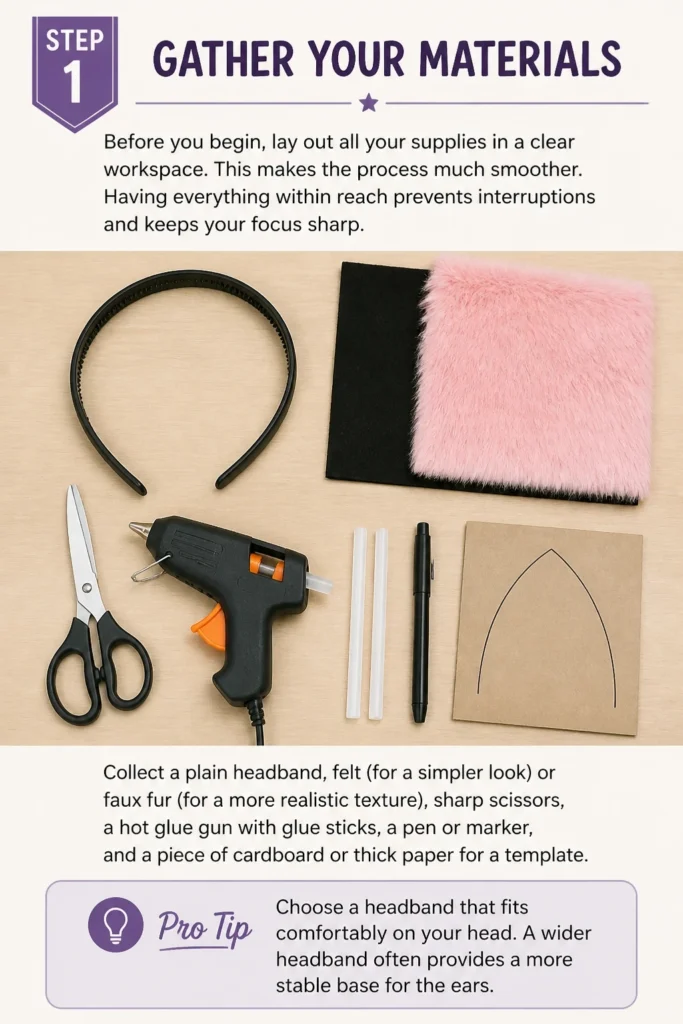
Having everything within reach prevents interruptions and keeps your focus sharp.
Collect a plain headband, felt (for a simpler look) or faux fur (for a more realistic texture), sharp scissors, a hot glue gun with glue sticks, a pen or marker, and a piece of cardboard or thick paper for a template.
Pro Tip: Choose a headband that fits comfortably on your head. A wider headband often provides a more stable base for the ears.
Step 2: Create Your Ear Template
The template determines the shape and size of your cat ears. This step is crucial for consistent results.
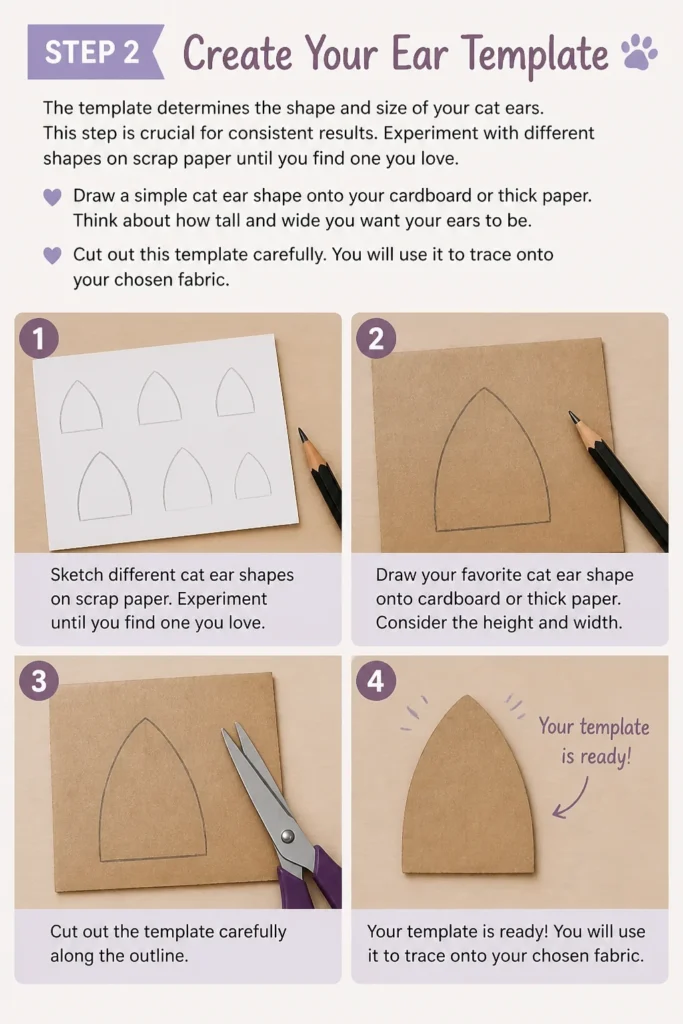
Experiment with different shapes on scrap paper until you find one you love.
Draw a simple cat ear shape onto your cardboard or thick paper. Think about how tall and wide you want your ears to be.
Cut out this template carefully. You will use it to trace onto your chosen fabric.
Step 3: Cut Your Fabric Pieces
Now it’s time to bring your ear shapes to life from your chosen material.
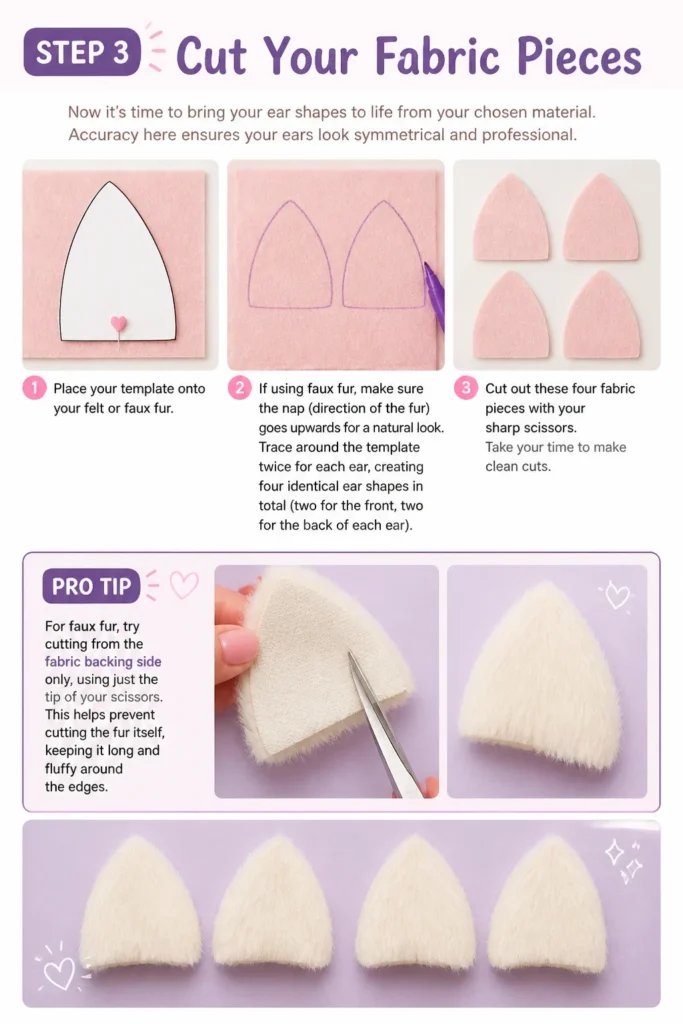
Accuracy here ensures your ears look symmetrical and professional.
Place your template onto your felt or faux fur. If using faux fur, make sure the nap (direction of the fur) goes upwards for a natural look.
Trace around the template twice for each ear, creating four identical ear shapes in total (two for the front, two for the back of each ear).
Cut out these four fabric pieces with your sharp scissors. Take your time to make clean cuts.
Pro Tip: For faux fur, try cutting from the fabric backing side only, using just the tip of your scissors. This helps prevent cutting the fur itself, keeping it long and fluffy around the edges.
Step 4: Add Inner Ear Detail (Optional but Recommended)
Adding an inner ear piece gives your cat ears more depth and realism.
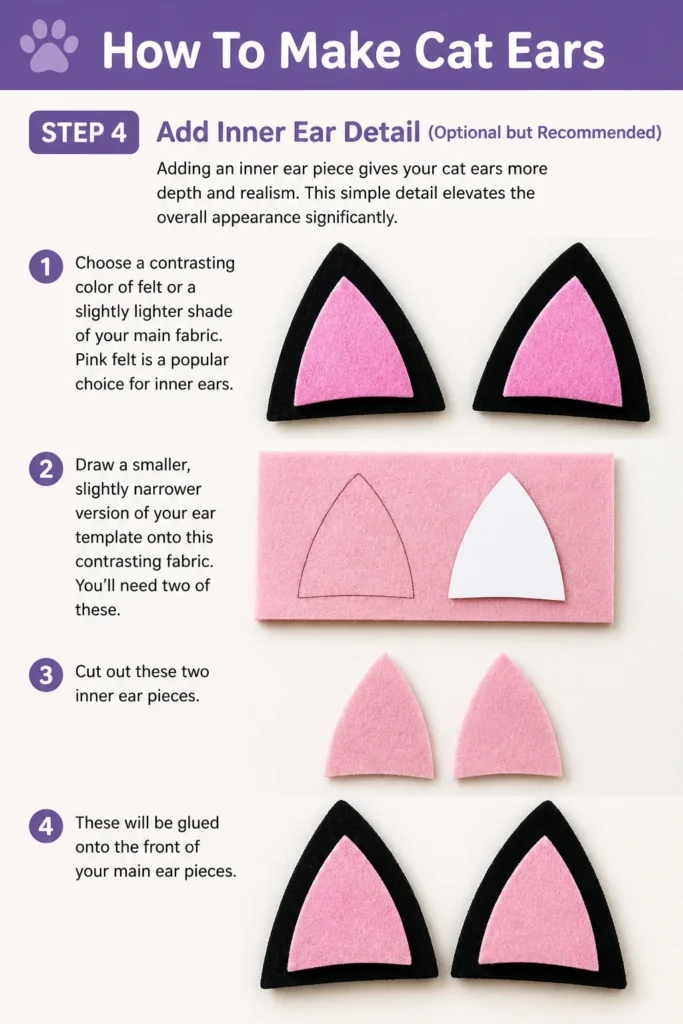
This simple detail elevates the overall appearance significantly.
Choose a contrasting color of felt or a slightly lighter shade of your main fabric. Pink felt is a popular choice for inner ears.
Draw a smaller, slightly narrower version of your ear template onto this contrasting fabric. You’ll need two of these.
Cut out these two inner ear pieces. These will be glued onto the front of your main ear pieces.
Step 5: Assemble the Ear Halves
This step brings the front and back of each ear together, forming a sturdy unit.
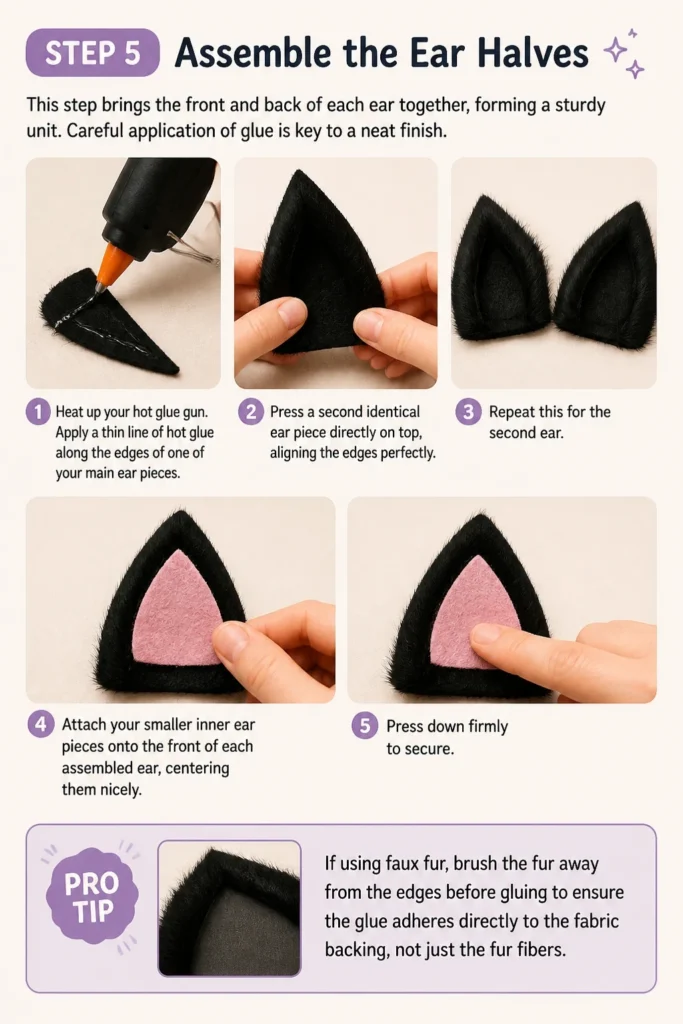
Careful application of glue is key to a neat finish.
Heat up your hot glue gun. Apply a thin line of hot glue along the edges of one of your main ear pieces.
Press a second identical ear piece directly on top, aligning the edges perfectly. Repeat this for the second ear.
Attach your smaller inner ear pieces onto the front of each assembled ear, centering them nicely. Press down firmly to secure.
Pro Tip: If using faux fur, brush the fur away from the edges before gluing to ensure the glue adheres directly to the fabric backing, not just the fur fibers.
Step 6: Shape and Stiffen the Ears (Optional Wire)
To give your ears a defined, upright shape, you can add wire reinforcement.
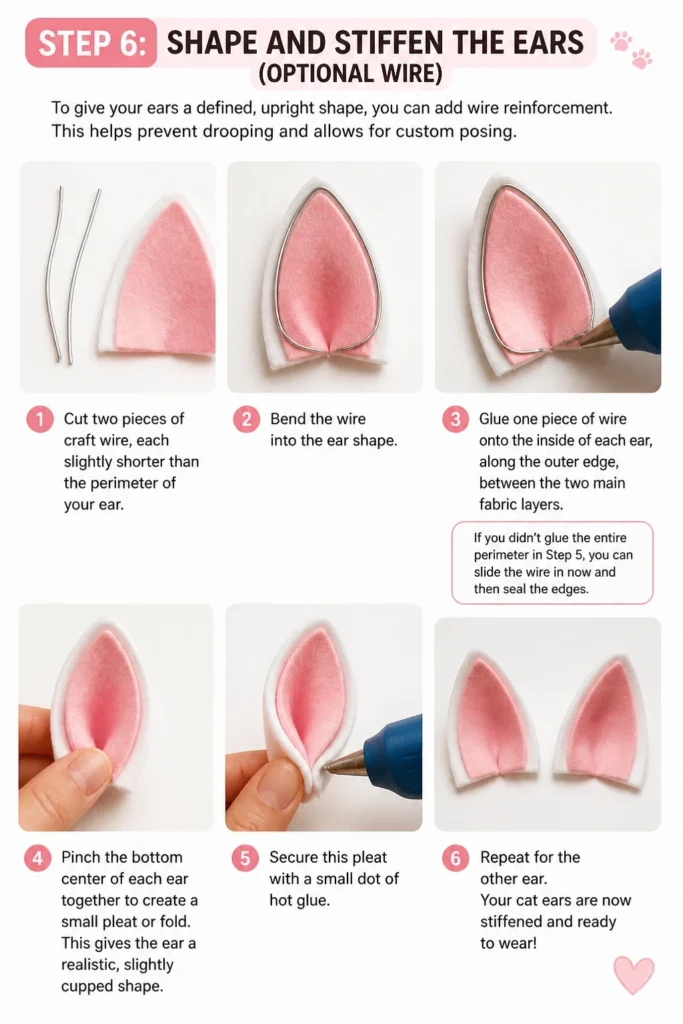
This helps prevent drooping and allows for custom posing.
Cut two pieces of craft wire, each slightly shorter than the perimeter of your ear. Bend the wire into the ear shape.
Glue one piece of wire onto the inside of each ear, along the outer edge, between the two main fabric layers. If you didn’t glue the entire perimeter in Step 5, you can slide the wire in now and then seal the edges.
Pinch the bottom center of each ear together to create a small pleat or fold. This gives the ear a realistic, slightly cupped shape. Secure this pleat with a small dot of hot glue.
Step 7: Attach Ears to the Headband
This is where your cat ears officially become wearable. Proper placement is essential.
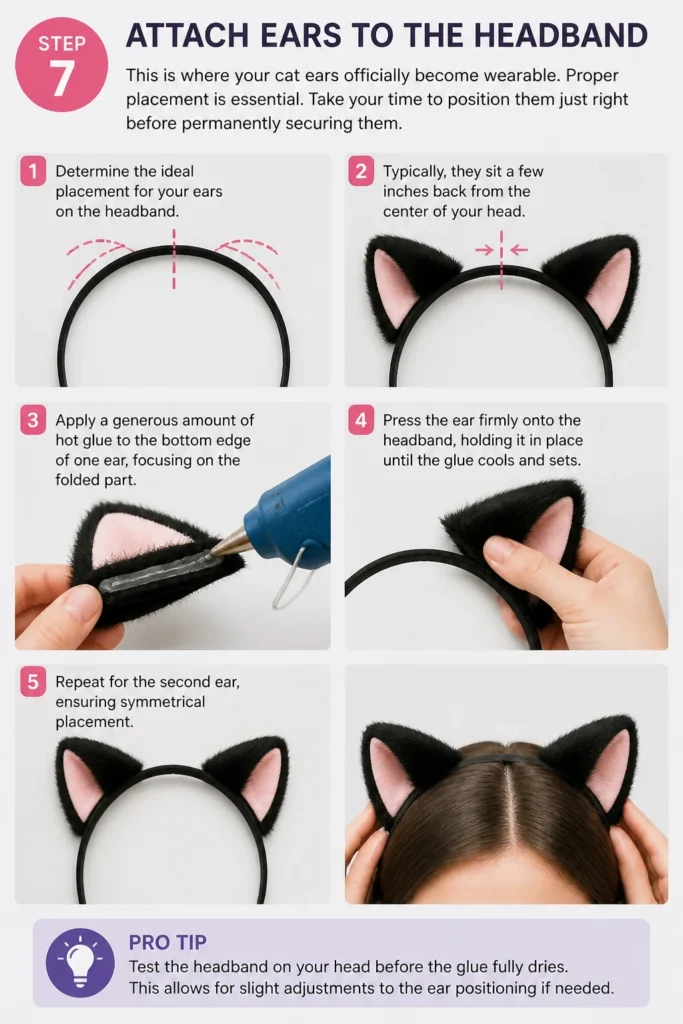
Take your time to position them just right before permanently securing them.
Determine the ideal placement for your ears on the headband. Typically, they sit a few inches back from the center of your head.
Apply a generous amount of hot glue to the bottom edge of one ear, focusing on the folded part.
Press the ear firmly onto the headband, holding it in place until the glue cools and sets. Repeat for the second ear, ensuring symmetrical placement.
Pro Tip: Test the headband on your head before the glue fully dries. This allows for slight adjustments to the ear positioning if needed.
Step 8: Finish and Refine
The final touches make all the difference in the overall look of your cat ears.
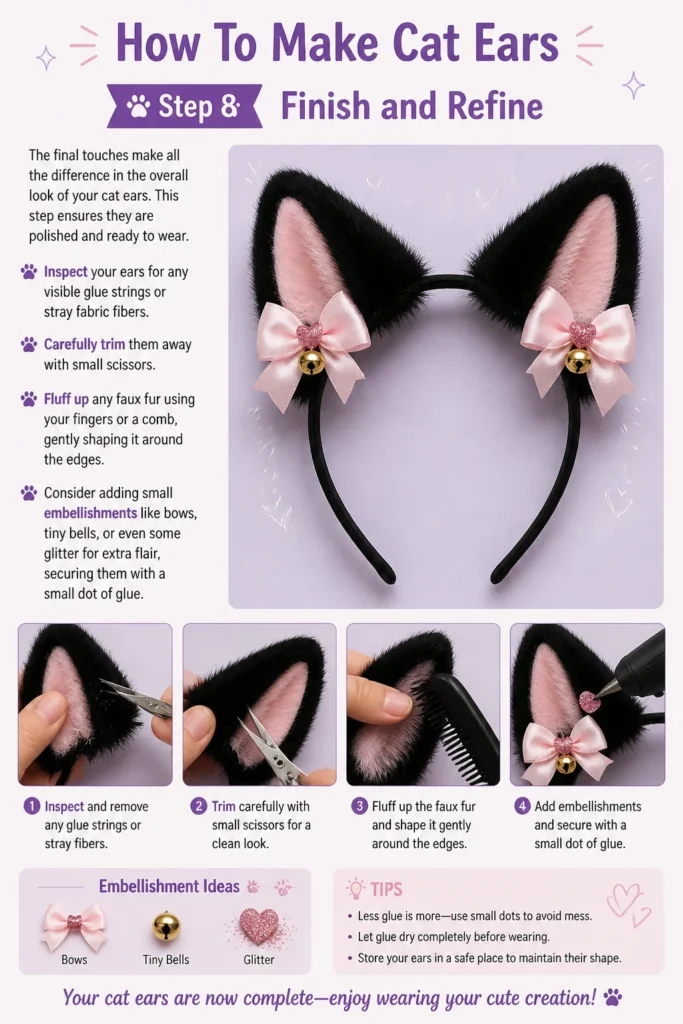
This step ensures they are polished and ready to wear.
Inspect your ears for any visible glue strings or stray fabric fibers. Carefully trim them away with small scissors.
Fluff up any faux fur using your fingers or a comb, gently shaping it around the edges.
Consider adding small embellishments like bows, tiny bells, or even some glitter for extra flair, securing them with a small dot of glue.
Common Mistakes to Avoid
Uneven Ear Shapes
Cutting freehand without a template often results in ears that don’t match. This can make your final product look less polished and symmetrical.
Always use a sturdy template for both the main ear shape and any inner ear details. Trace carefully and cut precisely to ensure both ears are identical.
Weak Attachment to Headband
Not using enough glue or not holding the ears firmly in place while the glue sets can lead to floppy ears that detach easily. This is frustrating when you’re trying to wear them.
Apply a generous amount of hot glue to the base of the ear and press it firmly onto the headband. Hold it steady for at least 30-60 seconds to allow the glue to cool and create a strong bond.
Flat, Unrealistic Ears
Simply gluing two flat pieces of fabric together can result in ears that lack dimension. Real cat ears have a slight cup to them, which makes them look more lifelike.
Always create a small pleat or fold at the bottom center of each ear before attaching it to the headband. This gives them that natural, slightly cupped appearance and helps them stand up better.
Visible Glue or Messy Edges
Excessive hot glue or uneven cutting can leave your ears looking unprofessional. This detracts from the handmade charm.
Use hot glue sparingly but effectively, especially when attaching inner ear pieces. Trim any stray fibers or visible glue strings once the ears are complete for a clean finish.
Troubleshooting
Ears Are Floppy or Don’t Stand Up
If your ears are sagging, it’s often due to lack of internal support or insufficient shaping. This can be disappointing after all your effort.
Consider adding craft wire along the outer edge of the ears during assembly. Also, ensure you’ve created a strong pleat at the base of each ear and secured it firmly to the headband with ample glue.
Ears Keep Sliding on the Headband
If your ears shift position on the headband, the initial glue bond might not have been strong enough, or the headband material is too smooth.
Rough up the area of the headband where the ears will attach with sandpaper before gluing. You can also wrap a thin strip of matching felt around the headband where the ears are glued, encasing the ear base for extra grip.
Ears Look Too Flat
If your ears lack the natural curve of a cat’s ear, they might appear two-dimensional. This takes away from their realistic appeal.
Gently pinch and fold the bottom center of each ear to create a subtle cup shape. Secure this fold with a small dot of hot glue. If you used wire, you can also gently bend the wire to enhance the curve.
Key Takeaways
- Preparation is key: Gather all materials and create a precise template before cutting.
- Symmetry matters: Use your template to ensure both ears are identical in size and shape.
- Add dimension: Create a small pleat at the base of each ear for a natural, cupped look.
- Secure attachment: Use plenty of hot glue and hold firmly until dry when attaching ears to the headband.
- Consider wire: Craft wire can provide excellent support and allow for custom ear posing.
- Refine your work: Trim excess glue and fluff fur for a polished final product.
Frequently Asked Questions
What is the best fabric for cat ears?
Felt is excellent for beginners due to its easy-to-cut, non-fraying properties. Faux fur offers a more realistic and luxurious look, but it can be a bit trickier to cut and work with. Both are great choices depending on your desired aesthetic and skill level.
Can I make cat ears without a sewing machine?
Absolutely! This guide focuses entirely on using hot glue, making it a perfect no-sew project. Hot glue is strong and dries quickly, ideal for crafting cat ears efficiently.
How do I make the ears stand up straight and not flop?
The key to perky ears is a combination of factors. Ensure you create a strong pleat at the base of the ear, use a generous amount of hot glue to secure it to the headband, and consider inserting craft wire for internal support and shaping.
How can I make my cat ears look more realistic?
To enhance realism, use high-quality faux fur with a natural color gradient. Add a contrasting inner ear color. Carefully shape the ears with a slight cup and consider adding subtle airbrushing or markers to create depth and shadow, mimicking natural ear contours.
Our Top Recommended Finds
- Comfortable Headband: A satin-covered or fabric-wrapped headband prevents slipping and is more comfortable for extended wear.
- High-Temp Hot Glue Gun: A reliable glue gun with good temperature control ensures strong bonds and smooth application.
- Sharp Fabric Scissors: Investing in a dedicated pair of sharp scissors makes cutting felt and faux fur much easier and more precise.
Unleash Your Inner Feline
You now have all the knowledge to craft your very own charming cat ears.
This project is not just about making an accessory; it’s about expressing your fun side and creating something unique.
Don’t hesitate to personalize your ears with embellishments or try different fabrics. Start your cat ear adventure today!