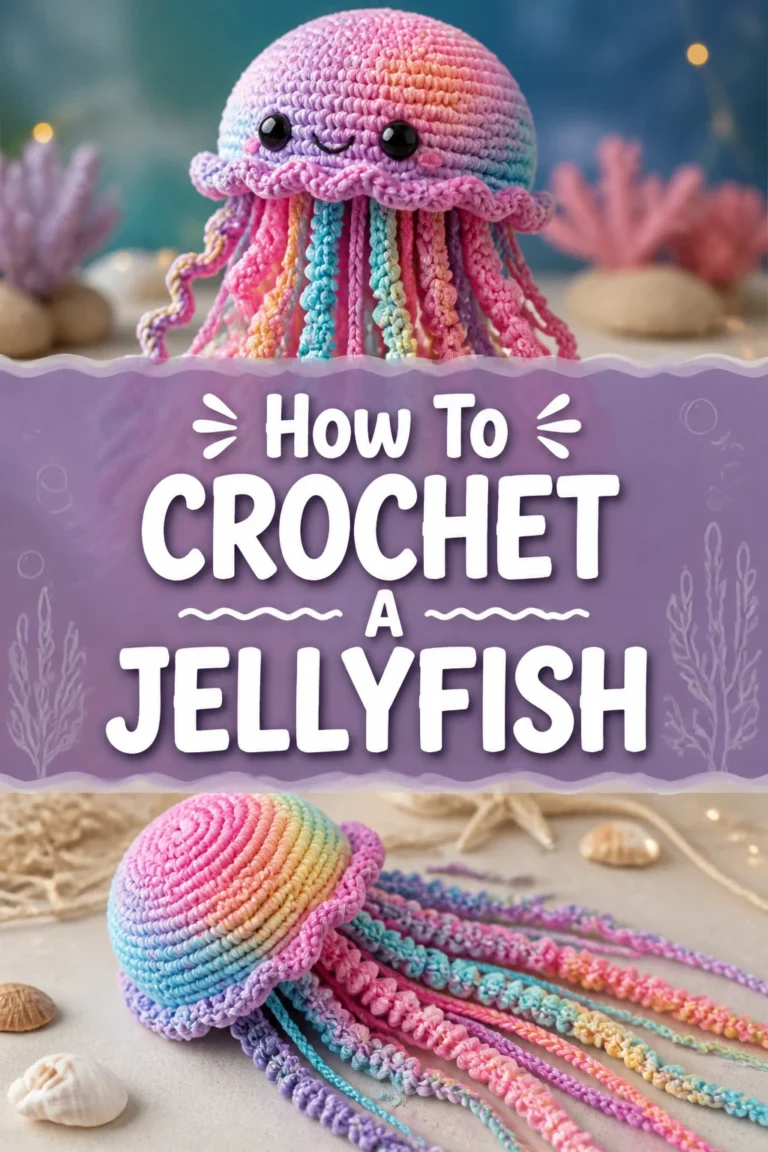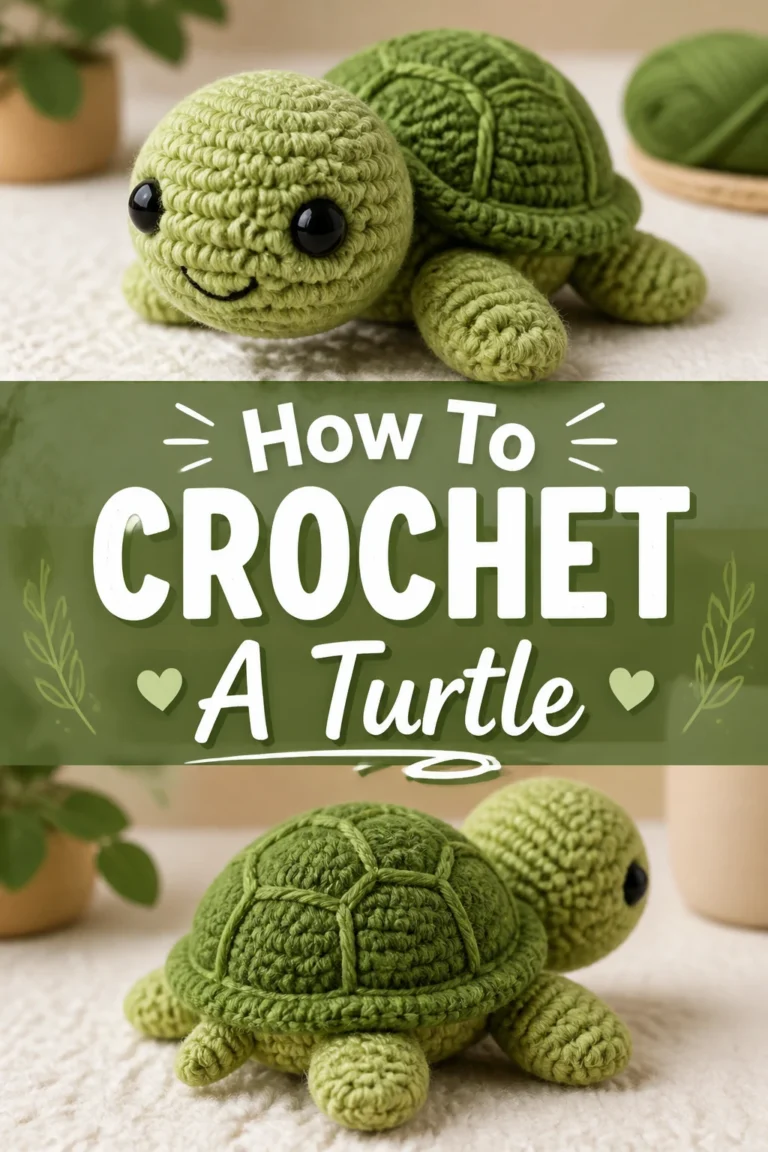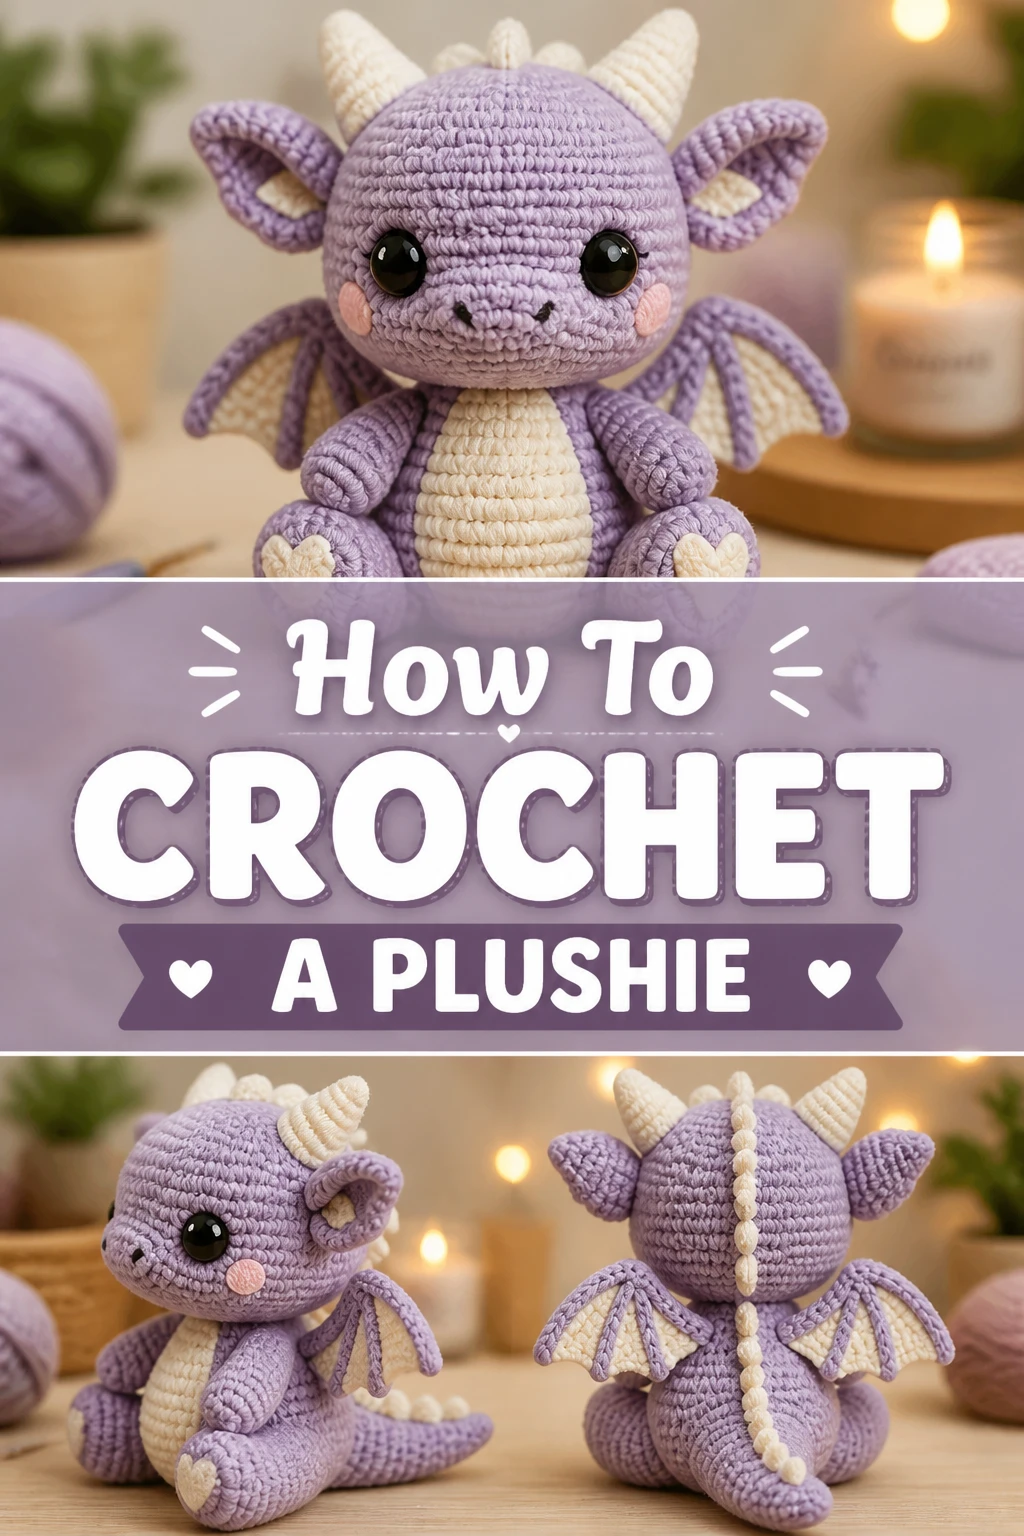
🧶 How To Crochet A Plushie
There’s a special kind of joy in crafting something with your own hands, especially when it results in a soft, cuddly friend. My first crocheted plushie, a slightly lopsided but deeply loved little bear, taught me the immense satisfaction of bringing yarn to life. This guide will help you experience that same rewarding journey.
You’ll soon be creating your very own adorable, handmade plushies, perfect for gifts or cherished companions.
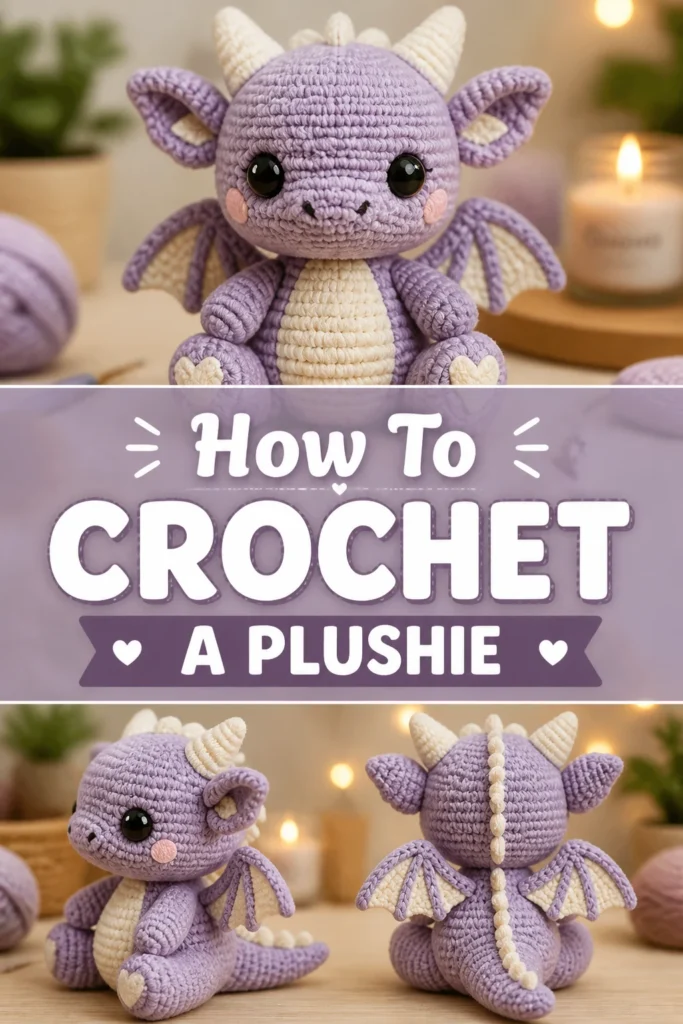
Quick Overview
This guide will walk you through the entire process of crocheting a plushie, from selecting your materials to the final assembly. You’ll learn essential techniques and tips to create a charming, squishy friend.
- Time needed: 4-8 hours (for a small, basic plushie)
- Difficulty: Beginner (with focus and patience)
- What you’ll need: Yarn, crochet hook, stuffing, safety eyes, tapestry needle, scissors, stitch markers
Step-by-Step Instructions
Step 1: Gather Your Supplies
Before you begin your crocheting adventure, ensure you have all the necessary tools and materials at hand. Having everything organized will make the process much smoother and more enjoyable.
Select your yarn. For plushies, worsted weight (medium 4) acrylic yarn is a popular choice due to its durability, washability, and wide color range. Cotton yarn also works well for a denser, less fuzzy finish.
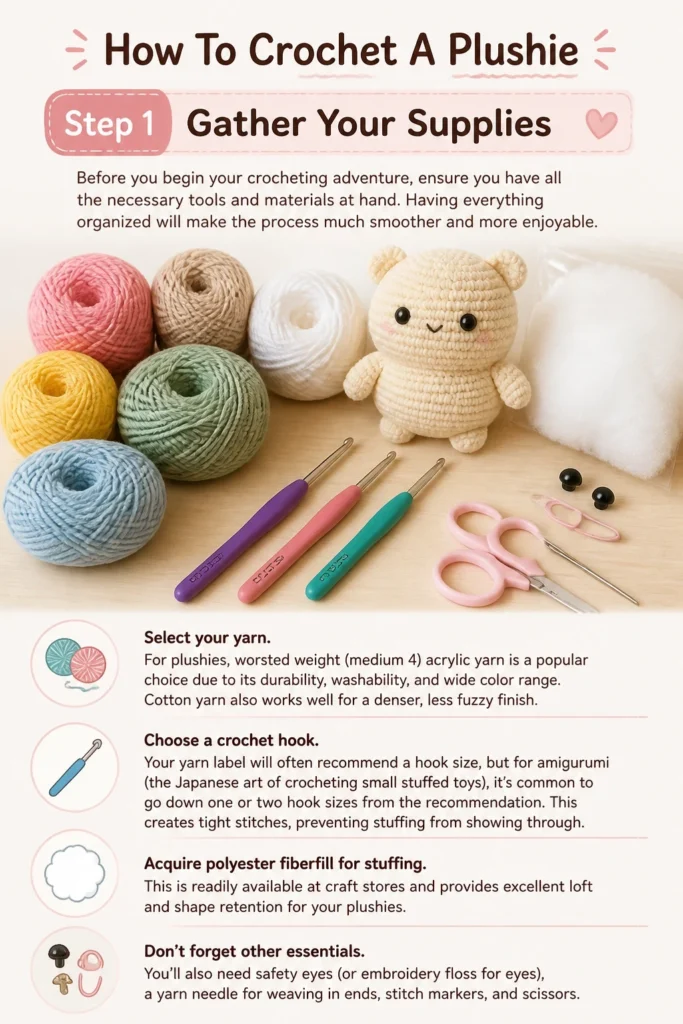
Choose a crochet hook. Your yarn label will often recommend a hook size, but for amigurumi (the Japanese art of crocheting small stuffed toys), it’s common to go down one or two hook sizes from the recommendation. This creates tight stitches, preventing stuffing from showing through.
Acquire polyester fiberfill for stuffing. This is readily available at craft stores and provides excellent loft and softness. You’ll also need a pair of sharp scissors, a tapestry needle (for weaving in ends and sewing parts), and a few stitch markers.
Purchase safety eyes or embroidery floss. Safety eyes come in various sizes and colors, adding personality to your plushie. If you’re making a toy for a very young child, embroidering eyes with floss is a safer alternative.
Pro Tip: Always check your yarn label for fiber content and care instructions. This helps ensure your finished plushie can be properly cared for.
Step 2: Master the Magic Ring
The magic ring, also known as the magic circle or adjustable ring, is fundamental for plushie making. It creates a tightly closed center, preventing a hole at the top of your plushie’s head or body.
Wrap the yarn around your fingers to form a loop. Hold the working yarn end with your thumb and forefinger.
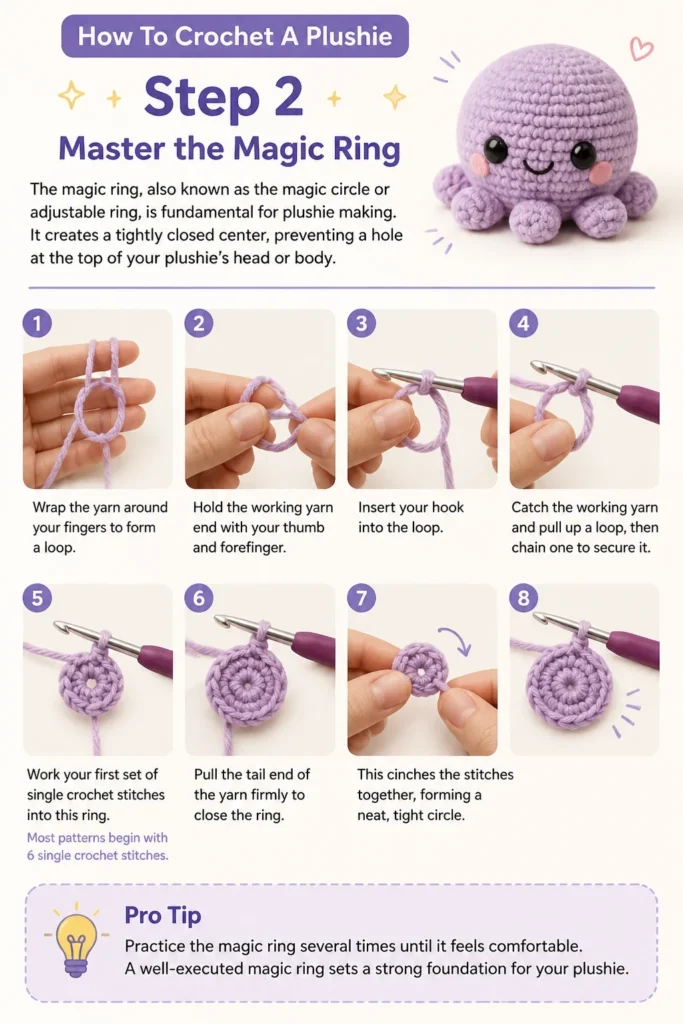
Insert your hook into the loop. Catch the working yarn and pull up a loop, then chain one to secure it.
Work your first set of single crochet stitches into this ring. Most patterns begin with 6 single crochet stitches.
Pull the tail end of the yarn firmly to close the ring. This cinches the stitches together, forming a neat, tight circle.
Pro Tip: Practice the magic ring several times until it feels comfortable. A well-executed magic ring sets a strong foundation for your plushie.
Step 3: Crochet the Main Body Parts
Most plushies are worked in continuous rounds, meaning you don’t join at the end of each round. This creates a seamless fabric, ideal for stuffed toys.
Place a stitch marker in the first stitch of each new round. This is crucial for keeping track of your stitch count and knowing where one round ends and the next begins.
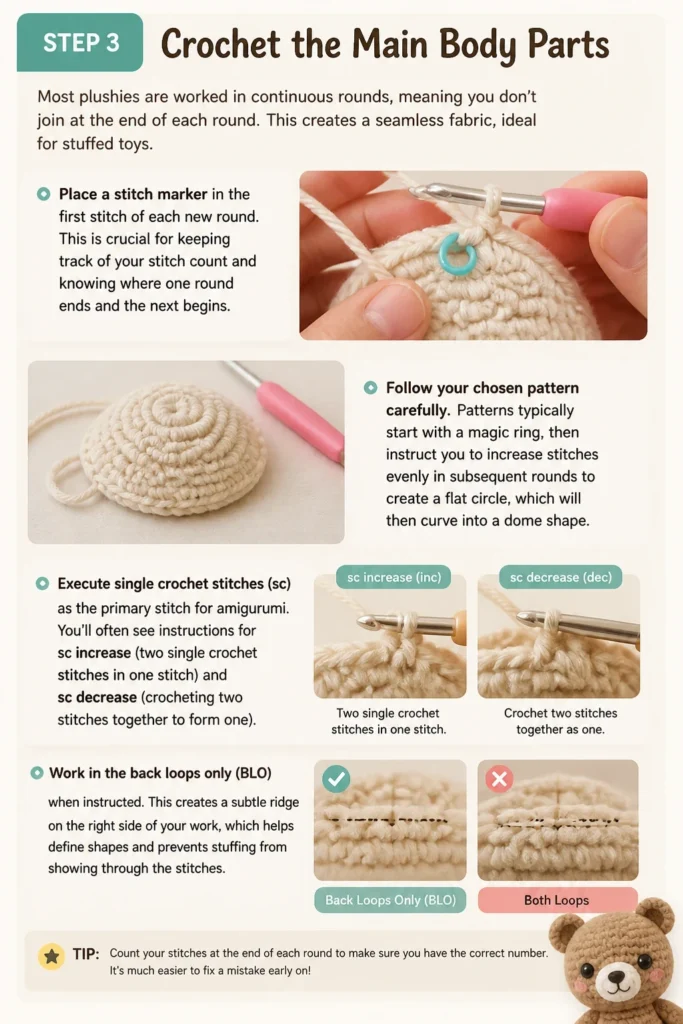
Follow your chosen pattern carefully. Patterns typically start with a magic ring, then instruct you to increase stitches evenly in subsequent rounds to create a flat circle, which will then curve into a dome shape.
Execute single crochet stitches (sc) as the primary stitch for amigurumi. You’ll often see instructions for “sc increase” (two single crochet stitches in one stitch) and “sc decrease” (crocheting two stitches together to form one).
Work in the back loops only (BLO) or front loops only (FLO) if your pattern specifies. Otherwise, work through both loops for a standard stitch. Consistent tension is key to an even fabric.
Pro Tip: Count your stitches at the end of every round. Miscounting is a common mistake that can throw off your entire project. If your stitch count is off, unravel and recount.
Step 4: Attach Features and Details
This step brings your plushie to life, adding personality with eyes, noses, ears, and other small details. These are often crocheted separately and then attached.
Crochet smaller pieces like ears, arms, or a snout according to your pattern. These are usually started with a magic ring and worked in a similar fashion to the main body parts, but on a smaller scale.
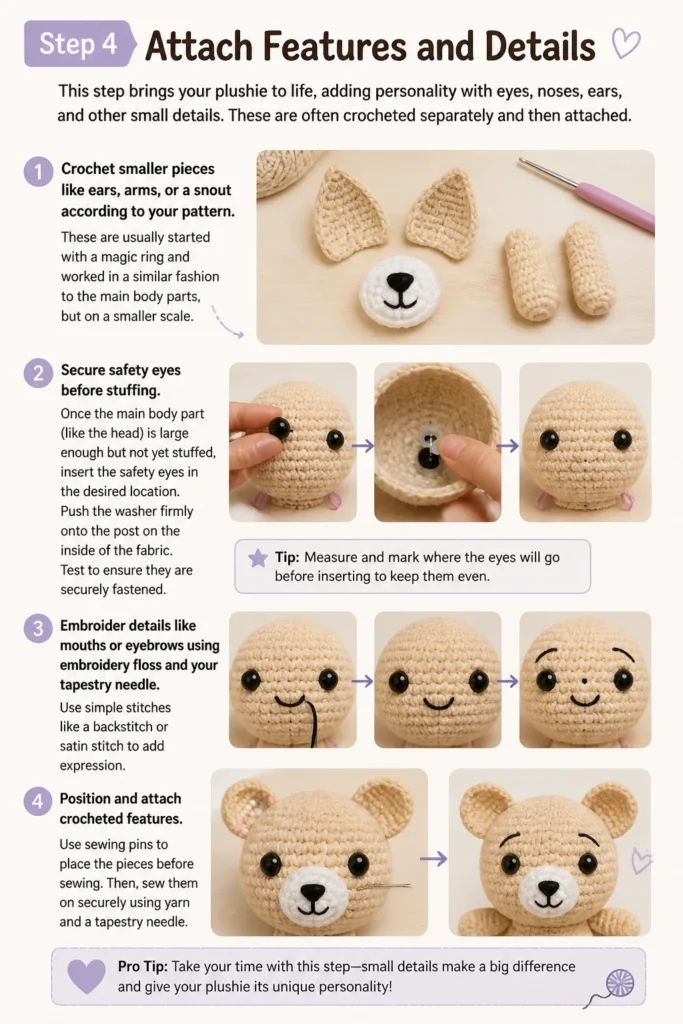
Secure safety eyes before stuffing. Once the main body part (like the head) is large enough but not yet stuffed, insert the safety eyes in the desired location. Push the washer firmly onto the post on the inside of the fabric. Test to ensure they are securely fastened.
Embroider details like mouths or eyebrows using embroidery floss and your tapestry needle. Use simple stitches like a backstitch or satin stitch to add expression.
Pin crocheted features in place before sewing. Use sewing pins to hold ears, arms, or other attachments exactly where you want them. This allows you to visualize the final placement and make adjustments before committing to stitching.
Pro Tip: When placing safety eyes, ensure they are symmetrical and at a height that looks natural for your plushie’s design. Sometimes, moving them just one stitch over can make a big difference.
Step 5: Stuff Your Plushie
Stuffing is critical for giving your plushie its shape and squishiness. It’s an art that requires patience and attention to detail.
Begin stuffing when your crocheted piece is about two-thirds complete. This allows you to reach into smaller areas and ensure even distribution of the fiberfill.
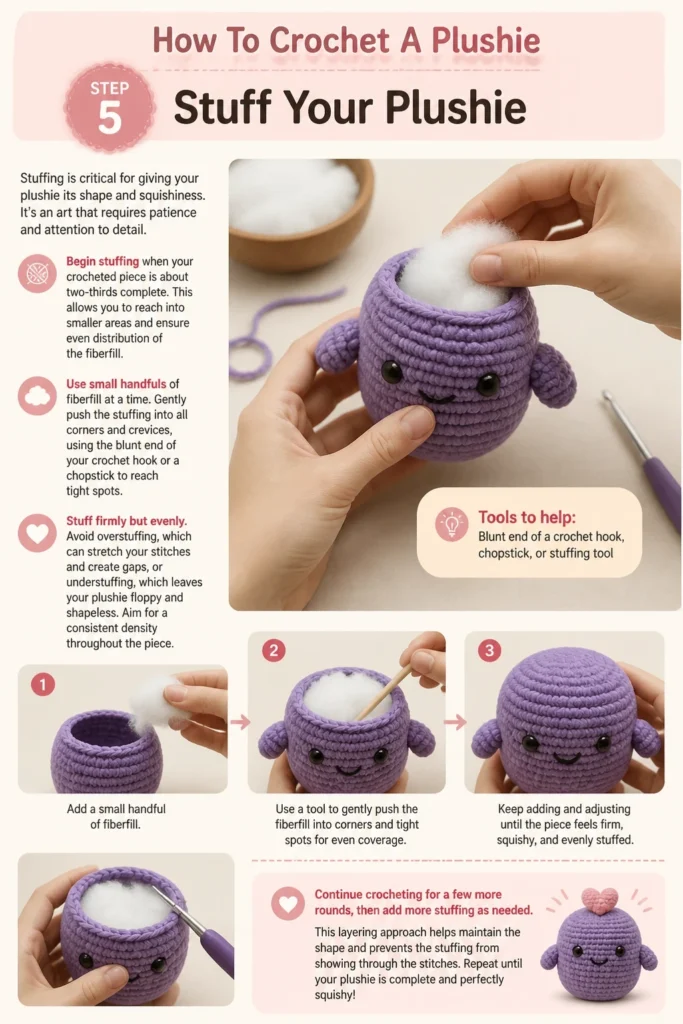
Use small handfuls of fiberfill at a time. Gently push the stuffing into all corners and crevices, using the blunt end of your crochet hook or a chopstick to reach tight spots.
Stuff firmly but evenly. Avoid overstuffing, which can stretch your stitches and create gaps, or understuffing, which leaves your plushie floppy and shapeless. Aim for a consistent density throughout the piece.
Continue crocheting for a few more rounds, then add more stuffing as needed. This layering approach helps maintain the shape as you close the opening.
Pro Tip: Pay special attention to the neck area if your plushie has a distinct head and body. Stuff the neck firmly to prevent the head from flopping around.
Step 6: Close and Finish Off
Once your plushie is fully stuffed and all the main crocheting is done, it’s time to close the opening and secure your work. This creates a clean, finished appearance.
Decrease stitches evenly in the final rounds to close the opening. Your pattern will guide you on how many decreases to make and when to make them.
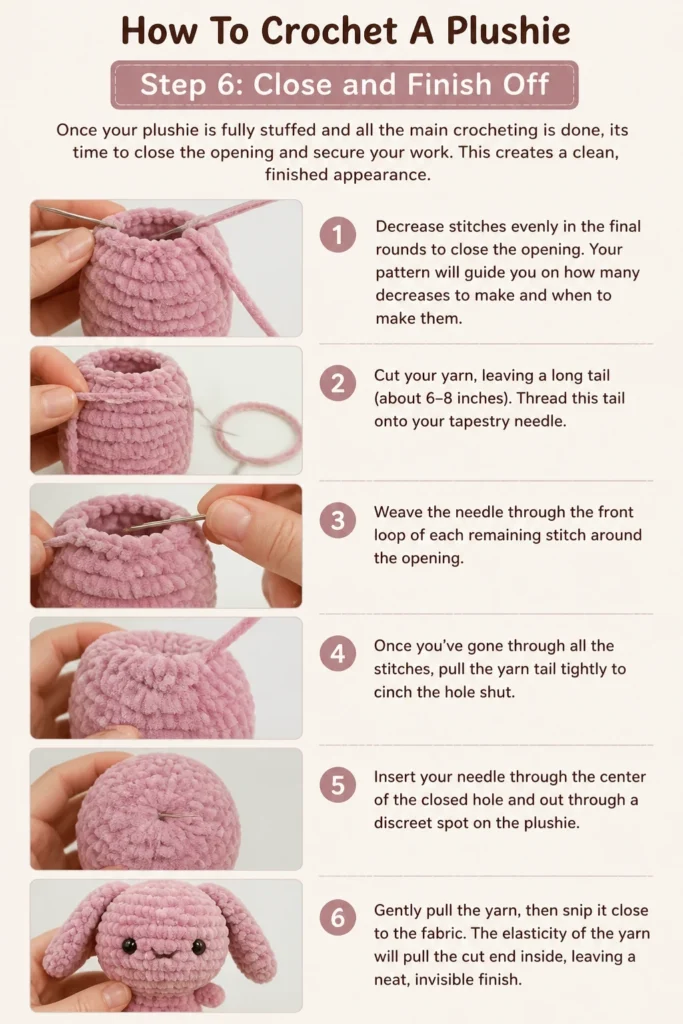
Cut your yarn, leaving a long tail (about 6-8 inches). Thread this tail onto your tapestry needle.
Weave the needle through the front loop of each remaining stitch around the opening. Once you’ve gone through all the stitches, pull the yarn tail tightly to cinch the hole shut.
Insert your needle through the center of the closed hole and out through a discreet spot on the plushie. Gently pull the yarn, then snip it close to the fabric. The elasticity of the yarn will pull the cut end inside, hiding it completely.
Pro Tip: When cinching the hole, take care not to pull so hard that you distort the shape of the plushie. A firm, gentle pull is usually enough.
Step 7: Assemble Your Creation
This is where all the individual parts come together to form your complete plushie. Careful placement and neat sewing are essential for a polished look.
Refer to your pattern’s assembly instructions or a finished photo of the plushie. This helps you visualize where each piece should go.
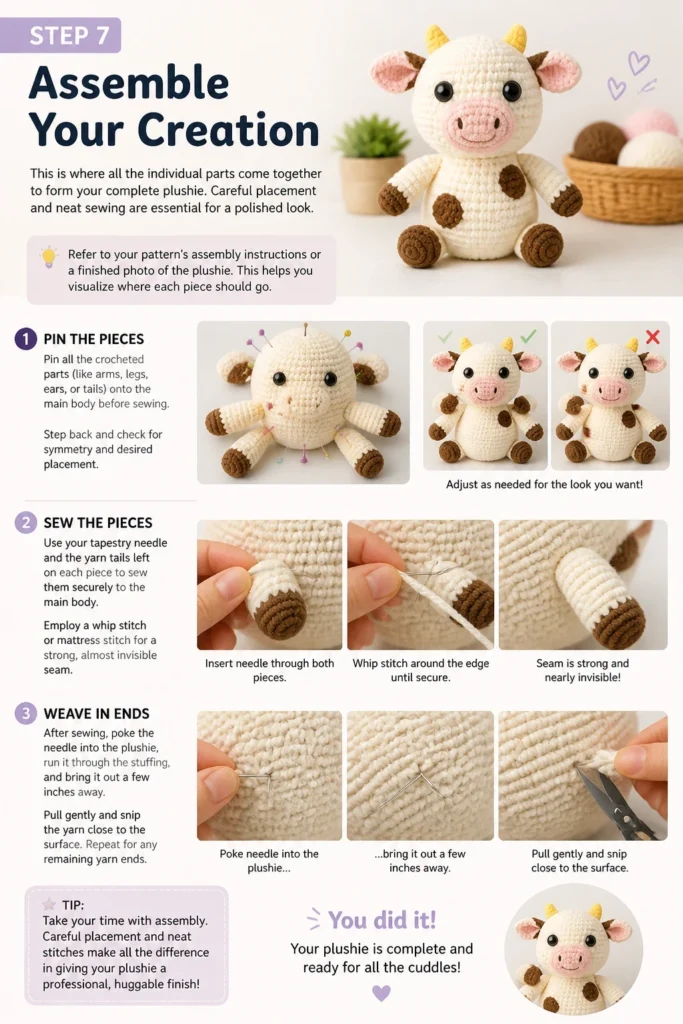
Pin all the crocheted parts (like arms, legs, ears, or tails) onto the main body before sewing. Step back and check for symmetry and desired placement.
Use your tapestry needle and the yarn tails left on each piece to sew them securely to the main body. Employ a whip stitch or mattress stitch for a strong, almost invisible seam.
Weave in any remaining yarn ends. After sewing, poke the needle into the plushie, run it through the stuffing, and bring it out a few inches away. Pull gently and snip the yarn close to the fabric, hiding the end inside.
Pro Tip: When sewing parts, use yarn that matches the color of the piece you are attaching. This ensures the seams are as invisible as possible.
Common Mistakes to Avoid
Loose Stitches
Crocheting with loose tension is a common pitfall for beginners making plushies. This creates gaps in your fabric, allowing the stuffing to peek through, which detracts from the plushie’s appearance. Always use a hook size smaller than what’s recommended for your yarn to achieve tighter stitches.
Under-stuffing or Over-stuffing
The amount of stuffing can significantly impact your plushie’s final look and feel. Under-stuffing leaves your plushie floppy and shapeless, while over-stuffing can stretch stitches, create gaps, and make the plushie hard. Aim for a firm, even density that holds its shape but still feels squishy.
Miscounting Stitches
Losing track of your stitch count is a frequent error that can lead to lopsided shapes or incorrect sizing. Always use stitch markers in the first stitch of each round. Make it a habit to count your stitches at the end of every single round to catch mistakes early.
Not Securing Ends Properly
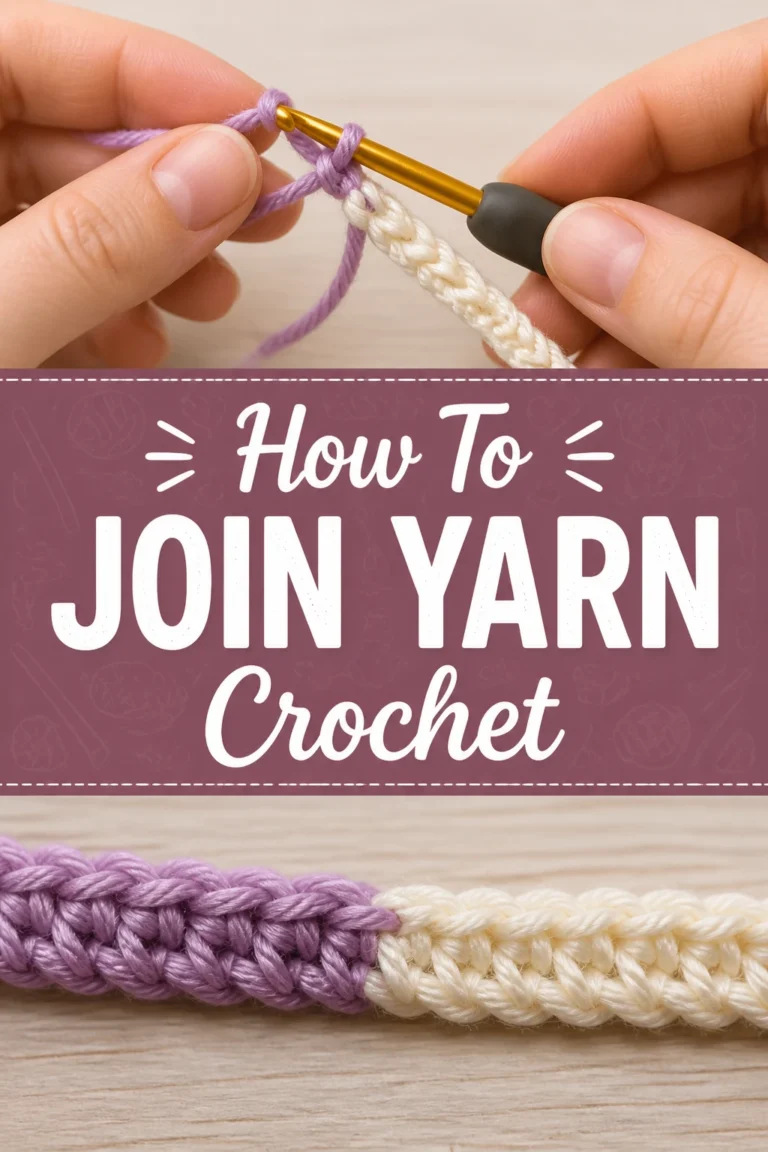
Leaving yarn tails untucked or improperly woven in can cause your plushie to unravel over time. After finishing a piece or joining yarn, always weave in the ends securely using a tapestry needle, running them through the stitches and into the stuffing for several inches.
Troubleshooting
My Plushie Has Gaps Where Stuffing Shows
This usually indicates your stitches are too loose. Try using a smaller crochet hook size for your chosen yarn. You can also try adjusting your tension to crochet more tightly.
My Plushie’s Shape Looks Wonky
An uneven shape often stems from inconsistent tension or miscounting stitches. Ensure you’re counting stitches diligently each round and maintaining an even tension throughout your work. Sometimes, uneven stuffing can also cause this; try redistributing the fiberfill.
I Can’t Get the Magic Ring to Close Tightly
If your magic ring isn’t closing completely, ensure you’re pulling the yarn tail firmly after working your stitches. Sometimes, the initial chain one that secures the ring can be too loose. Make sure your first stitches are worked directly into the adjustable loop, not into the chain.
Key Takeaways
- Choose the right yarn and a smaller hook size for tight, plushie-perfect stitches.
- Master the magic ring for a seamless, hole-free start to your projects.
- Use stitch markers diligently and count your stitches every round to maintain accuracy.
- Stuff your plushie firmly and evenly to achieve the desired shape and texture.
- Carefully attach features and assemble parts for a professional, polished finish.
- Practice and patience are your best tools; don’t be afraid to unravel and try again.
Frequently Asked Questions
What’s the best yarn for crocheting plushies?
Acrylic yarn is widely recommended due to its affordability, durability, and washability. It comes in a vast array of colors and weights. Cotton yarn is another great choice for a denser, less fuzzy finish, though it has less stretch.
How do I wash a crocheted plushie?
Most acrylic plushies can be gently hand-washed with mild soap and cold water, then air-dried flat. For machine washing, place the plushie in a mesh laundry bag on a delicate cycle with cold water, then air dry. Always check your yarn label for specific care instructions.
Are safety eyes safe for all ages?
Safety eyes are generally not recommended for toys intended for children under three years old, as they can pose a choking hazard if they come loose. For babies and toddlers, it’s best to embroider eyes and other facial features using embroidery floss.
Can I crochet a plushie without a pattern?
While possible for experienced crocheters, it’s highly recommended for beginners to start with a pattern. Patterns provide crucial stitch counts, shaping instructions, and assembly guides that are essential for creating a recognizable plushie. As you gain experience, you can start modifying patterns or designing your own.
Our Top Recommended Finds
- Ergonomic Crochet Hook Set: These hooks often have comfortable handles, reducing hand strain during long crocheting sessions.
- Locking Stitch Markers: Essential for keeping track of your rounds in continuous spiral crochet, preventing lost stitches.
- High-Quality Polyester Fiberfill: Ensures your plushie is evenly stuffed, soft, and maintains its shape over time.
Your Plushie Adventure Continues!
You’ve now got the foundational knowledge and practical steps to crochet your very own plushie. This guide is just the beginning of a wonderful crafting journey. The joy of creating something tangible, soft, and unique is truly unmatched.
Don’t be afraid to experiment with different yarn colors, patterns, and sizes. Each plushie you make will refine your skills and bring new ideas to life. Pick up your hook and yarn today, and start crafting your next cuddly companion!